|
|
|
|
|
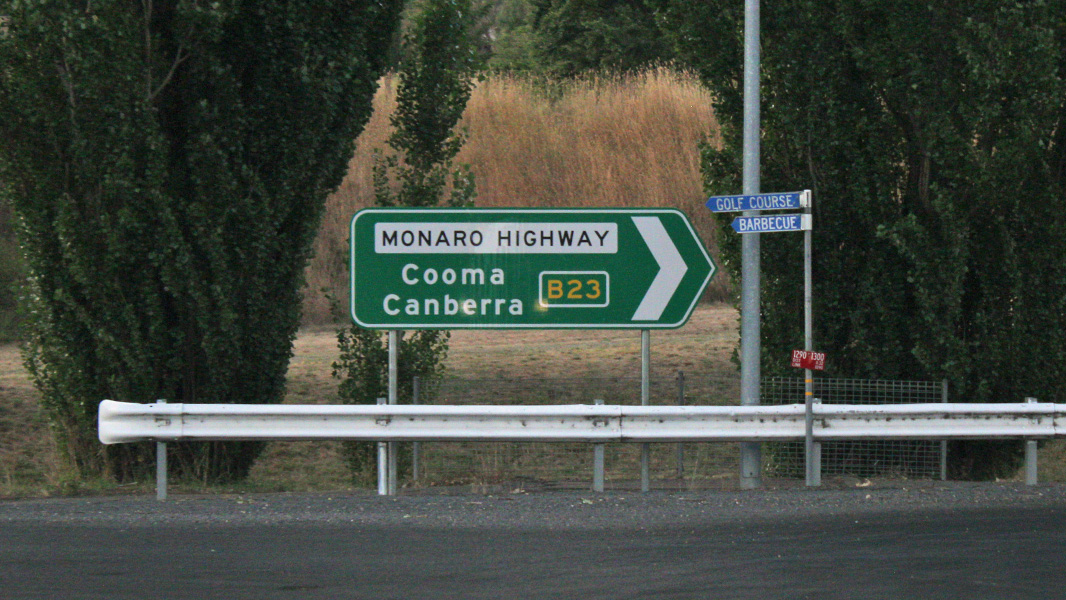
| M23 B23 | Federal Highway & Monaro Highway (M23 / B23) |
Statistics:
Route Numbering:


General Information:
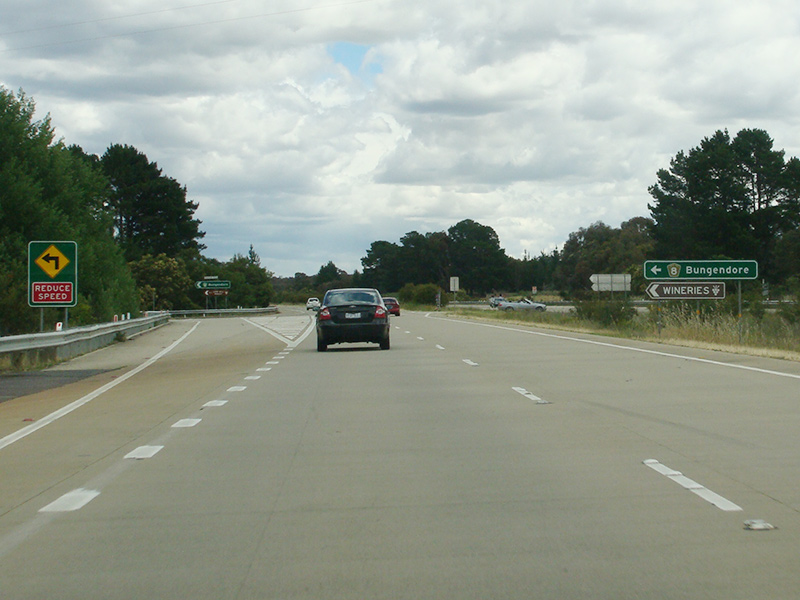
Federal Highway (M23) is one of two major connectors from Canberra to the Hume Highway, which links Sydney with Melbourne. The entire length of the Federal Highway is dual carriageway. The route forms the Remembrance Driveway which honours war veterans, click here for the Remembrance Driveway web site. 2
More than 12,000 vehicles use the Federal Highway each day, of which over 15 per cent are commercial vehicles.
Monaro Highway (B23) is a two-laned rural highway that travels through south eastern New South Wales. Parts of the route are subject to snow falls and ice during the winter months. The route continues out of the Australian Capital Territory, and passes through mostly farmland and small towns, with Cooma and Bombala being the 2 major towns on the route. At the southern end, the route passes through dense pine forests before crossing into the state of Victoria.
Multiplexes along the route include:
History:

| Victorian Border to Wollogorang | Wollogorang to Victorian Border | |||
| Preview: | Description: | Preview: | Description: | |
 |
New South Wales / Victoria Border: Monaro Hwy (B23) crossing from Victoria into New South Wales at Rockton, January 2017. Image © Huang Milton Collection |
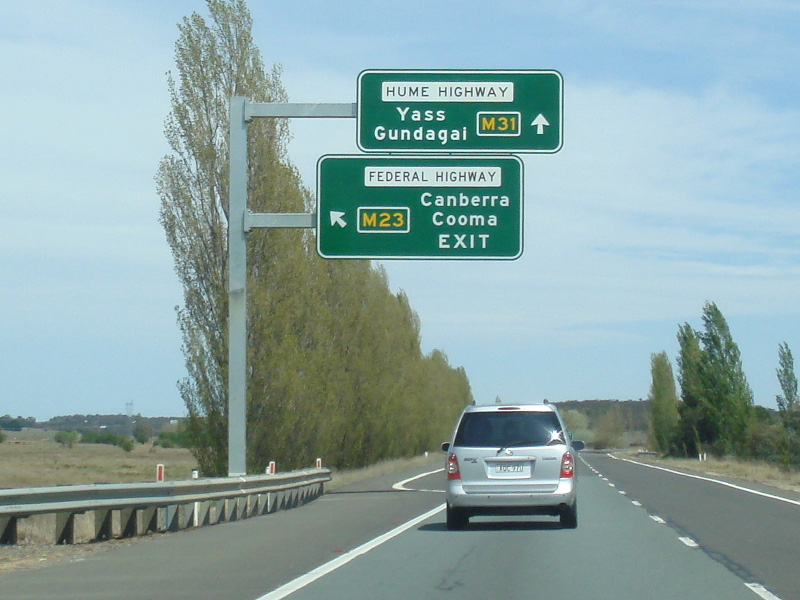 |
ID Signs: Southbound directional sign on the Hume Highway approaching the Federal Highway at Wollogorang, September 2013. Image © Paul Rands
|
|
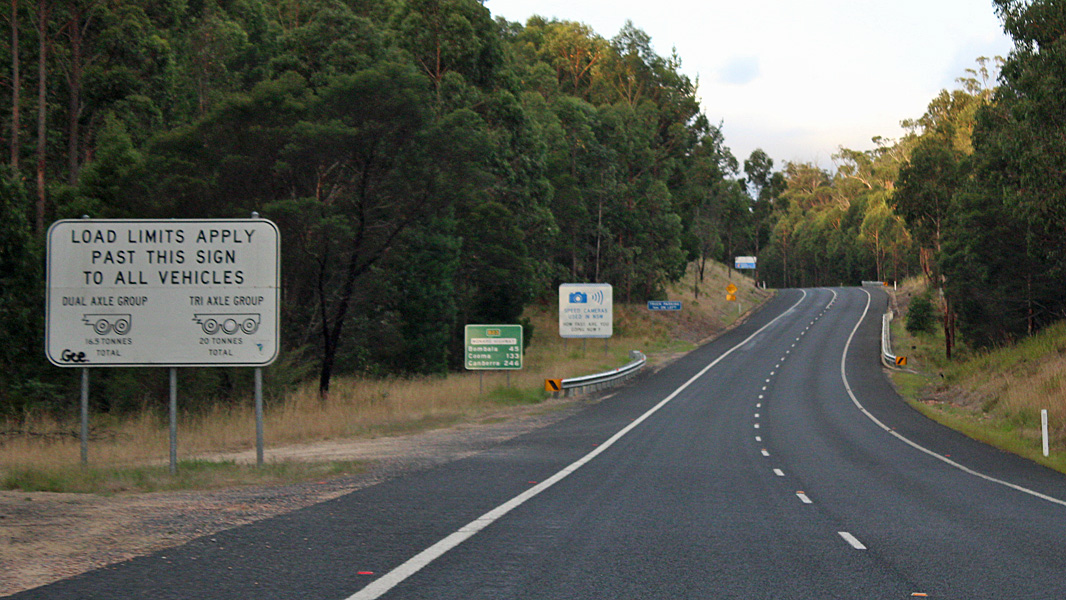 |
Load Limits Sign: Load limits sign at Rockton, January 2017. Image © Huang Milton Collection |
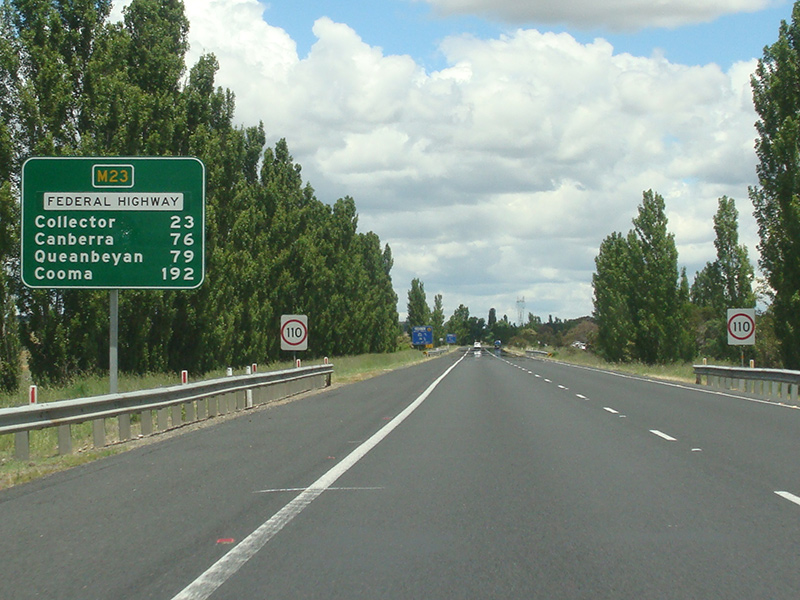 |
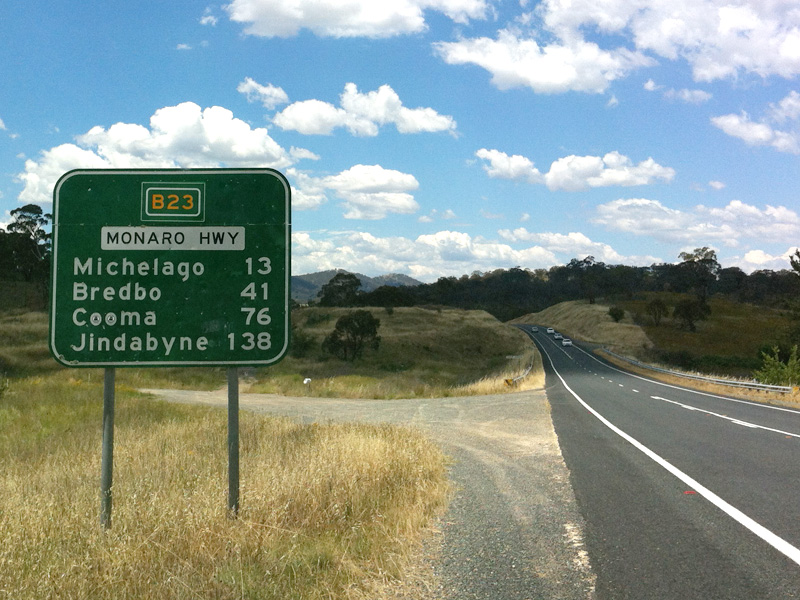
Distance Sign: The first RD sign on M23, as you head south from the Hume Highway interchange at Wollogorang, November 2013. Image © Paul Rands |
|
 |
Reassurance Directional Sign: Distance sign at Rockton, January 2017. Image © Huang Milton Collection |
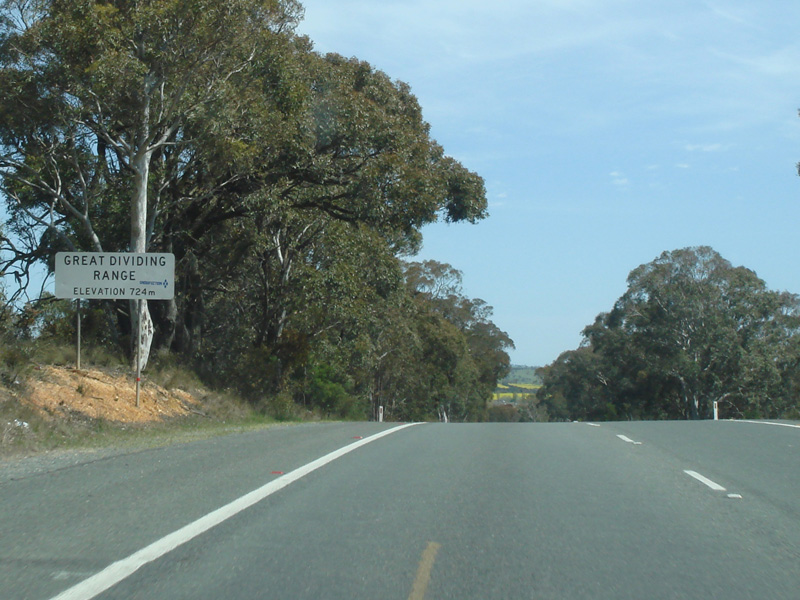 |
Crossing the Great Dividing Range: Sign on Federal Hwy (M23) indicating the top of the Great Dividing Range at Wollogorang, September 2013. Image © Paul Rands
|
|
 |
Reassurance Directional Sign: Tourism based distance sign at Rockton, January 2017. Image © Huang Milton Collection |
 |
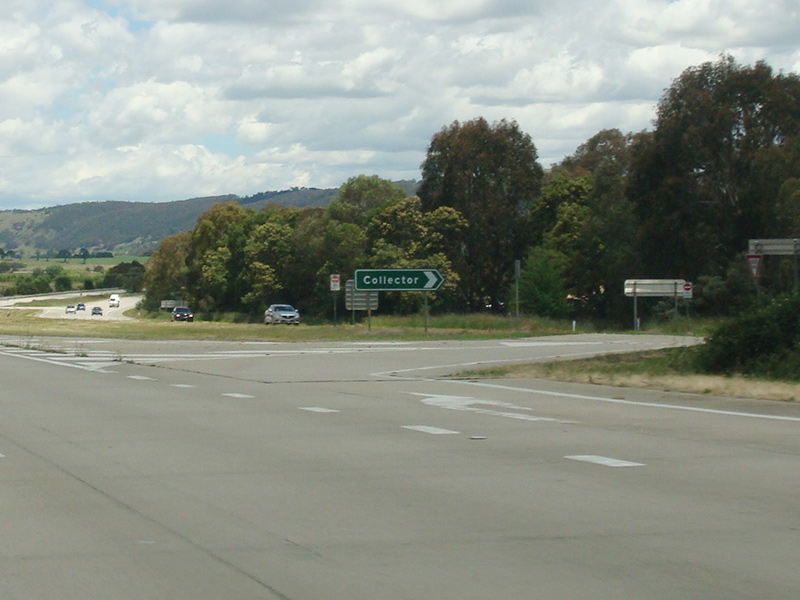
Supplemental AD Sign: Signage showing the bypassed town of Collector, November 2013. Image © Paul Rands |
|
 |
Advance Directional Sign: AD sign at Rockton, approaching Imlay Rd, January 2017. Imlay Rd links the Monaro and Princes Highways. Image © Huang Milton Collection |
 |
Services Sign: Services sign, southbound at Collector, November 2013. Image © Paul Rands |
|
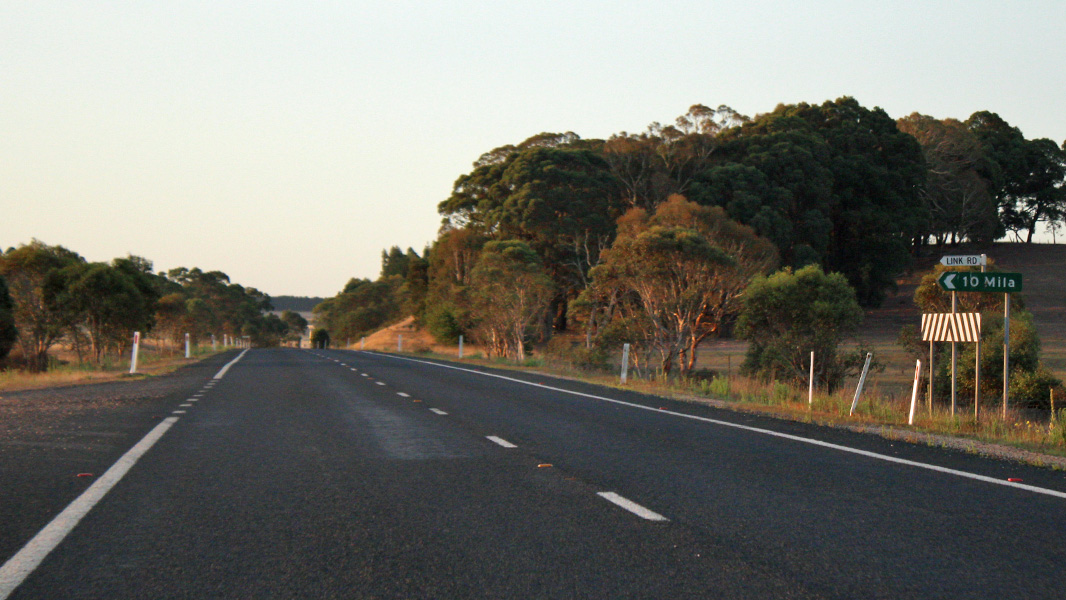 |
Link Road: Corner of Monaro Hwy (B23) and Link Rd at Paddys Flat, January 2017. Image © Huang Milton Collection |
 |
Advance Directional Sign: Southbound AD sign approaching the junction with Church Street at Collector, November 2013. Image © Paul Rands |
|
 |
Dundundra Road: Corner of Monaro Hwy (B23) and Dundundra Rd at Paddys Flat, January 2017. Image © Huang Milton Collection |
 |
Intersection Directional Sign: Southbound ID sign at the junction with Church Street at Collector, November 2013. Image © Paul Rands |
|
 |
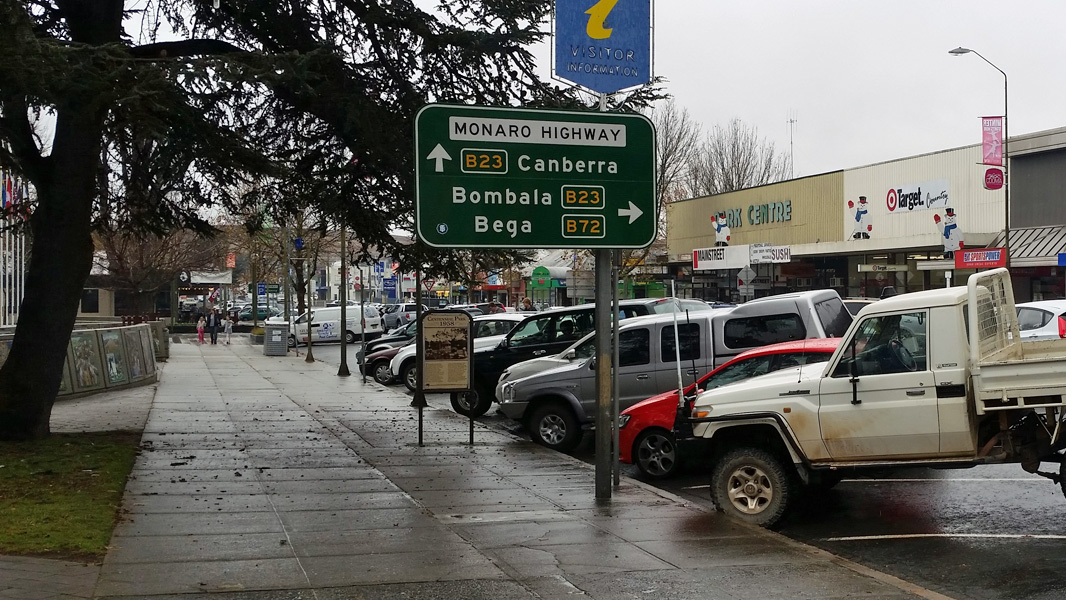
Advance Directional Sign: AD sign at Bombala approaching Delegate Rd, January 2017. Image © Huang Milton Collection |
 |
Intersection Directional Sign: Southbound ID sign at the junction with Church Street at Collector, November 2013. Image © Paul Rands |
|
 |
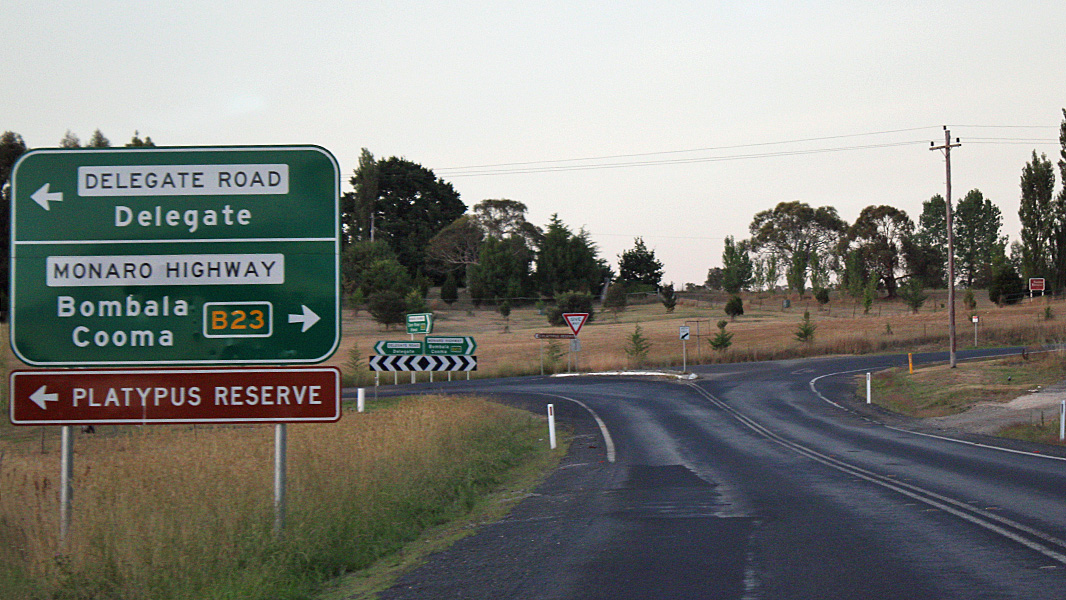
Delegate Road: Corner of Monaro Hwy (B23) and Delegate Rd at Bombala, January 2017. B23 turns right at this location. Image © Huang Milton Collection |
 |
Currawang Road Intersection: Southbound at the junction Currawang Road, Collector, November 2013. Image © Paul Rands |
|
 |
Reassurance Directional Sign: Distane sign at Bombala, January 2017. Image © Huang Milton Collection |
 |
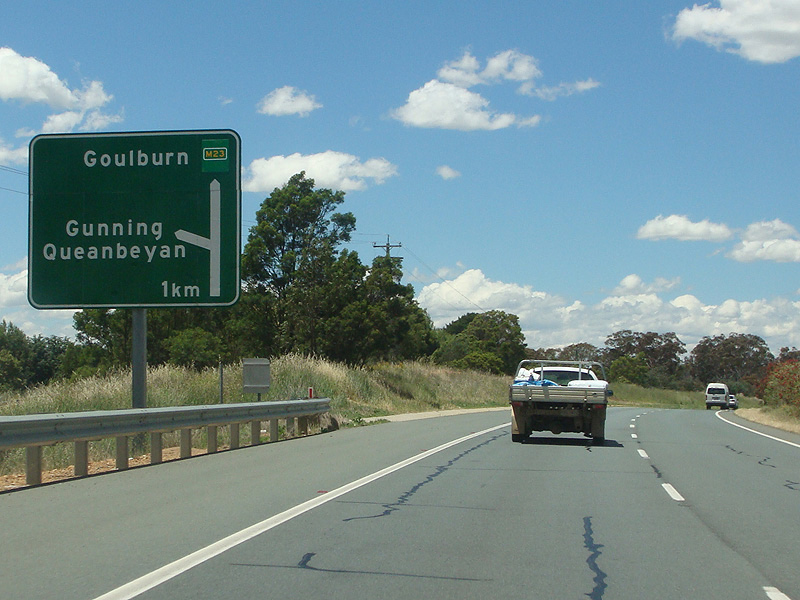
Advance Directional Sign: Southbound AD approaching the turn off to Collector-Gunning Rd (old Federal Highway) and also Collector Creek (Flood Plain 1) at Collector, November 2013. Image © Paul Rands |
|
 |
Entering Bombala: Monaro Hwy (B23) as it enters the town of Bombala, January 2017. Image © Huang Milton Collection |
 |
Intersection Directional Sign: ID sign approaching Collector-Gunning Rd at Collector, November 2013. Image © Paul Rands |
|
 |
Advance Directional Sign: AD sign at Bombala approaching Maybe St and Forbes St, January 2017. Image © Huang Milton Collection |
 |
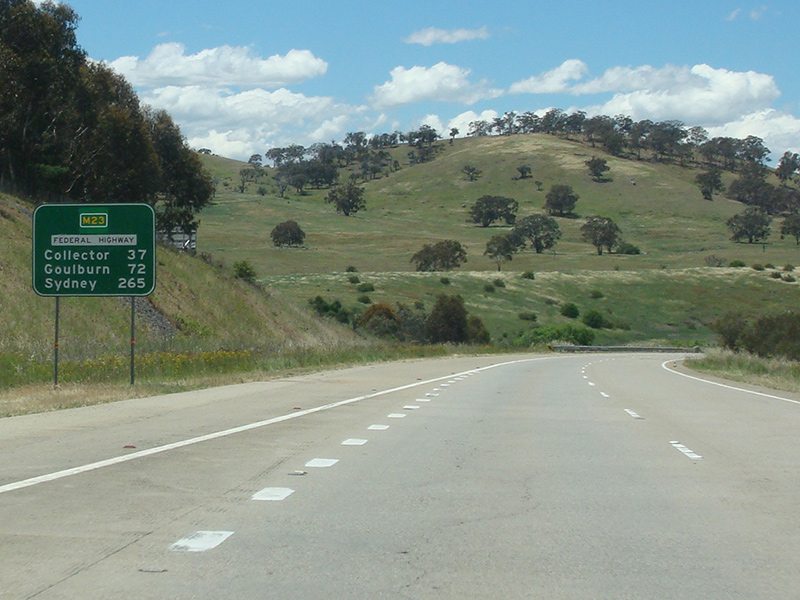
Distance Sign: Southbound RD sign at Collector, November 2013. Image © Paul Rands |
|
 |
Intersection Directional Sign: ID sign at the roundabout with Maybe St and Forbes St in Bombala, January 2017. Image © Huang Milton Collection |
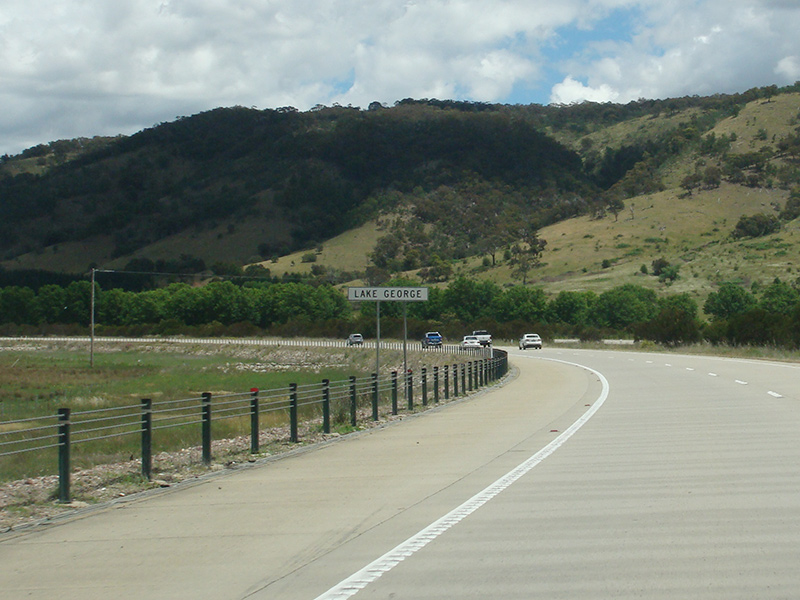 |
Entering the Lake George Area: Southbound past Lake George, November 2013. Image © Paul Rands |
|
 |
Intersection Directional Sign: ID sign at the roundabout with Maybe St and Forbes St in Bombala, January 2017. Image © Huang Milton Collection |
 |
Advance Directional Sign: AD Sign approaching the Weereewaa Lookout over Lake George and Hadlow Dr (former Federal Hwy), Bywong, November 2013. Image © Paul Rands |
|
 |
Advance Directional Sign: AD sign at Bombala approaching Mahratta St, January 2017. Image © Huang Milton Collection |
 |
Shingle Hill Way: Southbound at Bywong as you at the junction with Shingle Hill Way (formerly Bungendore Road), November 2013. Image © Paul Rands |
|
 |
Mahratta Street: Corner of Monaro Hwy (B23) and Mahratta St at Bombala, January 2017. B23 turns right at this location Image © Huang Milton Collection |
 |
Bungendore Road Junction: Southbound through the Bungendore Road (TD8) intersection at Bywong, November 2013. Image © Paul Rands |
|
 |
Reassurance Directional Sign: Distane sign at Bombala, January 2017. Image © Huang Milton Collection |
 |
Bungendore Road Junction: Southbound through the Bungendore Road (TD8) intersection at Bywong, November 2013. Image © Paul Rands |
|
 |
Iris Street: Corner of Monaro Hwy (B23) and Iris St in Bombala, January 2017. Image © Huang Milton Collection |
 |
Approaching Mac's Reef Road: Advance directional sign for Mac's Reef Road on the southbound carriageway at Sutton, November 2013. Image © Paul Rands |
|
 |
Advance Directional Sign: AD sign at Ando approaching The Snowy River Way, January 2017. Image © Huang Milton Collection |
 |
Mac's Reef Road Intersection: Intersection directional sign on the corner of Mac's Reef Road at Sutton, November 2013. Image © Paul Rands |
|
 |
Reassurance Directional Sign: Distane sign at Ando, January 2017. Image © Huang Milton Collection |
 |
Advance Directional Sign: AD sign as you approach the interchange with Sutton Road at Sutton, November 2013. Image © Paul Rands |
|
 |
Intersection Directional Sign: ID sign at the corner of Monaro Hwy (B23), Church Rd and Campbell St in Cooma, February 2017. Image © Paul Rands |
 |
Supplementary AD Sign: Sign indicating other destinations available from the Sutton Road interchange, November 2013. Image © Paul Rands |
|
 |
Advance Directional Sign: AD sign at Cooma approaching Snowy Mtns Hwy (B72), February 2017. The B72 duplex ends at this intersection. Image © Paul Rands |
 |
Sutton Road Exit: Southbound at the Sutton Road interchange at Sutton, November 2013. Image © Paul Rands |
|
 |
Advance Directional Sign: AD sign on Snowy Mountains Hwy (B72) at Cooma approaching Monaro Hwy (B23 / B72), June 2016. Image © Paul Rands |
 |
Distance Sign: Southbound RD sign after the Sutton Road interchange, November 2013. Image © Paul Rands |
|
 |
Reassurance Directional Sign: Distance sign at Cooma, February 2017. Image © Paul Rands |
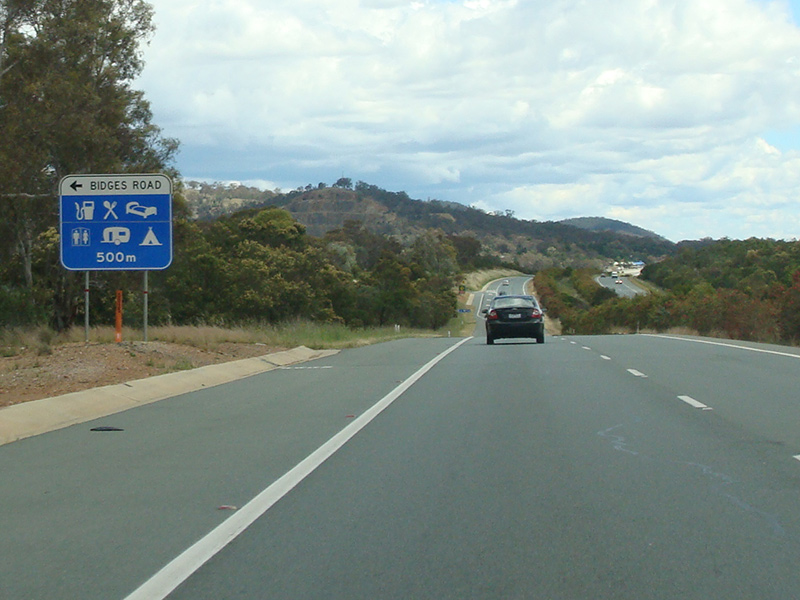 |
Services Sign: Sign indicating services available via Bidges Rd, Sutton, November 2013. Image © Paul Rands |
|
 |
Advance Directional Sign: AD sign at Sutton approaching Sutton Rd interchange, November 2013. Image © Paul Rands |
 |
Services Sign: Sign at Sutton indicating services available at the Eagle Hawk Hill Interchange, November 2013. Image © Paul Rands |
|
 |
Advance Directional Sign: AD sign at Sutton approaching Sutton Rd interchange, November 2013. Image © Paul Rands |
 |
Eagle Hawk Hill Interchange: Southbound through the Eagle Hawk Hill interchange at Eagle Hawk Hill, November 2013. Image © Paul Rands |
|
 |
Advance Directional Sign: AD sign at Sutton approaching Macs Reef Rd, November 2013. Image © Paul Rands |
 |
Advance Directional Sign: ACT designed southbound AD sign for the Majura Road (ALT NR-23 / OD1) / Horse Park Drive interchange over the NSW-ACT border. Southbound at Sutton / Ginn's Gap, November 2013. Image © Paul Rands |
|
 |
Distance Sign: RD sign at Sutton after the Macs Reef Rd junction, November 2013. Image © Paul Rands |
 |
ACT / NSW Border: End M23, at the ACT border at Sutton (Ginns Gap), November 2013. Image © Paul Rands |
|
 |
Bypassed Town Sign: Bypassed town sign for Collector, November 2013. Image © Paul Rands |
 |
NSW / ACT Border: Southbound at the NSW / ACT Border at Williamsdale, December 2013. Image © Paul Rands
|
|
 |
Advance Directional Sign: Southbound AD approaching the turn off to Collector-Gunning Rd (old Federal Highway) at Collector, November 2013. Image © Paul Rands |
 |
Reassurance Directional Sign : Distance sign on Monaro Hwy (B23) at Williamsdale, December 2013. Image © Paul Rands
|
|
 |
Intersection Directional Signs: ID signs facing Collector-Gunning Rd (old Federal Highway) at Collector, November 2013. Image © Paul Rands |
|||
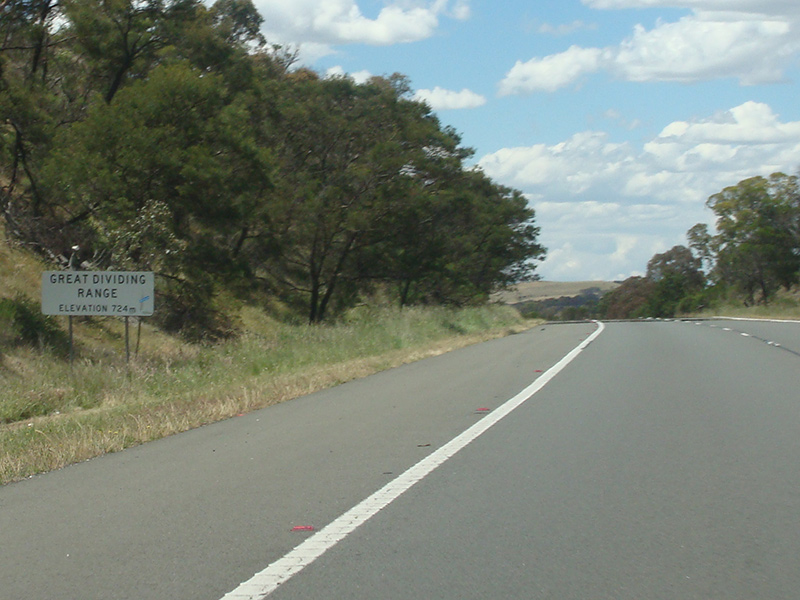 |
Crossing the Great Dividing Range: Sign on Federal Hwy (M23) indicating the top of the Great Dividing Range at Wollogorang, November 2013. Image © Paul Rands |
|||
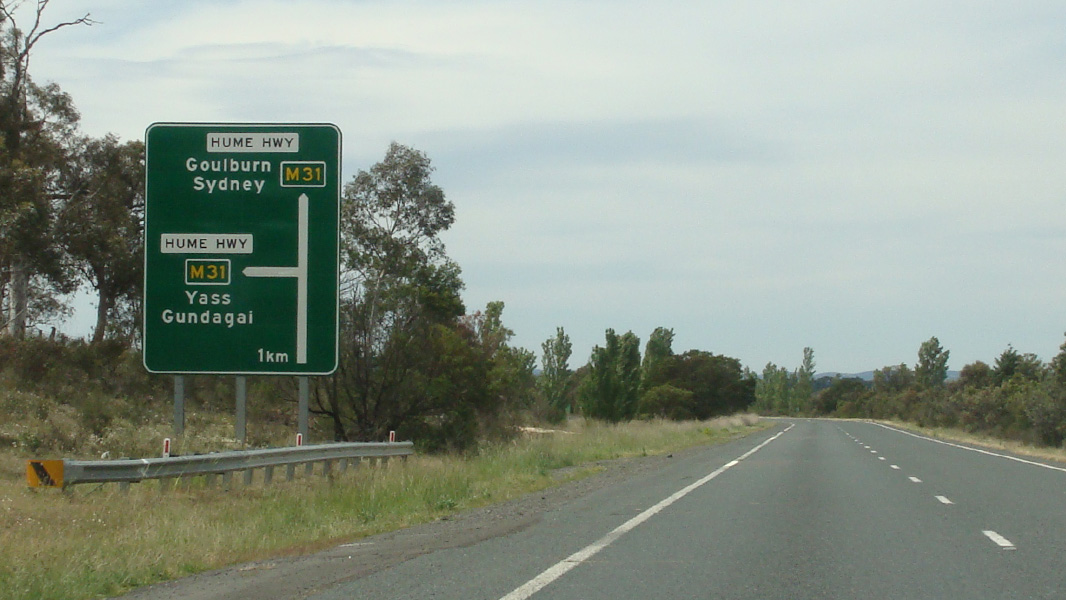 |
AD Sign: Northbound advance directional sign, 1 km from the Hume Hwy interchange at Yarra, November 2013. Image © Paul Rands |
|||
 |
Advance Directional Sign: AD sign approaching the interchange with the Hume Highway, northbound at Yarra, November 2013. Image © Paul Rands |
|||
 |
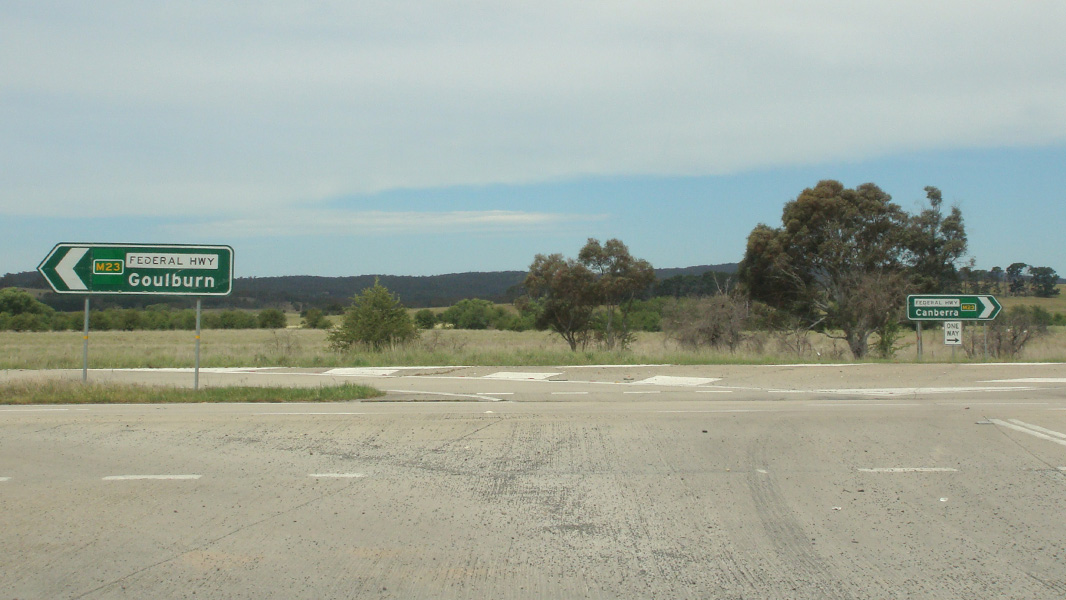
Hume Highway: AD sign at the interchange with the Hume Highway, Yarra, November 2013. Image © Paul Rands |
|||
| Click here for the continuation of the route as M23 / B23 in the ACT Click here for the continuation of B23 in Victoria |
||||
1 The Roadmakers, published by the Department of Main Roads
2 Roads and Traffic Authority
3 Canberra Times, By-pass is both early and late, 9 July 1987
4 Canberra Times, Mr Morris and Morrises Minor open the major Sutton by-pass, 19 March 1988
5 NSW Treasury
Last updated: 03-Jul-2020 14:09
This site © Paul Rands. All rights reserved. Some portions © (copyright) by their respective and credited owners. Permission must be obtained before using any images from this site. For details, please email by clicking here.