|
|
|
|
|
| M23 | Federal Highway, Majura Parkway & Monaro Highway (M23) |
Statistics:
Route Numbering:


General Information:
M23 is a major north-south route within the ACT.
The M23 section acts as a bypass of the urban area of North Canberra and travels past Canberra International Airport.
The route from Ginns Gap to Gilmore is divided motorway and arterial road standard, with at least 2 lanes in each direction and all junctions between Majura and Symonston grade separated. From Gilmore to Williamsdale, the route in undivided rural highway standard with occasional overtaking lanes.
Traffic types vary considerably along the route. Because of the proximity to the industrial areas of Fyshwick, Hume and to a lesser extent, Symonston, there is quite a lot of heavy vehicles using the route. Other traffic includes commuters travelling to and from Civic and South Canberra to Tuggeranong and during Winter, ski traffic making its way to and from the NSW snowfields, south of Cooma.
B23 crosses the Molonglo River at Pialligo, which feeds Lake Burley Griffin.
History:
Federal Highway:
- September 1928: Sydney-Canberra Road declared as Federal Highway. 1
- 1929: Work started on Federal Highway. 2
- June 1929: Contract awarded to John Fowler (Aust) Ltd, to construct a 6 mile section of highway from Canberra (now Lyneham) to the Federal Capital Territory boundary of earthwork and gravel. 3
- 1930: Completion of ACT section of Federal Highway. 4
- May 1961: Work commenced on straightening Federal Hwy and included an access road to Downer. 5
- September 1961: Northbourne Avenue name extended along Federal Highway to Stirling Avenue at Watson. 6
- February 1962: Construction of a turning circle at the entrance to the Starlight Drive-In Theatre on the Federal Highway completed. 7
- December 1965: Contract awarded to Thompson Constructions to widen and re-align a 1 mile section of Federal Highway near the border. 8
- May 1966: Widening and realingment works commence on Federal Hwy near border. 9
- May 1973: Installation begins of new direction signs, dark green with white reflectorised lettering, on the Federal Highway. 10
- 1974: Upgrade from National Route 23 to National Highway 23 to reflect the route being included in the federally funded National Highway system. 11
- November 1994: Plans to upgrade Federal Highway to dual carriageway from Stirling Avenue to Sutton Road (in NSW) submitted to Federal Minister for Transport for review. 12
- August 1998: Variation of the territory plan to allow construction of the Majura Road / Horse Park Drive interchange near Watson, and the duplication of Federal Highway from Watson to NSW border. 13
- 1999: Work commenced on upgrading the section of highway between the border and Stirling Avenue Watson to dual carriageway.
- December 2002: Completion of the dual carriageways between Stirling Avenue and NSW Border.
- 2016: M23 signposted on Federal Highway between ACT-NSW Border and interchange with Majura Parkway and Horse Park Drive.
Majura Parkway:
- January 2013: Preliminary construction work begins on Majura Parkway. 14
- 5 February 2013: Federal Minister for Infrastructure and Transport, Anthony Albanese joined ACT Chief Minister, Katy Gallagher to turn the sod on the Majura Parkway project. 15
- 5 January 2015: 5 km section of Majura Pkwy between Tambreet St and Federal Hwy opened to traffic. 16
- 14 May 2015: Majura Parkway’s northbound carriageway opened to traffic by Mick Gentleman and Zed Seselja, north of Fairbairn Avenue. 17
- 21 May 2015: The southbound section of the Majura Parkway opened to traffic between the Federal Highway and Fairbairn Avenue. 18
- 11 November 2015: The northbound Molonglo River bridge structure and Fairbairn Avenue twin bridges opened to traffic. 19
- 17 February 2016: New signals at the Monaro Hwy, Majura Pkwy and Morshead Dr interchange switched on. 20
- 22 April 2016: The ACT and Australian Governments held a special opening ceremony to mark the completion of major construction on the Majura Parkway and officially name the bridge spanning the Molonglo River. The bridge is known as the Malcolm Fraser Bridge.
Monaro Highway (Cooma Road):
- October 1958: Cooma Road renamed Monaro Highway. This meant the route had a single name between Canberra and the Victorian border. 21
- February 1988: Work started on Eastern Parkway project (Monaro Hwy) with the relocation of Hindmarsh Dr between Jerrabomberra Av and Canberra Av to allow construction of interchange and highway at Canberra Av / Ipswich St junction. 22
- 22 November 1989: Opening of interchange of Canberra Avenue, Ipswich Street and Monaro Highway at Fyshwick. This also included the rerouting of NR23 between Sturt Avenue at the interchange. 23
- 11 November 1992: Monaro Highway name gazetted. 24
- March 2011: Work started on duplicating Monaro Hwy bridge over Canberra Av. 25
- August 2012: Work completed on duplicating Monaro Hwy bridge over Canberra Av. Work included construction of a new southbound carriageway and pavement overlay of the existing Northbound carriageway, construction of two Super T Girder bridges over rail and a cast insitu box girder bridge over Canberra Avenue, installation of bridge safety screens for the bridges over Canberra Avenue, 150 metre reinforced earth retaining wall, the demolition of an existing railway over bridge, modification to an existing reinforced earth retaining wall and relocation of a 1283 millimetre diameter bulk watermain supply across Ipswich Street. The upgrade was the final link in the duplication of the Monaro Highway. 25
- 2019: B23 retired and replaced by A23 between Fyshwick and Williamsdale. 26
Click here for construction photos of the Majura Parkway.

| Ginns Gap to Fyshwick | Fyshwick to Ginns Gap | |||
| Preview: | Description: | Preview: | Description: | |
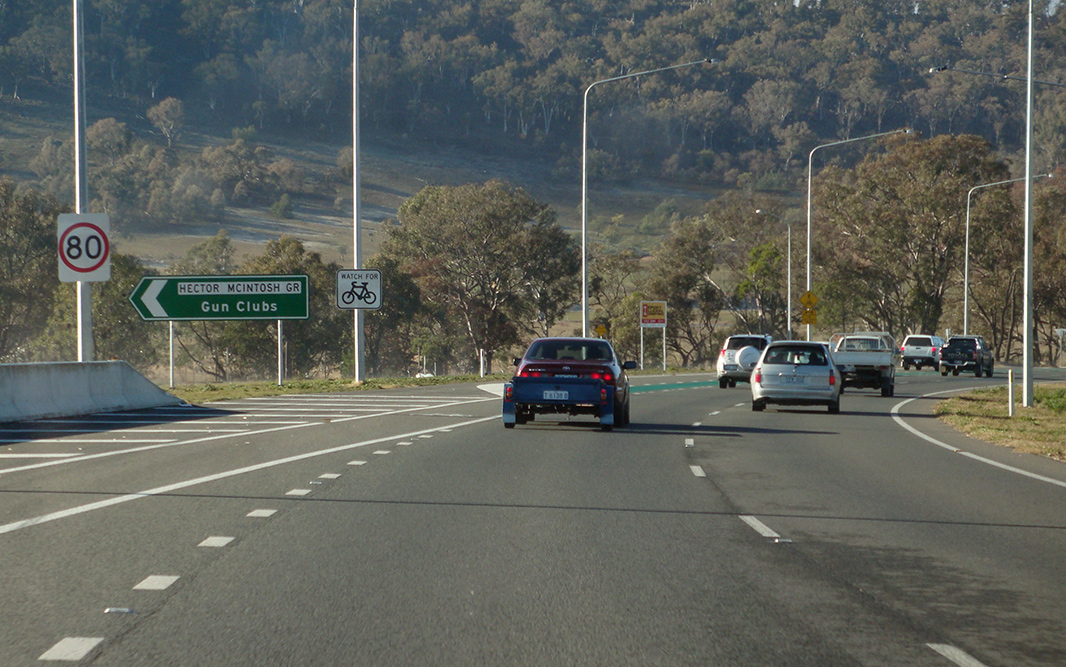 |
Hector McIntosh Grove: Majura Pkwy (M23) at the junction with Hector McIntosh Gr (former Majura Rd) at Majura, July 2016. Image © Paul Rands |
 |
Advance Directional Sign: AD sign at Campbell approaching the on ramp to Majura Pkwy (M23), July 2016. Image © Paul Rands |
|
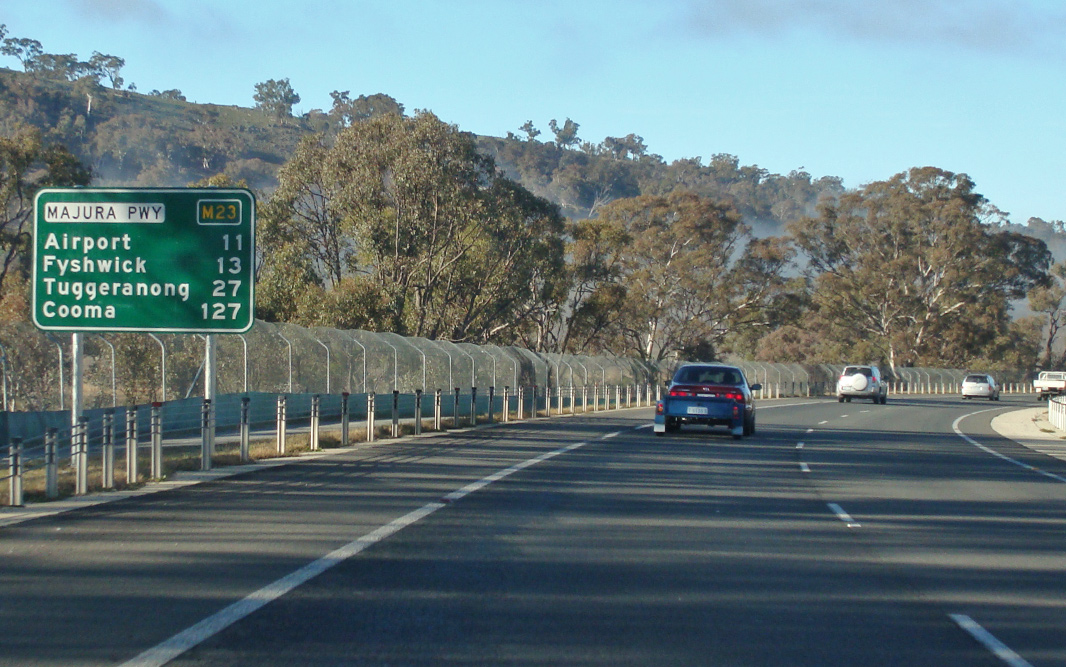 |
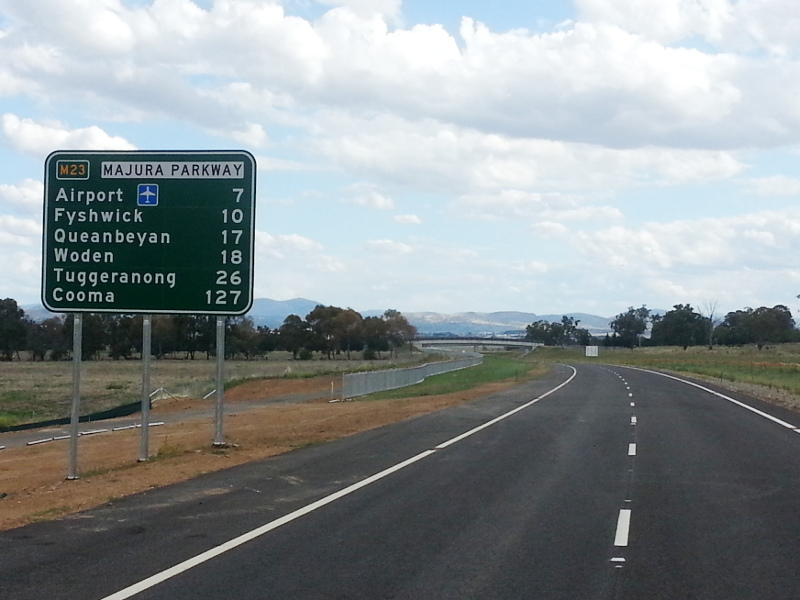
Reassurance Directional Sign: Distance sign at Majura, July 2016. Image © Paul Rands |
 |
Advance Directional Sign: AD sign with approaching Fairbairn Av at Pialligo, April 2017. Image © Paul Rands |
|
 |
Supplemental Advance Directional Sign: Supplemental AD sign at Majura approaching Majura Rd, July 2016. Image © Paul Rands |
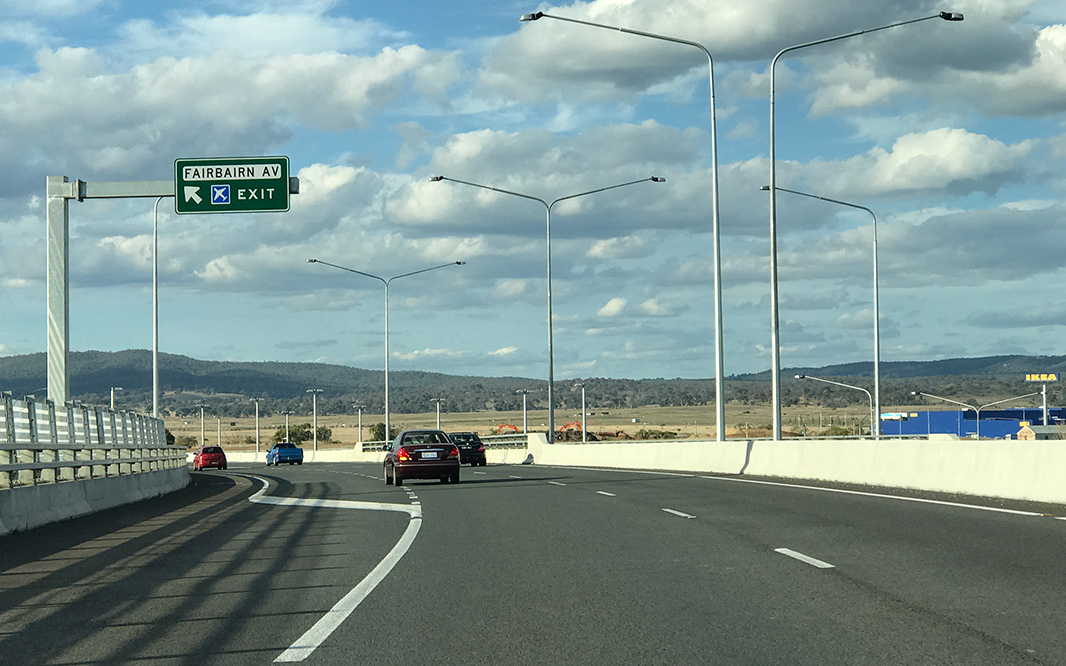 |
Fairbairn Avenue: Majura Pkwy (M23) at the Fairbairn Av interchange at Pialligo, April 2017. Image © Paul Rands |
|
 |
Supplemental Advance Directional Sign: Supplemental AD sign at Majura approaching Majura Rd, April 2015. Image © Paul Rands |
 |
Advance Directional Sign: AD sign at Majura approaching Tambreet St, December 2014. Image © Paul Rands |
|
 |
Supplemental Advance Directional Sign: Supplemental AD sign at Majura approaching Majura Rd, July 2016. Image © Paul Rands |
 |
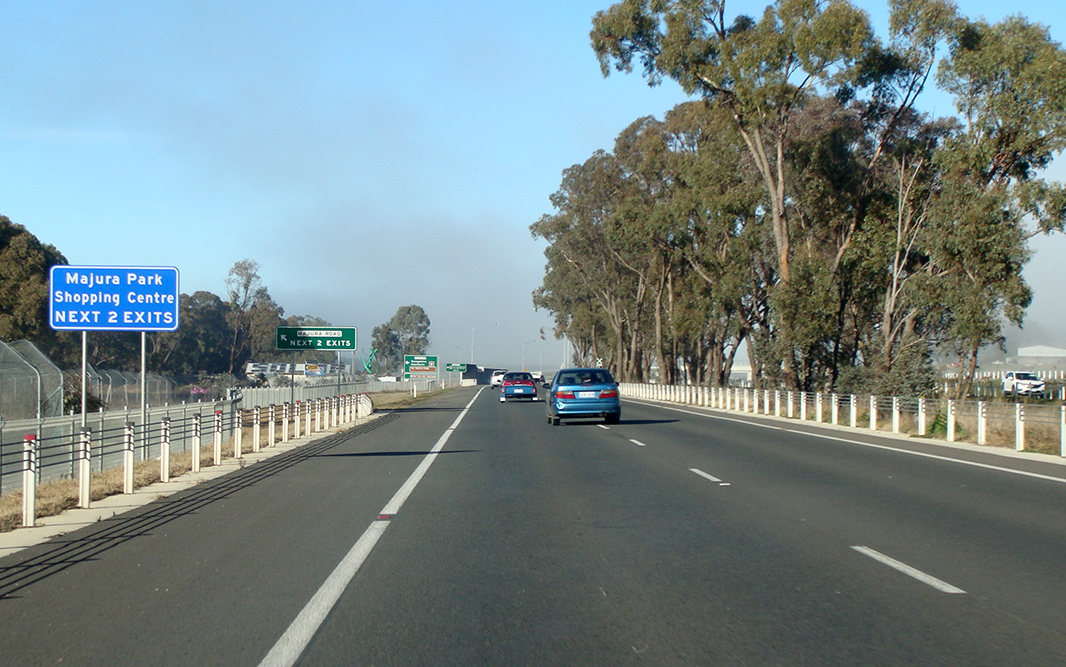
Tambreet Street: Majura Parkway at the Tambreet St interchange, Majura, December 2014. Image © Paul Rands |
|
 |
Advance Directional Sign: AD sign approaching access to Majura Rd and Lime Kiln Rd at Majura, July 2016. Click here for a photo of this location from April 2015. Image © Paul Rands |
|
Intersection Directional Sign: ID sign facing Tambreet St at Majura, April 2015. Image © Paul Rands |
|
 |
Lime Kiln Road: Majura Pkwy (M23) as it passes under Lime Kiln Rd at Majura, April 2015. Image © Paul Rands |
 |
Lime Kiln Road: Majura Pkwy (M23) as it passes under Lime Kiln Rd at Majura, April 2015. Image © Paul Rands |
|
 |
Advance Directional Sign: AD sign approaching Tambreet St, July 2016. Image © Paul Rands |
 |
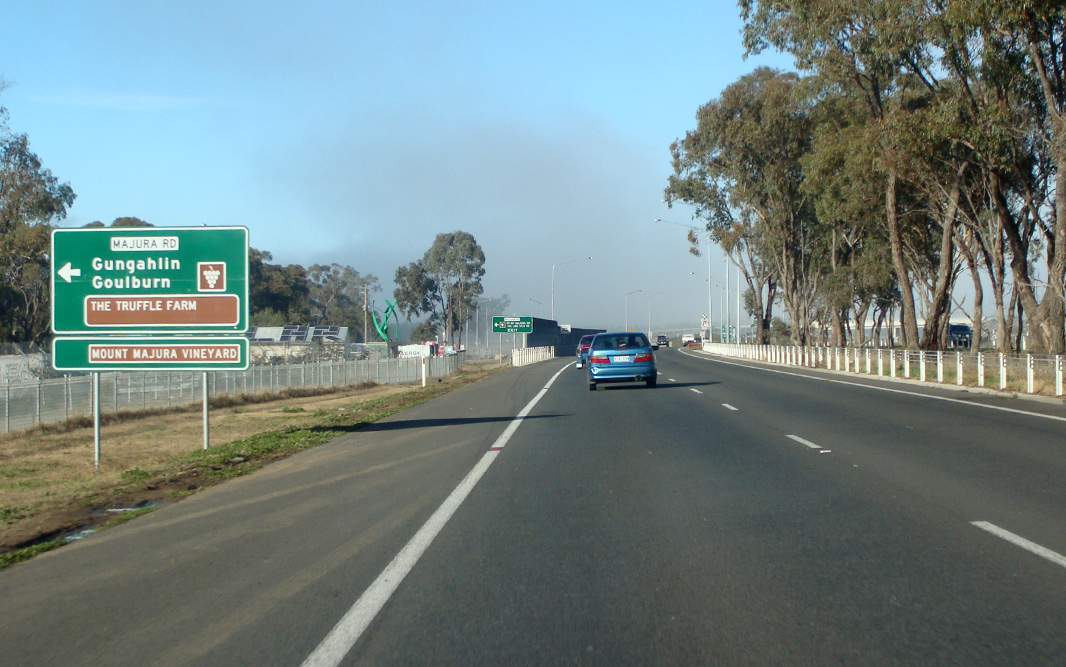
Mount Majura Road: Majura Pkwy (M23) at Majura at the junction with Mt Majura Rd, April 2015. Image © Paul Rands |
|
 |
Supplemental Advance Directional Sign: Supplemental AD sign at Majura approaching Tambreet St, July 2016. Image © Paul Rands |
 |
Federal Highway & Horse Park Drive Interchange: Majura Pkwy (M23) at the interchange with Federal Hwy (M23 / A23) and Horse Park Dr at Majura, April 2015. Image © Paul Rands |
|
 |
Tambreet Street: Majura Pkwy (M23) at Tambreet St in Majura, July 2016. Image © Paul Rands |
 |
Federal Highway & Horse Park Drive Interchange: Majura Pkwy (M23) at the interchange with Federal Hwy (M23 / A23) and Horse Park Dr at Majura, April 2015. Note the remnant NH23 shields on the sign. Image © Paul Rands |
|
 |
Tambreet Street : ID sign on the Tambreet St interchange, Majura, April 2015. Photo was taken prior to Majura Pkwy opening south of this interchange. Image © Paul Rands |
 |
Federal Highway & Horse Park Drive Interchange: Majura Pkwy (M23) at the interchange with Federal Hwy (M23 / A23) and Horse Park Dr at Majura, April 2015. Image © Paul Rands |
|
 |
Reassurance Directional Sign: Distance sign at Majura after the Tambreet St interchange, December 2014. Image © Paul Rands |
 |
Federal Highway & Horse Park Drive Interchange: Majura Pkwy (M23) at the interchange with Federal Hwy (M23 / A23) and Horse Park Dr at Majura, April 2015. These signals have since been fitted with U-turn arrows. Image © Paul Rands |
|
 |
Advance Directional Sign: AD sign with temporary supplementary plate approaching Fairbairn Av at Pialligo, July 2016. Image © Paul Rands |
 |
Federal Highway & Horse Park Drive Interchange: Majura Pkwy (M23) at the interchange with Federal Hwy (M23 / A23) and Horse Park Dr at Majura, April 2015. Note the remnant NH23 shields on the sign. Image © Paul Rands |
|
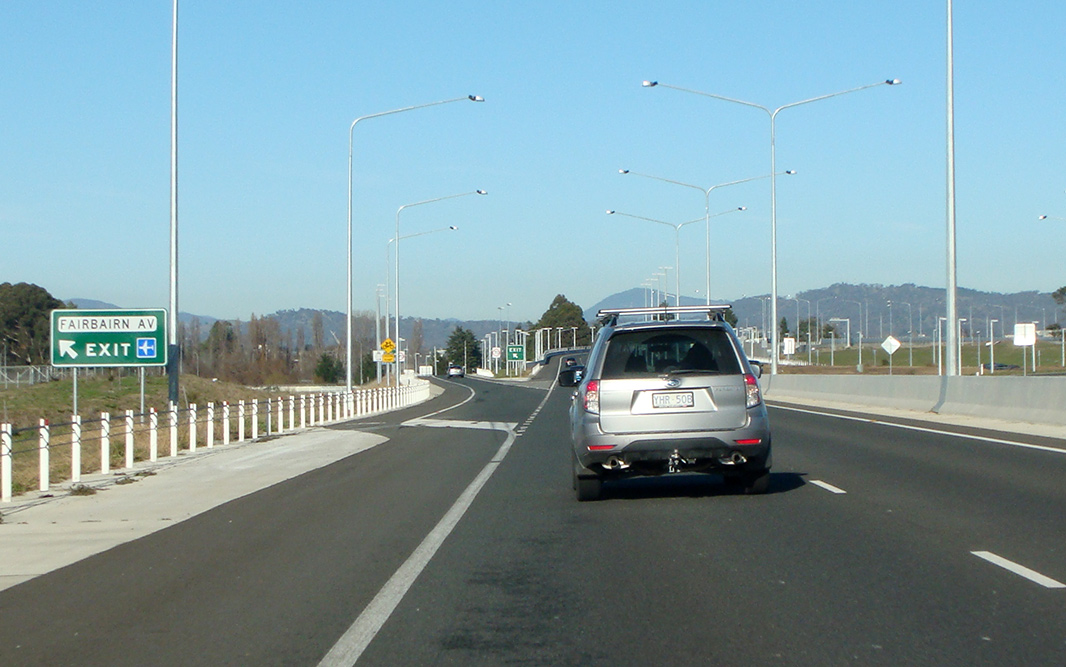 |
Fairbairn Avenue: Majura Pkwy (M23) at the Fairbairn Av interchange at Pialligo, July 2016. Image © Paul Rands |
 |
Federal Highway & Horse Park Drive Interchange: Majura Pkwy (M23) at the interchange with Federal Hwy (M23 / A23) and Horse Park Dr at Majura, April 2015. Note there's no route numbers on the sign. M23 continues left via cloverleaf ramp to head north towards Goulburn. Image © Paul Rands |
|
 |
Advance Directional Sign: AD sign on the off ramp to Fairbairn Av at Pialligo, July 2016. Image © Paul Rands |
|||
 |
Fairbairn Avenue: ID signs facing the off ramp to Fairbairn Av at Pialligo, July 2016. Image © Paul Rands |
|||
 |
Advance Directional Sign: AD sign on Fairbairn Av at Pialligo approaching Majura Pkwy (M23) interchange, July 2016. Image © Paul Rands |
|||
 |
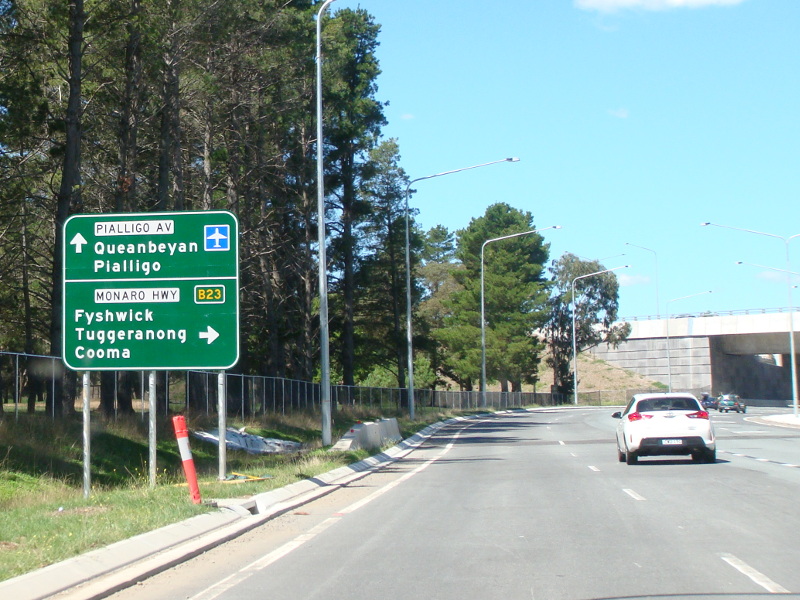
Fairbairn Avenue / Majura Parkway Interchange: Fairbairn Av at Pialligo at the Majura Pkwy (M23) interchange, July 2016. Image © Paul Rands |
|||
 |
Advance Directional Sign: AD sign on Pialligo Av approaching Majura Pkwy (A23) interchange, February 2016. B23 is a remnant from initial alphanumeric signposting and at August 2020 still remained in situ. Image © Paul Rands |
|||
 |
Intersection Directional Sign: ID sign at the interchange with Pialligo Av at Campbell, February 2016. B23 is a remnant from initial alphanumeric signposting and at August 2020 still remained in situ. Image © Paul Rands |
|||
| Click here for the continuation of Monaro Highway as A23 Click here for the continuation of M23 and B23 in New South Wales |
||||
1 Canberra Times, Page 1, 28 September 1928
2 Canberra Times, Page 1, 5 April 1929
3 Canberra Times, Page 1, 19 June 1929
4 Canberra Times, Page 4, 13 February 1930
5 Canberra Times, Page 4, 19 May 1961
6 Canberra Times, Page 27, 22 September 1961
7 Canberra Times, Page 6, 16 February 1962
8 Canberra Times, Page 9, 4 December 1965
9 Canberra Times, Page 25, 18 May 1966
10 Canberra Times, Page 11, 2 May 1973
11 Ozroads (Sam Laybutt), National Highway 23 - Federal Highway
12 Canberra Times, Page 3, 3 November 1994
13 ACT Planning & Land Authority, Variation to the Territory Plan, No 67, August 1998
14 Territory and Municipal Services, Media Release MR739/1212, Majura Parkway Preliminary Works Underway, 14 January 2013
15 ACT Government, Media Releases, Construction on the Majura Parkway Begins, 5 February 2013
16 Canberra Times, New Sections of Majura Parkway open to traffic, 5 January 2016
17 City News, Part of the Majura Parkway now open, 14 May 2015
18 City News, Majura Parkway southbound to Fairbairn Avenue opens up, 21 May 2015
19 City News, Majura Parkway crosses the Molonglo, 10 November 2015
20 Territory and Municipal Services, Roads and Transport, Major Construction Projects, City, Inner North and Inner South, Majura Parkway
21 Canberra Times, Page 3, 21 October 1958
22 Canberra Times, Page 9, 6 February 1988
23 Canberra Times, Page 5, 22 November 1989
24 ACT Planning & Land Authority, Place Name Search, Monaro Highway
25 BMD Constructions, Monaro Highway Duplication
26 ACT Government, Transport Canberra and City Services, Guide Signs, Municipal Infrastructure Standards 12, April 2019
Last updated: 12-Aug-2020 22:33
This site © Paul Rands. All rights reserved. Some portions © (copyright) by their respective and credited owners. Permission must be obtained before using any images from this site. For details, please email by clicking here.