|
|
|
|
|
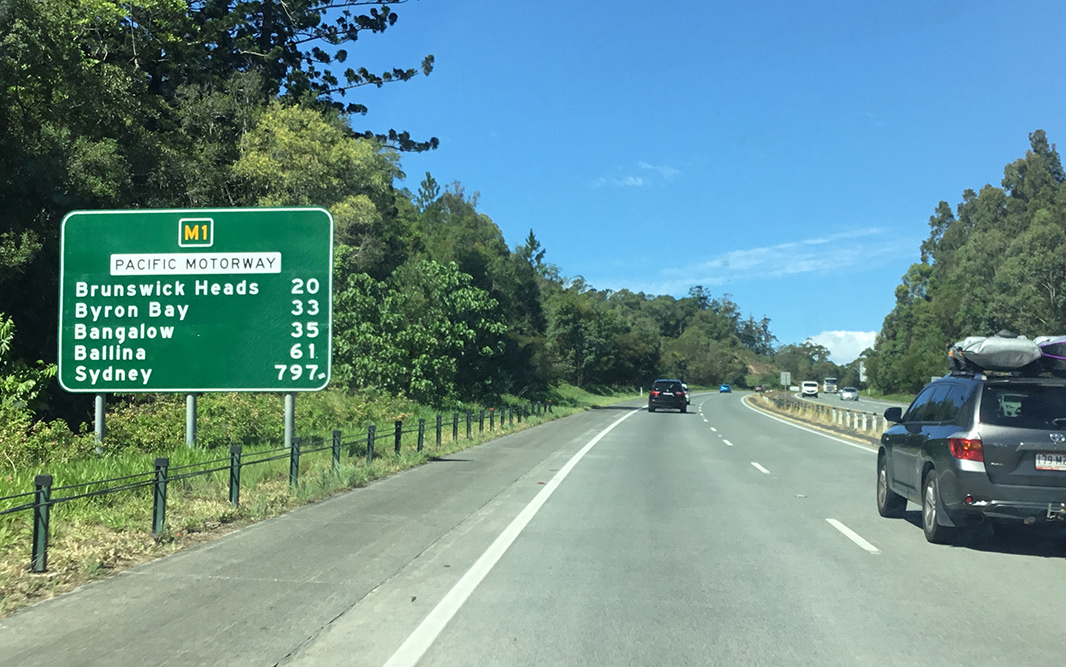
| M1 A1 | Pacific Motorway, Pacific Highway, New England Highway, John Renshaw Drive, Gore Hill Freeway, Warringah Freeway, Sydney Harbour Tunnel, Cahill Expressway, Eastern Distributor, Southern Cross Drive, General Holmes Drive, The Grand Parade, President Avenue, Princes Highway & Princes Motorway (M1 / A1) - Queensland Border To Brunswick Heads |
Statistics:
Route Numbering:

General Information:
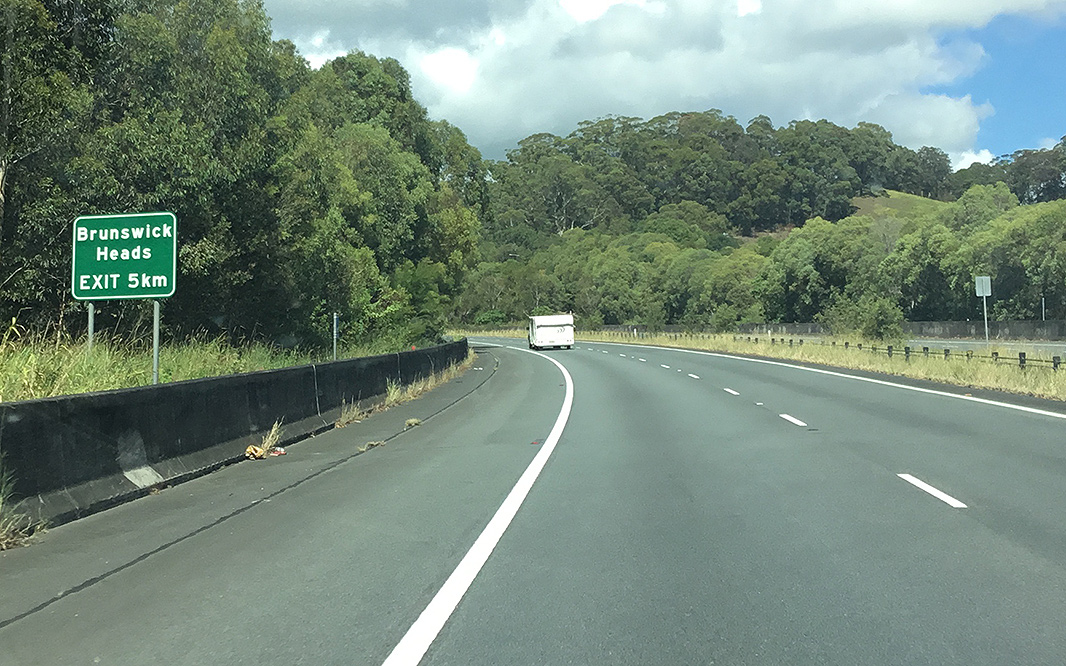
The northernmost section of Pacific Motorway runs from Brunswick Heads through to the Queensland border, and features 2 tunnels, one at Yelgun and the other at Tweed Heads, which travels under Coolangatta Airport in Queensland.
History:
Click here for construction photos of the Tugun Bypass.
| Brunswick Heads to QLD Border | QLD Border to Brunswick Heads | |||
| Preview: | Description: | Preview: | Description: | |
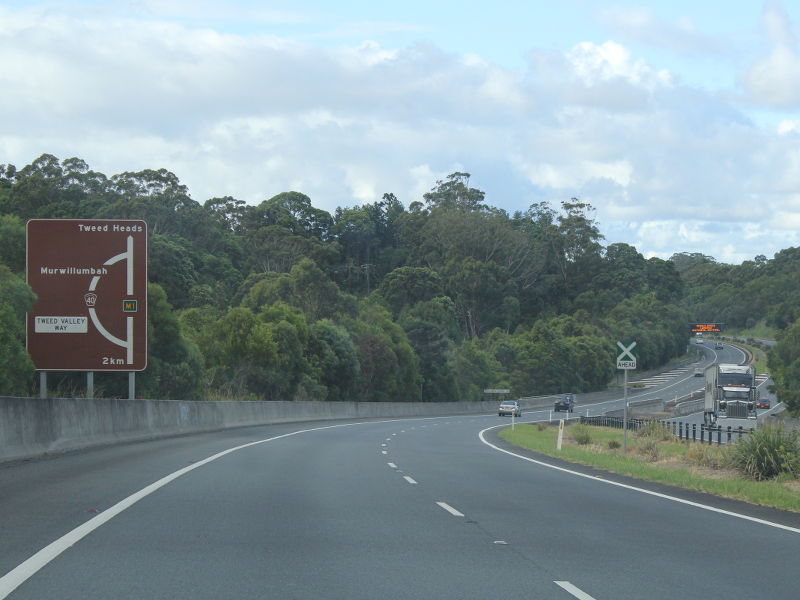 |
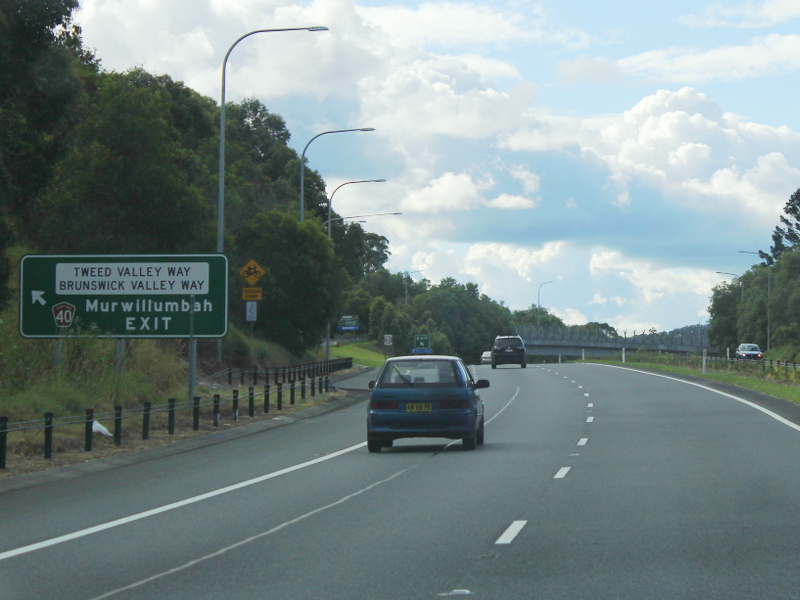
Advance Directional Sign : AD sign at Ocean Shores for the Tweed Valley Way (TD40) interchange, February 2015. Image © Rob Tilley |
 |
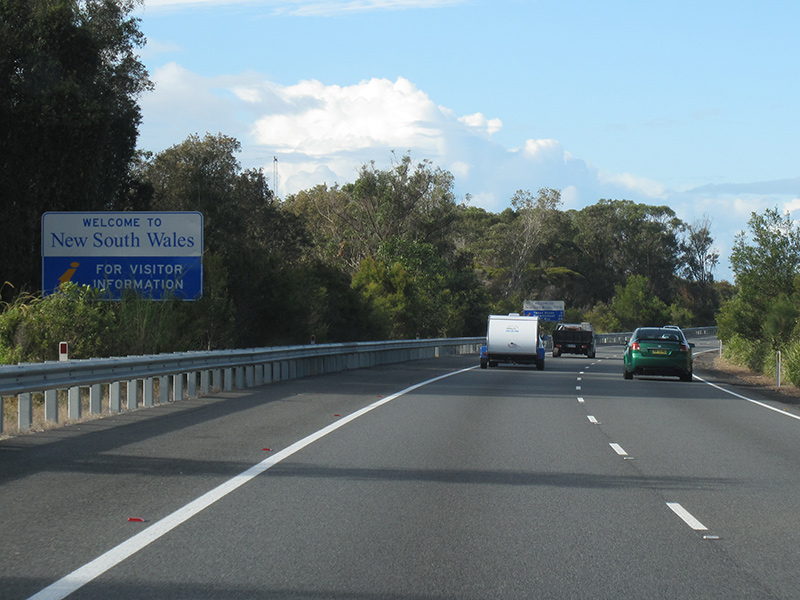
Queensland
Border: Tugun Bypass (M1) at the NSW-QLD Border at Cobaki Lanes, 2008. Image © Jamie Scuglia |
|
 |
Advance Directional Sign : AD sign at Billinudgel approaching Wilfred St, February 2015. Image © Rob Tilley |
 |
Queensland
Border: Tugun Bypass (M1) at the NSW-QLD Border at Cobaki Lanes, June 2012. Image © Justin Cozart |
|
 |
Supplemental Advance Directional Sign : Supplemental AD sign at Billinudgel for the Tweed Valley Way (TD40) interchange, February 2015. Image © Rob Tilley |
 |
New
South Wales Border: Tugun Bypass (M1) at the NSW-QLD Border at Cobaki Lanes, June 2012. < Image © Justin Cozart |
|
 |
Wilfred Street : Pacific Hwy (M1) at the junction with Wilfred St at Billinudgel, February 2015. Image © Rob Tilley |
 |
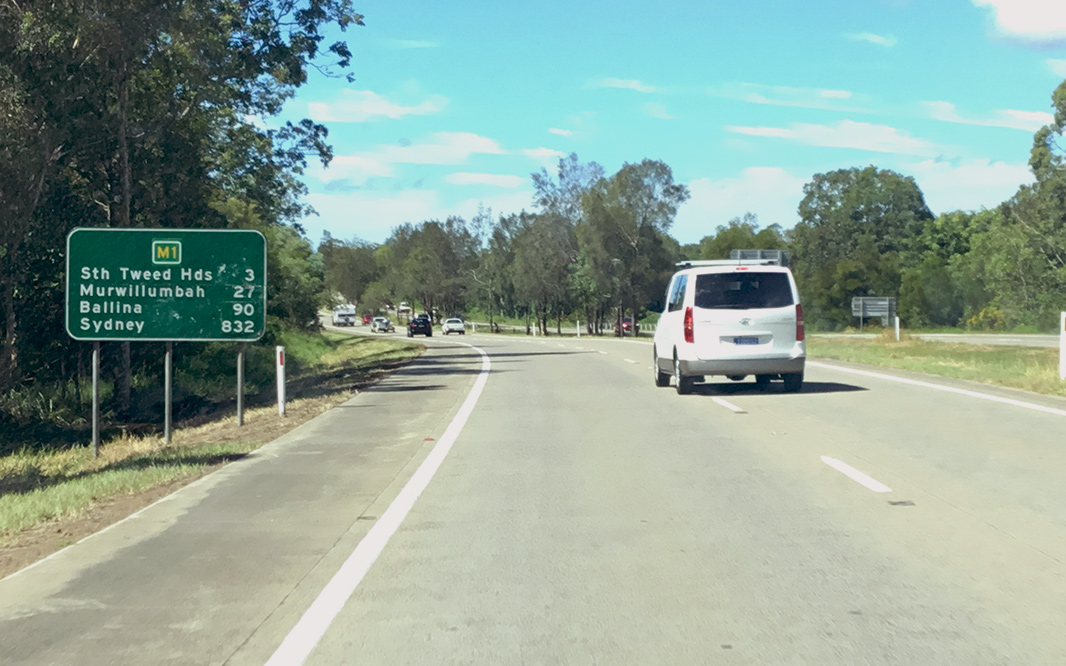
Tourist
Distance Sign: Tourism orientated distance sign on Tugun Bypass (M1) at Cobaki Lakes, February 2009. Image © Rob Tilley |
|
 |
Wilfred
Street: Left-in, left-out on ramps to Pacific Mwy (M1) at Billinudgel, July 2007. Image © Paul Rands |
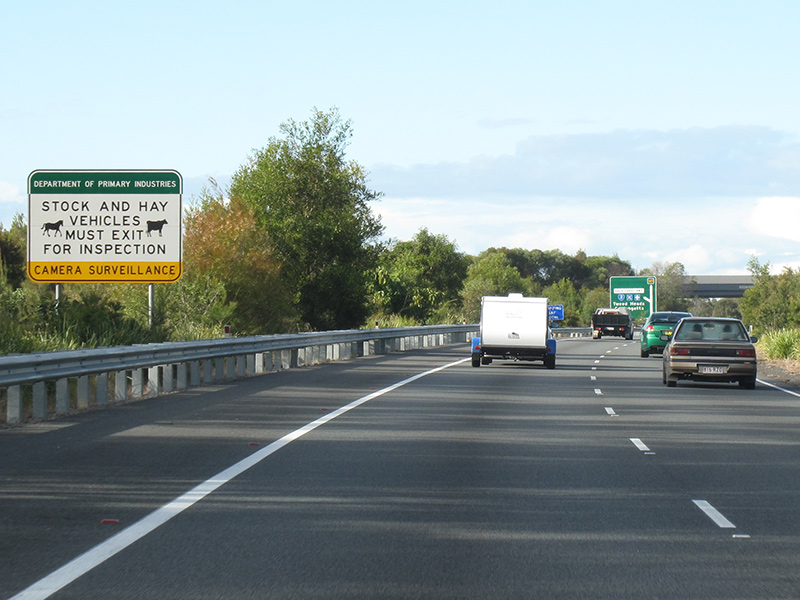 |
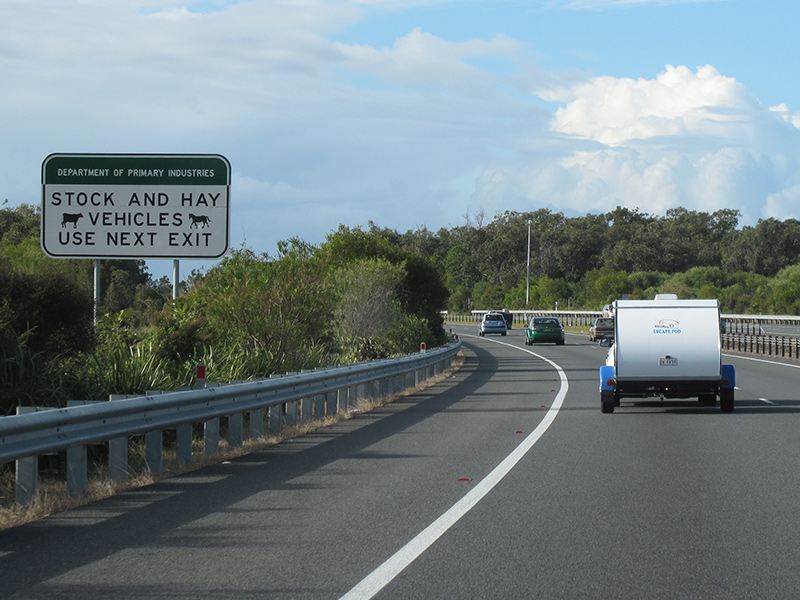
Agricultural
Sign: Sign on Tugun Bypass (M1) at Cobaki Lakes detailing agricultural quarantine requirements for vehicles carrying livestock from QLD into NSW, June 2012. Click here for a photo by Rob Tilley from February 2009 prior to the addition of pictograms. Image © Rob Tilley |
|
 |
Intersection
Directional Sign: ID sign facing Wilfred St, Billinudgel, July 2007. Image © Paul Rands |
 |
Advance
Directional Sign: AD sign on Tugun Bypass (M1) approaching the interchange with Gold Coast Hwy (SR2) at Tweed Heads West, February 2009. Image © Rob Tilley |
|
 |
Advance Directional Sign : AD sign at Billinudgel near Marshall Creek for the Tweed Valley Way & Brunswick Valley Way (TD40) interchange, February 2015. Image © Rob Tilley |
 |
Agricultural
Sign: Sign on Tugun Bypass (M1) at Tweed Heads West detailing agricultural quarantine requirements for vehicles carrying livestock from QLD into NSW, June 2012. Click here for a photo by Rob Tilley from February 2009 prior to the addition of pictograms. Image © Rob Tilley |
|
 |
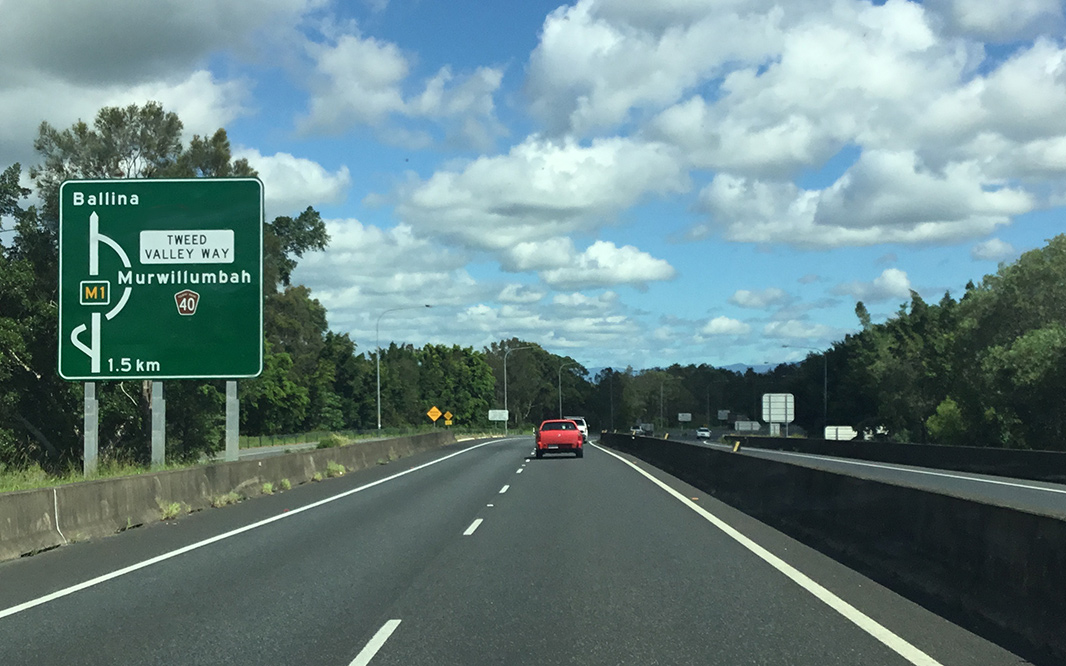
Tweed Valley Way & Brunswick Valley Way Interchange : Pacific Hwy (M1) at the Tweed Valley Way & Brunswick Valley Way (TD40) interchange at Yelgun, February 2015. Image © Rob Tilley |
 |
Advance
Directional Sign: AD sign on Tugun Bypass (M1) approaching the interchange with Gold Coast Hwy (SR2) at Tweed Heads West, June 2012. Image © Justin Cozart |
|
 |
Reassurance Directional Sign: Distance sign and land bridge at Yelgun, February 2015. Image © Rob Tilley |
 |
Variable Speed
Limit Signs: Variable speed limit signs on Tugun Bypass (M1) at Tweed Heads West approaching the tunnel under Gold Coast Airport, February 2009. Image © Rob Tilley |
|
 |
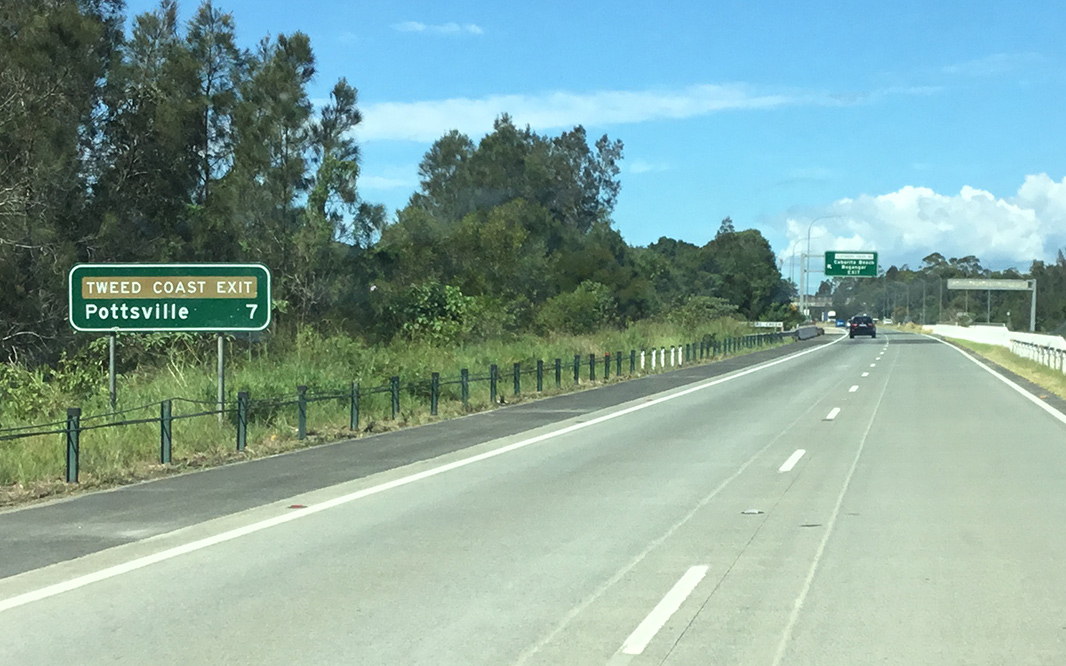
Advance Directional Sign : AD sign at Cudgera Creek approaching Cudgera Creek Rd, February 2015. Image © Rob Tilley |
 |
Changeable Sign: Changeable sign on Tugun Bypass (M1) at West Tweed Heads, June 2012. Image © Justin Cozart |
|
 |
Distance Sign : Reassurance directional sign at Cudgera Creek, February 2015. Image © Rob Tilley |
 |
Tunnel Entrance: Tugun Bypass as it enters the tunnel under Gold Coast Airport, at Tweed Heads West, February 2009. The airport is on both NSW and QLD land. Image © Rob Tilley |
|
 |
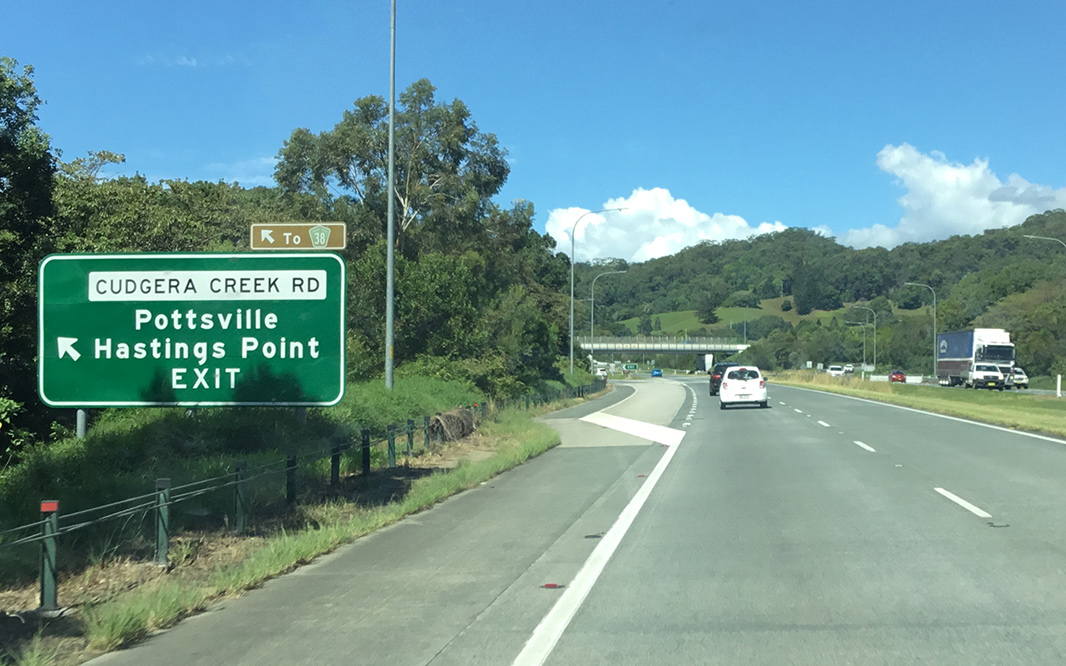
Cudgera Creek Road : Pacific Mwy (M1) at Cudgera Creek at the Cudgera Creek Rd interchange, February 2015. Image © Rob Tilley |
 |
Inside Tunnel: Tugun Bypass (M1) under Gold Coast Airport at Tweed Heads West, February 2009. Image © Rob Tilley |
|
 |
Distance Sign : Reassurance directional sign at Cudgera Ck, February 2015. Image © Rob Tilley |
 |
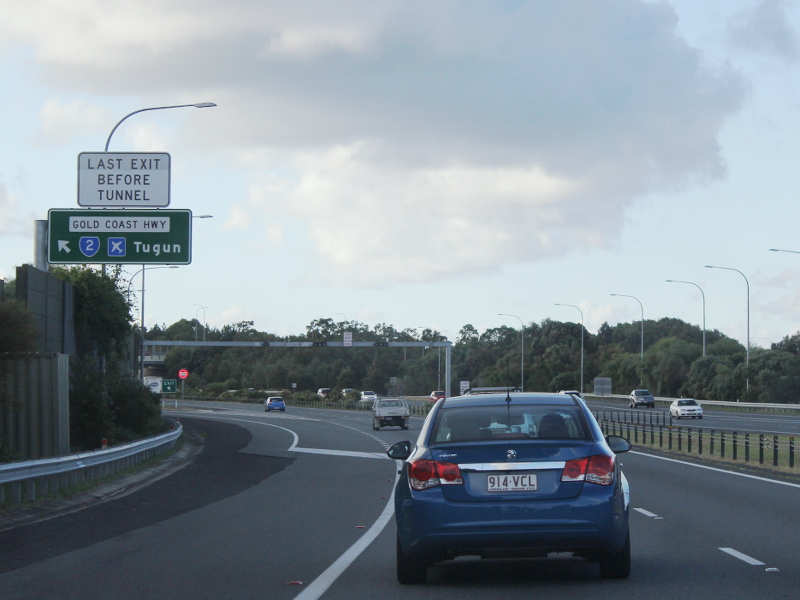
Gold Coast Highway & Pacific
Highway Interchange: Tugun Bypass (M1) at the interchange with Gold Coast Hwy (SR2 (former NR1) and Pacific Hwy (NR1) at Tweed Heads West, February 2009. Image © Rob Tilley |
|
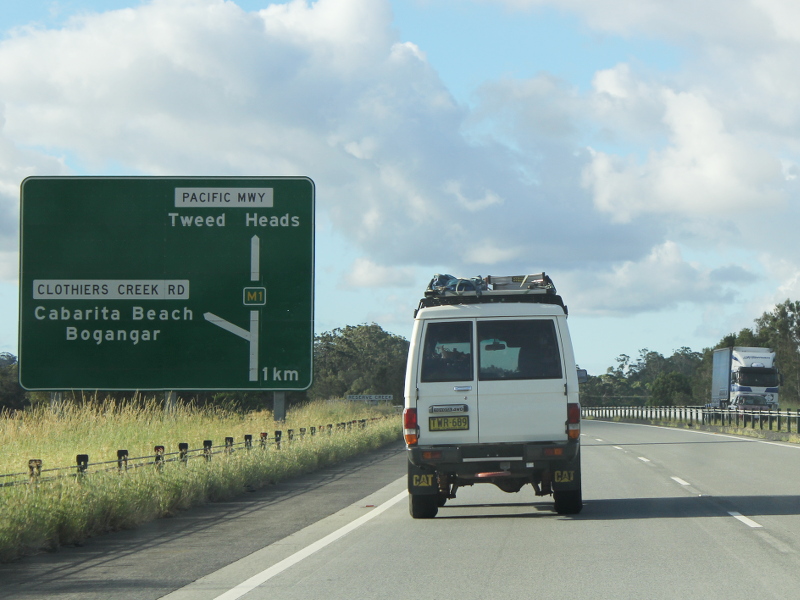 |
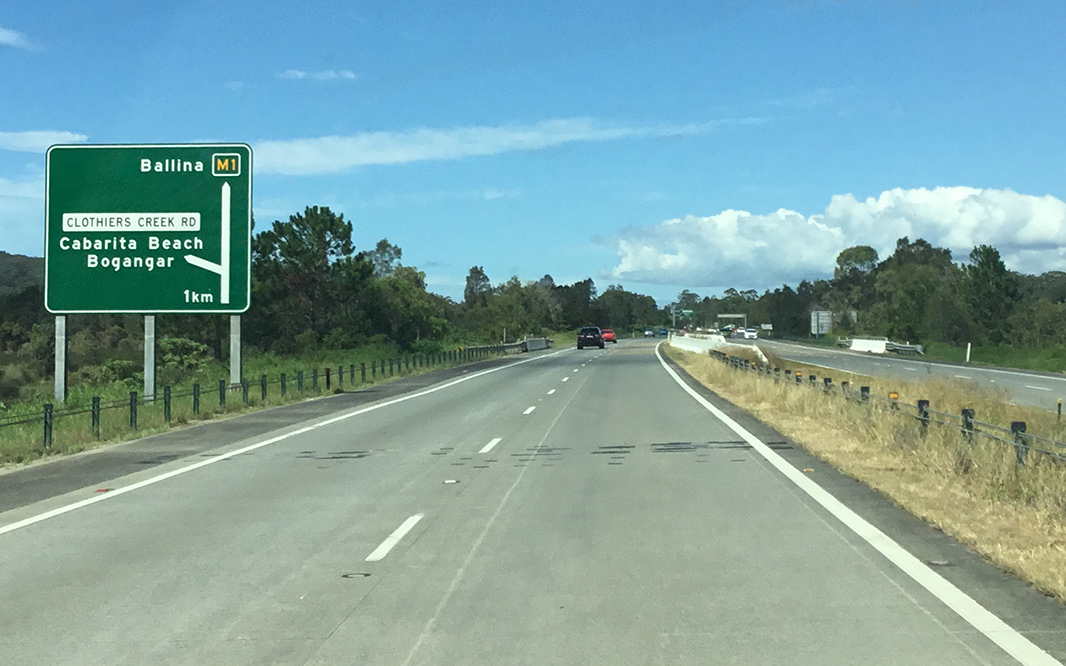
Advance Directional Sign : AD sign at Clothiers Creek approaching the Clothiers Creek Rd interchange, February 2015. Image © Rob Tilley |
 |
End National Route 1 / Start M1: Northern terminus of NR1 and southern terminus of M1, at the interchange with Gold Coast Hwy (SR2) at Tweed Heads West, February 2009. This sign has since been removed as NSW now uses alphanumeric route numbering. Image © Rob Tilley |
|
 |
Distance Sign : RD sign at Clothiers Ck, February 2015. Image © Rob Tilley |
 |
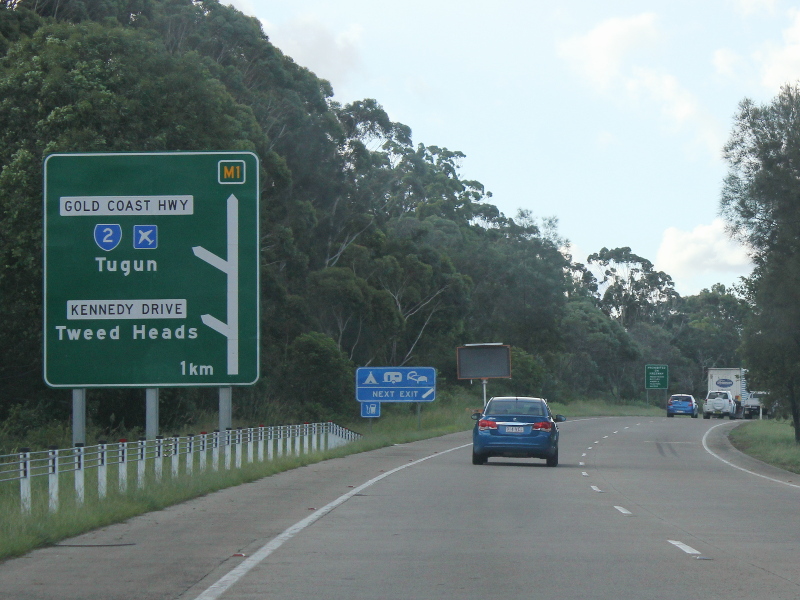
Kennedy Drive: M1 as it crosses over Kennedy Drive at Tweed Heads West, June 2012. Image © Justin Cozart |
|
 |
Clothiers Creek Road Interchange : Pacific Mwy (M1) at the Clothiers Creek Road interchange at Clothiers Creek, February 2015. Image © Rob Tilley |
 |
Advance Directional Sign: AD sign at Tweed Heads South approaching Kirkwood Rd interchange, April 2019. Image © Dean Sherry |
|
 |
Distance Sign : RD sign on Pacific Mwy (M1) at Clothiers Creek still showing highway, February 2015. Image © Rob Tilley |
 |
Kirkwood Road: Pacific Mwy (M1) at the Kirkwood Rd interchange at Tweed Heads Sth, April 2019. Image © Dean Sherry |
|
 |
Supplemental Advance Directional Sign : Supplemental AD sign at Stotts Creek approaching Tweed Valley Way (TD40), February 2015. Image © Rob Tilley |
 |
Reassurance Directional Sign: Distance sign at Tweed Heads South, April 2019. Image © Dean Sherry |
|
 |
Supplemental Advance Directional Sign : Supplemental AD sign at Stotts Creek approaching Tweed Valley Way (TD40), February 2015. Image © Rob Tilley |
 |
Advance Directional Sign: AD sign on the off ramp to Minjungbal Dr, at Tweed Heads South, approaching Darlington Dr (former highway alignment through Banora Point) and Shallow Bay Dr, June 2012. Image © Justin Cozart |
|
 |
Advance Directional Sign : AD sign at Stotts Creek approaching Tweed Valley Way (TD40), February 2015. Image © Rob Tilley |
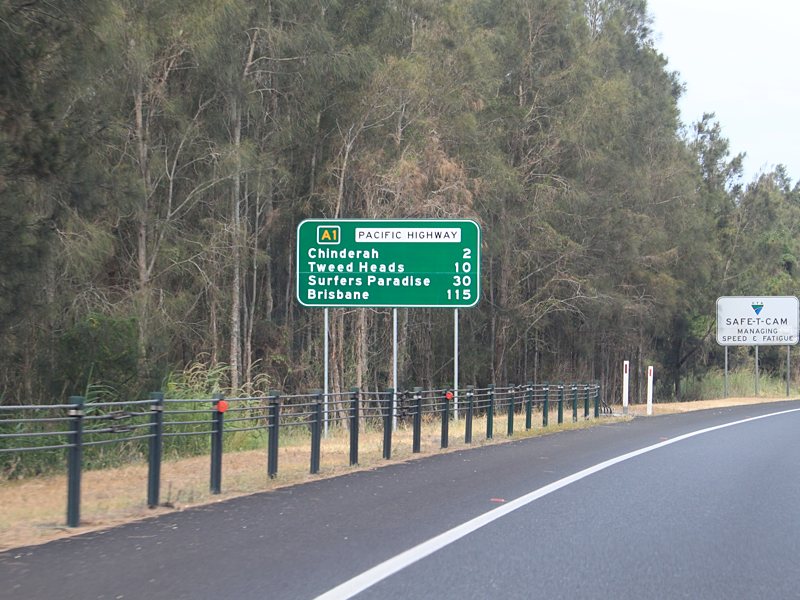 |
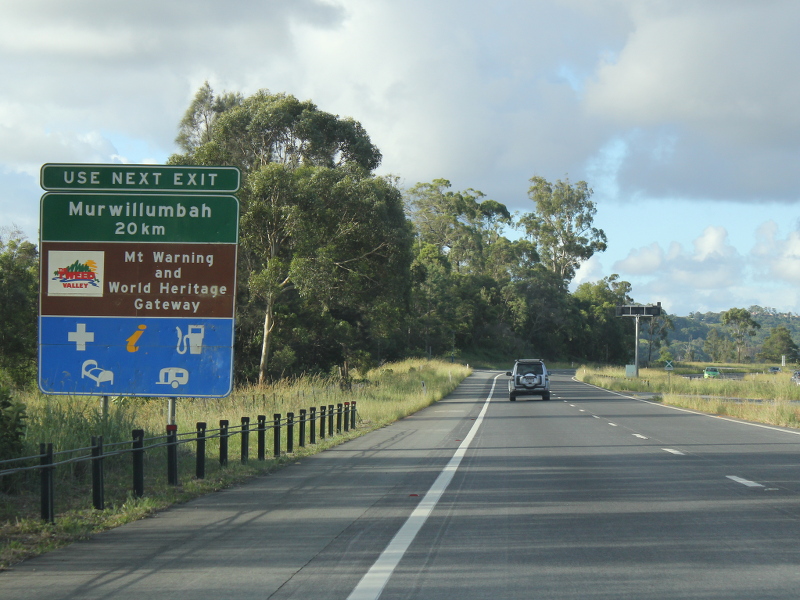
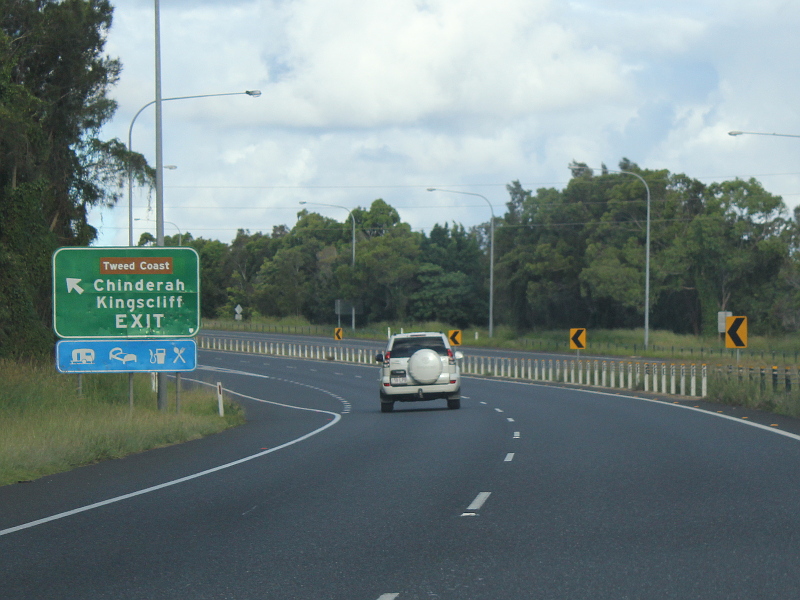
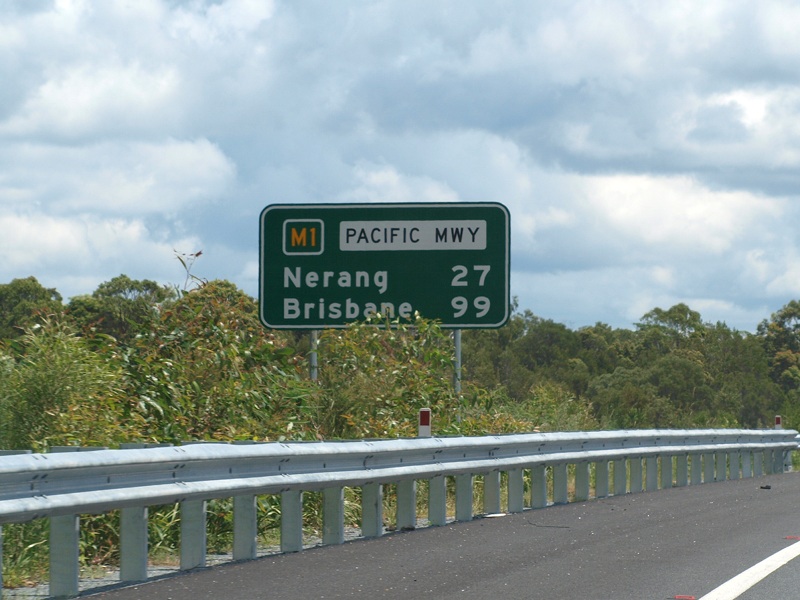
Distance
Sign: Reassurance directional sign at Chinderah, December 2009. Image © Rob Tilley |
|
 |
Tweed Valley Way: Pacific Mwy (M1) at the Tweed Valley Way (TD40) interchange at Chinderah, February 2015. Image © Rob Tilley |
 |
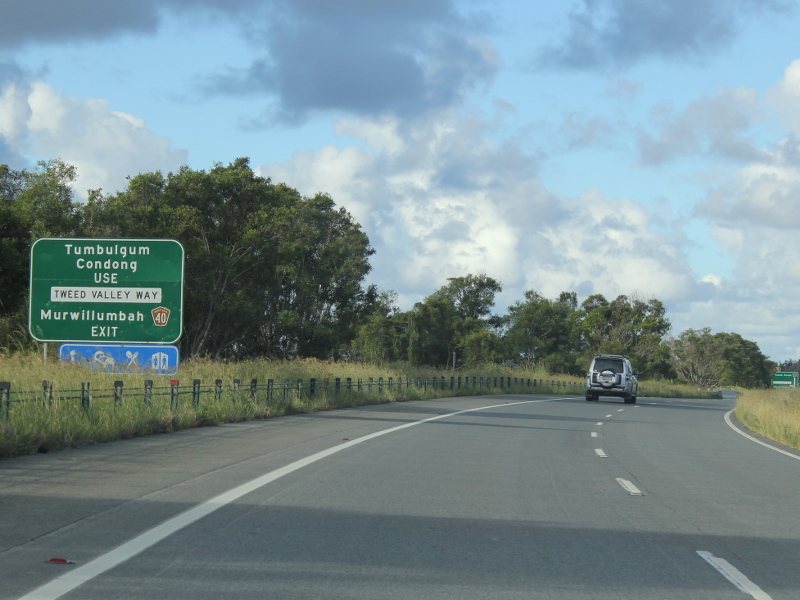
Advance
Directional Sign: AD sign at Chinderah approaching Chinderah Rd and Tweed Coast Rd, April 2019. Image © Dean Sherry |
|
 |
Advance Directional Sign : AD sign at Chinderah approaching Tweed Coast Rd, February 2015. Image © Rob Tilley |
 |
Advance Directional Sign: AD sign at Chinderah approaching Tweed Valley Way (TD40) (former Pacific Hwy), April 2019. Click here for a photo of this location by Michael Greenslade from November 2013 Image © Dean Sherry |
|
 |
Tweed Coast Road Interchange : Pacific Mwy (M1) at the interchange with Tweed Coast Rd at Chinderah, February 2015. Image © Rob Tilley |
 |
Supplemental Advance Directional Sign: Supplemental AD sign at Chinderah approaching Tweed Valley Way (TD40) (former Pacific Hwy), April 2019. Image © Dean Sherry |
|
 |
Advance Directional Sign : AD sign at Chinderah approaching Waugh St, February 2015. Image © Rob Tilley |
 |
Tweed Valley Way: Pacific Mwy (M1) at the Tweed Valley Way interchange at Chinderah, April 2019. Image © Dean Sherry |
|
 |
Waugh Street: Pacific Mwy (M1) at the Waugh St interchange at Chinderah, February 2015. Image © Rob Tilley |
 |
Start Freeway: Remnant Start Freeway sign at Chinderah, April 2019. Motorway conditions were extended north of this location after installation of this sign. Image © Dean Sherry |
|
 |
Advance Directional Sign: AD sign at Chinderah for Sexton Hill Dr interchange, February 2015. Image © Rob Tilley |
 |
Reassurance Directional Sign: Distance sign at Chinderah, April 2019. Image © Dean Sherry |
|
 |
Distance Sign : Reassurance directional sign at Chinderah, February 2015. Image © Rob Tilley |
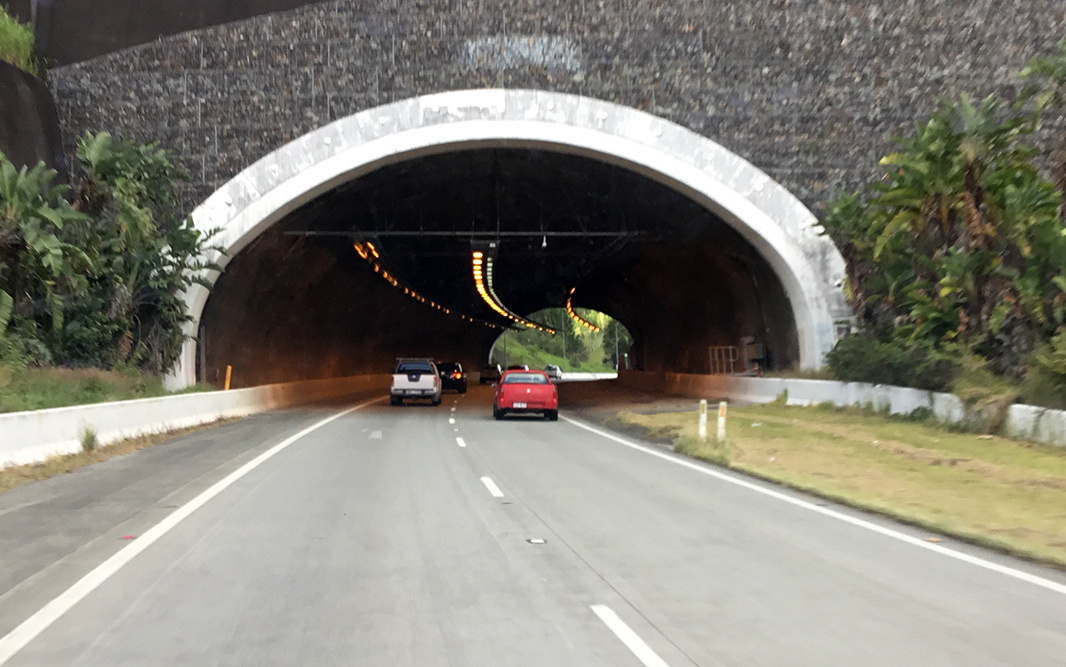 |
Tunnel: Pacific Mwy (M1) as it enters the tunnel at Stotts Creek, April 2019. Image © Dean Sherry |
|
 |
Advance Directional Sign: AD sign near Barneys Point Bridge over the Tweed River at Chinderah for Sexton Hill Dr interchange, February 2015. Image © Rob Tilley |
 |
Advance Directional Sign: AD sign at Clothiers Creek approaching Clothiers Ck Rd, April 2019. Image © Dean Sherry |
|
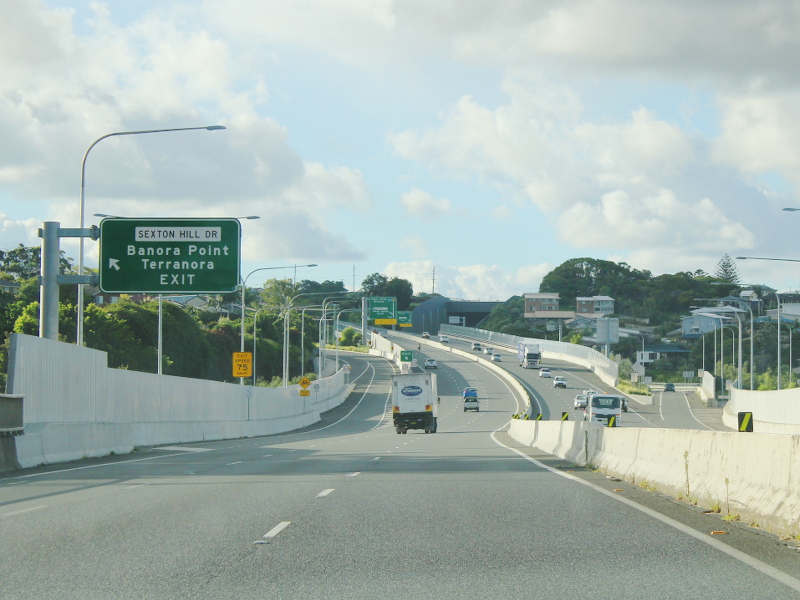 |
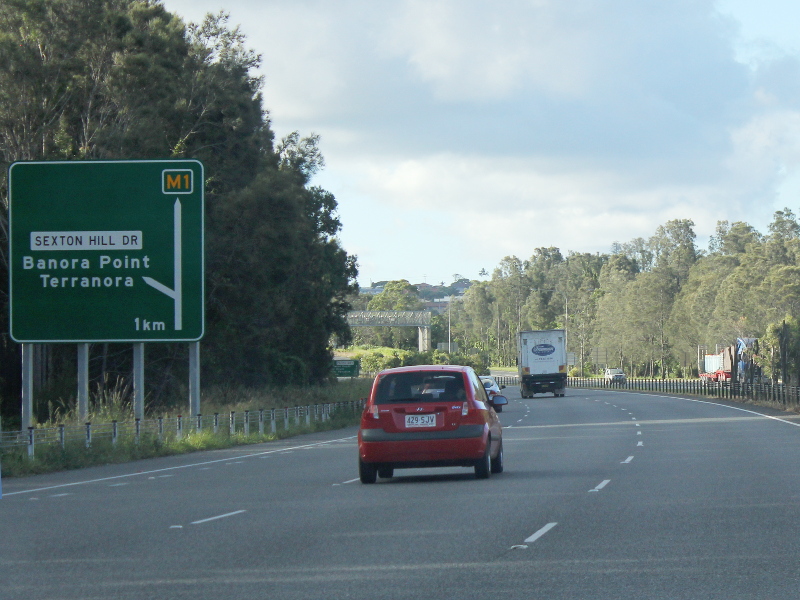
Sexton Hill Drive : Pacific Mwy (M1) at the Sexton Hill Dr interchange at Banora Point, February 2015. Image © Rob Tilley |
 |
Reassurance Directional Sign: Distance sign at Clothiers Creek, April 2019. Image © Dean Sherry |
|
 |
Advance Directional Sign : AD sign at Banora Point approaching Minjungbal Dr, February 2015. Image © Rob Tilley |
 |
Reassurance Directional Sign: Distance sign at Clothiers Creek, April 2019. Image © Dean Sherry |
|
 |
Advance Directional Sign : AD sign near Laura St overpass at Banora Point approaching Minjungbal Dr, February 2015. Image © Rob Tilley |
 |
Services Sign: Services sign at Cudgera Creek approaching Cudgera Ck Rd, April 2019. Image © Dean Sherry |
|
 |
Minjungbal Drive : Pacific Mwy (M1) at Tweed Heads South at the Minjungbal Dr interchange, February 2015. Image © Rob Tilley |
 |
Advance Directional Sign: AD sign at Cudgera Creek approaching Cudgera Creek Rd, April 2019. Image © Dean Sherry |
|
 |
Distance Sign : RD sign at Tweed Heads South near Greenway Dr, February 2015. Image © Rob Tilley |
 |
Cudgera Creek Road: Pacific Mwy (M1) at the Cudgera Ck Rd interchange at Cudgera Creek, April 2019. Image © Dean Sherry |
|
 |
Advance
Directional Sign: AD sign at Tweed Heads South approaching Kennedy Dr and Gold Coast Hwy, February 2015. Image © Rob Tilley |
 |
Reassurance Directional Sign: Distance sign at Cudgera Creek, April 2019. Image © Dean Sherry |
|
 |
Advance
Directional Sign: AD sign at Tweed Heads South approaching Kennedy Dr and Gold Coast Hwy, February 2015. Image © Rob Tilley |
 |
Advance Directional Sign: AD sign at Yelgun approaching Brunswick Valley Way, April 2019. Image © Dean Sherry |
|
 |
Kennedy Drive : Pacific Mwy (M1) at the Kennedy Dr interchange at Tweed Heads South, February 2015. Image © Rob Tilley |
 |
Supplemental Advance Directional Sign: Supplemental AD sign at Yelgun approaching Brunswick Valley Way, April 2019. Image © Dean Sherry |
|
 |
Advance
Directional Sign: AD sign at Tweed Heads South approaching Gold Coast Hwy, February 2015. Image © Rob Tilley |
 |
Advance Directional Sign: AD sign at Yelgun approaching Brunswick Valley Way, April 2019. Image © Dean Sherry |
|
 |
Gold Coast Highway : Pacific Mwy (M1) at the interchange with Gold Coast Hwy (SR2), February 2015. SR2 is the only remaining active state route in NSW, and provides consistency with Gold Coast Hwy (SR2) on the QLD side of the border. Image © Rob Tilley |
 |
Brunswick Valley Way: Pacific Mwy (M1) at the Brunswick Valley Way interchange at Billinudgel, April 2019. Image © Dean Sherry |
|
 |
End National Route
1 / Start M1: Northern terminus of NR1 and southern terminus of M1, at the interchange with Gold Coast Hwy (SR2) at Tweed Heads West, February 2009. This sign has since been removed, as alphanumeric route numbers are now statewide in NSW. Image © Rob Tilley |
 |
Reassurance Directional Sign: Distance sign at Billinudgel, April 2019. Image © Dean Sherry |
|
 |
Changeable
Sign: Changeable sign on Tugun Bypass (M1) at West Tweed Heads, February 2009. Image © Rob Tilley |
 |
Supplemental Advance Directional Sign: Supplemental AD sign at Ocean Shores approaching Brunswick Valley Way, April 2019. Image © Dean Sherry |
|
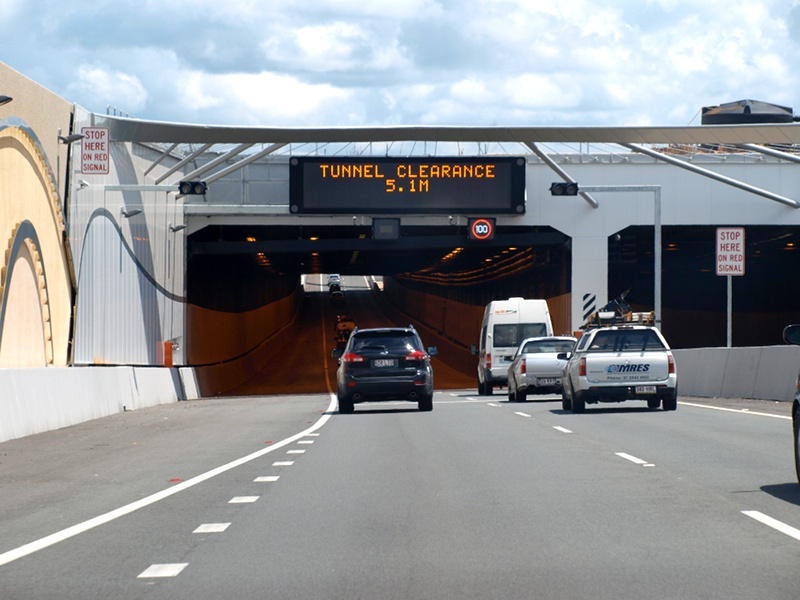 |
Tunnel
Entrance: Tugun Bypass as it enters the tunnel under Gold Coast Airport, at Tweed Heads West, February 2009. The airport is on both NSW and QLD land. Image © Rob Tilley |
 |
Reassurance Directional Sign: Distance sign at Ocean Shores, November 2013. Image © Michael Greenslade |
|
 |
Inside
Tunnel: Tugun Bypass (M1) under Gold Coast Airport at Tweed Heads West, February 2009. Image © Rob Tilley |
|||
 |
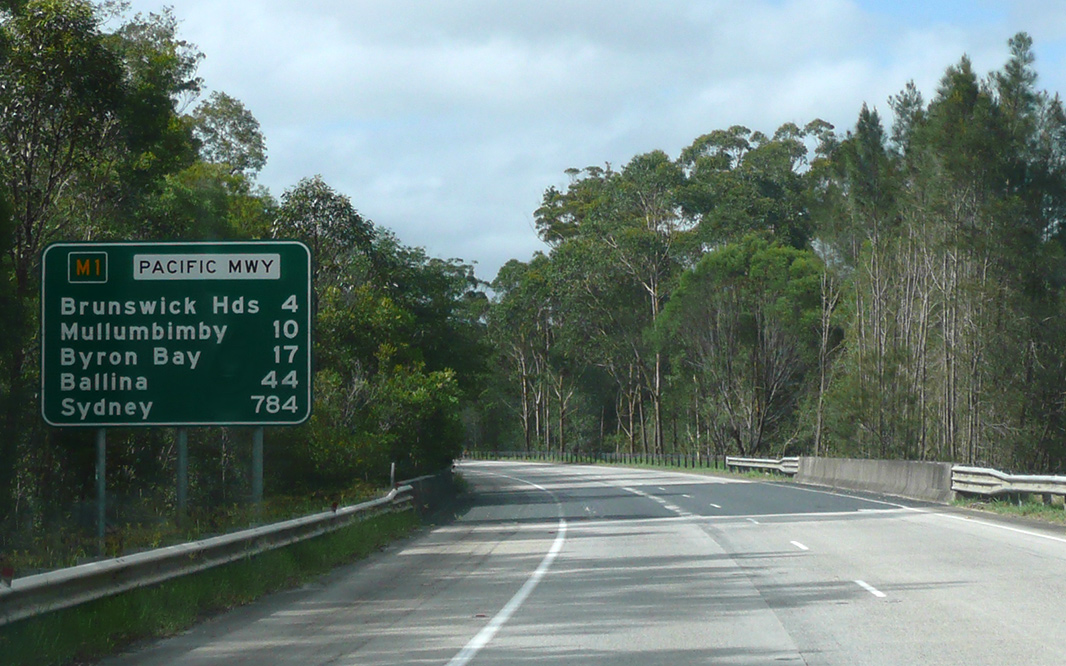
Distance
Sign: RD sign on Tugun Bypass (M1) at Tweed Heads West, February 2009. Image © Rob Tilley |
|||
 |
Queensland
Border: Tugun Bypass (M1) at the NSW-QLD Border at Cobaki Lanes, February 2009. Image © Rob Tilley |
|||
| Click
here for the continuation of M1 in Queensland Click here for continuation of M1 / A1 between Brunswick Heads and Ballina |
||||
1 Roads & Maritime Services,
Schedule of Classified Roads and Unclassified Regional Roads, August
2013.
2 Roads and Maritime Services,
Projects, Pacific Highway Upgrade, Ballina To Tweed Heads, Completed
Projects, Chinderah
Bypass.
3 Roads & Maritime Services,
Projects, Pacific Highway Upgrade, Ballina To Tweed Heads, Completed
projects, Yelgun to Chinderah.
4 Roads & Traffic Authority, Annual Report 2006
5 Minister for Infrastructure,
Transport, Regional Development and Local Government, Media Release,
Tugun Bypass To Open, 11 April 2008
6 Engineers Australia / Queensland
Division, Engineering Excellence Awards, Winners, High
Commendations and Category Entrants, 14 September 2007
7 Roads and Traffic Authority, New South Wales Government Gazette, 1 May 2009
8 Roads & Maritime Services,
Projects, Pacific Highway Upgrade, Ballina To Tweed Heads, Banora
Point
Last updated: 30-Jun-2020 13:53
This site Paul Rands. All rights reserved. Some portions (copyright) by their respective and credited owners. Permission must be obtained before using any images from this site. For details, please email by clicking here.