|
|
|
|
|
| B160 | Glenelg Highway (B160) |
Statistics:
Route Numbering:
General Information:
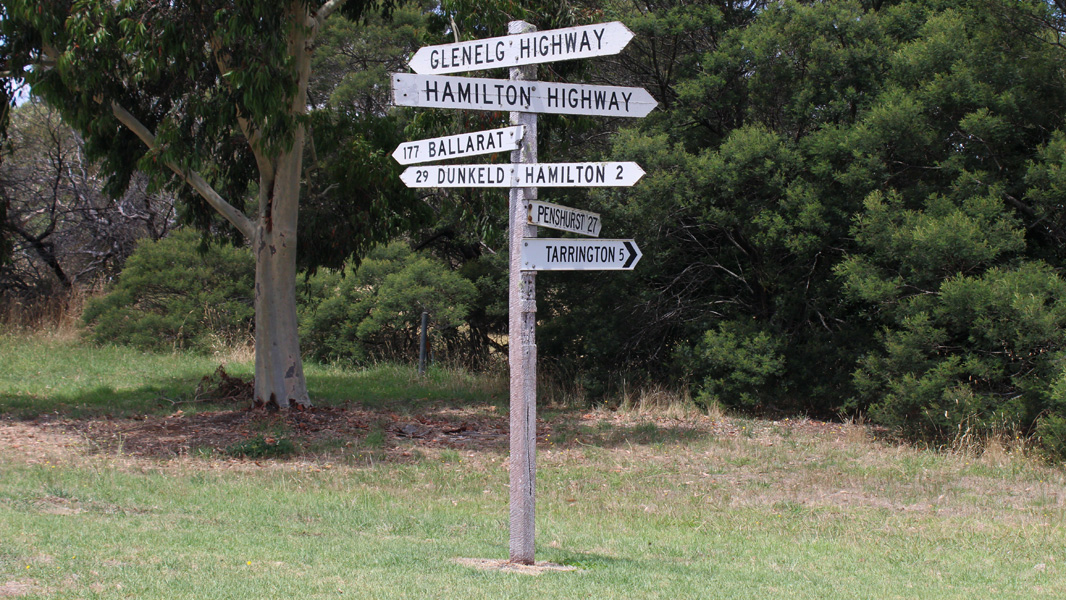
The Glenelg Highway is a rural highway connecting the city of Ballarat, and towns along the route, to South Australia. Its a mix of 2-lane rural highway standard and also multi-laned divided in the larger towns.
Multiplexes along the route include:
History:
Click here for photos of pre-alphanumeric signage along the route.

| Ballarat To SA Border | SA Border To Ballarat | |||
| Preview: | Description: | Preview: | Description: | |
 |
Advance Directional Sign: AD sign approaching the roundabout with Wiltshire Ln (C307) at Delacombe, July 2013. Image © Rob Tilley |
 |
French Street & Station Street: Glenelg Hwy (B160) at the junction with French St and Station St, Hamilton, January 2017. Image © Huang Milton Collection |
|
 |
Supplemental Advance Directional Sign: Supplemental AD sign (with old NH8 route number) approaching the roundabout with Wiltshire Ln (C307) at Delacombe, July 2013. Image © Rob Tilley |
 |
Intersection Directional Sign: ID sign on the corner of Glenelg Highway (B160), Station and French Streets in Hamilton, December 2006. Image © Rob Tilley |
|
 |
Trailblazer: B160 trailblazer facing Wiltshire Ln (C307) in Delacombe, July 2013. Image © Rob Tilley |
 |
Advance Directional Sign: AD sign at Hamilton approaching Hamilton Hwy (B140) and Hiller Ln, January 2017. Image © Huang Milton Collection |
|
 |
Reassurance Directional Sign: Distance sign as Glenelg Hwy (B160) passes through Smythes Creek, July 2013. Image © Rob Tilley |
 |
Hamilton Highway & Hiller Lane: Glenelg Hwy (B160) at the junction with Hamilton Hwy (B140) and Hiller Ln at Hamilton, January 2017. Image © Huang Milton Collection |
|
 |
Advance Directional Sign: AD sign at Streatham approaching Ross Bridge-Streatham Rd (C182), January 2017. Image © Huang Milton Collection |
 |
Timber Fingerboard Assembly: Timber fingerboards at the Hamilton Hwy (B140) and Hiller Ln junction, Hamilton, January 2017. Image © Huang Milton Collection |
|
 |
Reassurance Directional Sign: Distance sign at Streatham, January 2017. Image © Huang Milton Collection |
|
Trailblazer: B160 trailblazer facing Carnham-Streatham Rd at Streatham, January 2017. Image © Huang Milton Collection |
|
 |
Supplemental Advance Directional Sign: Supplemental AD sign at Lake Bolac approaching Mortlake-Ararat Rd (C148), January 2017. Image © Huang Milton Collection |
 |
Interesection Directional Sign: ID sign facing Carnham-Streatham Rd at Streatham, January 2017. Image © Huang Milton Collection |
|
 |
Advance Directional Sign: AD sign at Lake Bolac approaching Mortlake-Ararat Rd (C148), January 2017. Image © Huang Milton Collection |
 |
Advance Directional Sign: AD sign approaching the roundabout with Wiltshire Ln (C307) at Delacombe, July 2013. Image © Rob Tilley |
|
 |
Mortlake-Ararat Road: Corner of Glenelg Hwy (B160) and Mortlake-Ararat Rd (C148) at Lake Bolac, January 2017. Image © Huang Milton Collection |
 |
Supplemental Advance Directional Sign: Supplemental AD sign (with old NH8 route number) approaching the roundabout with Wiltshire Ln (C307) at Delacombe, July 2013. Image © Rob Tilley |
|
 |
Reassurance Directional Sign: Distance sign at Lake Bolac, January 2017. Image © Huang Milton Collection |
 |
Intersection Directional Sign: ID sign on the roundabout with Wiltshire Ln (C307) at Delacombe, July 2013. Image © Rob Tilley |
|
 |
Advance Directional Sign: AD sign at Wickliffe approaching Willaura-Wickliffe Rd, January 2017. Image © Huang Milton Collection |
|||
 |
Advance Directional Sign: AD sign at Glenthompsom approaching McLennan St and Pyrenees Hwy (B180), January 2017. Image © Huang Milton Collection |
|||
 |
Intersection Directional Sign: ID sign at the corner of McLennan St and Pyrenees Hwy (B180) at Glenthompson, January 2017. Image © Huang Milton Collection |
|||
 |
Intersection Directional Signs: ID signs at the corner of McLennan St and Pyrenees Hwy (B180) at Glenthompson, January 2017. Image © Huang Milton Collection |
|||
 |
Reassurance Directional Sign: Distance sign at Glenthompson, January 2017. Image © Huang Milton Collection |
|||
 |
Blackwood-Dunkeld Road: Glenelg Hwy (B160) at the junction with Blackwood-Dunkeld Rd at Dunkeld, January 2017. Image © Huang Milton Collection |
|||
 |
Advance Directional Sign: AD sign at Dunkeld approaching Templeton St & Victoria Valley Rd (C216), January 2017. Image © Huang Milton Collection |
|||
 |
Advance Directional Sign: AD sign at Dunkeld approaching Penshurst-Dunkeld Rd (C178) and Dunkeld-Cavendish Rd (C188), January 2017. Image © Huang Milton Collection |
|||
 |
Penshurst-Dunkeld Road & Dunkeld-Cavendish Rd: Glenelg Hwy (B160) at the junction with Penshurst-Dunkeld Rd (C178) and Dunkeld-Cavendish Rd (C188) at Dunkeld, January 2017. Image © Huang Milton Collection |
|||
 |
Reassurance Directional Sign: Distance sign at Dunkeld, January 2017. Image © Huang Milton Collection |
|||
 |
Intersection Directional Sign Assembly: ID sign assembly facing southbound traffic on Ross Creek-Haddon Road in Nintingbool. December 2006. Image © Rob Tilley |
|||
 |
Advance Directional Sign: AD sign at Hamilton approaching Hamilton Hwy (B140) and Hiller Ln, January 2017. Image © Huang Milton Collection |
|||
 |
Hamilton Highway & Hiller Lane: Glenelg Hwy (B160) at the junction with Hamilton Hwy (B140) and Hiller Ln at Hamilton, January 2017. Image © Huang Milton Collection |
|||
 |
Timber Fingerboard Assembly: Timber fingerboards at the Hamilton Hwy (B140) and Hiller Ln junction, Hamilton, January 2017. Image © Huang Milton Collection |
|||
 |
Advance Directional Sign: AD sign as you enter the town of Hamilton, after the Hamilton Hwy (B140) intersection. December 2006. Image © Rob Tilley |
|||
 |
Tourism Sign: Tourism sign as Glenelg Hwy (B160) makes its way through Hamilton, January 2017. Image © Huang Milton Collection |
|||
 |
Supplemental AD Sign: Supplemental advance directional sign at Hamilton, as you approach the bridge over Grange Burn and the Apex Drive intersection. December 2006. Image © Rob Tilley |
|||
 |
AD Sign: Advance directional sign as you cross the railway bridge at Hamilton, December 2006. Image © Rob Tilley |
|||
 |
Intersection Directional Sign: ID sign on the corner of Glenelg Highway (B160), Station and French Streets in Hamilton, December 2006. Image © Rob Tilley |
|||
 |
Advance Directional Sign: AD sign approaching Portland Rd in Hamilton. December 2006. Image © Rob Tilley |
|||
 |
Intersection Directional Sign: ID sign on the corner of Portland Rd in Hamilton. December 2006. Image © Rob Tilley |
|||
 |
AD Sign: Diagrammatic advance directional sign approaching the roundabout with Henty Hwy, Kenny St and Mt Bainbridge Rd in Hamilton, December 2006. The A200 duplex begins from this intersection. Image © Rob Tilley |
|||
 |
Intersection Directional Sign: ID sign on the Henty Hwy leg of the roundabout with Henty Hwy (A200), Kenny St and Mt Bainbridge Rd in Hamilton, December 2006. Image © Rob Tilley |
|||
 |
Intersection Directional Sign: ID sign on the Glenelg Hwy leg of the roundabout with Henty Hwy (A200), Kenny St and Mt Bainbridge Rd in Hamilton, December 2006. Image © Rob Tilley |
|||
 |
AD Sign: Advance directional sign approaching the Henty Hwy (A200) intersection on the outskirts of Hamilton, December 2006. The A200 duplex ends at this intersection. Image © Rob Tilley |
|||
 |
Distance Sign: RD sign as you leave the town of Hamilton, December 2006. Image © Rob Tilley |
|||
1 VicRoads
2 Viseth Uch
Last updated: 11-Feb-2019 17:28
This site © Paul Rands. All rights reserved. Some portions © (copyright) by their respective and credited owners. Permission must be obtained before using any images from this site. For details, please email by clicking here.