|
|
|
|
|
| M1 A1 | Pacific Motorway, Gateway Motorway & Bruce Highway (M1 / A1) - Bald Hills to Beerburrum |
Statistics:
Route Numbering:


General Information:
The M1 / A1 corridor is the main coastal route from the NSW border to the northern tip of the east coast of Australia, and links major cities and towns with Brisbane, and beyond the NSW border, Sydney.
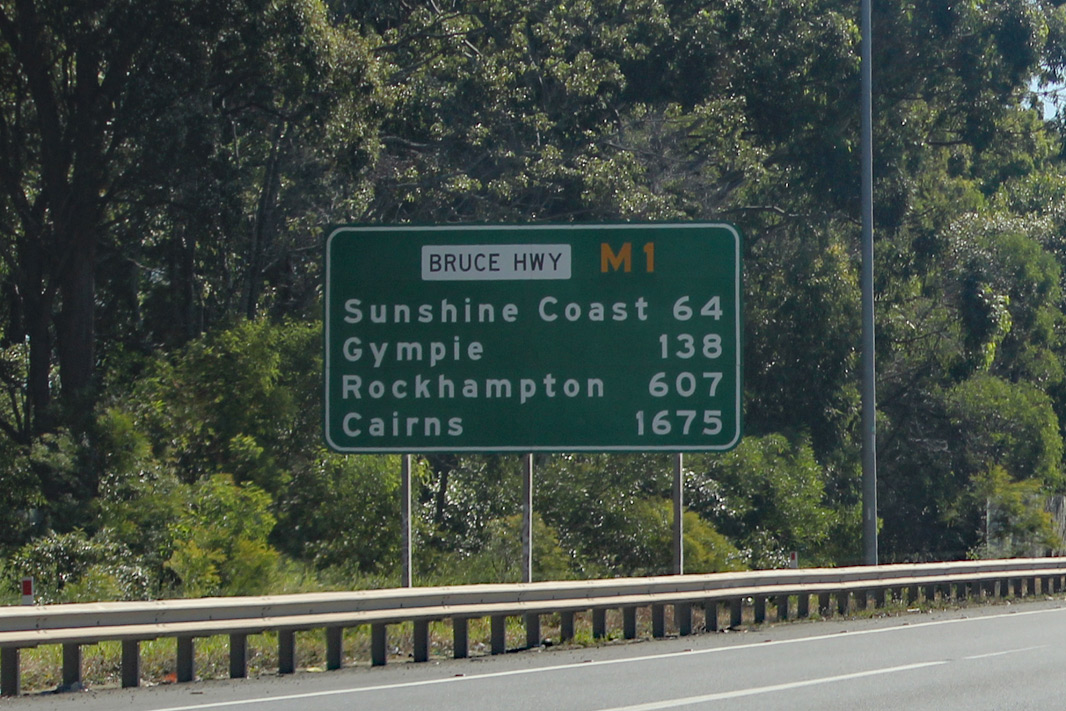
Bruce Highway:
Bruce Highway is named after former Minister of Public Works, Henry Bruce 2 and connects Brisbane with all coastal regions north of the city.
The route is freeway standard from the Gateway Motorway interchange to Curra, north of Cooroy. From there, the route alternates between single and dual carriageway, and passes through rural, residential, industrial and commercial areas.
History:
Bruce Highway:
- October 1934: Bruce Highway named after Minister for Works. 4
- November 1934: Bruce Highway declared. 5
- December 1934: Bruce Highway was officially opened at Glasshouse Mountains. 6 After many years of agitation by the Great North Coast Road Committee, local authorities and the RACQ, the first declaration of the Bruce Highway, between what is now Rothwell and Eumundi was officially opened. 7
- November 1963: Construction begun on first four lane section with the Maroochy Shire Council region. 8
- March 1965: Construction of Stage 1 of Caboolture Bypass (Burpengary to Bribie Island Road) commenced. 3
- August 1966: Completion of Stage 1 of Caboolture Bypass. 3
- July 1968: Beerburrum to Glasshouse Mountains reconstruction completed. 3
- January 1969: Stage 2 of Caboolture Bypass (Pumicestone Road to Beerburrum) completed. 3
- 1972: Work begins on the Bald Hills to Burpengary Deviation. The new route took traffic from Gympie Road at Bald Hills to Uhlmann Road at Burpengary along a much more superior alignment which was also constructed to four lanes. 9
- August 1970: Stage 3 Caboolture Bypass (Bribie Island Road to Pumicestone Road) completed. 3
- April 1970: Work on the Pumicestone Road interchange commenced. 3
- October 1970: Pumicestone Road interchange completed. 3
- 10 November 1977: The Bald Hills to Burpengary Deviation was officially opened. 9
- 9 December 1985: Bruce Highway deviated around the Glass House Mountains region. 10
- April 2014: Work started on on-ramp upgrades at Uhlmann Road, Deception Bay Road, Boundary Road, Anzac Avenue and Dohles Rocks Road. Work included widening the southbound on-ramps to the Bruce Highway, installing ramp signals to control flow onto the highway; underground traffic sensors; closed circuit television cameras; dynamic message signs and necessary electrical and fibre optic cables. 11
Click here for photos of the former alignment around the Caboolture area.
| Bald Hills to Beerburrum | Beerburrum to Bald Hills | |||
| Preview: | Description: | Preview: | Description: | |
 |
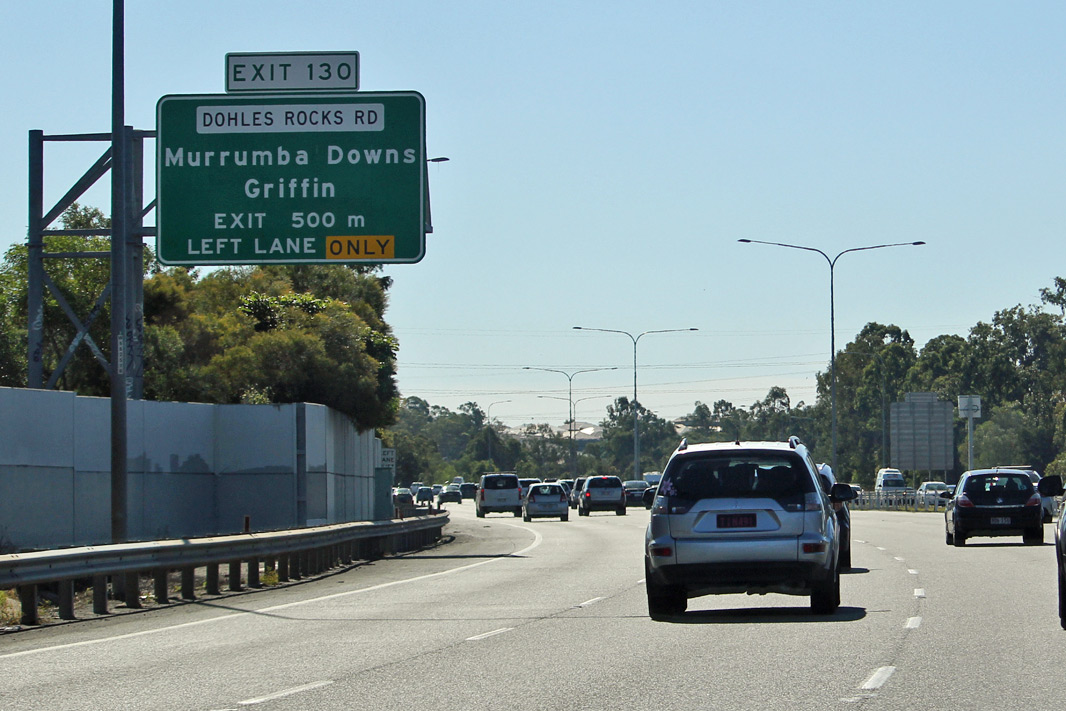
Start Of Bruce Highway: Sign indicating the start of Bruce Hwy, Murrumba Downs, near Dohles Rocks Rd, April 2012. Click here for a photo of this location by Michael Greenslade from November 2005 Image © Paul Rands |
 |
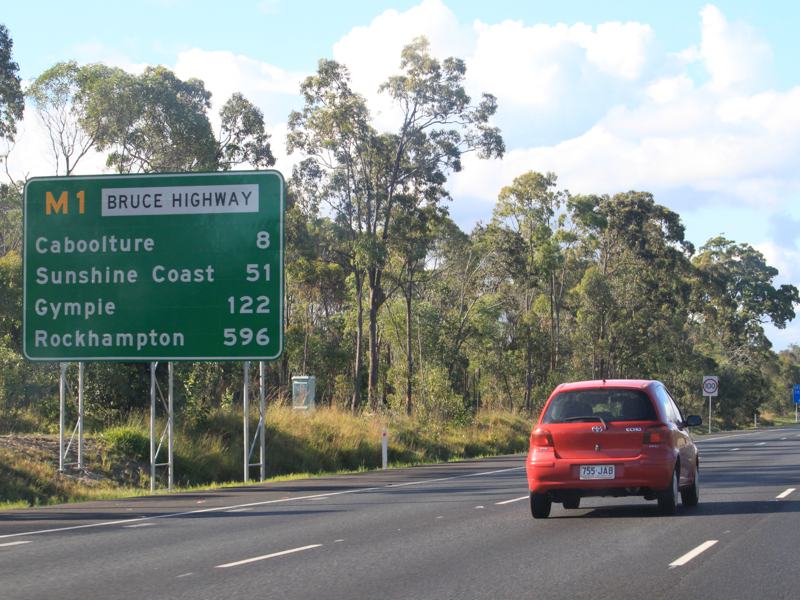
Reassurance Directional Sign: Distance sign at Elimbah, November 2008. Image © Rob Tilley |
|
 |
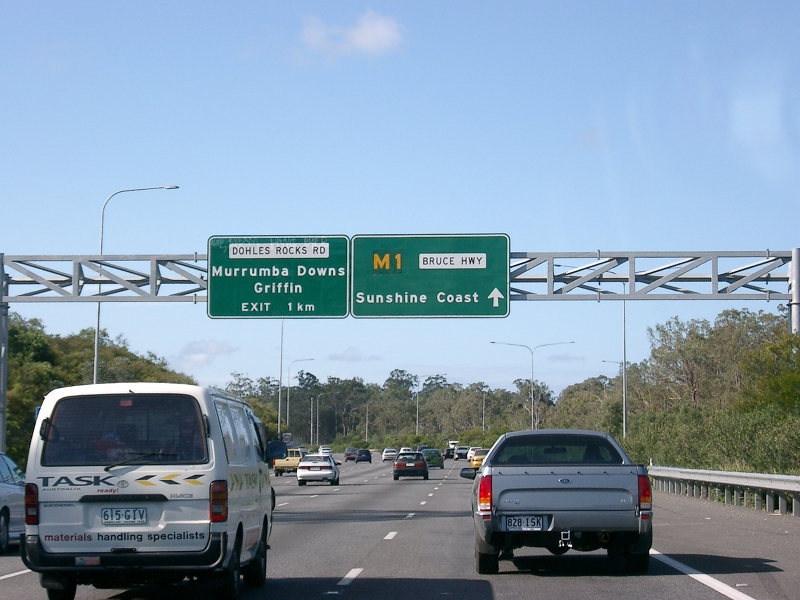
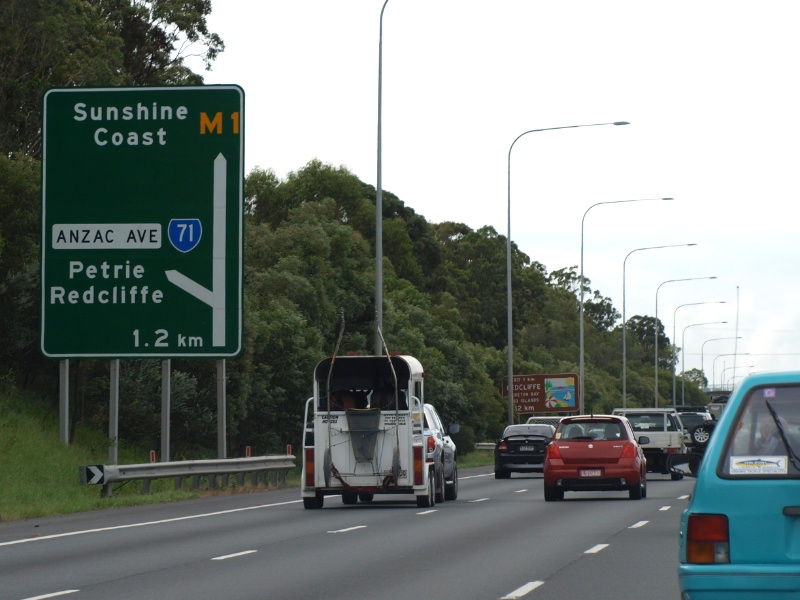
Advance Directional Sign: AD sign at Murrumba Downs approaching Dohles Rocks Rd, May 2018. Click here for a photo of this location by Rob Tilley from October 2005. Image © Rob Tilley |
 |
Welcome to The Brisbane Region : Bruce Hwy (M1) at Elimbah as it enters the Brisbane tourism region, June 2018. Image © Rob Tilley |
|
 |
Supplemental Advance Directional Sign: Supplemental AD sign at Murrumba Downs approaching Dohles Rocks Rd, July 2018. Image © Rob Tilley |
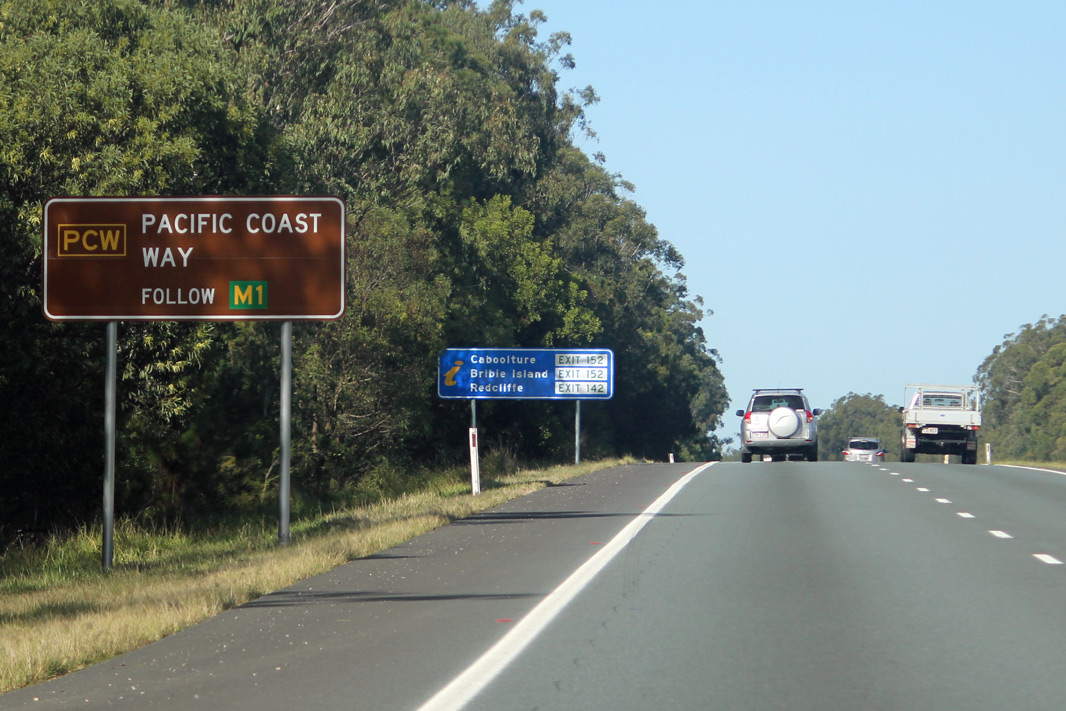 |
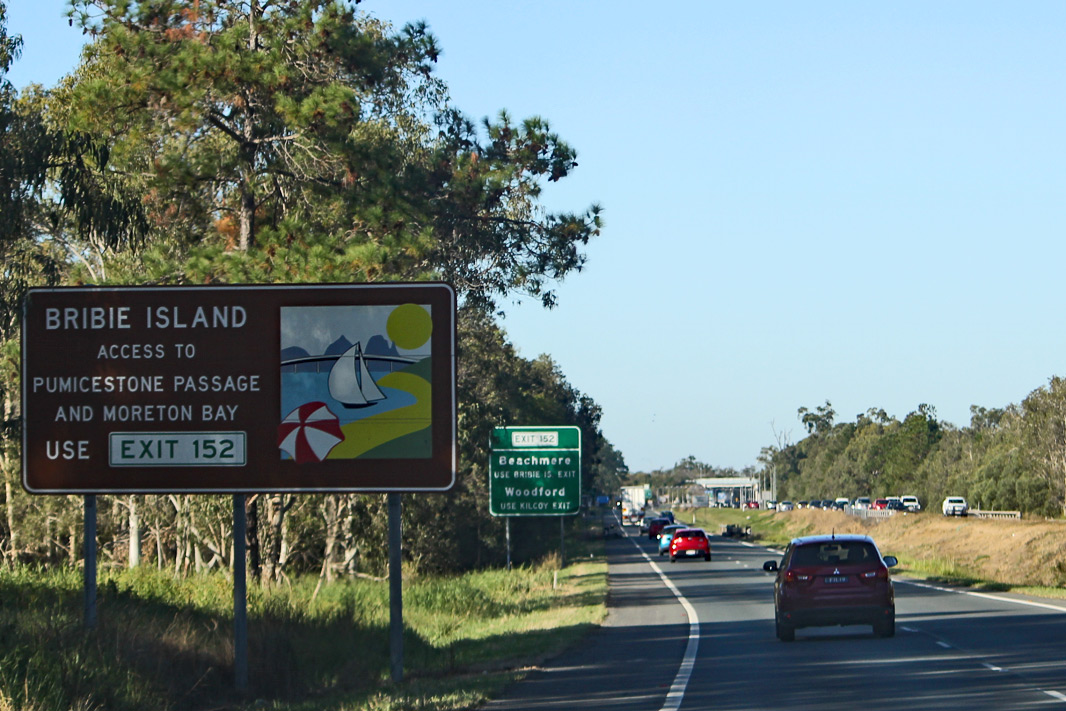
Pacific Coast Way Reassurance Marker: Sign denoting route to follow for Pacific Coast Way tourist route at Elimbah, June 2018. Image © Rob Tilley |
|
 |
Advance Directional Sign: AD sign at Murrumba Downs approaching Dohles Rocks Rd, May 2018. Click here for a photo of this location by Rob Tilley from March 2009. Image © Rob Tilley |
 |
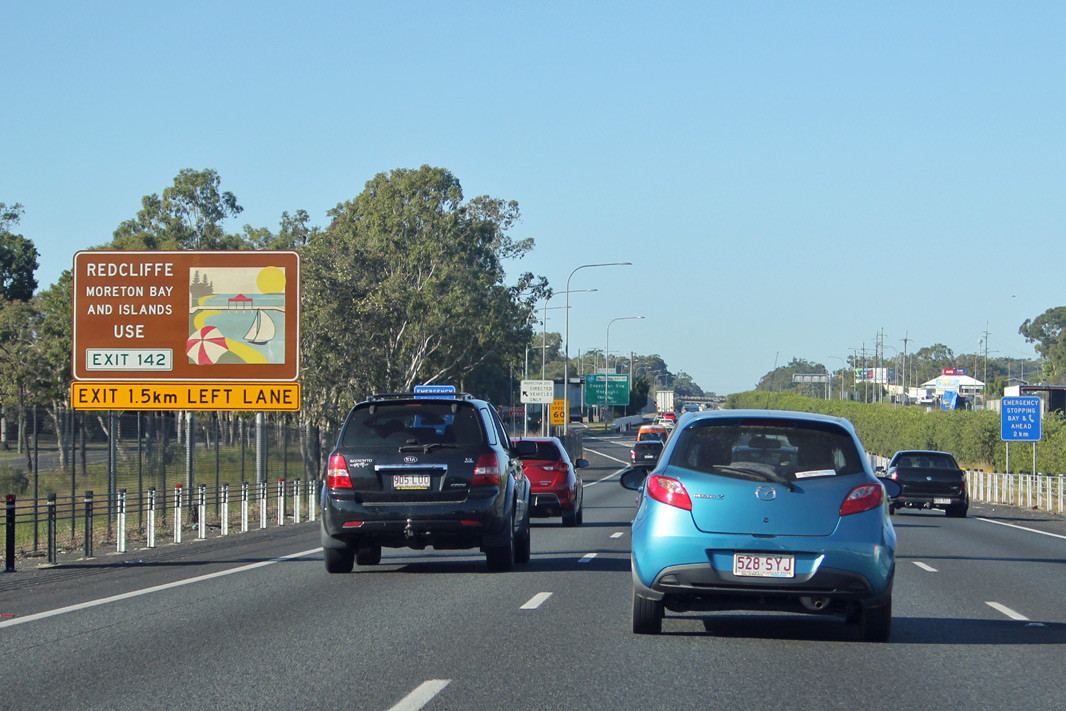
Services Sign: Tourist infomation services sign at Elimbah, June 2018. Image © Rob Tilley |
|
 |
Dohles Rocks Road Interchange: Bruce Hwy (M1) at the Dohles Rocks Rd interchange at Murrumba Downs, April 2012. Click here for a photo of this location by Rob Tilley from March 2009. Image © Paul Rands |
 |
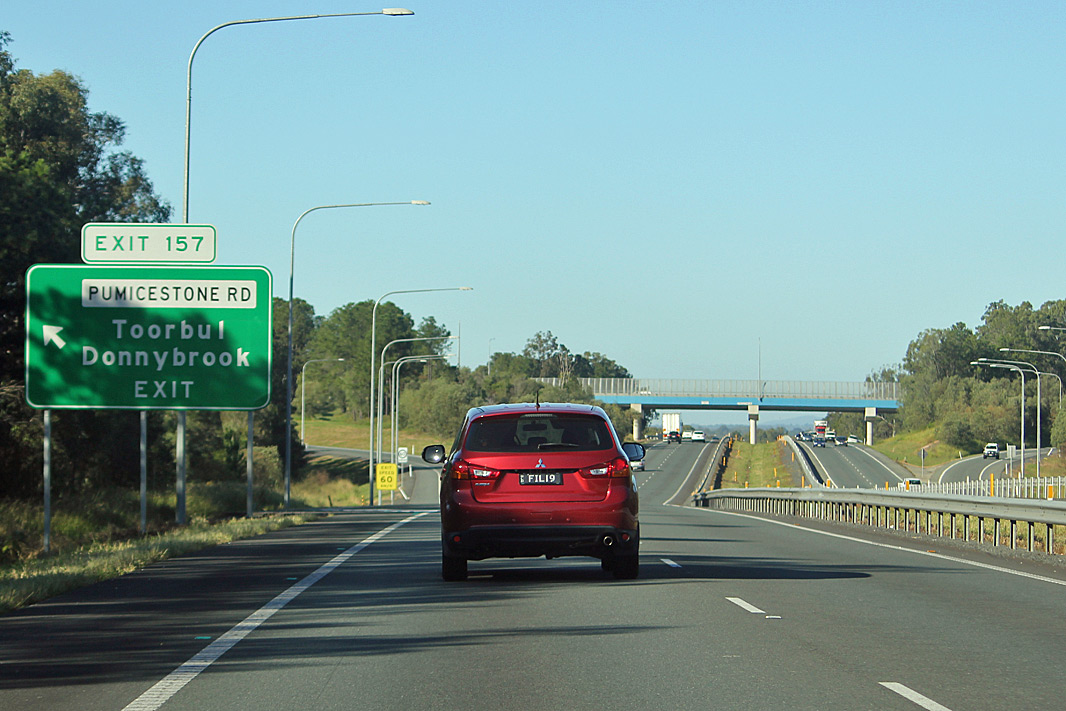
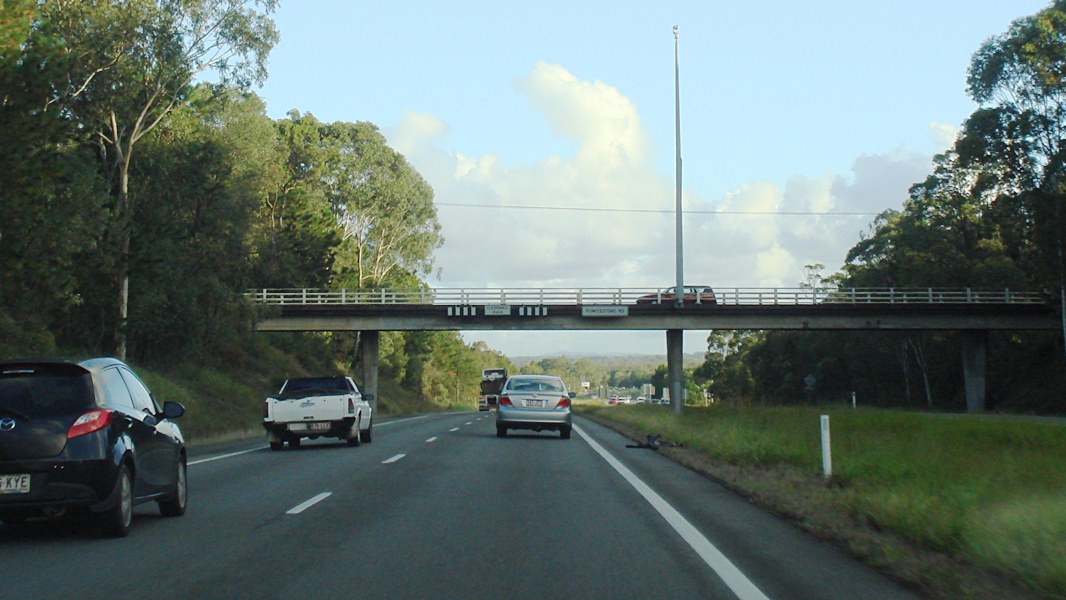
Advance Directional Sign: AD sign approaching Pumicestone Rd at Elimbah, May 2018. Click here for a photo of this location by Rob Tilley from July 2011. Click here for a photo by Rob Tilley of this location from March 2009. Image © Rob Tilley |
|
 |
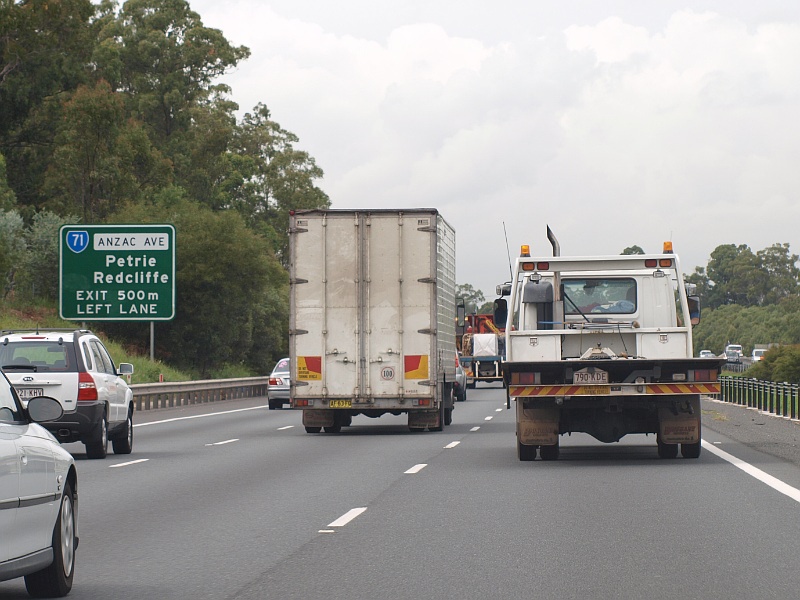
Supplemental Advance Directional Sign: Supplemental AD sign at Murrumba Downs approaching Anzac Av (SR71), April 2012. Image © Paul Rands |
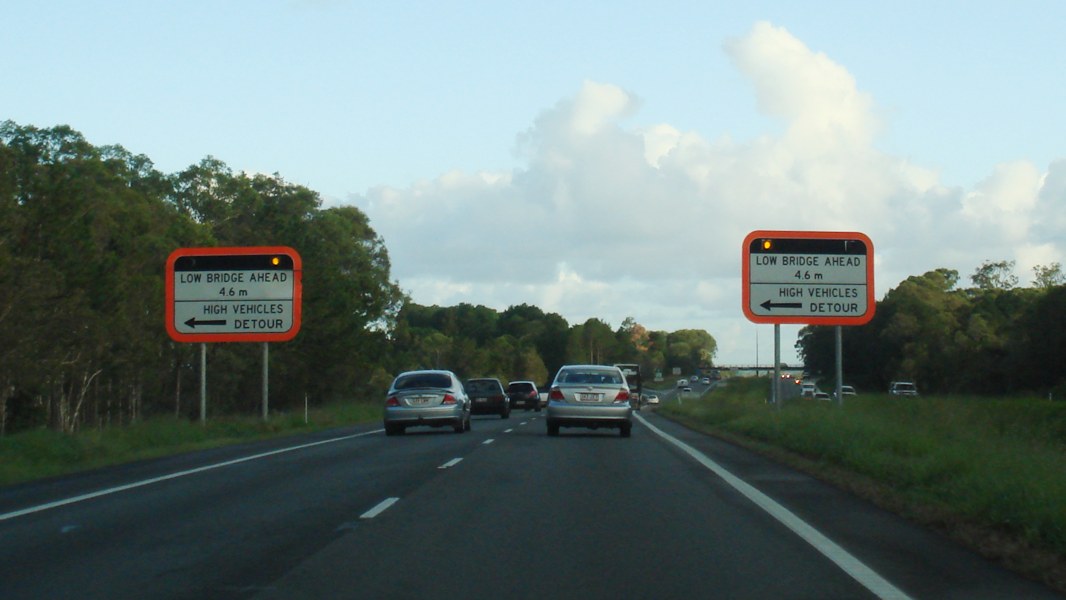 |
Flashing Low Bridge Detour Signs: Low bridge detour signs with flashing lights, approaching Pumicestone Rd at Elimbah, April 2012. This sign has since been removed. Image © Paul Rands |
|
 |
Services Sign: Tourist infomation services sign at Murrumba Downs, July 2018. Image © Rob Tilley |
 |
Low Bridge Detour Signs: Low bridge detour signs approaching Pumicestone Rd at Elimbah, April 2012. This sign has since been removed. Image © Paul Rands |
|
 |
Advance Directional Sign: AD sign at Murrumba Downs approaching Anzac Av (SR71), May 2018. Click here for a photo of this location by Rob Tilley from March 2009. Image © Rob Tilley |
 |
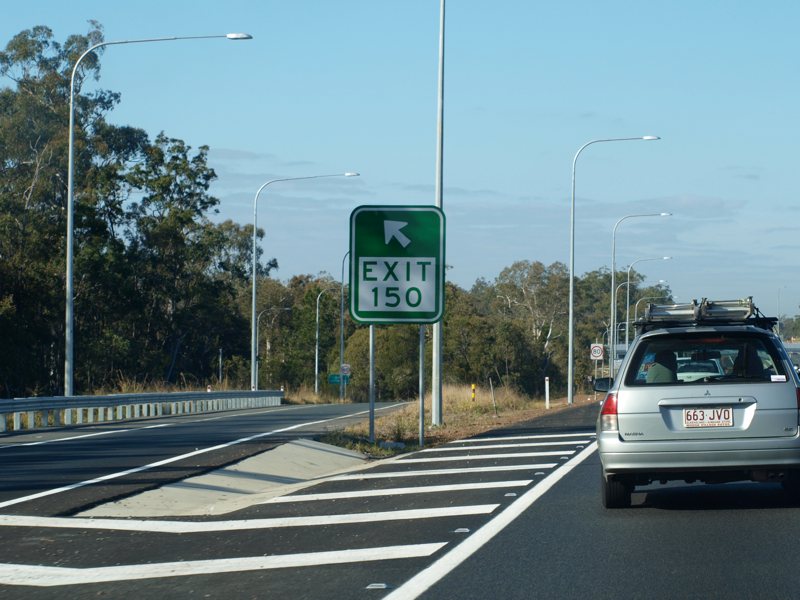
Pumicestone Road Interchange: Bruce Hwy (M1) at the interchange with Pumicestone Rd at Elimbah, May 2018. Click here for a photo of this location by Rob Tilley from July 2011. Click here for a photo by Rob Tilley of this location from November 2008. Image © Rob Tilley |
|
 |
Supplemental Advance Directional Sign: Supplemental AD sign near Brays Rd at Murrumba Downs approaching Anzac Av (SR71), May 2018. Image © Rob Tilley |
 |
Low Bridge Signs : Low bridge clearance signs at Pumicestone Rd interchange, Elimbah, April 2012. Image © Paul Rands |
|
 |
Supplemental Advance Directional Sign: Supplemental AD sign near Brays Rd at Murrumba Downs approaching Anzac Av (SR71), May 2018. Click here for a photo of this location by Rob Tilley from March 2009. Image © Rob Tilley |
 |
Pumicestone Road Interchange: Bruce Hwy (M1) at the interchange with Pumicestone Rd at Elimbah, April 2012. Image © Paul Rands |
|
 |
Advance Directional Sign: AD sign at Murrumba Downs approaching Anzac Av (SR71), May 2018. Click here for a photo of this location by Rob Tilley from October 2005. Image © Rob Tilley |
 |
Westbound Advance Directional Sign: AD sign on Pumicestone Rd in Caboolture, approaching Old Toorbul Point Rd, Rutters Rd and Bruce Hwy (M1) interchange, November 2009. Image © Rob Tilley |
|
 |
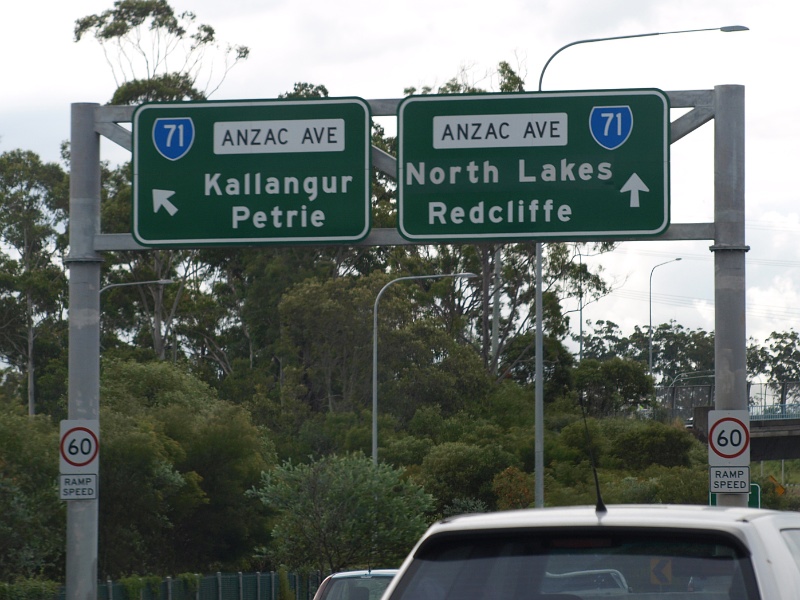
Anzac Avenue Interchange: Anzac Av (SR71) interchange, Kallangur, May 2018. Click here for a photo of this location by Rob Tilley from October 2005. Image © Rob Tilley |
 |
Distance Sign: Distance sign at Caboolture, after Pumicestone Rd interchange, March 2019. Click here for a photo of freeway green sign this location by Rob Tilley from March 2009. The freeway green sign was removed in 2013. Image © Dean Sherry |
|
 |
Advance Directional Sign: AD sign at Kallangur on the interchange with Anzac Av (SR71), March 2009. Image © Rob Tilley |
 |
Travel Time Sign: Sign at Caboolture showing real time travel times to the next 3 exits, May 2018. Image © Rob Tilley |
|
 |
Anzac Avenue: Bruce Hwy (M1) at the Anzac Av (SR71) interchange at Kallangur, April 2012. Image © Paul Rands |
 |
Supplemental Advance Directional Sign: Supplemental AD sign at Caboolture approaching D'Aguilar Hwy (SR85) and Bribie Island Rd interchange, June 2018. Click here for a photo of this location by Rob Tilley from May 2018. Image © Rob Tilley |
|
 |
Reassurance Directional Sign: Distance sign at Kallangur, May 2018. Image © Rob Tilley |
 |
Supplemental Advance Directional Sign: Supplemental AD sign at Caboolture approaching D'Aguilar Hwy (SR85) and Bribie Island Rd interchange, May 2018. Image © Rob Tilley |
|
 |
Advance Directional Sign: AD sign at Dakabin approaching Boundary Rd, March 2009. Click here for a photo of this location from March 2006. Image © Rob Tilley |
 |
Supplemental Advance Directional Sign: Supplemental AD sign at Caboolture approaching D'Aguilar Hwy (SR85) and Bribie Island Rd interchange, March 2019. Image © Dean Sherry |
|
 |
Advance Directional Sign: AD sign at Dakabin approaching Boundary Rd, March 2009. Image © Rob Tilley |
 |
End 110km/h Zone: Signs indicating reduction in speed limit, Caboolture, April 2012. Image © Paul Rands |
|
 |
Boundary Road: Bruce Hwy (M1) at the Boundary Rd interchange, Dakabin, March 2009. Image © Rob Tilley |
 |
Advance Directional Sign: AD sign at Caboolture, approaching the interchange with D'Aguilar Hwy (SR85) and Bribie Island Rd, July 2011. Click here for a photo by Rob Tilley of this location from November 2008. Image © Rob Tilley |
|
 |
Boundary Road: Bruce Hwy (M1) at the Boundary Rd interchange, Dakabin, April 2012. Image © Paul Rands |
 |
Supplemental Advance Directional Sign: Supplemental AD sign at Caboolture, approaching the interchange with D'Aguilar Hwy (SR85) and Bribie Island Rd, April 2012. Image © Paul Rands |
|
 |
Boundary Road Interchange: Westbound on Boundary Rd at Mango Hill at the interchange with Bruce Hwy (M1), May 2005. Image © Michael Greenslade |
 |
Low Bridge Detour Signs: Low bridge detour signs approaching D'Aguilar Hwy (SR85) and Bribie Island Rd, Caboolture, April 2012. Image © Paul Rands |
|
 |
Pacific Coast Way Reassurance Marker: Sign denoting route to follow for Pacific Coast Way tourist route at Narangbar, May 2018. Image © Rob Tilley |
 |
Advance Directional Sign: AD sign at Caboolture, approaching the interchange with D'Aguilar Hwy (SR85) and Bribie Island Rd, July 2011. Click here for a photo by Rob Tilley of this location from November 2008. Image © Rob Tilley |
|
 |
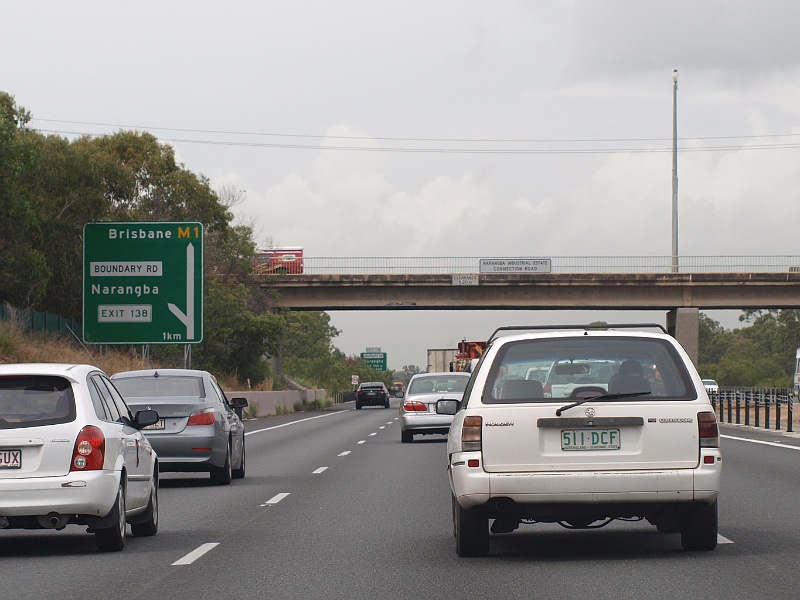
Advance Directional Sign: AD sign near Narangba Industrial Estate Connection Rd approaching the interchange with Deception Bay Rd (SR26) at Narangba, March 2009. Image © Rob Tilley |
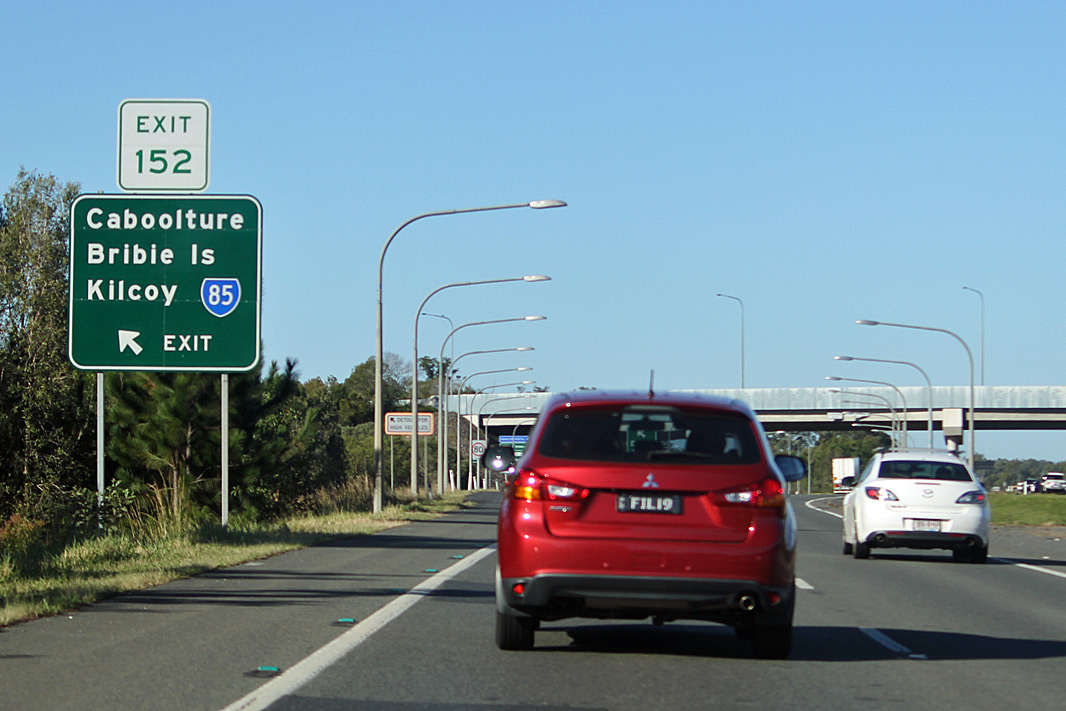 |
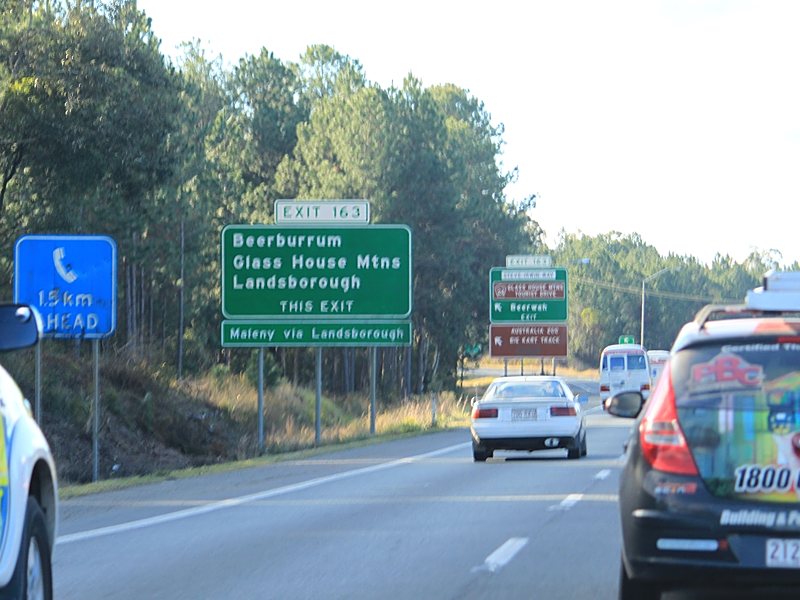
D'Aguilar Highway & Bribie Island Road Interchange: Bruce Hwy (M1) at the interchange with D'Aguilar Hwy (SR85) and Bribie Island Rd at Caboolture, May 2018. Click here for a photo of this location by Rob Tilley from July 2011. Click here for a photo by Rob Tilley of this location from November 2008. Image © Rob Tilley |
|
 |
Advance Directional Sign: AD sign approaching the interchange with Deception Bay Rd (SR26) at Narangba, May 2018. Image © Rob Tilley |
 |
D'Aguilar Highway & Bribie Island Road Interchange: Bruce Hwy (M1) at the interchange with D'Aguilar Hwy (SR85) and Bribie Island Rd at Caboolture, April 2012. Image © Paul Rands |
|
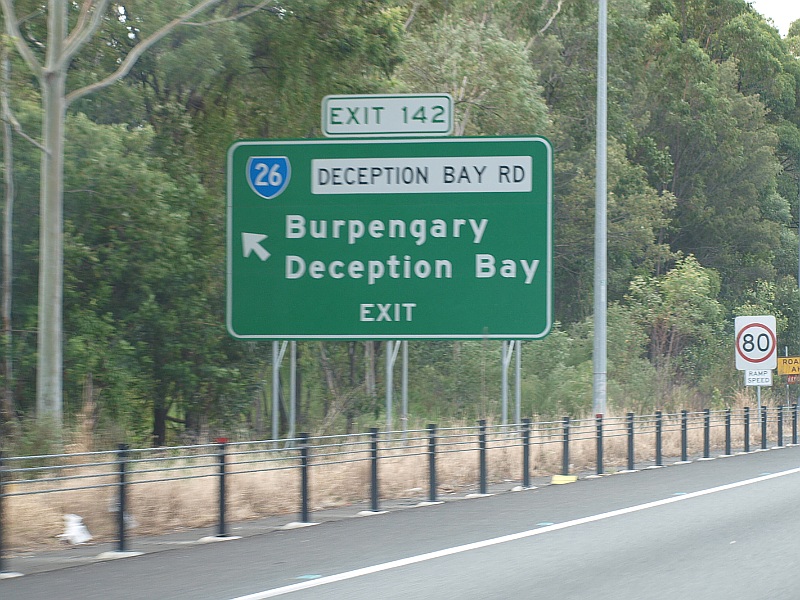 |
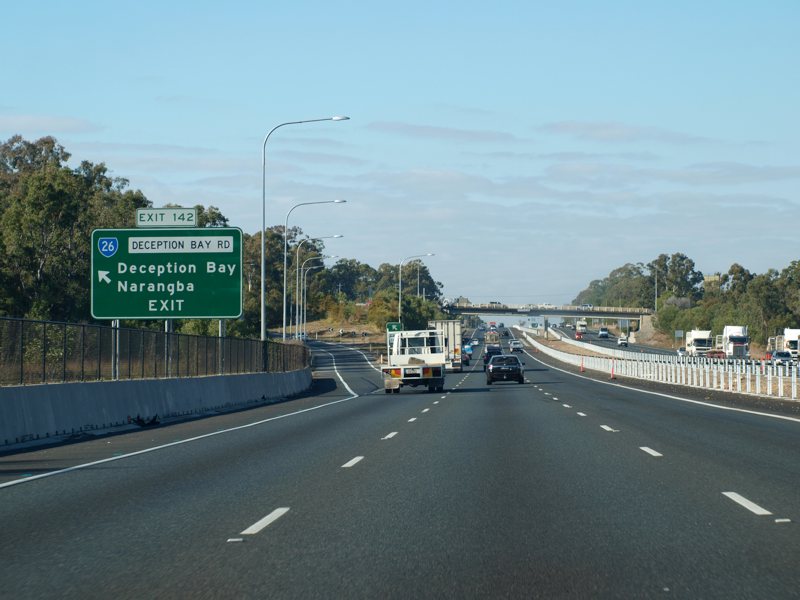
Deception Bay Road: ID sign at the Deception Bay Rd (SR26) interchange, Narangba, March 2009. Image © Rob Tilley |
 |
Caboolture River: Bruce Hwy (M1) crossing Caboolture River via Captain Whish Bridge at Caboolture, April 2012. Image © Paul Rands |
|
 |
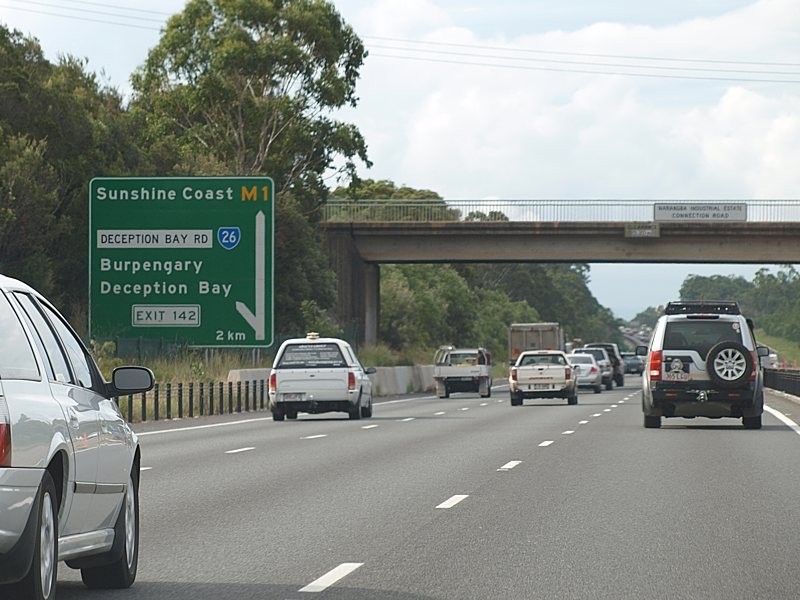
Deception Bay Road: Bruce Hwy (M1) at the Deception Bay Rd (SR26) interchange at Burpengary, March 2009. Image © Rob Tilley |
 |
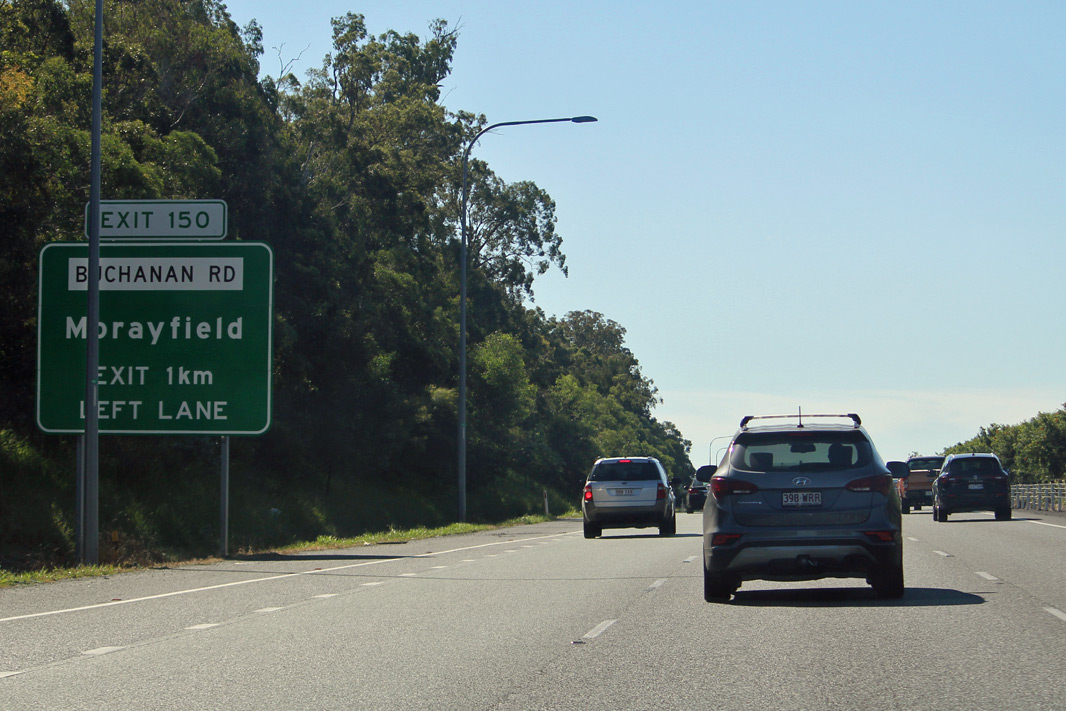
Advance Directional Sign: AD sign at Morayfield approaching Buchanan Rd, May 2018. Image © Rob Tilley |
|
 |
Advance Directional Sign: AD sign at Burpengary approaching Morayfield Rd and Uhlmman Rd (SR60), March 2009. Image © Rob Tilley |
 |
Travel Time Sign: Sign near Buchannan Rd at Morayfield showing real time travel times to the next 3 exits, May 2018. Image © Rob Tilley |
|
 |
Advance Directional Sign: AD sign at Burpengary approaching Morayfield Rd and Uhlmman Rd (SR60), March 2009. Click here for a photo of this location from March 2006. Image © Rob Tilley |
 |
Advance Directional Sign: AD sign at Morayfield approaching Buchanan Rd, August 2009. Image © Rob Tilley |
|
> |
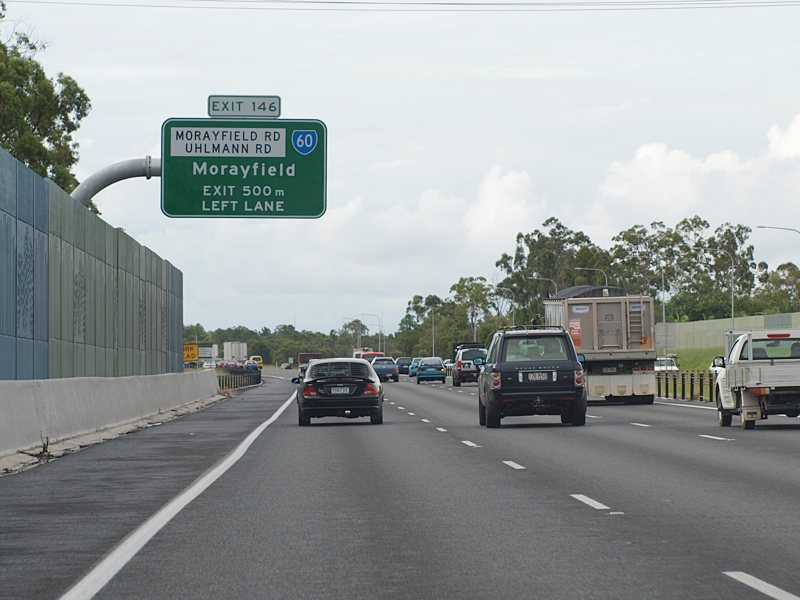
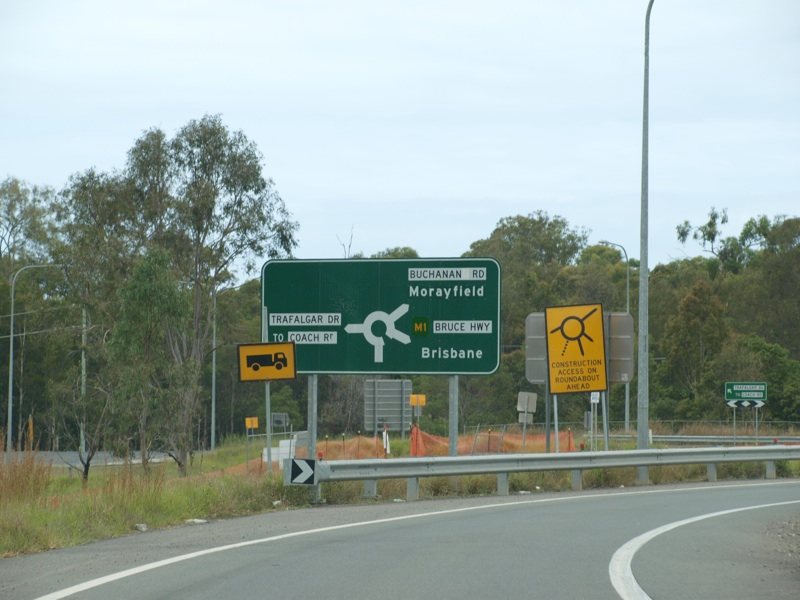
Morayfield Road & Uhlmann Road: Bruce Hwy (M1) interchange with Morayfield Rd and Uhlmann Rd (SR60) at Burpengary, March 2009. Image © Rob Tilley |
 |
Buchanan Road Interchange: Bruce Hwy (M1) at the Buchanan Rd interchange, Morayfield, August 2009. Image © Rob Tilley |
|
 |
Morayfield Road: Bruce Hwy (M1) passing under Morayfield Rd at Burpengary, April 2012. Image © Paul Rands |
 |
Buchanan Road Interchange: Bruce Hwy (M1) at the Buchanan Rd interchange, Morayfield, August 2009. Image © Rob Tilley |
|
 |
Distance Sign: RD sign at Burpengary, November 2009. Image © Rob Tilley |
 |
Advance Directional Sign: AD sign on the southbound ramp to Buchanan Rd at Morayfield, November 2008. Image © Rob Tilley |
|
 |
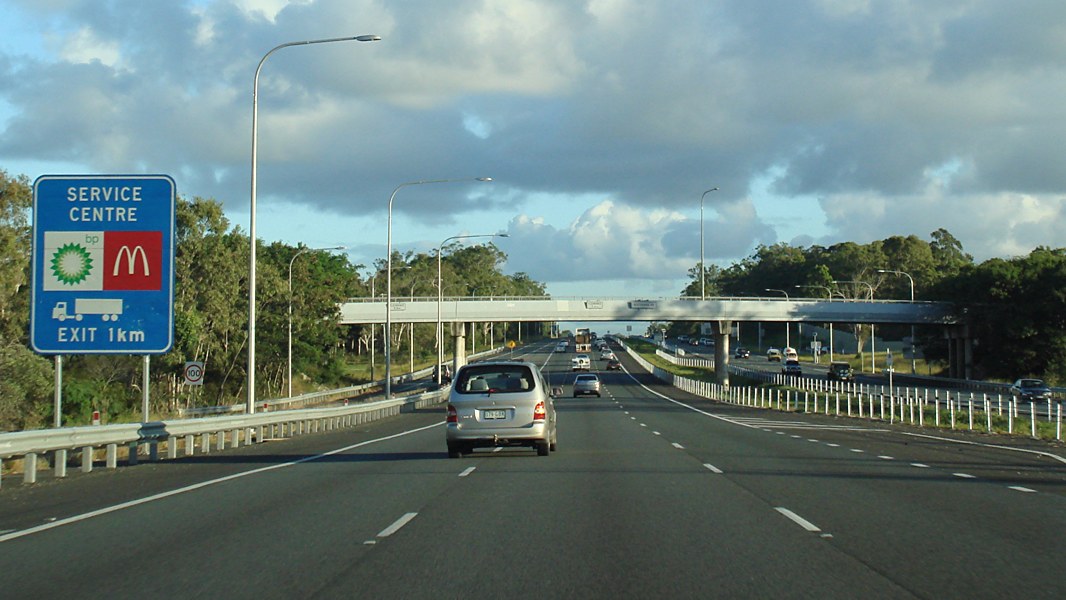
Advance Directional Sign: AD sign at Burpengary for the service centre, April 2012. Image © Paul Rands |
 |
Intersection Directional Sign: ID sign assembly at the roundabout on the southbound ramp to Buchanan Rd at Morayfield, November 2008. Image © Rob Tilley |
|
 |
Advance Directional Sign: AD sign at Burpengary for the service centre, April 2012. Image © Paul Rands |
 |
Advance Directional Sign: Westbound AD sign on the Buchanan Rd interchange at Morayfield, November 2008. Image © Rob Tilley |
|
 |
Service Centre: Bruce Hwy (M1) at the service centre entrance, at Morayfield, April 2012. Image © Paul Rands |
 |
Advacne Directional Sign: AD sign at Morayfield approaching the service centre, April 2012. Image © Paul Rands |
|
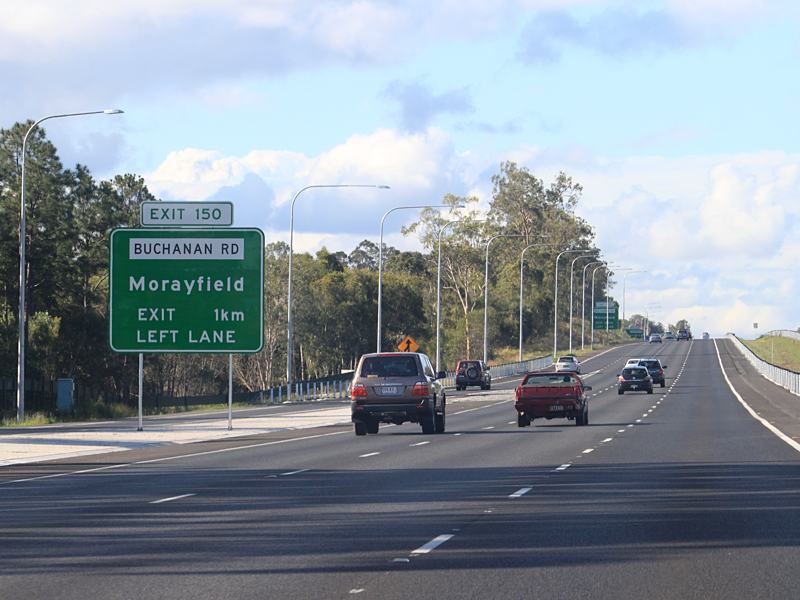 |
Advance Directional Sign: AD sign at Morayfield approaching Buchanan Rd, November 2009. This sign has since been relocated. Image © Rob Tilley |
 |
Service Centre: Bruce Hwy (M1) at the service centre entrance, at Morayfield, April 2012. Image © Paul Rands |
|
 |
Advance Directional Sign: AD sign at Morayfield approaching Buchanan Rd, May 2018. Click here for a photo of this location by Rob Tilley from November 2009. Image © Rob Tilley |
 |
Advance Directional Sign: AD sign at Burpengary approaching Morayfield Rd (SR60) and Uhlmann Rd, August 2009. Click here for a photo by Rob Tilley of this location from January 2009. Image © Rob Tilley |
|
 |
Buchanan Road Interchange: Bruce Hwy (M1) at the the Buchanan Rd interchange at Morayfield, November 2009. Image © Rob Tilley |
 |
Advance Directional Sign: AD sign at Burpengary approaching Morayfield Rd (SR60) and Uhlmann Rd, April 2012. Image © Paul Rands |
|
 |
Advance Directional Sign: AD sign at Morayfield approaching Buchanan Rd, November 2009. Image © Rob Tilley |
 |
Supplemental Advance Directional Sign: Supplemental AD sign at Burpengary approaching Morayfield Rd (SR60) and Uhlmann Rd, March 2009. Image © Rob Tilley |
|
 |
Supplemental Advance Directional Sign: Supplemental AD sign at Morayfield approaching Buchanan Rd, November 2009. Image © Rob Tilley |
 |
Advance Directional Sign: AD sign at Burpengary approaching Morayfield Rd (SR60) and Uhlmann Rd, August 2009. Image © Rob Tilley |
|
 |
Supplemental Advance Directional Sign: Supplemental AD sign at Morayfield for the interchange with D'Aguilar Hwy (SR85), Bribie Island Rd and Lower King St, March 2009. Image © Rob Tilley |
 |
Morayfield Road: Bruce Hwy (M1) passing under Morayfield Rd at Burpengary, April 2012. Image © Paul Rands |
|
 |
Supplemental Advance Directional Sign: Supplemental AD sign at Morayfield for the interchange with D'Aguilar Hwy (SR85), Bribie Island Rd and Lower King St, May 2018. Image © Rob Tilley |
 |
Advance Directional Sign: AD sign at Burpengary approaching Deception Bay Rd (SR26), August 2009. Image © Rob Tilley |
|
 |
Advance Directional Sign: AD sign at Morayfield for the interchange with D'Aguilar Hwy (SR85), Bribie Island Rd and Lower King St, November 2009. Image © Rob Tilley |
 |
Travel Time Sign: Sign near Station Rd at Burpengary showing real time travel times to the next 3 exits, May 2018. Image © Rob Tilley |
|
 |
Advance Directional Sign: AD sign at Morayfield for the interchange with D'Aguilar Hwy (SR85), Bribie Island Rd and Lower King St, November 2009. Image © Rob Tilley |
 |
Supplemental Advance Directional Sign: Supplemental AD sign at Burpengary approaching Deception Bay Rd (SR26), June 2018. Click here for a photo of this location by Rob Tilley from May 2018. Click here for a photo of this location by Rob Tilley from August 2009. Click here for a photo by Rob Tilley of this location from March 2009. Image © Rob Tilley |
|
 |
Lower King Street, Bribie Island Road & D'Aguilar Highway Interchange: Bruce Hwy (M1) as it crosses Caboolture River via Captain Wish Bridge at Morayfield at the interchange Lower King St and Bribie Island Rd and D'Aguilar Hwy (SR85), November 2009. Image © Rob Tilley |
 |
Advance Directional Sign: AD sign at Burpengary approaching Deception Bay Rd (SR26), August 2009. Image © Rob Tilley |
|
 |
Lower King Street, Bribie Island Road & D'Aguilar Highway Interchange: Bruce Hwy (M1) at Morayfield at the interchange Lower King St and Bribie Island Rd and D'Aguilar Hwy (SR85), November 2009. Image © Rob Tilley |
 |
Travel Time Sign: Variable travel time sign at Burpengary approaching Deception Bay Rd (SR26), February 2015. Click here for a photo of this location by Rob Tilley from August 2009. Image © Rob Tilley |
|
 |
Lower King Street, Bribie Island Road & D'Aguilar Highway Interchange: Bruce Hwy (M1) at Morayfield at the interchange Lower King St and Bribie Island Rd and D'Aguilar Hwy (SR85), November 2009. Image © Rob Tilley |
 |
Deception Bay Road Interchange: Bruce Hwy (M1) at the Deception Bay Rd (SR26) interchange at Deception Bay, August 2009. Image © Rob Tilley |
|
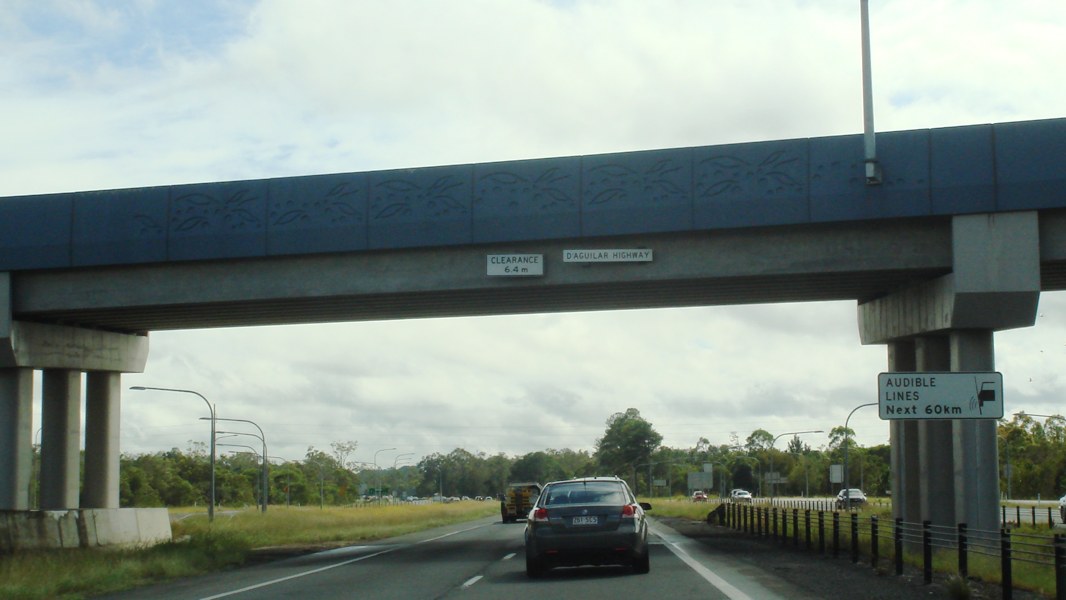 |
D'Aguilar Highway: Bruce Hwy (M1) as it passes under D'Aguilar Hwy (SR85) at Caboolture, April 2012. Image © Paul Rands |
 |
Advance Directional Sign: AD sign at Deception Bay on the off ramp to Deception Bay Rd (SR26), January 2009. Image © Rob Tilley |
|
 |
Distance Sign: RD sign at Caboolture, March 2009. Image © Rob Tilley |
 |
Intersection Directional Sign: ID sign at Deception Bay facing the off ramp to Deception Bay Rd (SR26), January 2009. Image © Rob Tilley |
|
 |
Advance Directional Sign: AD sign at Caboolture approaching Pumicestone Rd, May 2018. Click here for a photo of this location by Rob Tilley from July 2011. Click here for a photo by Rob Tilley of this location from March 2009. Image © Rob Tilley |
 |
Deception Bay Road: Bruce Hwy (M1) as it passes under Deception Bay Rd (SR26) at Deception Bay, April 2012. Image © Paul Rands |
|
 |
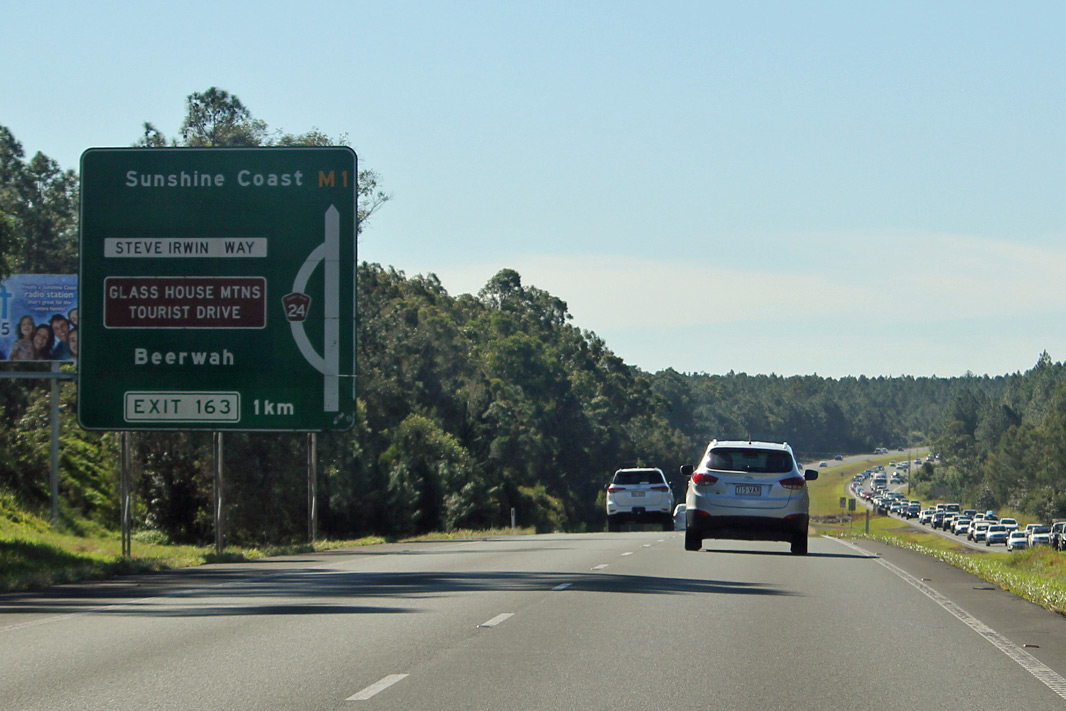
Pumicestone Road Interchange: Bruce Hwy (M1) at Pumicestone Rd at Caboolture, July 2011. Click here for a photo by Rob Tilley of this location from March 2009. Image © Rob Tilley |
 |
Travel Time Sign: Variable travel time sign at Northlakes, near Boundary Rd, February 2015. Image © Rob Tilley |
|
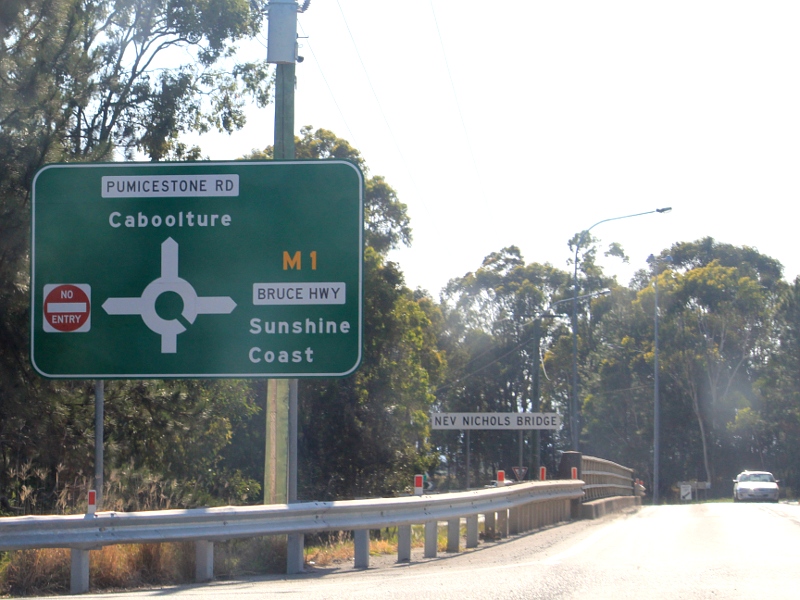 |
Advance Directional Sign: Westbound AD sign at Caboolture on Pumicestone Rd approaching Bruce Hwy (M1), November 2009. Image © Rob Tilley |
 |
Advance Directional Sign: AD sign at Narangba near Narangba Industrial Estate Connection Rd approaching Boundary Rd interchange, May 2018. Click here for a photo of this location by Rob Tilley from March 2009. Image © Rob Tilley |
|
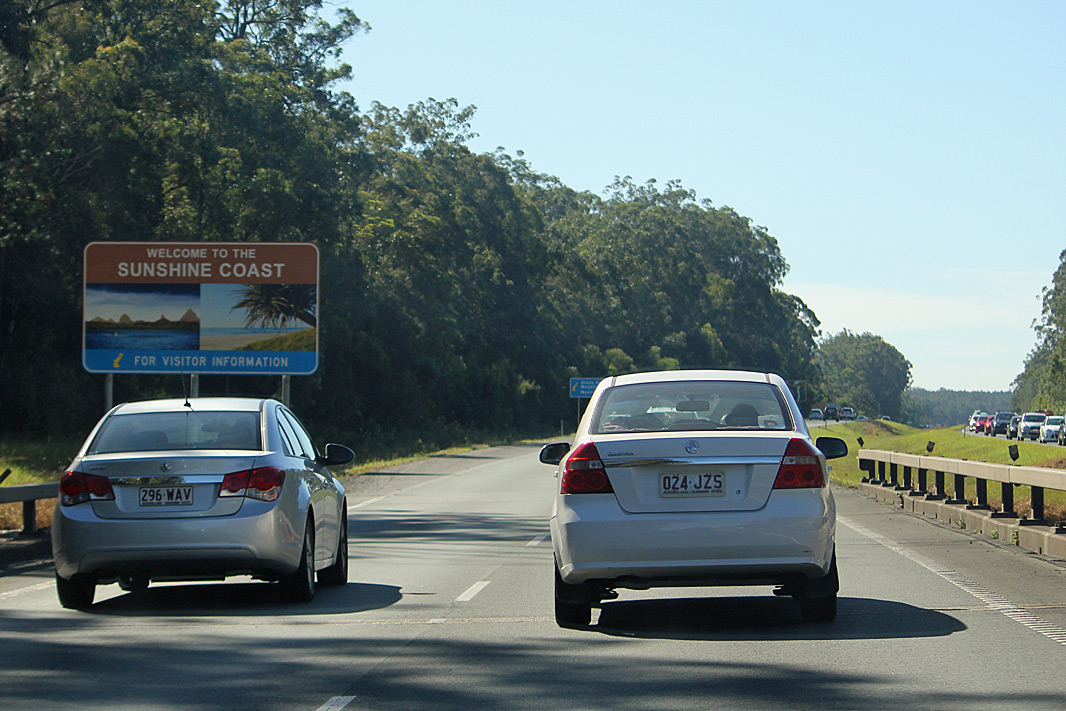 |
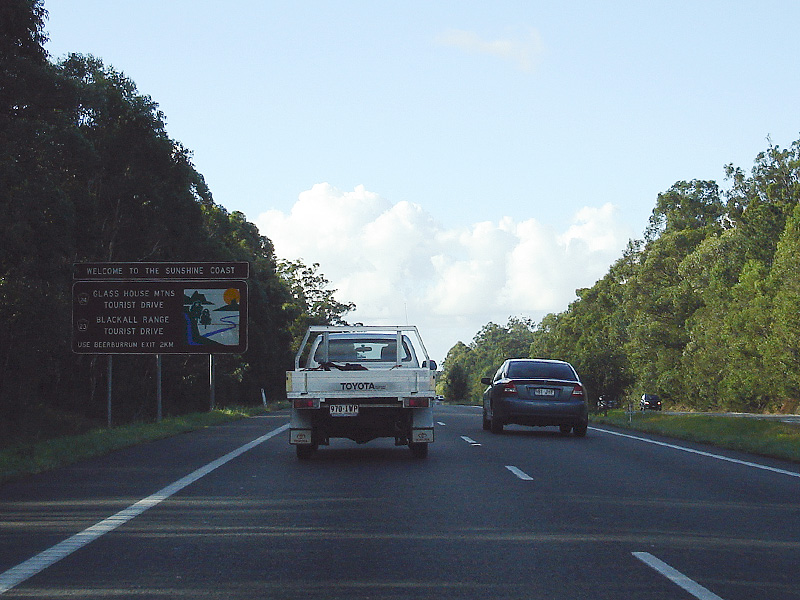
Welcome To The Sunshine Coast Region: Sign indicating the boundary of the Sunshine Coast tourism region at Elimbah, May 2018. Image © Rob Tilley |
 |
Advance Directional Sign: AD sign approaching Boundary Rd interchange, May 2018. Click here for a photo of this location by Rob Tilley from March 2009. Image © Rob Tilley |
|
 |
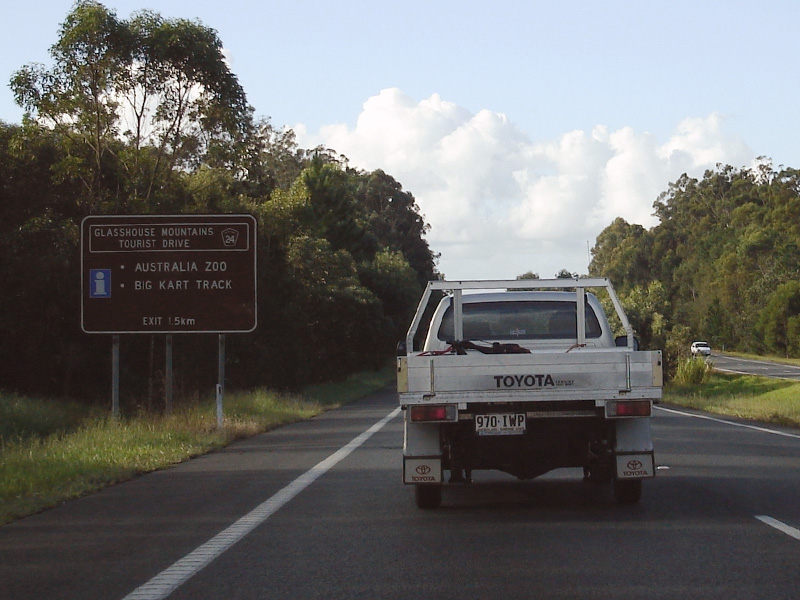
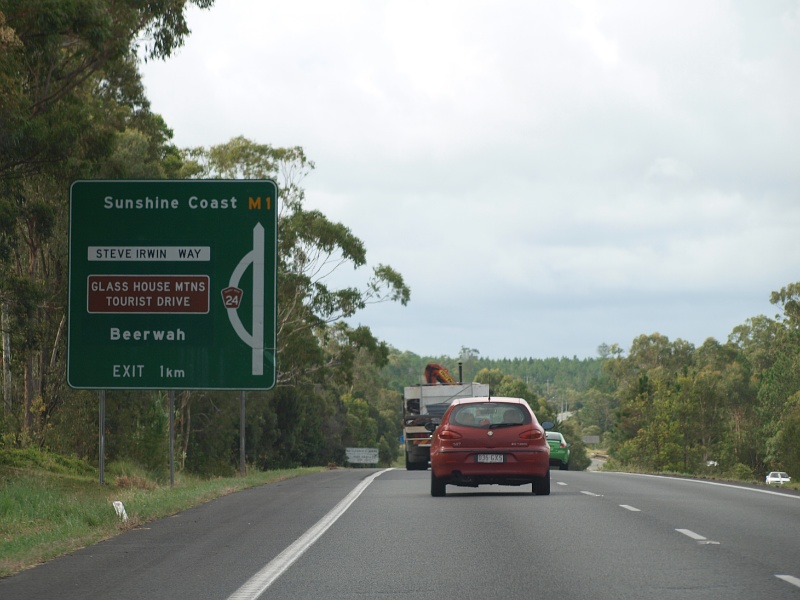
Supplemental Advance Directional Sign: Supplemental AD sign at Elimbah approaching Steve Irwin Way (TD24) (former Bruce Hwy), May 2018. Click here for a photo of this location by Rob Tilley from July 2011. Click here for a photo of this location from March 2006. Click here for a photo by Rob Tilley of this location from March 2009. Image © Rob Tilley |
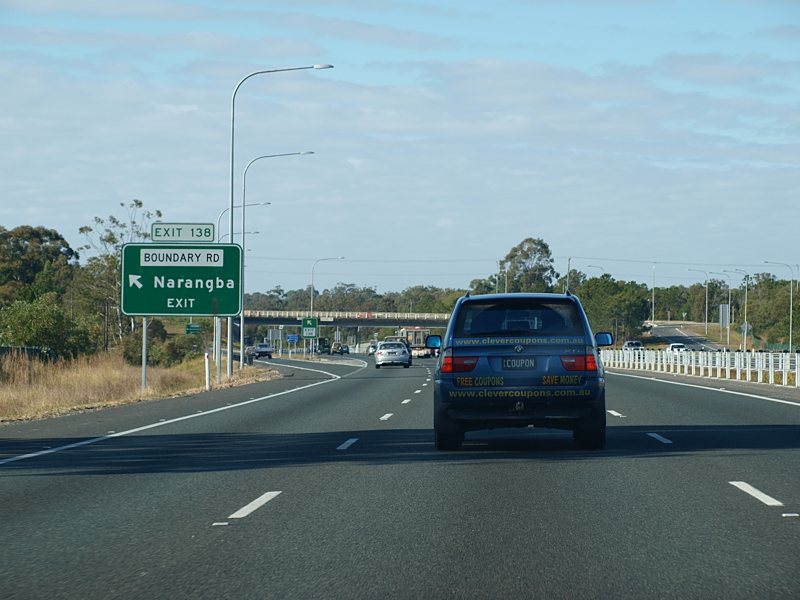 |
Boundary Road Interchange: Bruce Hwy (M1) at the Boundary Rd interchange, Narangba, August 2009. Image © Rob Tilley |
|
 |
Supplemental Advance Directional Sign: Supplemental AD sign at Elimbah approaching Steve Irwin Way (TD24) (former Bruce Hwy), May 2018. Image © Rob Tilley |
 |
Boundary Road Interchange: Bruce Hwy (M1) at the Boundary Rd interchange, Narangba, August 2009. Image © Rob Tilley |
|
 |
Supplemental Advance Directional Sign: Supplemental AD sign at Elimbah approaching Steve Irwin Way (TD24) (former Bruce Hwy), May 2018. Click here for a photo of this location by Rob Tilley from April 2012. Click here for a photo of this location from March 2006. |
 |
Boundary Road Interchange: Westbound on Boundary Rd at Mango Hill at the interchange with Bruce Hwy (M1), May 2005. Image © Michael Greenslade |
|
 |
Supplemental Advance Directional Sign: Supplemental AD sign at Elimbah approaching Steve Irwin Way (TD24) (former Bruce Hwy), July 2011. Click here for a photo of this location from March 2006. Click here for a photo by Rob Tilley of this location from March 2009. Image © Rob Tilley |
 |
Supplemental Advance Directional Sign: Supplemental AD sign at North Lakes approaching Anzac Av (SR71), May 2018. Image © Rob Tilley |
|
 |
Advance Directional Sign: AD sign at Elimbah approaching Steve Irwin Way (TD24) (former Bruce Hwy), May 2018. Click here for a photo by Rob Tilley of this location from March 2009. Image © Rob Tilley |
 |
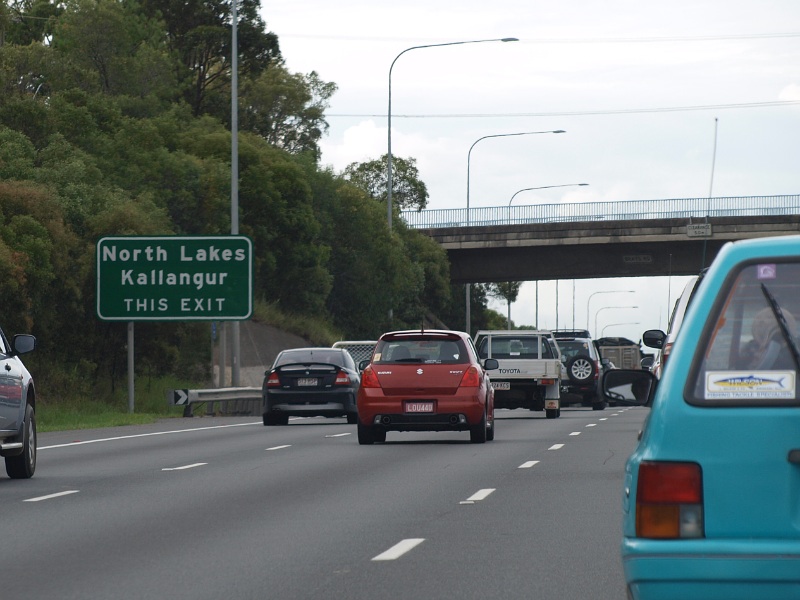
Distance Sign: Poorly designed RD sign at North Lakes, June 2018. Click here for a photo of this location by Rob Tilley from March 2009. Image © Rob Tilley |
|
 |
Supplemental Advance Directional Sign: Supplemental AD sign at Elimbah approaching Steve Irwin Way (TD24) (former Bruce Hwy), May 2018. Image © Rob Tilley |
 |
Advance Directional Sign: AD sign at North Lakes approaching Anzac Av (SR71), August 2009. Click here for a photo by Rob Tilley of this location from March 2009. Image © Rob Tilley |
|
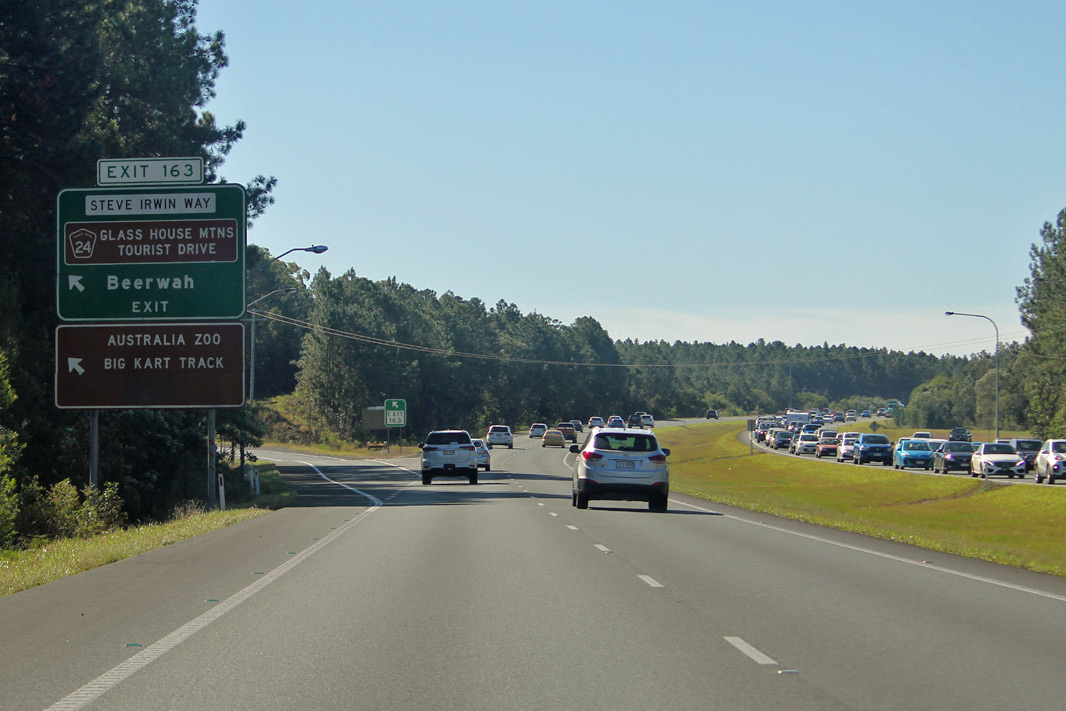 |
Advance Directional Sign: AD sign at Elimbah approaching Steve Irwin Way (TD24) (former Bruce Hwy), May 2018. Click here for a photo by Rob Tilley of this location from March 2009. Image © Rob Tilley |
 |
Supplemental Advance Directional Sign: Supplemental AD sign at North Lakes approaching Anzac Av (SR71), April 2012. Image © Paul Rands |
|
 |
Distance Sign: RD sign at Elimbah, March 2006. Image © Rob Tilley |
 |
Supplemental Advance Directional Sign: Supplemental AD sign at North Lakes approaching Anzac Av (SR71), March 2009. This sign has since been relocated. Image © Rob Tilley |
|
 |
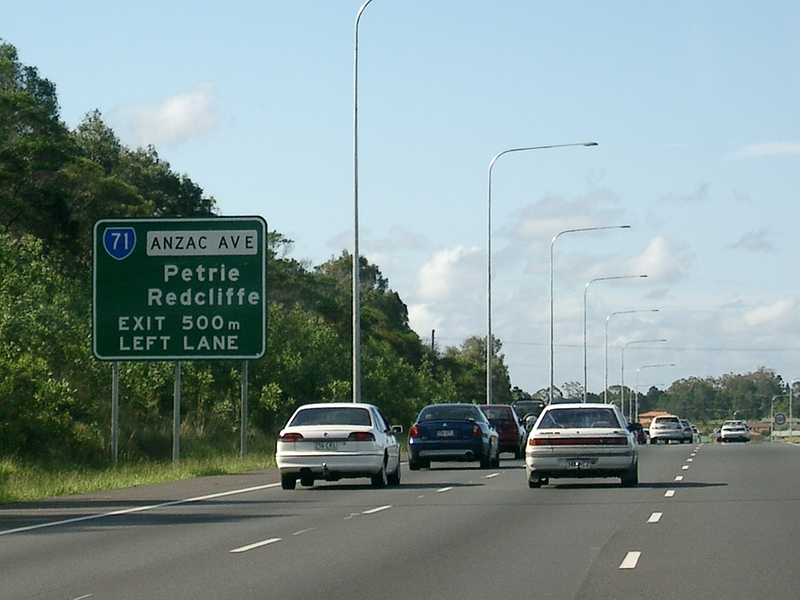
Advance Directional Sign: AD sign at North Lakes approaching Anzac Av (SR71), March 2009. Image © Rob Tilley |
|||
 |
Plantation Road: Bruce Hwy (M1) as it passes under Plantation Rd at North Lakes, May 2018. Image © Rob Tilley |
|||
 |
Advance Directional Sign: AD sign at North Lakes approaching Anzac Av (SR71), May 2018. Image © Rob Tilley |
|||
 |
Anzac Avenue: Bruce Hwy (SR71) at the Anzac Av (SR71) interchange, August 2009. Click here for a photo by Rob Tilley of this location from March 2009. Image © Rob Tilley |
|||
 |
Pacific Coast Way Reassurance Marker: Sign denoting route to follow for Pacific Coast Way tourist route at Kallangur, June 2018. Image © Rob Tilley |
|||
 |
Distance Sign: Reassurance directional sign at Mango Hill, March 2009. Image © Rob Tilley |
|||
|
Services Sign: Tourist infomation services sign at Griffin, June 2018. Image © Rob Tilley |
|||
|
Pacific Coast Way Reassurance Marker: Sign denoting route to follow for Pacific Coast Way tourist route at Griffin, June 2018. Image © Rob Tilley |
|||
 |
Advance Directional Sign: AD sign at Griffin approaching Gympie Arterial Rd (M3) and Gateway Mwy (M1), August 2009. Click here for a photo of this location from March 2006. Click here for a photo by Rob Tilley of this location from March 2009. Image © Rob Tilley |
|||
 |
Advance Directional Sign: AD sign at Griffin approaching Gympie Arterial Rd (M3) and Gateway Mwy (M1), August 2009. Click here for a photo of this location from March 2006. Click here for a photo by Rob Tilley of this location from March 2009. Image © Rob Tilley |
|||
 |
end Of Bruce Highway: Sign at Bald Hills at the Pine River bridge denoting the end of the Bruce Hwy and start of Gympie Arterial Rd, May 2018. Image © Rob Tilley |
|||
 |
Advance Directional Sign: AD sign at Bald Hills approaching Gympie Arterial Rd (M3) and Gateway Mwy (M1), May 2018. Click here for a photo of this location by Rob Tilley from August 2009. Click here for a photo of this location from March 2006. Click here for a photo by Rob Tilley of this location from March 2009. Image © Rob Tilley |
|||
 |
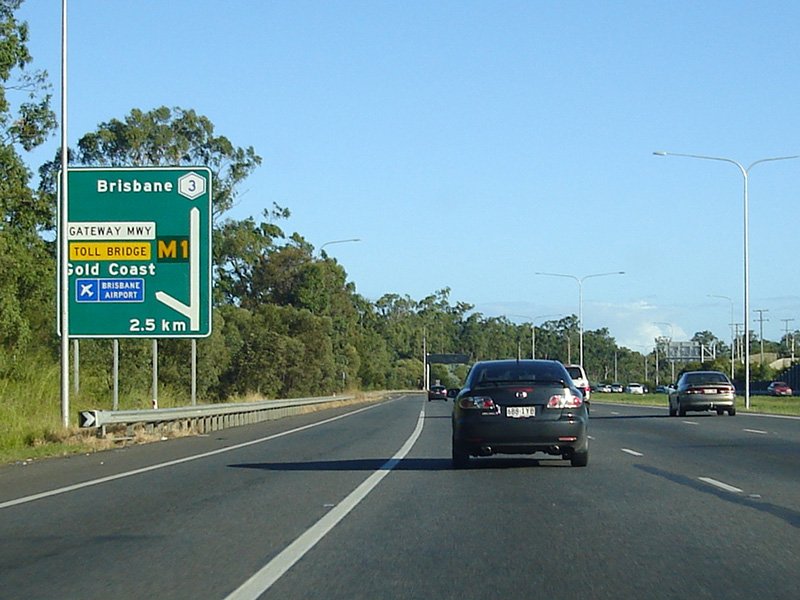
Gateway Motorway & Gympie Arterial Road Interchange: Bruce Hwy (M1) changes to Gateway Mwy (M1) at the interchange with Gympie Art Rd (M3) at Bald Hills, August 2009. Click here for a photo of this location from March 2006. Click here for a photo by Rob Tilley of this location from March 2009. Image © Rob Tilley |
|||
| Click here for the continuation of M1 between Beerburrum and Nambour Click here for the continuation of M1 as Gateway Motorway |
||||
1 Department of Transport and Main Roads, The State Road Network of Queensland, 30 June 2010
2 Bulldust, Beef & Beyond
3 Tyler Bullock
4 Nambour Chronicle, 26 October 1934
5 Nambour Chronicle, 23 November 1934
6 Nambour Chronicle, 21 December 1934
7 Department of Environment and Heritage Protection, North Coast Roadside Rest Areas
8 Nambour Chronicle, 8 November 1963
9 Caboolture in the 70s
10 Sam Laybutt (Ozroads)
11 Department of Transport and Main Roads, Projects, Bruce Highway Managed Motorway Project
Last updated: 21-Oct-2021 1:07
This site © Paul Rands. All rights reserved. Some portions © (copyright) by their respective and credited owners. Permission must be obtained before using any images from this site. For details, please email by clicking here.