|
|
|
|
|
 |
Lane Cove Tunnel, Hills Motorway, Old Windsor Road, Windsor Road & Bridge Street (Metroad 2) - Kellyville to Artarmon (Decommissioned) |
Statistics:
Route Numbering:
General Information:
Metroad 2 is a major route located in the Sydney area, linking the northwestern suburbs with Sydney's inner suburbs, and eventually via, several other routes to the central business district.
The standard of the route varies from multi-laned arterial road through to freeway standard (covered by the 21 km long Hills Mwy) 1. It passes through inner city suburbs, residential areas, light industrial areas and semi-rural areas.
The Hills Motorway segment of Metroad 2 was funded and built by the private sector which will operate, maintain and repair the motorway until 2042, when it will revert to the ownership of the NSW government. The Hills Motorway consists of a four-lane expressway plus a two-lane busway (between the east-bound and west-bound carriageways) from Beecroft Road to Old Windsor Road, breakdown lanes and cyclist lanes. 1
The route has gone through a number of signficant changes since it was introduced, along with Sydney's other Metroads back in the early 1990s. Several changes to routing have occured, massive upgrades between Seven Hills and Windsor and more. Details of the changes are covered in the history section below.
Metroad 2 features the following multiplexes:
The introduction of M7 is the first official public display of alphanumeric route numbering in New South Wales, however there has been several instances of incorrectly uncovered alphanumeric shields across the state.
History:
The Roads and Traffic Authority's Heritage Register features a detailed history on the route, and can be found here.
| Kellyville to Artarmon | Artarmon to Kellyville | |||
| Preview: | Description: | Preview: | Description: | |
 |
Distance Sign: Reassurance directional sign at Kellyville, November 2010. Image © Rob Tilley |
 |
ID Sign: Intersection directional sign on the interchange with Pennant Hills Road at West Pennant Hills. The M7 duplex starts here. September 2007. Image © Paul Rands |
|
 |
Samantha Riley Drive: ID sign at Samantha Riley Dr at Kellyville, November 2010. Image © Rob Tilley |
 |
Distance Sign: Westbound RD sign after the Pennant Hills Rd interchange at Carlingford. September 2007. Image © Paul Rands |
|
 |
Samantha Riley Drive: ID sign at Samantha Riley Dr at Kellyville, November 2010. Image © Rob Tilley |
 |
Tolling Sign: Sign indicating automated tolling options available for Metroad 2, westbound at North Rocks, September 2007. Image © Paul Rands |
|
 |
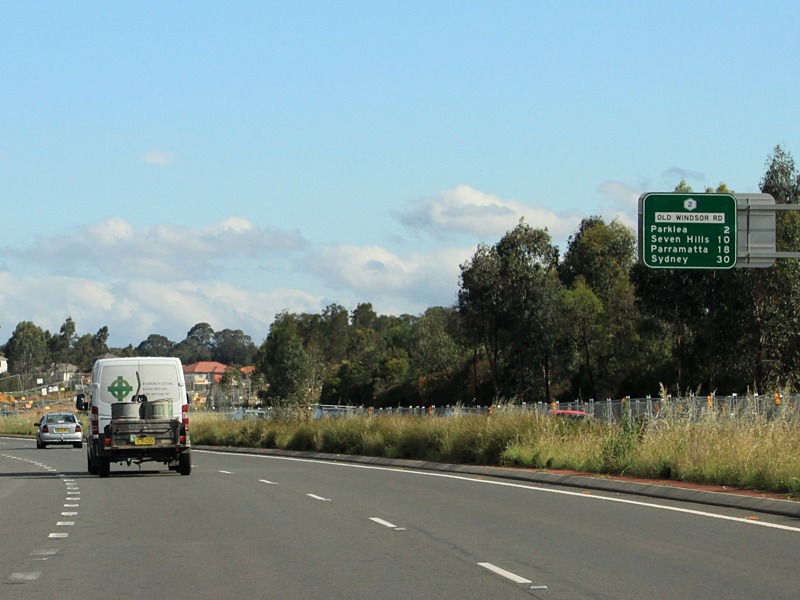
Advance Directional Sign: AD sign on Old Windsor Rd (Metroad 2) approaching Memorial Av and Sunnyholt Rd at Kellyville, November 2010. Image © Rob Tilley |
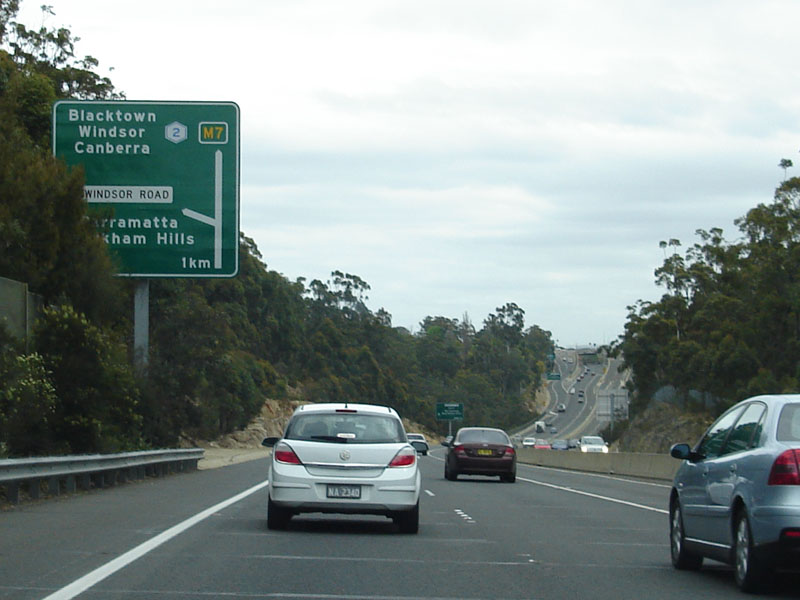 |
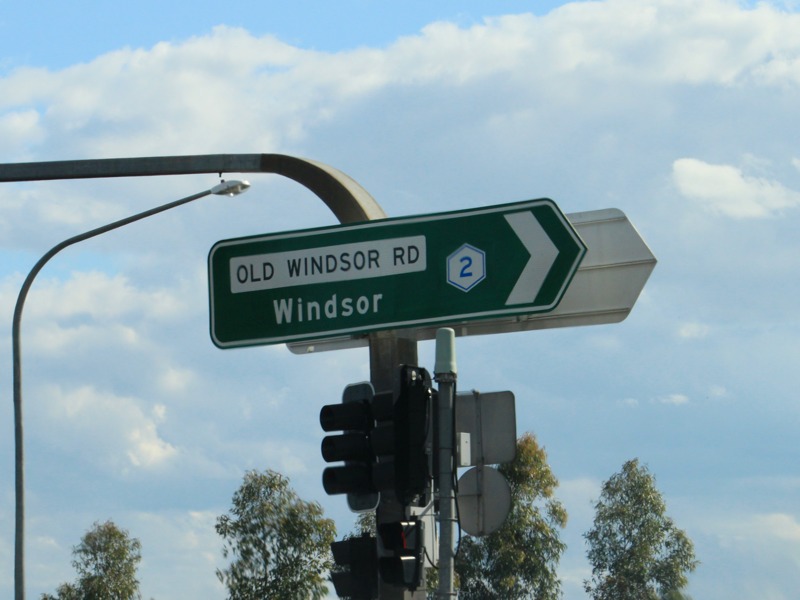
Windsor Road Advance Directional Sign: Heading west at North Rocks, this is the AD sign for the Windsor Road exit, September 2007. Image © Paul Rands |
|
 |
Intersection Directional Sign: ID sign at Memorial Av and Sunnyholt Rd at Kellyville, November 2010. Image © Rob Tilley |
 |
Antill Street Approach: Southbound at Watson, approaching Antill Street, note the white lines across the lanes - they're used to alert drivers to the upcoming roundabout as they come out of an 80 km/h zone. September 2007. Image © Paul Rands |
|
 |
Intersection Directional Sign: ID sign at Memorial Av and Sunnyholt Rd at Kellyville, November 2010. Image © Rob Tilley |
 |
Windsor Road Interchange: Image © Paul Rands |
|
 |
Intersection Directional Sign: ID sign at Memorial Av and Sunnyholt Rd at Kellyville, November 2010. Image © Rob Tilley |
 |
Tolling Sign: Sign indicating tolling options available to motorists who don't have an e-tag, westbound at Winston Hills, September 2007. Image © Paul Rands |
|
 |
Entering Bella Vista: Old Windsor Rd (Metroad 2) as it enters the suburb of Bella Vista, November 2010. Image © Rob Tilley |
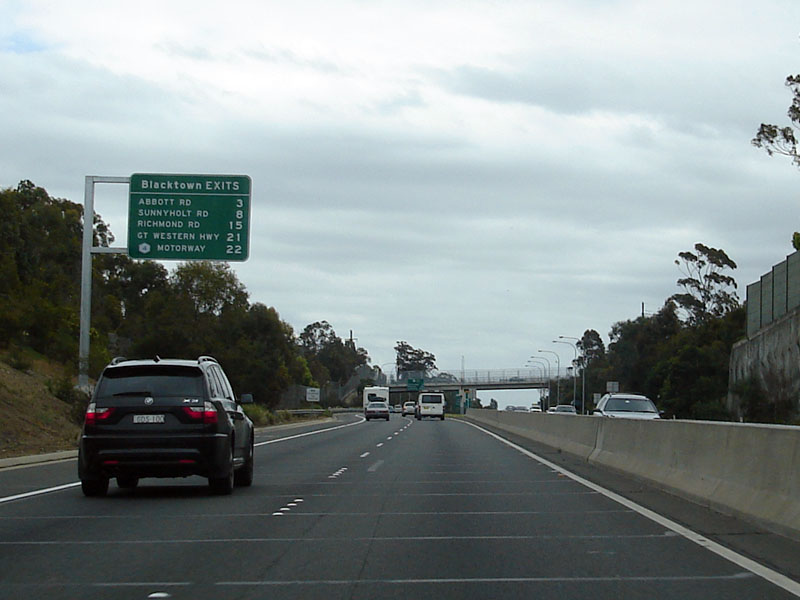 |
Distance Sign: Westbound at Winston Hills, September 2007. Image © Paul Rands |
|
 |
Advance Directional Sign: AD sign approaching Norwest Blvd at Bella Vista, November 2010. Image © Rob Tilley |
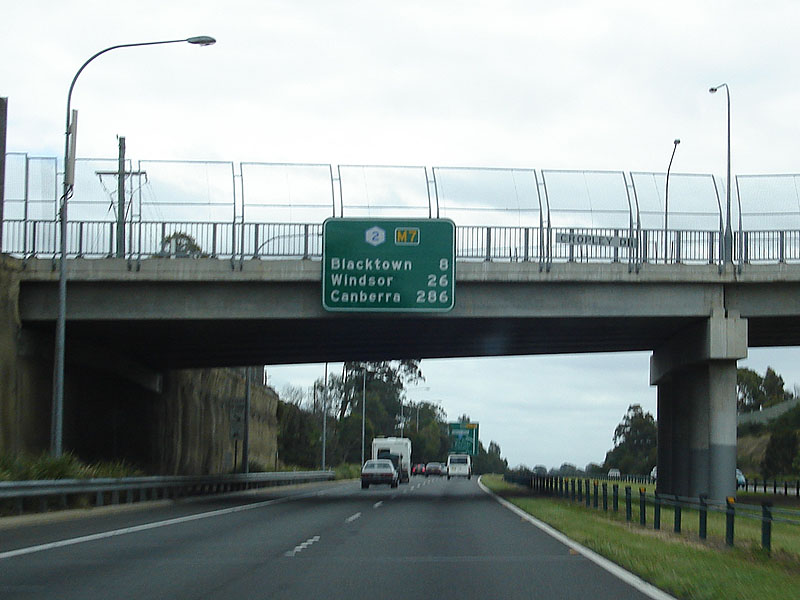 |
Distance Sign: Signage on the Cropley Drive overpass at Winston Hills, September 2007. Image © Paul Rands |
|
 |
Supplemental Advance Directional Sign: Image © Rob Tilley |
 |
Advance Directional Sign: AD sign for Old Windsor Road / Abbott Road interchange, westbound through Winston Hills, September 2007. Image © Paul Rands |
|
 |
Norwest Boulevard: Old Windsor Rd (Metroad 2) at Norwest Blvd, Bella Vista, November 2010. Image © Rob Tilley |
 |
Supplemental AD Sign: Sign located at Winston Hills indicating the Old Windsor Road interchange is the last untolled exit before the tolling begins for the Westlink M7, September 2007. Image © Paul Rands |
|
 |
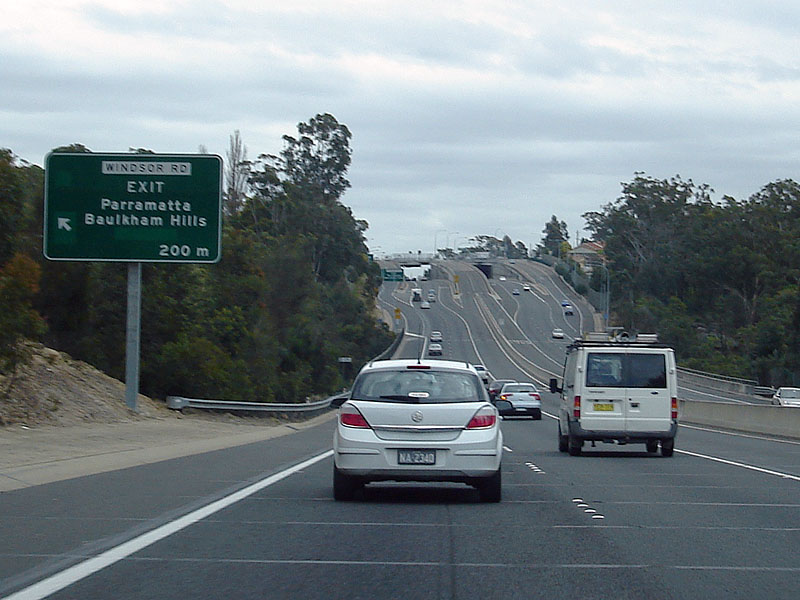
Advance Directional Sign: AD sign on the off ramp to Norwest Blvd at Bella Vista, November 2010. Image © Rob Tilley |
 |
Advance Directional Sign: Westbound through Winston Hills, approaching Abbott Road / Old Windsor Road interchange. September 2007. Image © Paul Rands |
|
 |
Advance Directional Sign: AD sign approaching Norbrik Dr, November 2010. Image © Rob Tilley |
 |
Toll Options Sign: Sign showing what forms of payment are accepted to access the fully automated tolling system used on the Westlink M7. September 2007 at Winston Hills. Image © Paul Rands |
|
 |
Intersection Directional Sign: ID sign at Norbrok Dr in Bella Vista, November 2010. Image © Rob Tilley |
 |
Abbott Road Interchange: Looking northwest at the Abbott Road interchange at Winston Hills. September 2007. Image © Paul Rands |
|
 |
Advance Directional Sign: AD sign at Bella Vista approaching Westlink (M7) and Hills Mwy (Metroad 2), November 2010. Image © Rob Tilley |
 |
Start Westlink M7 Sign: Sign indicating the beginning of the Westlink M7 at Winston Hills, September 2007. This sign is here despite the M7 duplex from Pennant Hills Road interchange. It's purpose is probably to indicate the beginning of distanced based tolling for Westlink M7. Image © Paul Rands |
|
 |
Westlink Interchange: Old Windsor Road at the Westlink M7 interchange at Bella Vista, November 2010. Metroad 2 veers left here and duplexes with M7. Click here for a photo of this location from October 2005. Image © Rob Tilley |
 |
Advance Directional Sign: AD sign on the Abbott Road / Old Windsor Road interchange at Winston Hills, September 2007. Image © Paul Rands |
|
 |
E-Tag Sign: Sign on Westlink (M7 / Metroad 2) at Baulkham Hills, indicating this section of road uses e-tags for paying tolls, November 2010. Image © Rob Tilley |
 |
ID Sign: Westbound AD sign facing Hills Motorway traffic at the junction with Abbott Road and Old Windsor Road at Winston Hills. September 2007. Image © Paul Rands |
|
 |
Distance Sign: RD sign on Westlink (M7 / Metroad 2) at Baulkham Hills, November 2010. Image © Rob Tilley |
 |
Intersection Directional Sign: ID sign at the Sunnyholt Rd and Memorial Av junction in Kellyville, November 2010. Image © Rob Tilley |
|
 |
Electronic Toll Point: Electronic toll point at Baulkam Hills, this is the last of these along the route, November 2010. Abbott Rd interchange (which once carried Metroad 2) is in the distance. Image © Rob Tilley |
|||
 |
Start Hills Motorway: Westlink ends at this point in Baulkham Hills and becomes Hills Motorway, November 2010. At this point the tolling arrangements change. Image © Rob Tilley |
|||
 |
Welcome Sign: Sign announcing the Hills M2 Motorway, November 2010, as you pass under the Langdon Road overpass at Winston Hills. Image © Rob Tilley |
|||
 |
Cropley Drive: Hills Mwy (Metroad 2) as it passes under Cropley Dr in Baulkham Hills, November 2010. Image © Rob Tilley |
|||
 |
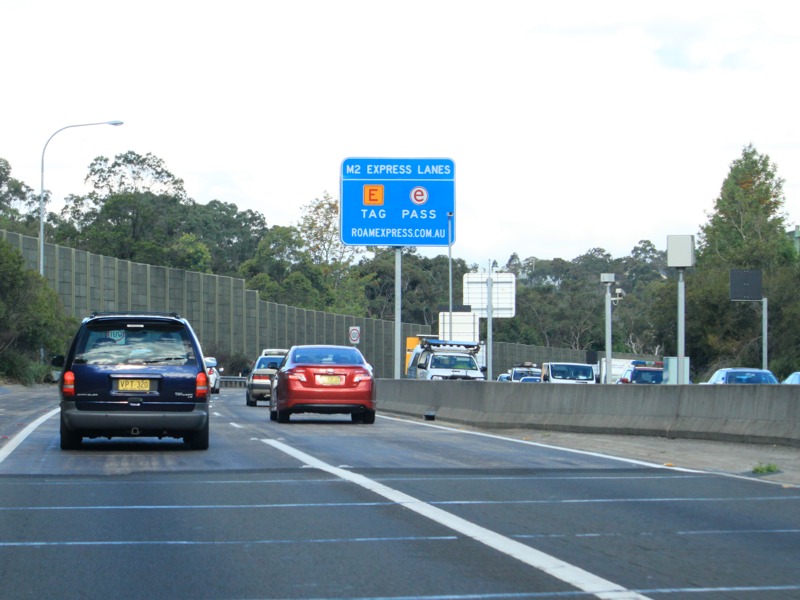
E-Tag Sign: Sign on Hills Mwy (Metroad 2) at North Rocks, indicating that tolls can be paid using different types of e-tags, November 2010. Image © Rob Tilley |
|||
 |
Distance Sign: Eastbound RD sign as you pass through the North Rocks area, November 2010. Image © Rob Tilley |
|||
 |
Advance Directional Sign: AD sign at North Rocks, approaching Pennant Hills Road (Metroad 6 / Metroad 7) interchange at Carlingford, September 2007. Image © Paul Rands |
|||
 |
Supplemental AD Sign: Image © Rob Tilley |
|||
 |
Dangerous Goods Sign: Regulatory sign banning dangerous goods from the Epping Tunnel and offering an alternate route. November 2010 at North Rocks. Image © Rob Tilley |
|||
 |
Advance Directional Sign: AD sign for the Pennant Hills Road interchange at North Rocks, November 2010. Image © Rob Tilley |
|||
 |
Dangerous Goods Sign: Regulatory sign banning dangerous goods from the Epping Tunnel and offering an alternate route. November 2010 at North Rocks. Image © Rob Tilley |
|||
 |
ID Sign: Intersection directional signage at the Pennant Hills Road interchange at West Pennant Hills, September 2007. Image © Paul Rands |
|||
 |
Toll Charges Sign: Sign indicating toll charges as you approach the toll plaza on the Pennant Hills Road interchange at West Pennant Hills, September 2007. Image © Paul Rands |
|||
 |
Advance Directional Sign & Toll Plaza: Approaching the Toll Plaza on the eastbound ramps of the Pennant Hills Road interchange at Pennant Hills. Image © Paul Rands |
|||
 |
Intersection Directional Sign: ID sign on Pennant Hills Rd (Metroad 7) at West Pennant Hills, July 2013. Image © Paul Rands |
|||
 |
Distance Sign: RD sign at Cheltenham, November 2010. Image © Rob Tilley |
|||
| Epping Tunnel: Eastbound entrance to the Epping Tunnel, which travels under several residential buildings and Epping Oval. April 2007. Image © Transurban |
||||
 |
Epping Tunnel: Inside the Epping Tunnel, which travels under several residential buildings and Epping Oval. November 2010. Image © Rob Tilley |
|||
 |
E-Tag Sign: Sign on Hills Mwy (Metroad 2) at Epping, indicating that tolls can be paid using different types of e-tags, November 2010. Image © Rob Tilley |
|||
 |
Advance Directional Sign: AD sign at Epping approaching Christie Rd, July 2013. Image © Paul Rands |
|||
 |
Lane Allocation Sign: Lane allocation sign at Marsfield for the toll plaza at Macquarie Park, November 2010. The toll plaza was removed in 2013, along with this sign. Image © Rob Tilley |
|||
 |
Distance Sign: RD sign at Marsfield, November 2010. Image © Rob Tilley |
|||
 |
Advance Directional Sign: AD sign at Marsfield, approaching Christie Rd, July 2013. Image © Paul Rands |
|||
 |
Supplemental Advance Directional Sign: Supplemental AD sign at Macquarie Park for Christie Rd interchange, July 2013. Click here for a photo of this area by Rob Tilley from November 2010. Image © Paul Rands |
|||
 |
Lane Allocation Sign: Lane allocation sign for the toll plaza at Macquarie Park, November 2010. The toll plaza was removed in 2013, along with this sign. Image © Rob Tilley |
|||
 |
Toll Charges Sign: Toll charges sign at Macquarie Park, July 2013. Click here for a photo of this area by Rob Tilley from November 2010. Image © Paul Rands |
|||
 |
Culloden Road: Toll booth signage on the Culloden Rd overpass at Macquarie Park, November 2010. The toll plaza was removed in 2013, along with the overhead signs. Image © Rob Tilley |
|||
| Toll Plaza: Looking southeast from Culloden Road overpass at Macquarie Park, towards the main Hills Mwy toll plaza. April 2007. The toll plaza was removed in 2013. Image © Transurban |
||||
 |
Christie Road: Supplemental AD sign on the Christie Rd overpass at Macquarie Pk for the Lane Cove Rd interchange, July 2013. Click here for a photo of this area by Rob Tilley from November 2010. Image © Paul Rands |
|||
 |
Thank You Sign: Sign from toll operator Transurban thanking motorists for using the Hills Mwy, November 2010. Image © Rob Tilley |
|||
 |
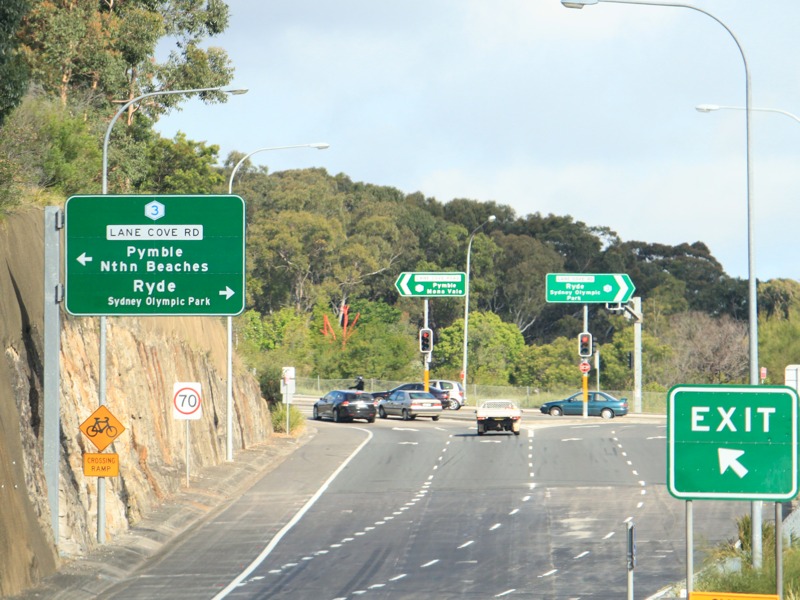
Advance Directional Sign: AD sign approaching Lane Cove Rd (Metroad 3) at Macquarie Park, November 2010. Image © Rob Tilley |
|||
 |
Advance Directional Sign: AD sign approaching Lane Cove Rd (Metroad 3) at Macquarie Park, November 2010. Image © Rob Tilley |
|||
 |
Lane Cove Road Interchange: Travelling southeast through the Lane Cove Rd (Metroad 3) interchange at Macquarie Park, November 2010. Image © Rob Tilley |
|||
 |
Lane Cove Road Interchange: Travelling southeast through the Lane Cove Rd (Metroad 3) interchange at Macquarie Park, November 2010. Image © Rob Tilley |
|||
 |
Toll Options Sign: Sign at Macquarie Park showing what forms of payment are accepted to access the fully automated tolling system used on the Lane Cove Tunnel, November 2010, Click here for a photo by Dave Whiteman of this location from March 2007. Image © Rob Tilley |
|||
 |
Advance Directional Sign: AD sign approaching Delhi Rd (SR29) at Macquarie Pk, November 2010. Image © Rob Tilley |
|||
 |
Overheight Signage: Warning signs design to flash when an oversized vehicle is approaching the Lane Cove Tunnel. Looking southeast at Macquarie Park. November 2010. Image © Rob Tilley |
|||
 |
Supplemental AD Sign: Supplemental advance directional indicating the upcoming interchange is the last exit to Epping Road. Macquarie Park, November 2010. Image © Rob Tilley |
|||
 |
Approaching Delhi Road Interchange: Southbound approaching Delhi Road (SR29) at Macquarie Park, November 2010, Click here for a photo Dave Whiteman of this location from March 2007. Image © Rob Tilley |
|||
 |
Delhi Road: Hills Mwy (Metroad 2) at Delhi Rd (SR29) at Macquarie Park, November 2010. Image © Rob Tilley |
|||
 |
Delhi Road: Hills Mwy (Metroad 2) at Delhi Rd (SR29) at Macquarie Park, November 2010. Image © Rob Tilley |
|||
 |
Delhi Road: Hills Mwy (Metroad 2) at Delhi Rd (SR29) at Macquarie Park, November 2010. Image © Rob Tilley |
|||
 |
Reassurance Directional Sign: Distance sign near Delhi Rd (SR29) interchange at Macquarie Park, July 2013. Image © Paul Rands |
|||
 |
Delhi Road Interchange: Southbound as you pass through the Delhi Road interchange at Macquarie Park. March 2007. Image © David Whiteman |
|||
 |
Delhi Road Interchange: Southbound as you pass through the Delhi Road interchange at Macquarie Park. March 2007. Image © David Whiteman
|
|||
 |
Epping Road Interchange: Looking through the Epping Road interchange, approaching Lane Cove Tunnel at Lane Cove North, July 2013. Image © Paul Rands |
|||
 |
Mowbray Road and Lane Cove Tunnel Portal: Looking southeast as you approach the Lane Cove Tunnel near Mowbray Road at Lane Cove North, March 2007. Image © David Whiteman |
|||
 |
Lane Cove Tunnel Eastbound Portal: Entering the eastbound tunnel of the Lane Cove Tunnel. March 2007. For a full rundown of the tunnel, click here. Image © David Whiteman |
|||
 |
Inside Lane Cove Tunnel: Inbound tunnel of the Lane Cove Tunnel as it makes its way under Lane Cove North, March 2007. Image © David Whiteman |
|||
 |
End Metroad 2: The eastern end of the Lane Cove Tunnel at Artarmon marks the end of Metroad 2, as it meets with Metroad 1 (Gore Hill Fwy) and the interchange with Pacific Hwy (Metroad 1), March 2007. Image © David Whiteman |
|||
| Click here for the continuation of Metroad 2 between Kellyville and Windsor | ||||
1 Roads and Traffic Authority
Last updated: 17-Dec-2019 0:55
This site © Paul Rands. All rights reserved. Some portions © (copyright) by their respective and credited owners. Permission must be obtained before using any images from this site. For details, please email by clicking here.