|
|
|
|
|
| M2 A2 | Lane Cove Tunnel, Hills Motorway, Old Windsor Road & Windsor Road (M2 / A2) |
Statistics:
Route Numbering:

General Information:
M2 is a major route located in the Sydney area, linking the northwestern suburbs with Sydney's inner suburbs, and eventually via, several other routes to the central business district.
The standard of the route varies from multi-laned arterial road through to freeway standard (covered by the 21 km long Hills Mwy) 1. It passes through inner city suburbs, residential areas, light industrial areas and semi-rural areas.
The Hills Motorway segment of M2 was funded and built by the private sector which will operate, maintain and repair the motorway until 2042, when it will revert to the ownership of the NSW government. The Hills Motorway consists of a four-lane motorway plus a two-lane busway (between the east-bound and west-bound carriageways) from Beecroft Road to Old Windsor Road, breakdown lanes and cyclist lanes. 1
M2 features the following multiplexes:
History:
The Roads and Maritime Service's Heritage Register features a detailed history on the route, and can be found here.

| Lane Cove to Windsor | Windsor To Lane Cove | |||
| Preview: | Description: | Preview: | Description: | |
 |
Advance Directional Sign: AD sign on Hills Mwy (M2) at North Ryde approaching the Epping Rd exit, January 2017. Image © Spenser Tan |
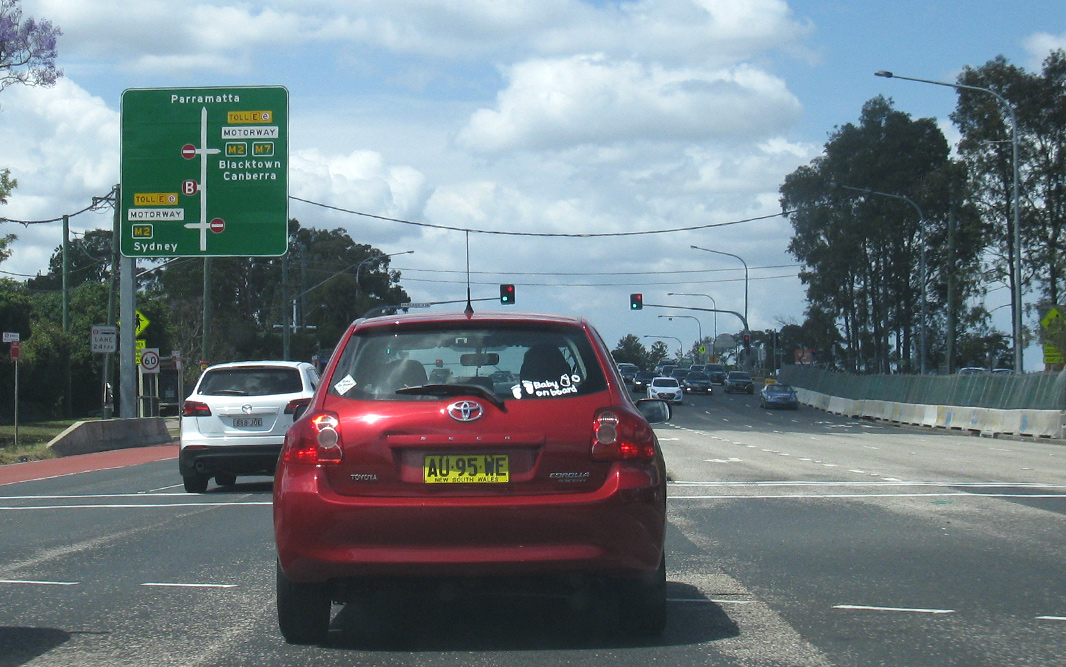 |
Advance Directional Sign: AD sign, southbound on Old Windsor Rd at Baulkham Hills approaching the interchange with Hills Mwy (M2), October 2017. Image © Paul Rands |
|
 |
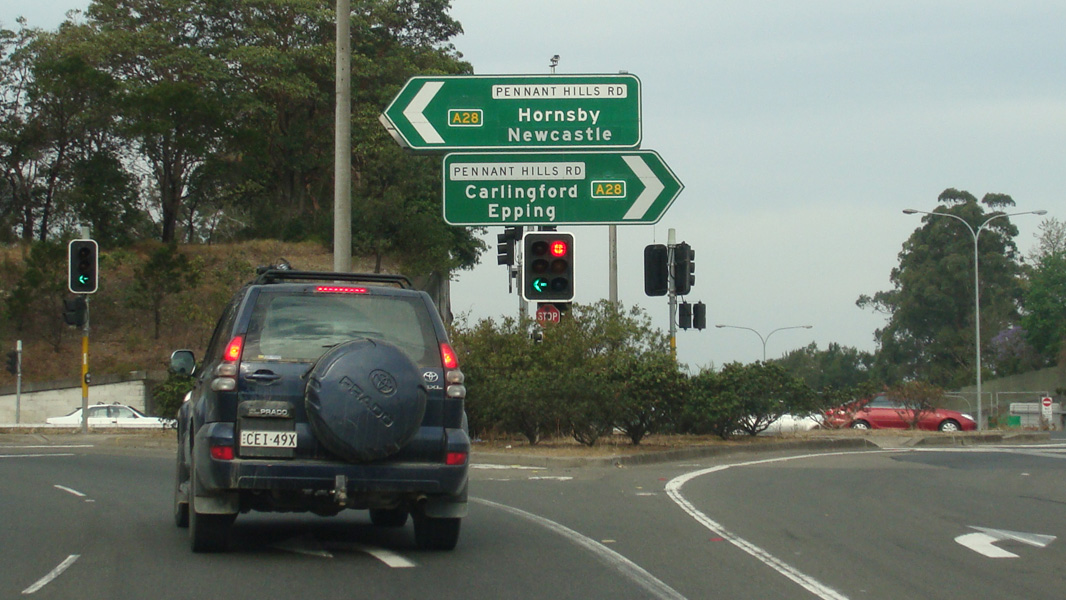
Reassurance Directional Sign: Distance sign at Carlingford after Pennant Hills Rd (A28) interchange, November 2013. Image © Paul Rands |
 |
Start M2: Sign as Westlink (M7) joins Hills Mwy (M2) at Baulkham Hills, August 2015. Image © Paul Rands |
|
 |
Tolling Sign: Tolling options sign at North Rocks, November 2013. Image © Paul Rands |
 |
Langdon Road: Hills Mwy (M2) as it passes under Langdon Rd at Baulkham Hills, November 2013. Image © Paul Rands |
|
 |
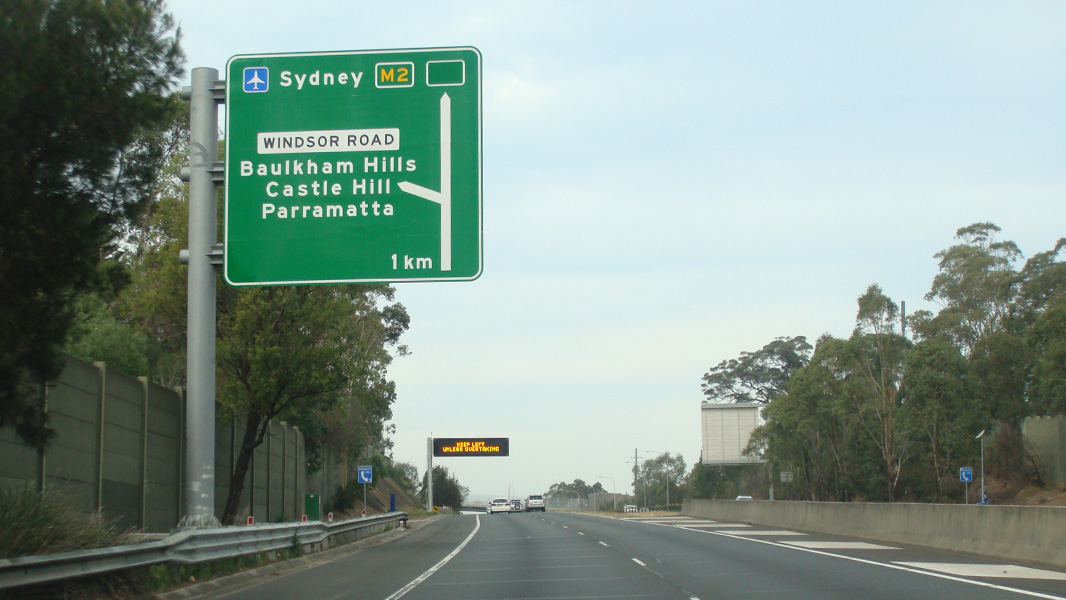
Advance Directional Sign: AD sign at North Rocks approaching Windsor Rd interchange, November 2013. Image © Paul Rands |
 |
Advance Directional Sign: AD sign at Baulkham Hills for Windsor Rd interchange, August 2015. Image © Paul Rands |
|
 |
Advance Directional Sign: AD sign at North Rocks approaching Windsor Rd interchange, November 2013. Image © Paul Rands |
 |
Gooden Reserve: Hills Mwy (M2) as it passes under the pedestrian walkway for Gooden Reserve at Baulkham Hills, November 2013. Image © Paul Rands |
|
 |
Windsor Road Interchange: ID sign at Windsor Rd interchange at Northmead, November 2013. Image © Paul Rands |
 |
Advance Directional Sign: AD sign at Baulkham Hills for Windsor Rd interchange, November 2013. Image © Paul Rands |
|
 |
Toll Charges Sign: Toll charges sign with remnant Metroad 2 shield on the ramp from Windsor Rd at Northmead, October 2017. Image © Paul Rands |
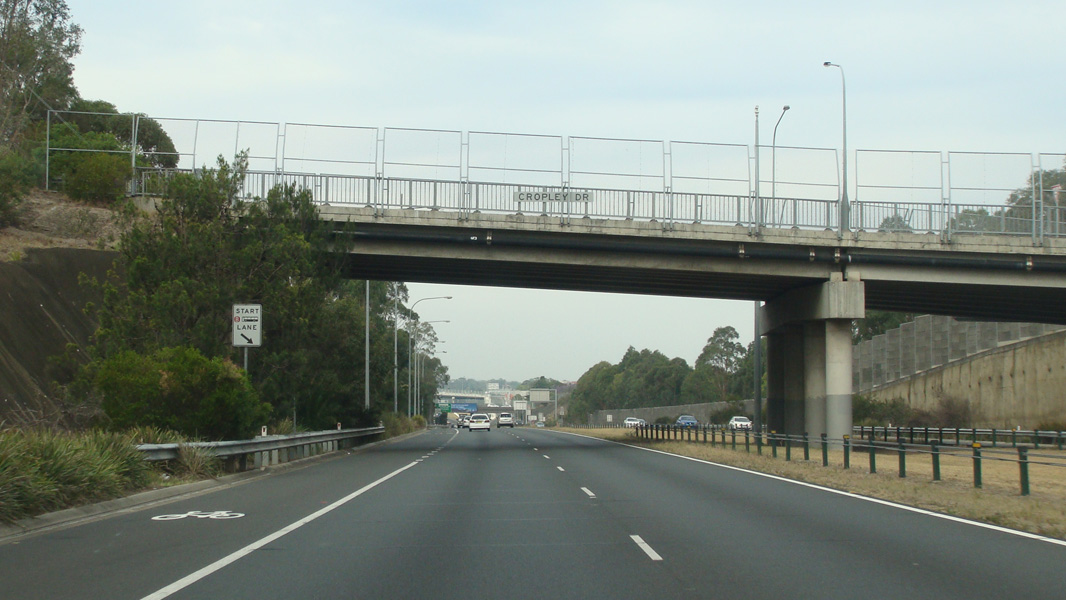 |
Cropley Drive: Hills Mwy (M2) at Baulkham Hills as it passes under Cropley Dr, November 2013. Image © Paul Rands |
|
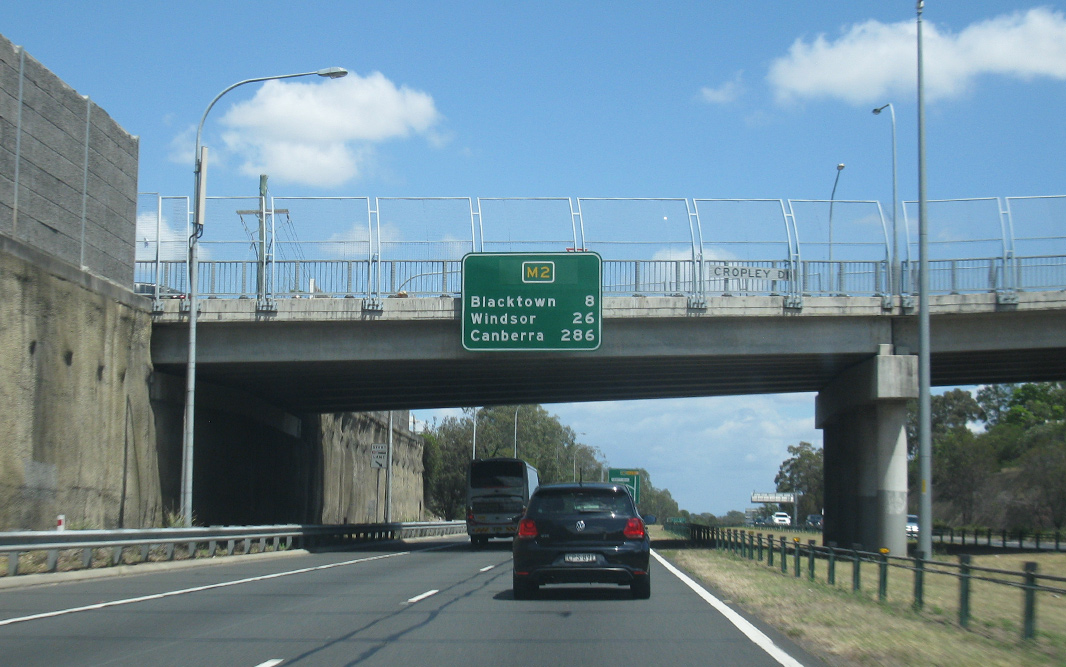 |
Reassurance Directional Sign: Distance sign on the Cropley Dr overpass, Northmead, October 2017. Image © Paul Rands |
 |
Windsor Road: Hills Mwy (M2) at the Windsor Rd interchange, with Watkins Rd in the foreground, November 2013. Image © Paul Rands |
|
 |
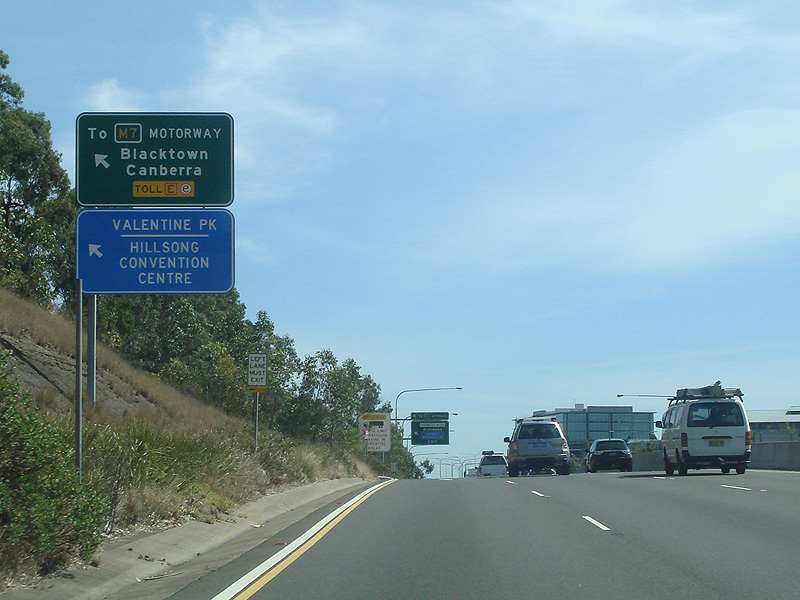
Advance Directional Sign: AD sign at Winston Hills approaching Old Windsor Rd (A40), Westlink (M7) and Abbott Rd interchange, October 2017. Image © Paul Rands |
 |
Windsor Road: Hills Mwy (M2) at the Windsor Rd interchange, Baulkham Hills, November 2013. Image © Paul Rands |
|
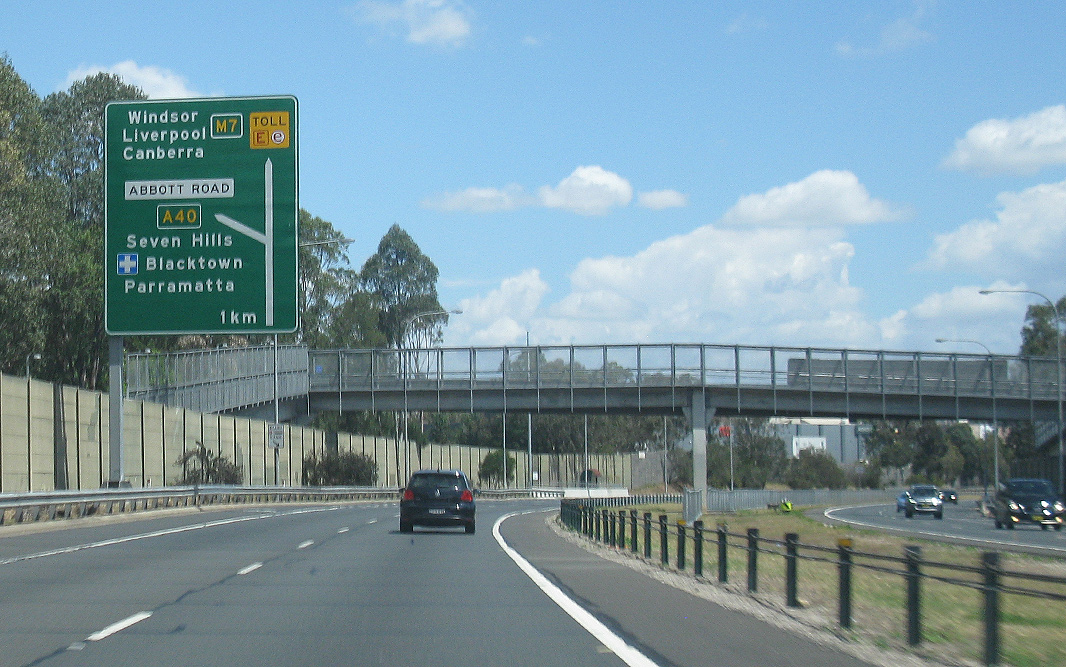 |
Advance Directional Sign: AD sign at Winston Hills approaching Old Windsor Rd (A40), Westlink (M7) and Abbott Rd interchange, October 2017. Image © Paul Rands |
 |
Tolling Sign: Tolling options sign at Baulkham Hills, November 2013. Image © Paul Rands |
|
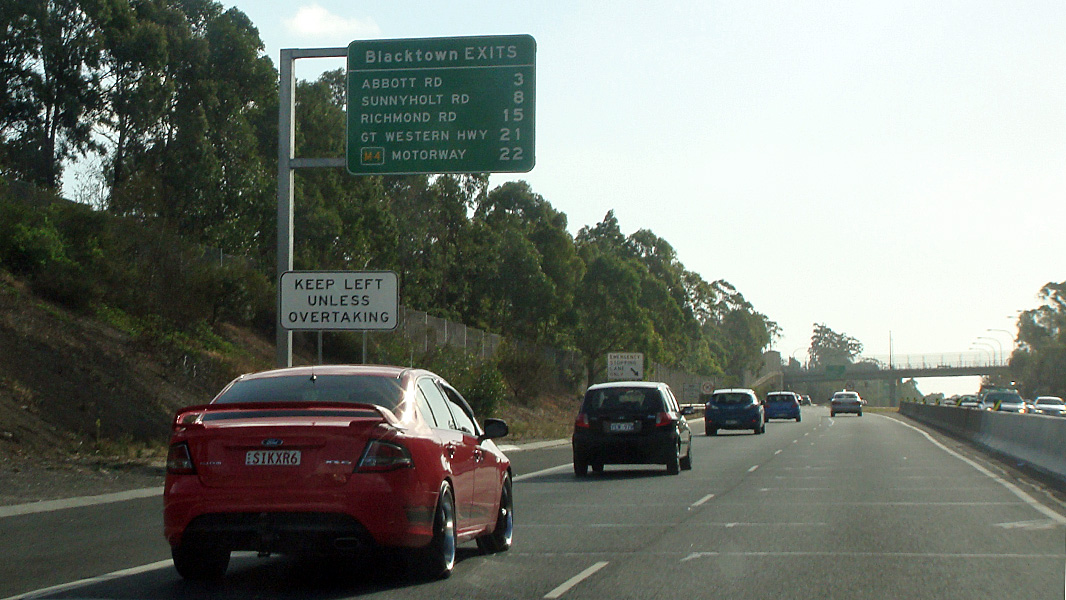 |
Distance Sign: RD sign showing next exits, Winston Hills, November 2013. Image © Paul Rands |
 |
Distance Sign: RD sign with remnant Metroad 6 shield at North Rocks, November 2013. Image © Paul Rands |
|
 |
Tolling Sign: Tolling options sign at Winston Hills for Westlink (M7), October 2017. Image © Paul Rands |
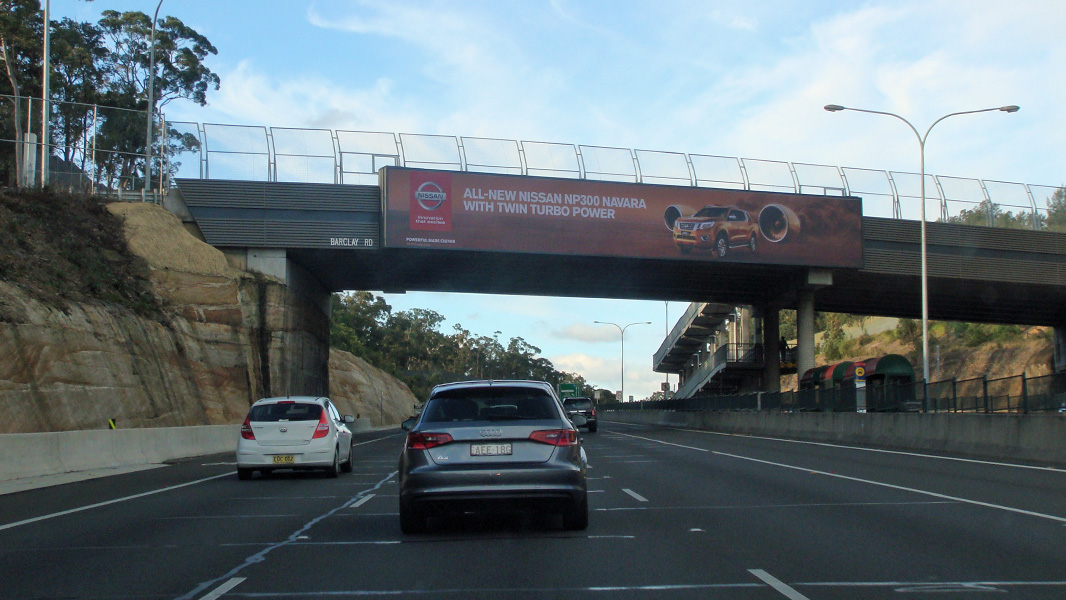 |
Barclay Road: Hills Mwy (M2) as it passes under Barclay Rd at North Rocks, August 2015. Image © Paul Rands |
|
 |
Abbott Road Interchange: Hills Mwy (M2) at the Abbott Rd interchange, Winston Hills, November 2013. Image © Paul Rands |
 |
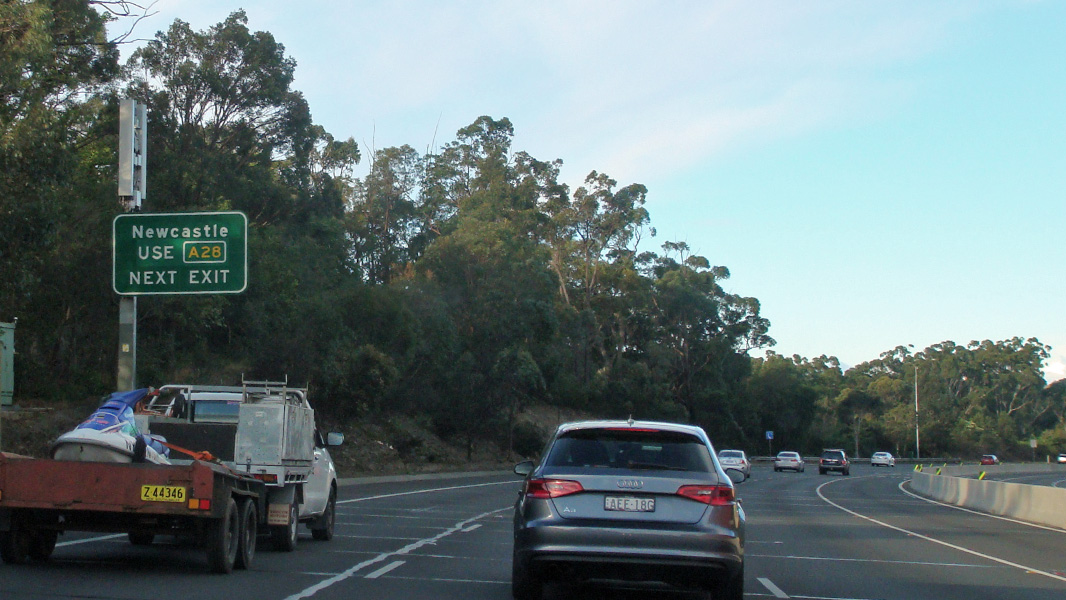
Advance Directional Sign: AD sign at North Rocks approaching Pennant Hills Rd (A28) interchange, November 2013. Image © Paul Rands |
|
 |
Distance Sign: Reassurance directional sign on Old Windsor Rd (A2) at Seven Hills, September 2013. Image © Paul Rands |
 |
Supplemental Advance Directional Sign: Supplemental AD sign at North Rocks approaching Pennant Hills Rd (A28) interchange, August 2015. Image © Paul Rands |
|
 |
Advance Directional Sign: AD sign approaching Seven Hills Rd at Seven Hills, September 2013. Image © Paul Rands |
 |
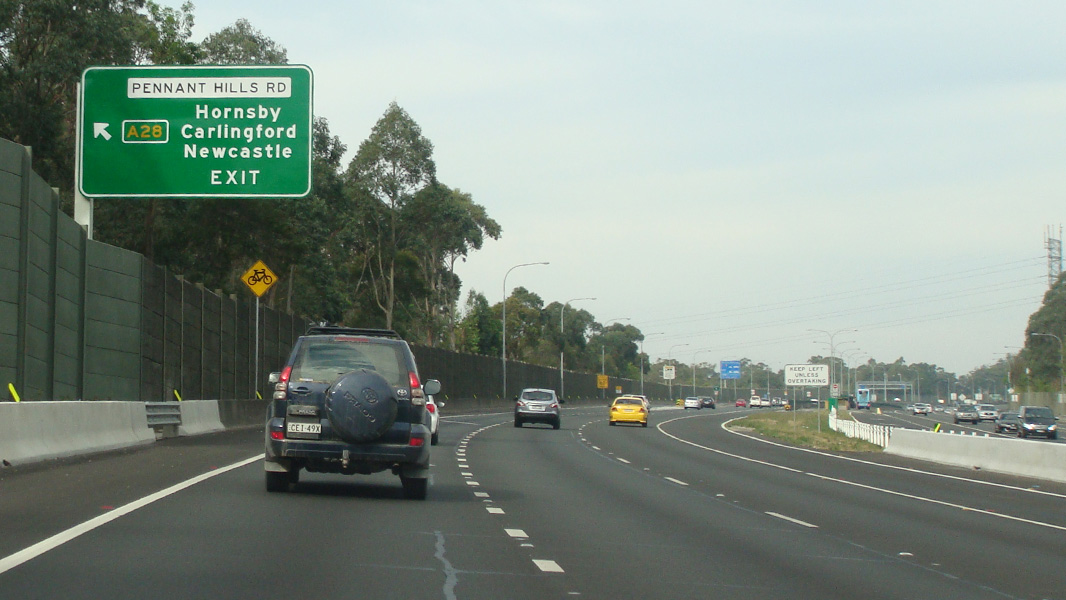
Advance Directional Sign: AD sign at West Pennant Hills approaching Pennant Hills Rd (A28) interchange, November 2013. Image © Paul Rands |
|
 |
Intersection Directional Sign: ID sign at the corner of Old Windsor Rd (A2) and Seven Hills Rd in Seven Hills, September 2013. Image © Paul Rands |
 |
Pennant Hills Road Interchange: Hills Mwy (M2) at the Pennant Hills Rd (A28) interchange at West Pennant Hills, November 2013. Image © Paul Rands |
|
 |
Intersection Directional Sign: ID sign at the corner of Old Windsor Rd (A2) and Seven Hills Rd in Seven Hills, September 2013. Image © Paul Rands |
 |
Toll Charges Sign: Toll charge sign approaching the toll gantry on the off ramp to Pennant Hills Rd (A28) at West Pennant Hills, November 2013. Image © Paul Rands |
|
 |
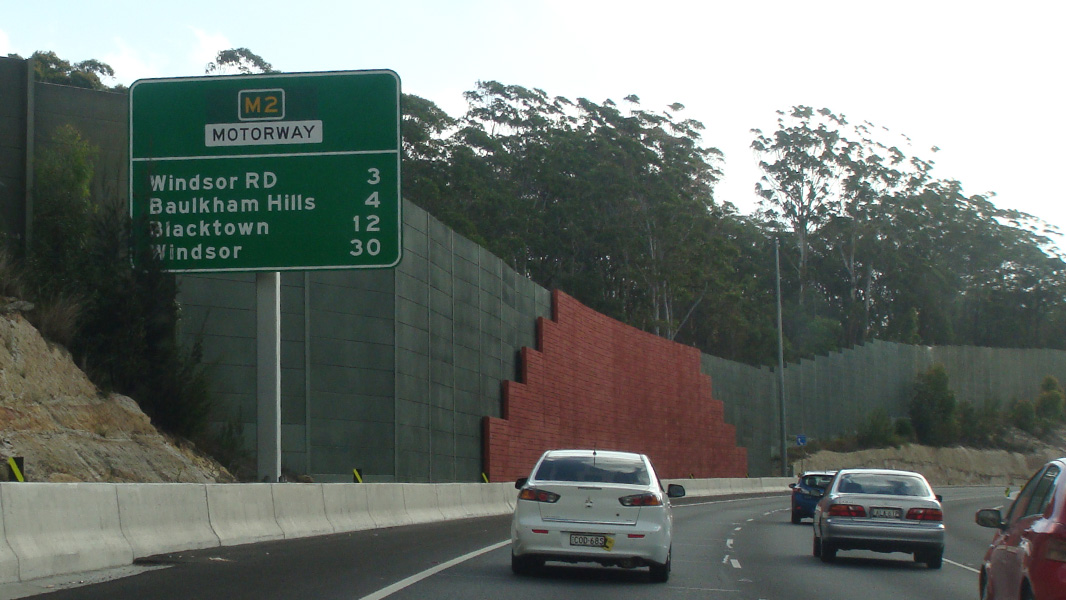
Reassurance Directional Sign: Distance sign at Bella Vista, September 2013. Image © Paul Rands |
 |
Advance Directional Sign: AD sign on the Pennant Hills Rd (A28) off ramp at West Pennant Hills, November 2013. Image © Paul Rands |
|
 |
Westlink Interchange: Old Windsor Road (A2) as it passes under Westlink (M7) at Bella Vista, September 2013. Image © Paul Rands |
 |
Intersection Directional Sign: ID sign facing the off ramp to Pennant Hills Rd (A28) at West Pennant Hills, November 2013. Image © Paul Rands |
|
 |
Advance Directional Sign: AD sign approaching Norbrik Dr, Bella Vista, September 2013. Image © Paul Rands |
 |
Pennant Hills Road: Hills Mwy (M2) at the Pennant Hills Rd (Cumberland Hwy) (A28) interchange at West Pennant Hills, August 2015. Image © Paul Rands |
|
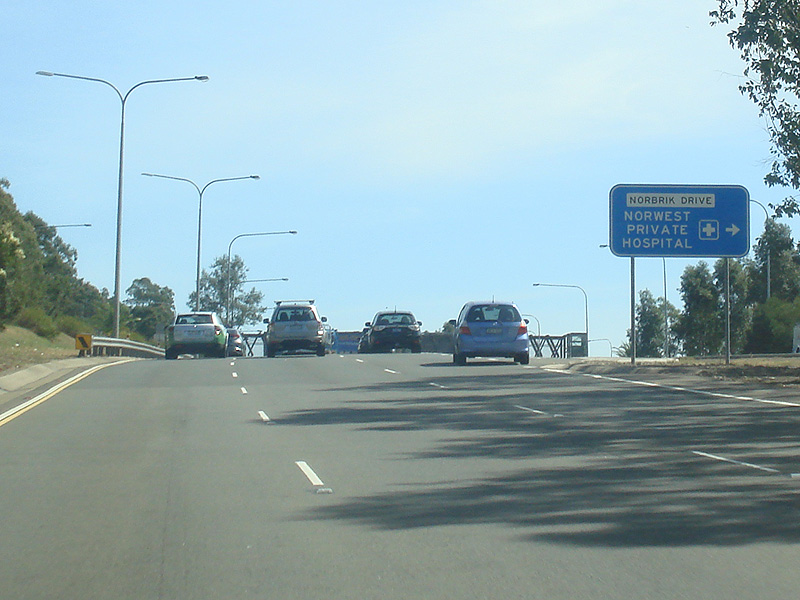 |
Advance Directional Sign: AD sign approaching Norbrik Dr, Bella Vista, September 2013. Image © Paul Rands |
 |
Murray Farm Road: Hills Mwy (M2) as it passes under Murray Farm Rd at Beecroft, August 2015. Image © Paul Rands |
|
 |
Norbrik Drive: Old Windsor Rd (A2) at the Norbrik Dr junction, Bella Vista, September 2013. Image © Paul Rands |
 |
Reassurance Directional Sign: Distance sign at Beecroft, August 2015. Image © Paul Rands |
|
 |
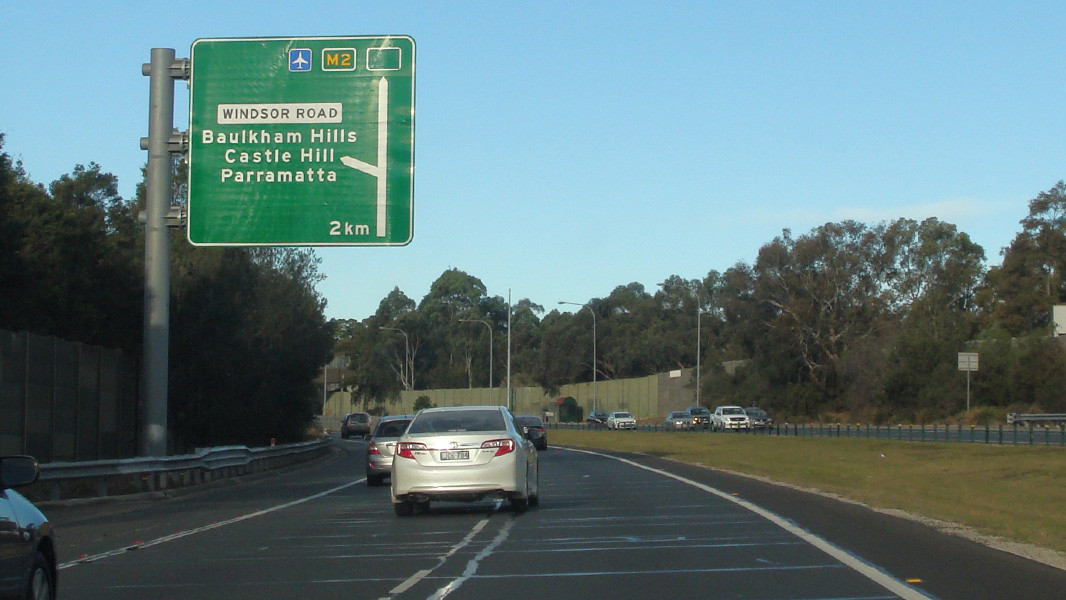
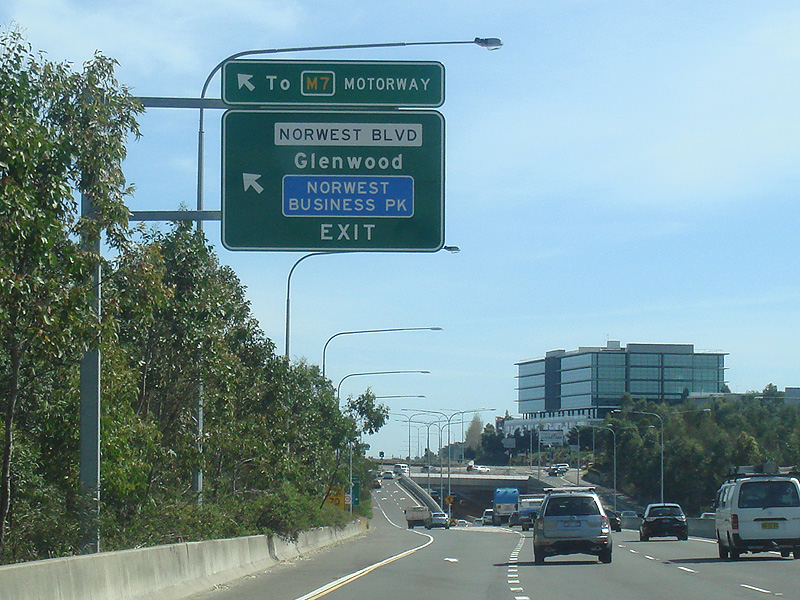
Advance Directional Sign: AD sign at Bella Vista approaching Norwest Blvd, September 2013. Image © Paul Rands |
 |
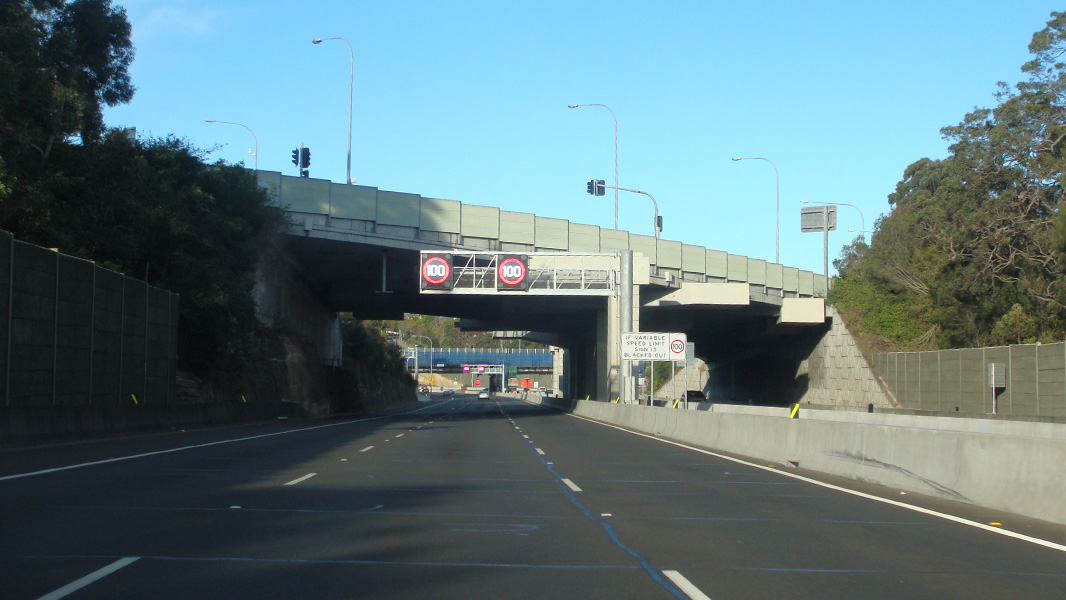
Start Variable Speed Limit: Sign indicating the beginning of variable speed zone, Epping, near Beecroft Rd, July 2013. Image © Paul Rands |
|
 |
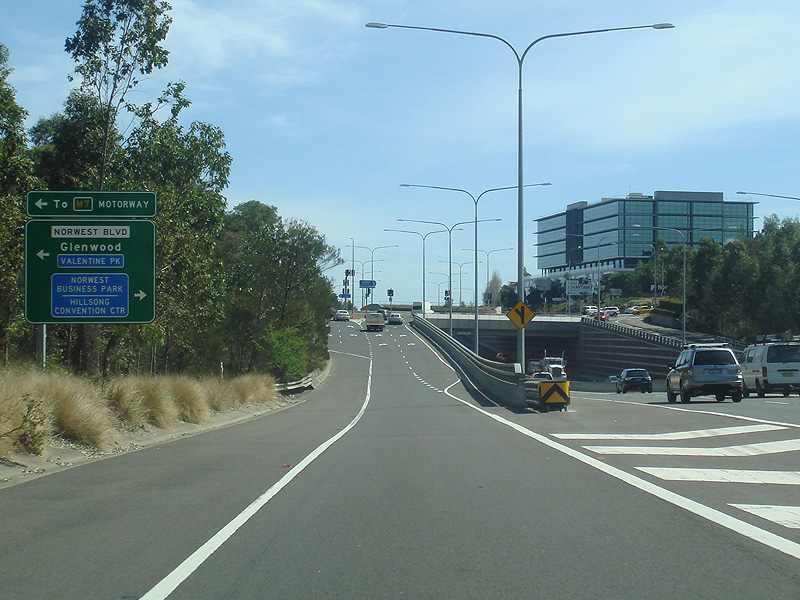
Supplemental Advance Directional Sign: Supplemental AD sign approaching Norwest Blvd, Bella Vista, September 2013. Image © Paul Rands |
 |
Beecroft Road: Hills Mwy (M2) as it passes under Beecroft Rd at Beecroft, August 2015. Image © Paul Rands |
|
 |
Advance Directional Sign: AD sign approaching Norwest Blvd, Bella Vista, September 2013. Image © Paul Rands |
 |
Lane Changing Prohibited: Sign prohibiting lane changing in the Epping tunnel, July 2013. Image © Paul Rands |
|
 |
Norwest Boulevard: Norwest Blvd interchange, Bella Vista, September 2013. Image © Paul Rands |
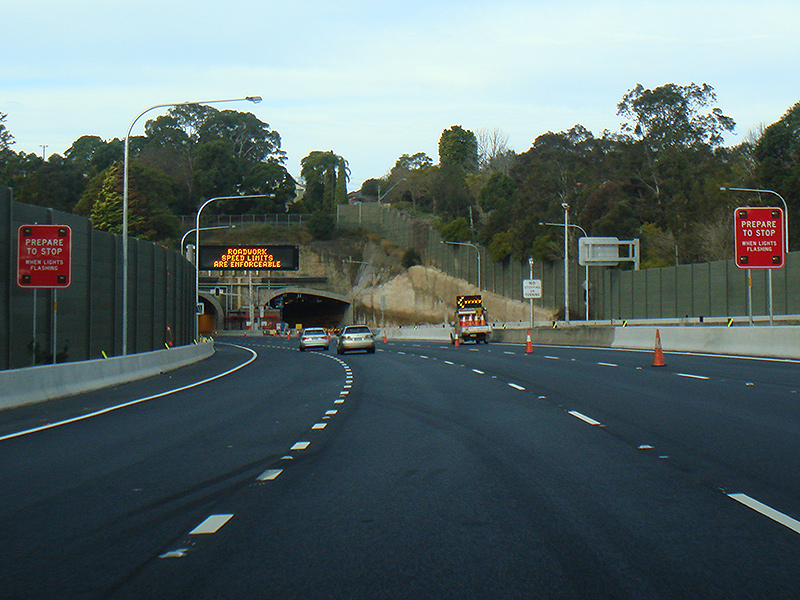 |
Prepare To Stop: Prepare to stop signs with flashing warning lights, approaching Epping tunnel, July 2013. Image © Paul Rands |
|
 |
Intersection Directional Sign: ID sign on the off ramp to Norwest Blvd, Bella Vista, September 2013. Image © Paul Rands |
 |
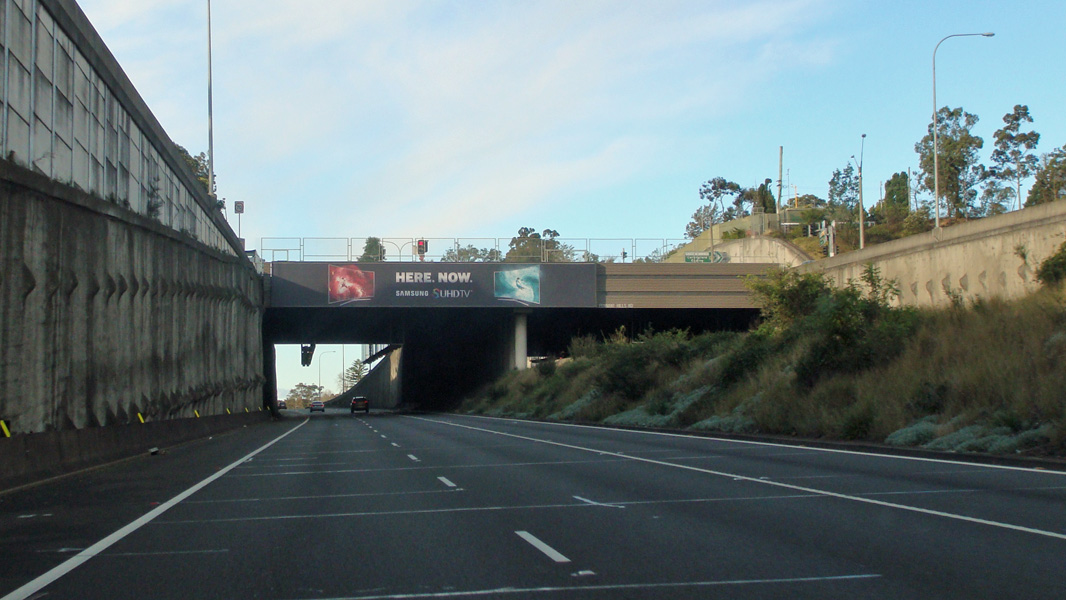
Tunnel Entrance: Hills Mwy (M2) as it enters the Epping tunnel, July 2013. Image © Paul Rands |
|
 |
Tunnel Entrance: Hills Mwy (M2) as it enters the Epping tunnel, August 2015. Image © Paul Rands |
|||
 |
Epping Tunnel: Inside the Epping tunnel, showing variable message signs and lane indicators, July 2013. Image © Paul Rands |
|||
 |
Advance Directional Sign: AD sign at Macquarie Park approaching Christie Rd, August 2015. Image © Paul Rands |
|||
 |
Reassurance Directional Sign: Distance sign at Macquarie Park, August 2015. Image © Paul Rands |
|||
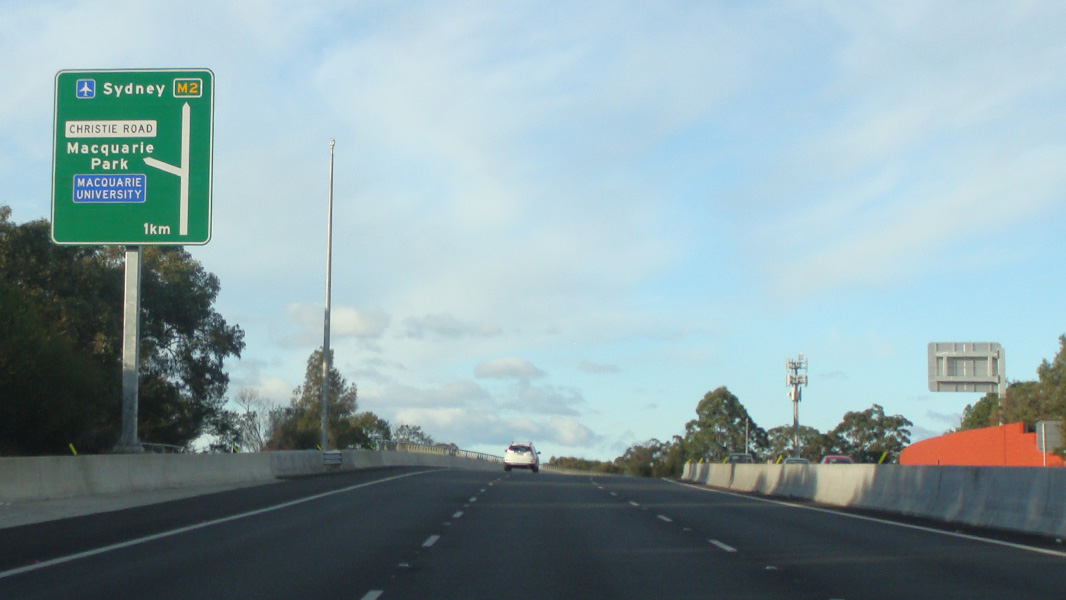 |
Advance Directional Sign: AD sign at Macquarie Park approaching Christie Rd, August 2015. Image © Paul Rands |
|||
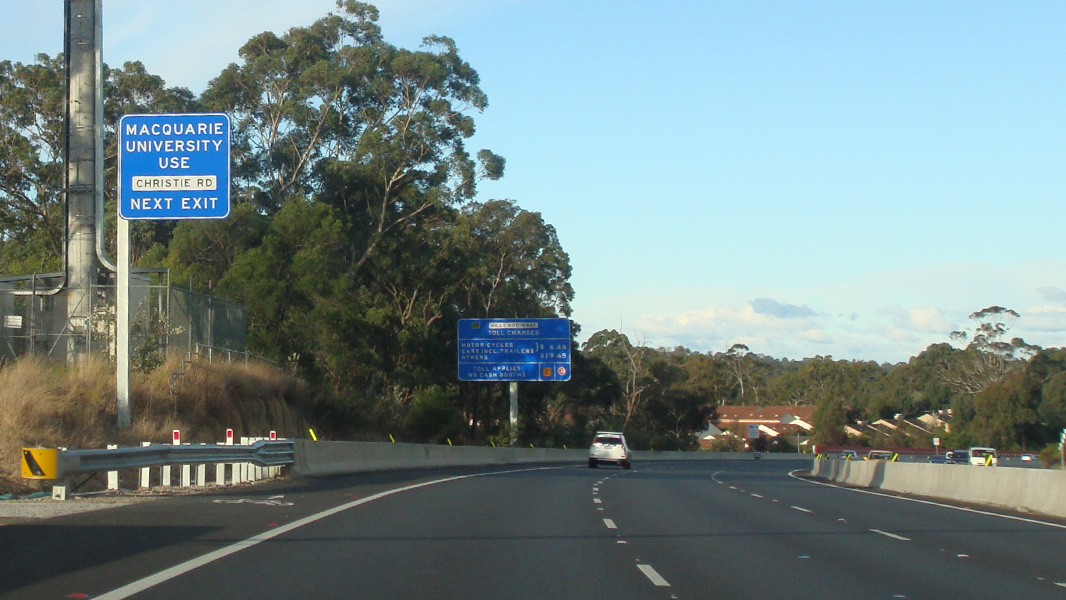 |
Supplemental Advance Directional Sign: Supplemental AD sign approaching Christie Rd at Macquarie Park, August 2015. Image © Paul Rands |
|||
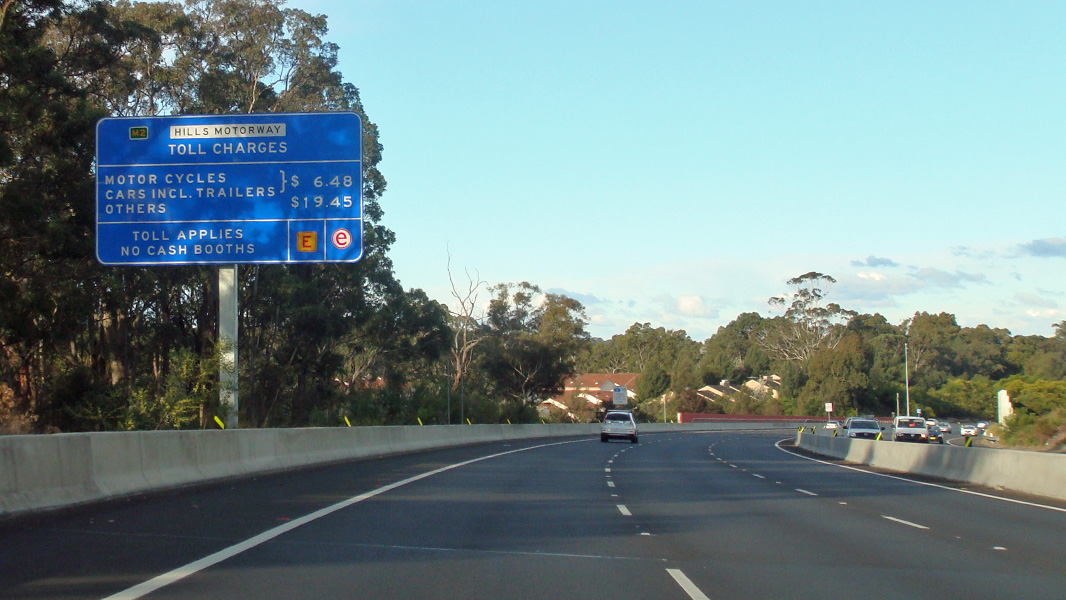 |
Toll Charges Sign: Toll charges signage at Macquarie Park, before the Christie Rd interchange, August 2015. Image © Paul Rands |
|||
 |
Christie Road: ID sign for Christie Road interchange at Macquarie Park, August 2015. Image © Paul Rands |
|||
 |
Advance Directional Sign: AD sign at Macquarie Park approaching Lane Cove Rd (A3), August 2015. Image © Paul Rands |
|||
 |
Christie Road: Hills Mwy (M2) as it passes through the Christie Rd interchange at Macquarie Park, August 2015. Image © Paul Rands |
|||
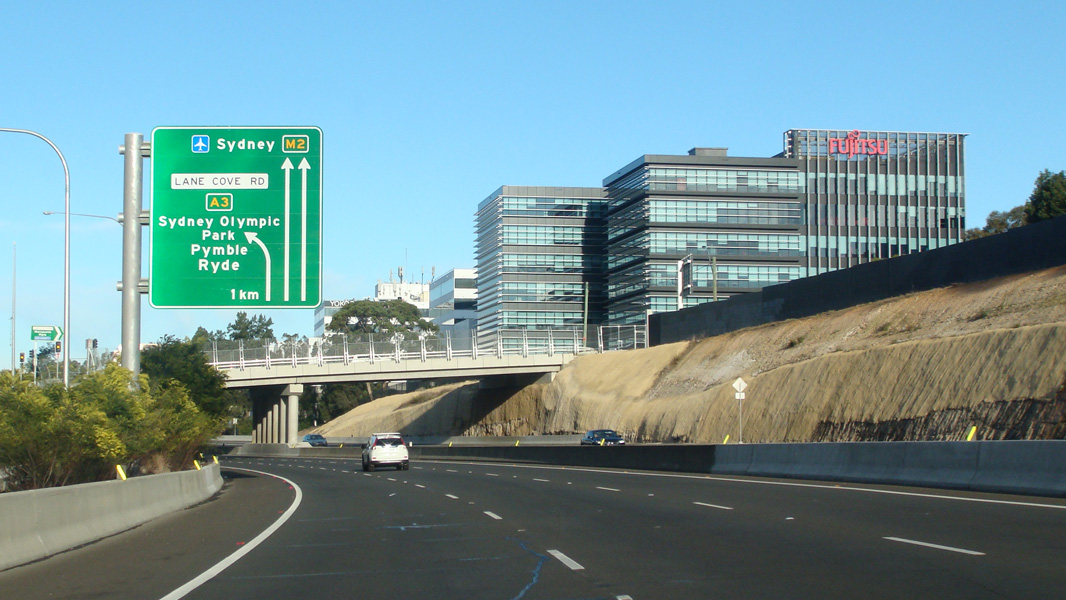 |
Advance Directional Sign: AD sign at Macquarie Park approaching Lane Cove Rd (A3), August 2015. Image © Paul Rands |
|||
 |
Macquarie Park: Hills Mwy (M2) at Macquarie Park, August 2015. Image © Paul Rands |
|||
 |
Lane Cove Road Interchange: Hills Mwy (M2) at the Lane Cove Rd (A3) interchange in Macquarie Park, August 2015. Image © Paul Rands |
|||
 |
Advance Directional Sign: AD sign at Macquarie Park on the off ramp to Lane Cove Rd (A3), August 2015. Image © Paul Rands |
|||
 |
Lane Cove Road: ID signs facing the off ramp to Lane Cove Rd (A3) at Macquarie Park, August 2015. Image © Paul Rands |
|||
 |
Tolling & Dangerous Goods Signage: Electronic tolling signage and sign prohibiting dangerous goods inside the Lane Cove Tunnel, July 2013. Image © Paul Rands |
|||
 |
Advance Directional Sign: AD sign approaching Delhi Rd (A38) at Macquarie Park, July 2013. Image © Paul Rands |
|||
 |
Intersection Directional Sign: ID sign assembly at the Delhi Rd (A38) interchange in Macquarie Park, July 2013. Image © Paul Rands |
|||
 |
Toll Charges Sign: Toll charges sign at North Ryde approaching Lane Cove Tunnel (M2), January 2017. Image © Spenser Tan |
|||
 |
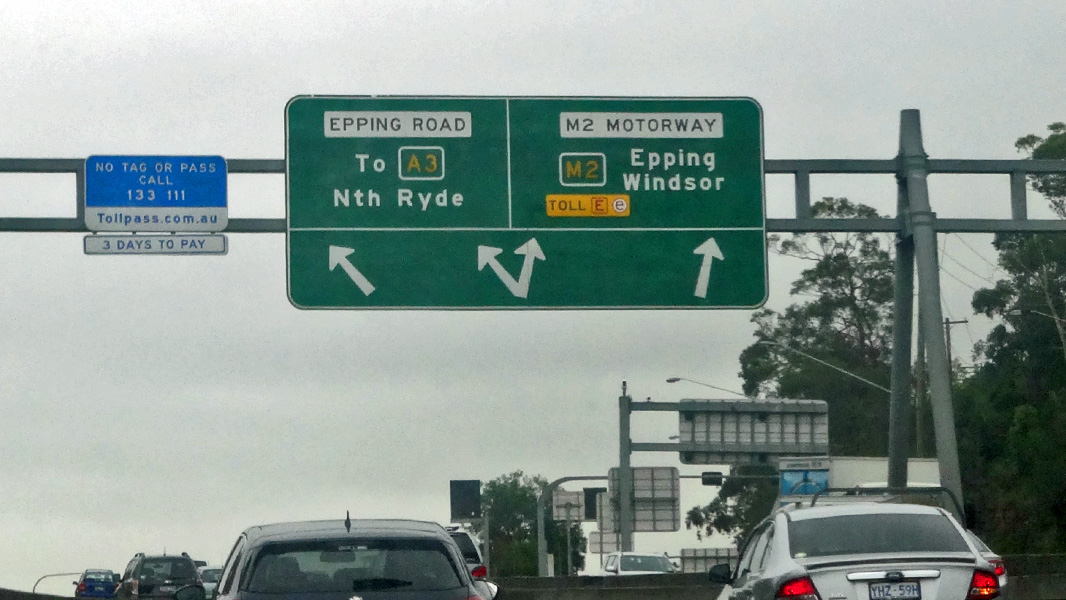
Advance Directional Sign: AD sign at North Ryde approaching Epping Rd, January 2017. Image © Spenser Tan |
|||
 |
Lane Allocation Sign: Hills Mwy (M2) at the exit to Epping Rd and entrance to Lane Cove Tunnel (M2) at North Ryde, January 2017. Image © Spenser Tan |
|||
1 Roads and Maritime Services
Last updated: 01-Jul-2020 11:39
This site © Paul Rands. All rights reserved. Some portions © (copyright) by their respective and credited owners. Permission must be obtained before using any images from this site. For details, please email by clicking here.