|
|
|
|
|
| M1 A1 | Pacific Motorway, Pacific Highway, New England Highway, John Renshaw Drive, Gore Hill Freeway, Warringah Freeway, Sydney Harbour Tunnel, Cahill Expressway, Eastern Distributor, Southern Cross Drive, General Holmes Drive, The Grand Parade, President Avenue, Princes Highway & Princes Motorway (M1 / A1) - South Grafton To Urunga |
Statistics:
Route Numbering:

General Information:
The Pacific Highway section of A1 runs between Brunswick Heads and Hexham, and also between Wahroonga and the Gore Hill Freeway at Artarmon. The northern section between Brunswick Heads and Hexham is a mix of dual carriageway, rural highway and urban arterial roadway. The southern section between Wahroonga and Artarmon is urban arterial standard and passes through one of Sydney's more affluent areas.
History:
| Urunga to South Grafton | South Grafton to Urunga | |||
| Preview: | Description: | Preview: | Description: | |
 |
Supplemental Advance Directional Sign: Supplemental AD sign at Raliegh approachign Waterfall Way (B78 / TD18), February 2015. Image © Rob Tilley |
 |
Six Mile Lane: Corner of Pacific Hwy (A1) and Six Mile Ln at Glenugie, February 2015. Image © Rob Tilley |
|
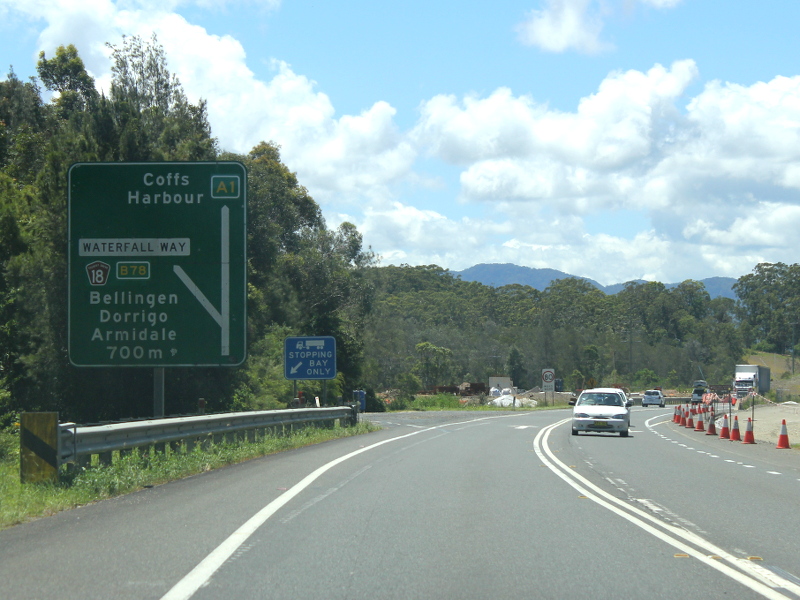 |
Advance Directional Sign: AD sign at Raliegh approachign Waterfall Way (B78 / TD18), February 2015. Image © Rob Tilley |
 |
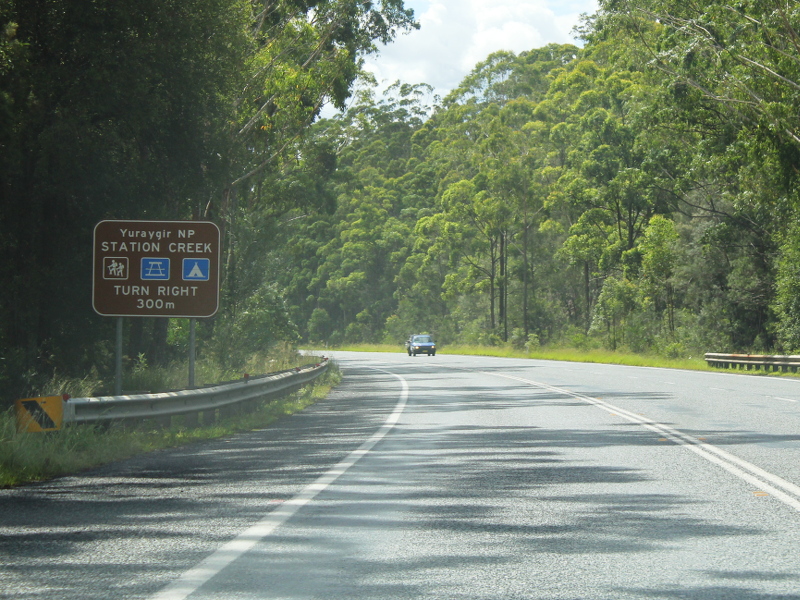
Rest Area Distance Sign: Rest area RD sign near Dinjerra Rd at Glenugie, February 2015. Image © Rob Tilley |
|
 |
Waterfall Way: Pacific Hwy (A1) at the Waterfall Way (B78 / TD18) at Raleigh, February 2015. Image © Rob Tilley |
 |
Advance Directional Sign: AD sign at Glenugie approaching Eight Mile Ln, February 2015. Image © Rob Tilley |
|
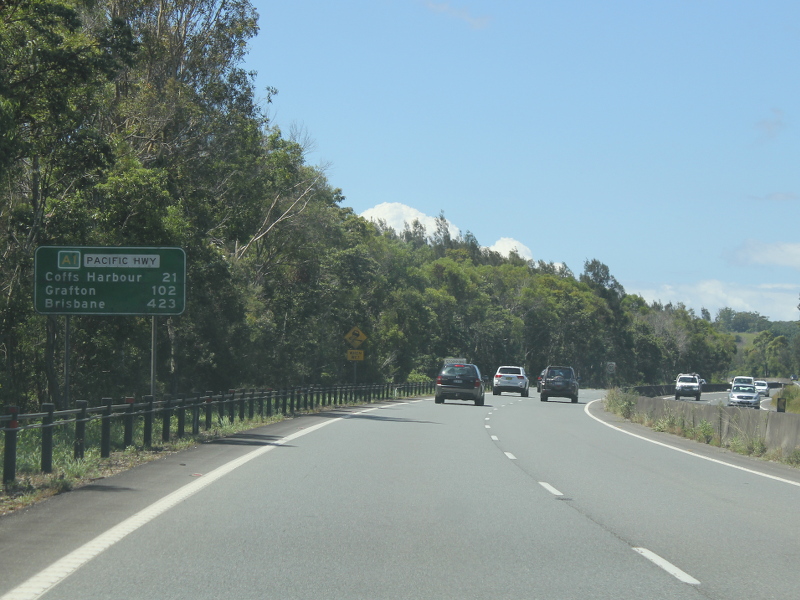 |
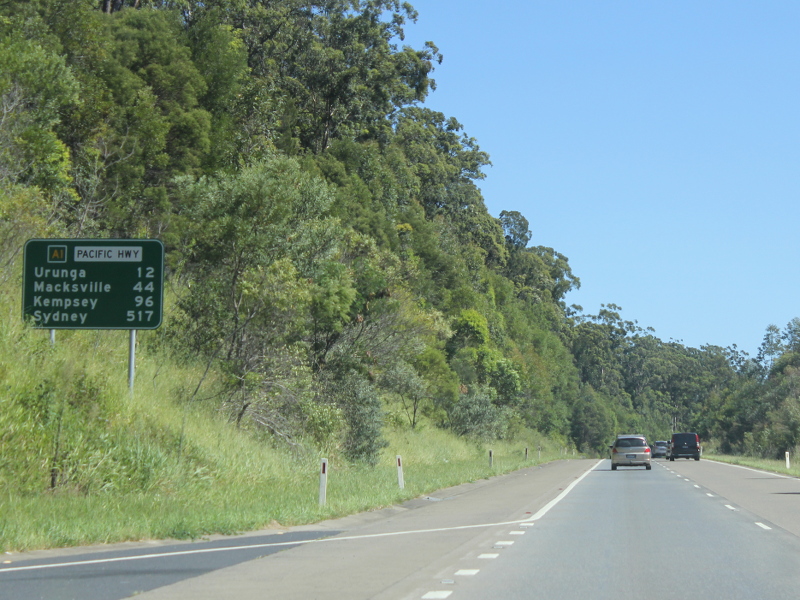
Distance Sign: Reassurance directional sign at Raleigh, February 2015. Image © Rob Tilley |
 |
Six Mile Lane: Corner of Pacific Hwy (A1) and Eight Mile Ln at Glenugie, February 2015. Image © Rob Tilley |
|
 |
Advance Directional Sign: AD sign at Raleigh approaching Keevers Dr (TD18) at Raleigh, February 2015. Image © Rob Tilley |
 |
Advance Directional Sign: AD sign at Corindi Beach approaching Coral St, February 2015. Image © Rob Tilley |
|
 |
Keevers Drive: Pacific Hwy (A1) at the interchange with Keevers Dr (TD18) at Raleigh, February 2015. Image © Rob Tilley |
 |
Coral Street: Corner of Pacific Hwy (A1) and Coral St at Corindi Beach, February 2015. Image © Rob Tilley |
|
 |
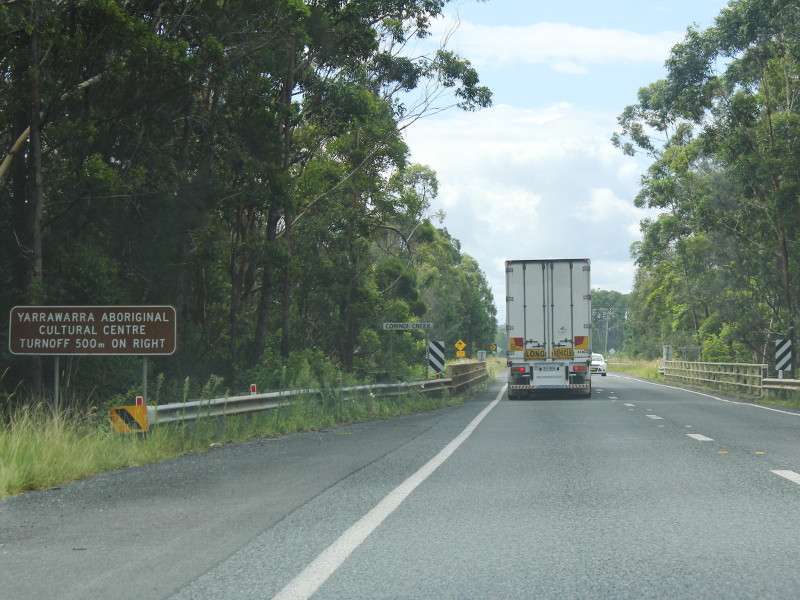
Distance Sign: RD sign and land bridge in the distance at Valery, February 2015. Image © Rob Tilley |
 |
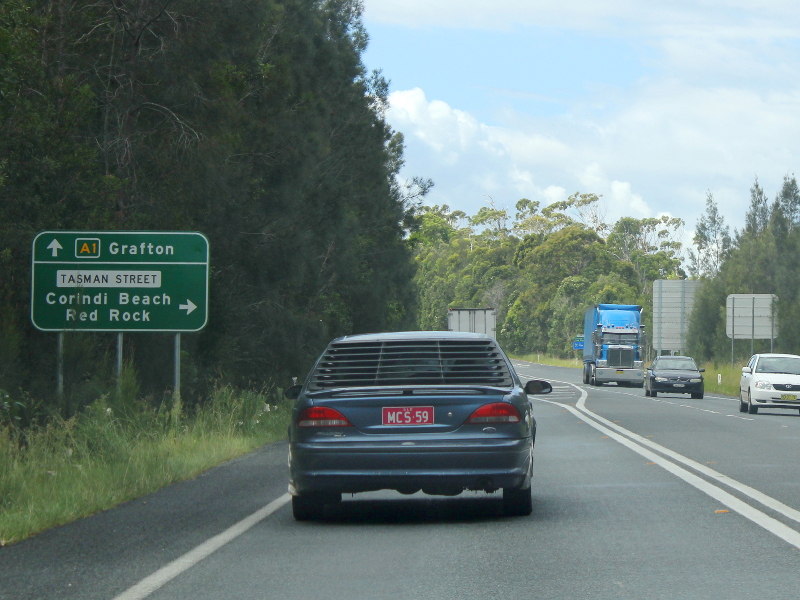
Tasman Street: Corner of Pacific Hwy (A1) and Tasman St at Corindi Beach, February 2015. Image © Rob Tilley |
|
 |
Advance Directional Sign: AD sign at Bonville approaching Archville Station Rd interchange, February 2015. Image © Rob Tilley |
 |
Bypassed Town Sign: Bypassed town AD sign at Corindi Beach for Solitary Islands Way, February 2015. Image © Rob Tilley |
|
 |
Archville Station Road: Pacific Hwy (A1) at the interchange with Archville Stn Rd at Bonville, February 2015. Image © Rob Tilley |
 |
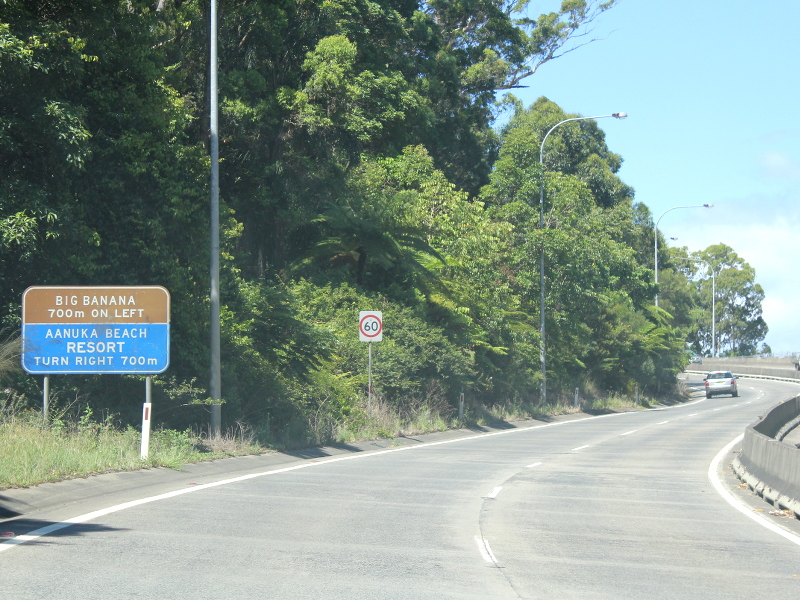
Services Sign: Services sign at Corindi Beach approaching Solitary Islands Way, February 2015. Image © Rob Tilley |
|
 |
Distance Sign: RD sign at Bonville, February 2015. Image © Rob Tilley |
 |
Supplemental Advance Directional Sign: Supplemental AD sign at Arrawarra approaching Solitary Islands Way, February 2015. Image © Rob Tilley |
|
 |
Advance Directional Sign: AD sign at Bonville approaching Lyons Rd (TD18), February 2015. Image © Rob Tilley |
 |
Advance Directional Sign: AD sign at Arrawarra approaching Solitary Islands Way, February 2015. Image © Rob Tilley |
|
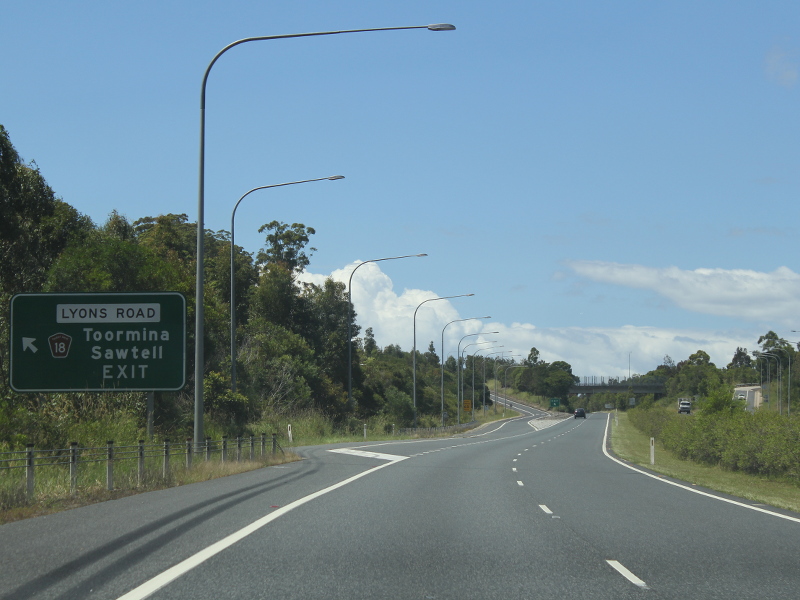 |
Lyons Road: Pacific Hwy (A1) at the Lyons Rd (TD18) interchange at Bonville, February 2015. Image © Rob Tilley |
 |
Advance Directional Sign: AD sign at Arrawarra approaching Sherwood Creek Rd, February 2015. Image © Rob Tilley |
|
 |
Reassurance Directional Sign: Distance sign at Bonville, February 2015. Image © Rob Tilley |
 |
Intersection Directional Sign: ID sign assembly at the Sherwood Ck Rd junction at Arrawarra, February 2015. Image © Rob Tilley |
|
 |
Advance Directional Sign: AD sign at Boambee approaching South Boambee Rd, February 2015. Image © Rob Tilley |
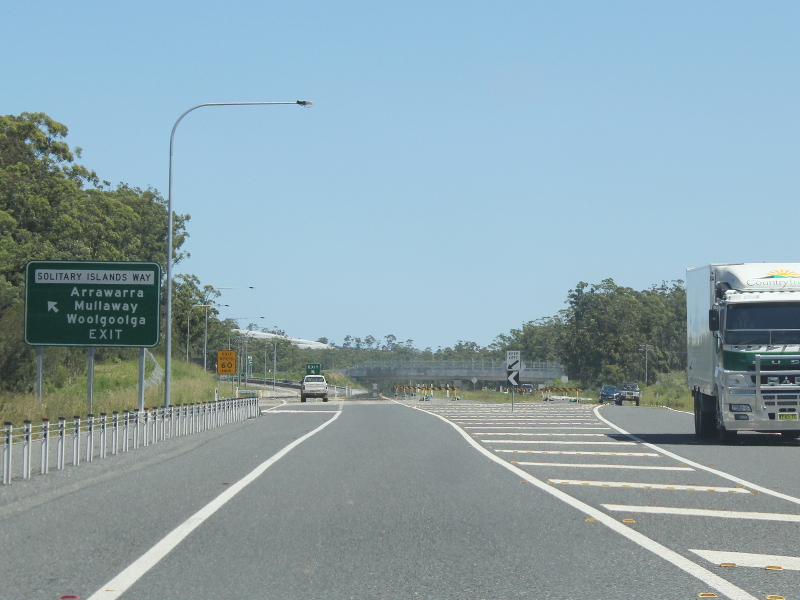 |
Solitary Islands way: Pacific Hwy (A1) at the Solitary Islands Way interchange at Arrawarra, February 2015. Image © Rob Tilley |
|
 |
South Boambee Road: Corner of Pacific Hwy (A1) and South Boambee Rd at Boambee, February 2015. Image © Rob Tilley |
 |
Advance Directional Sign: AD sign on the off ramp to Solitary Islands Way at Arrawarra, February 2015. Image © Rob Tilley |
|
 |
Advance Directional Sign: AD sign approaching Lindsays Rd and Sawtell Rd at Boambee, February 2015. Image © Rob Tilley |
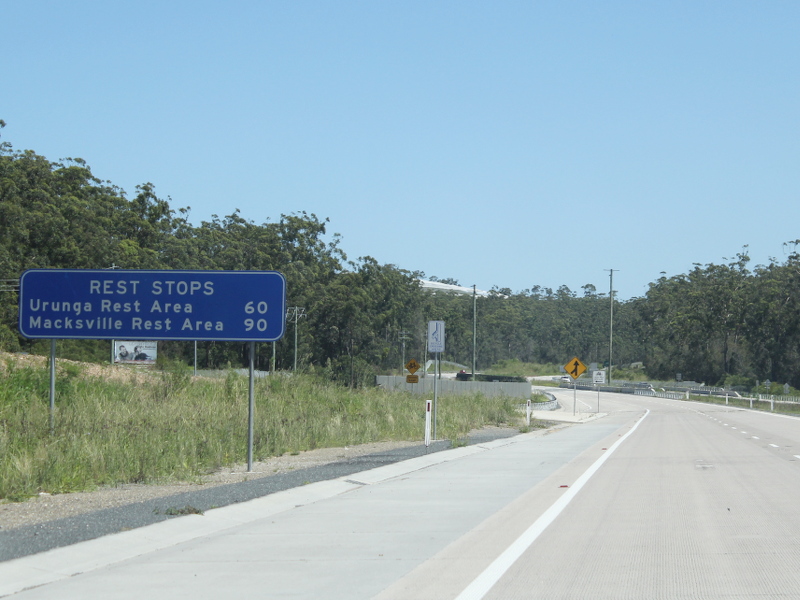 |
Rest Area Distance Sign: RD sign for rest areas, Woolgoolga, February 2015. Image © Rob Tilley |
|
 |
Lindsays Road & Sawtell Road: Pacific Hwy (A1) at the interchange with Lindsays Rd and Sawtell Rd at Boambee, February 2015. Image © Rob Tilley |
 |
Distance Sign: RD sign, Woolgoolga, February 2015. Image © Rob Tilley |
|
 |
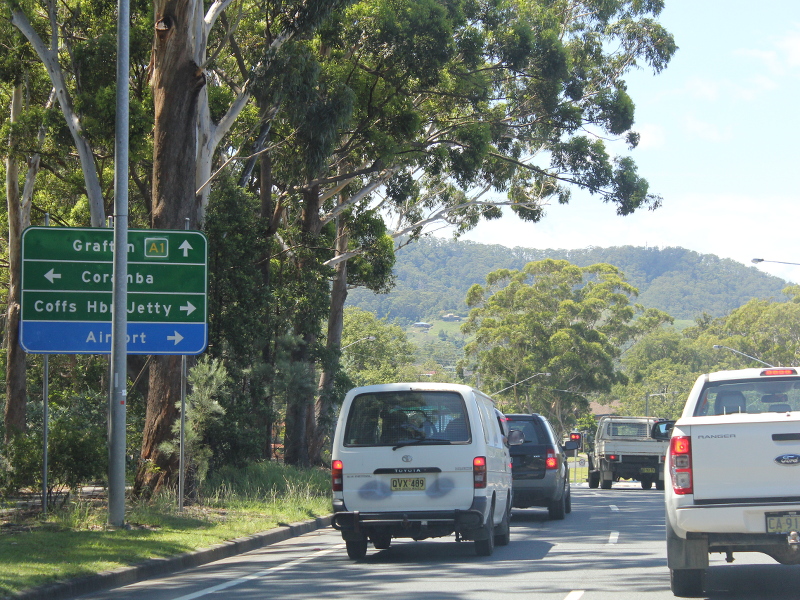
Advance Directional Sign: AD sign approaching Englands Rd and Stadium Dr at Coffs Harbour, February 2015. Image © Rob Tilley |
 |
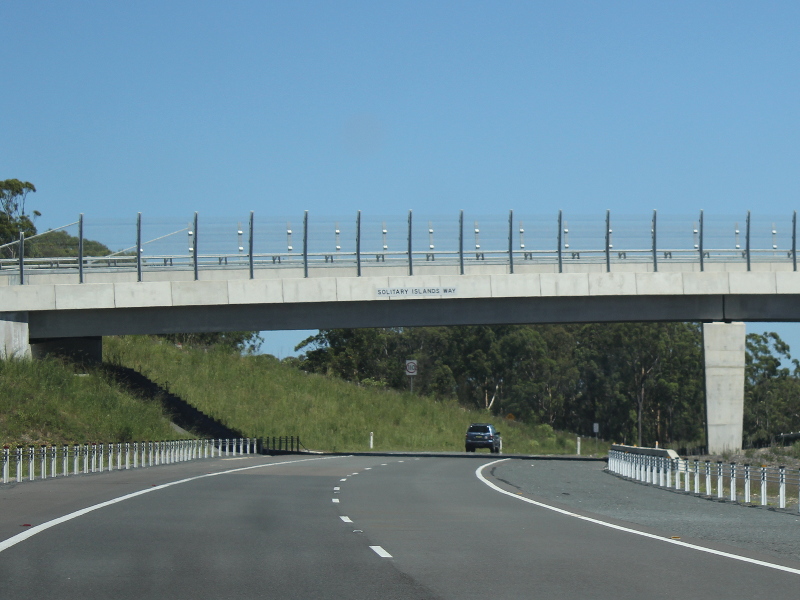
Bark Hut Road: Pacific Hwy (A1) as it passes under Bark Hut Rd at Woolgoolga, February 2015. Image © Rob Tilley |
|
 |
Intersection Directional Sign: ID sign on the roundabout with Englands Rd and Stadium Dr at Coffs Harbour, February 2015. Image © Rob Tilley |
 |
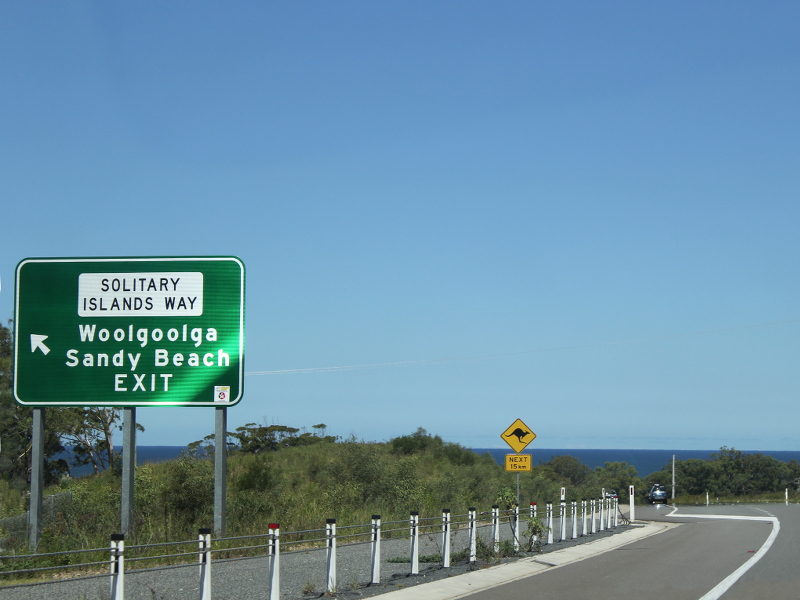
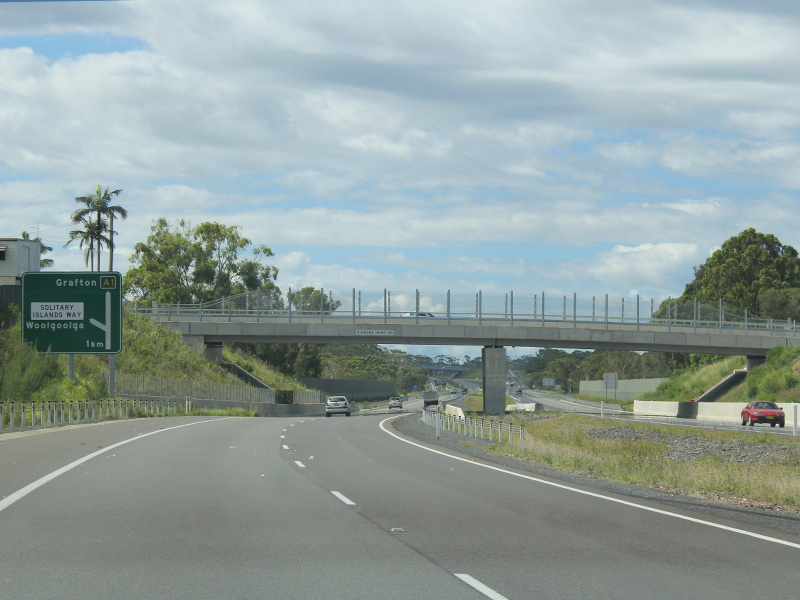
Advance Directional Sign: AD sign at Woolgoolga approaching Solitary Islands Way, February 2015. Image © Rob Tilley |
|
 |
Distance Sign: RD sign at Coffs Harbour after Englands Rd and Stadium Dr, February 2015. Image © Rob Tilley |
 |
Woolgoolga Creek Road: Pacific Hwy (A1) as it passes under Woolgoolga Ck Rd at Woolgoolga, February 2015. Image © Rob Tilley |
|
 |
Advance Directional Sign: Poorly placed AD sign at Coffs Harbour approaching Combine St and Albany St, February 2015. Image © Rob Tilley |
 |
Advance Directional Sign: AD sign at Woolgoolga approaching Solitary Islands Way, February 2015. Image © Rob Tilley |
|
 |
Advance Directional Sign: AD sign at Coffs Harbour approaching Orlando St and Bray St, February 2015. Image © Rob Tilley |
 |
Solitary Islands Way: Pacific Hwy (A1) at the Solitary Islands Way interchange at Woolgoolga, February 2015. Image © Rob Tilley |
|
 |
Orlando Street & Bray Street: Corner of Pacific Hwy (A1), Orlando St and Bray St at Coffs Harbour, February 2015. Image © Rob Tilley |
 |
Solitary Islands Way: Pacific Hwy (A1) at the Solitary Islands Way interchange at Woolgoolga, February 2015. Image © Rob Tilley |
|
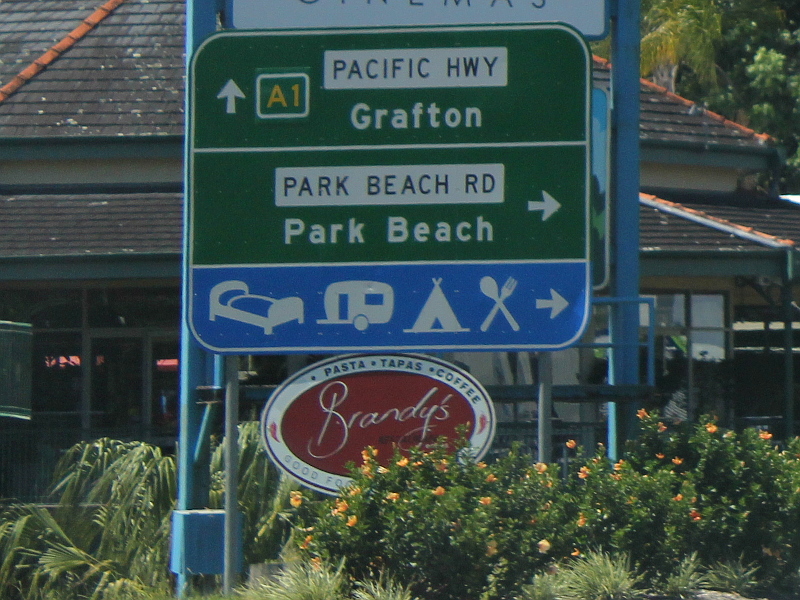 |
Advance Directional Sign: AD sign at Coffs Harbour approaching Park Beach Rd, February 2015. Image © Rob Tilley |
 |
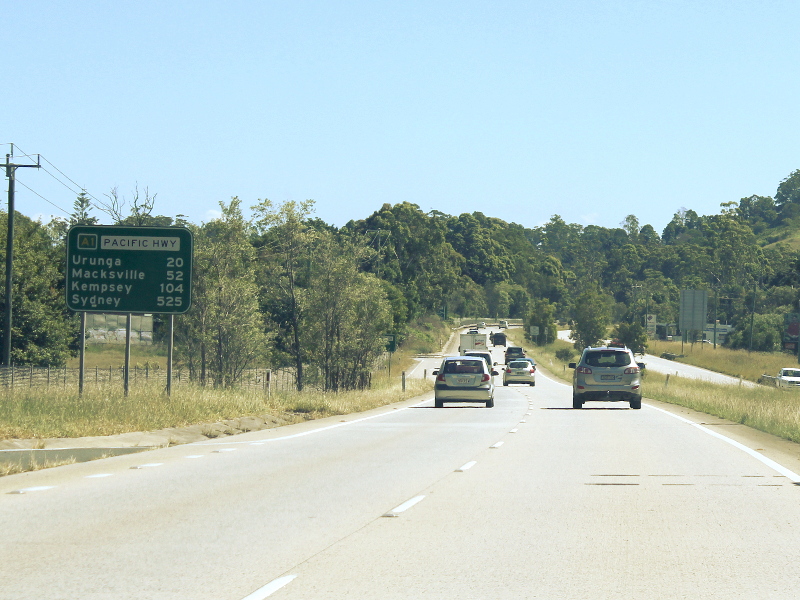
Distance Sign: Reassurance directional sign at Woolgoolga, February 2015. Image © Rob Tilley |
|
 |
Advance Directional Sign: AD sign approaching Arthur St and Mastracolas Rd at Coffs Harbour, February 2015. Image © Rob Tilley |
 |
Diamond Head Road: Pacific Hwy (A1) as it passes under Diamond Head Rd at Woolgoolga, February 2015. Image © Rob Tilley |
|
 |
Park Beach Road: Corner of Pacific Hwy (A1) and Park Beach Rd at Coffs Harbour, February 2015. Image © Rob Tilley |
 |
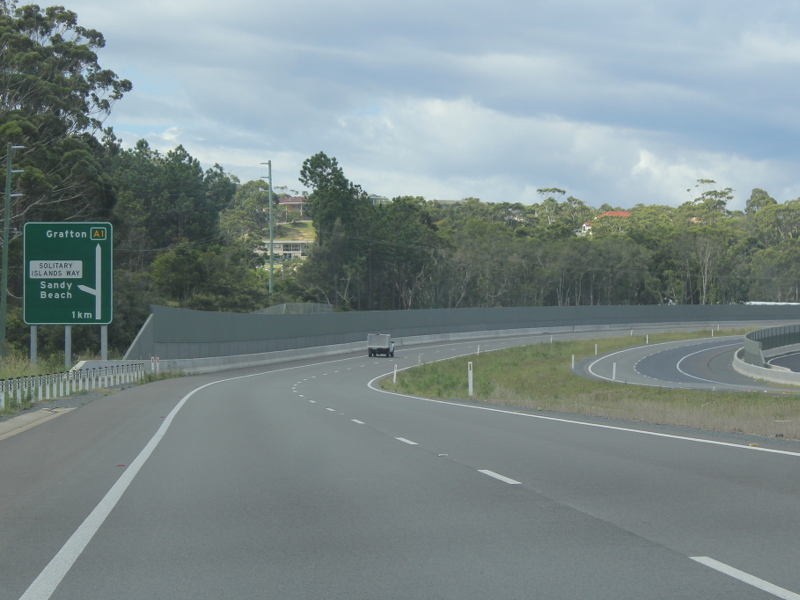
Advance Directional Sign: AD sign at Sandy Beach approaching Solitary Islands Way, February 2015. Image © Rob Tilley |
|
 |
Advance Directional Sign: AD sign at Coffs Harbour approaching Diggers Beach Rd, February 2015. Image © Rob Tilley |
 |
Solitary Islands Way: Pacific Hwy (A1) at the Solitary Islands Way interchange at Sandy Beach, February 2015. Image © Rob Tilley |
|
 |
Supplemental Advance Directional Sign: Supplemental AD sign at Coffs Harbour approaching Bruxner Park Rd and James Small Dr, February 2015. Image © Rob Tilley |
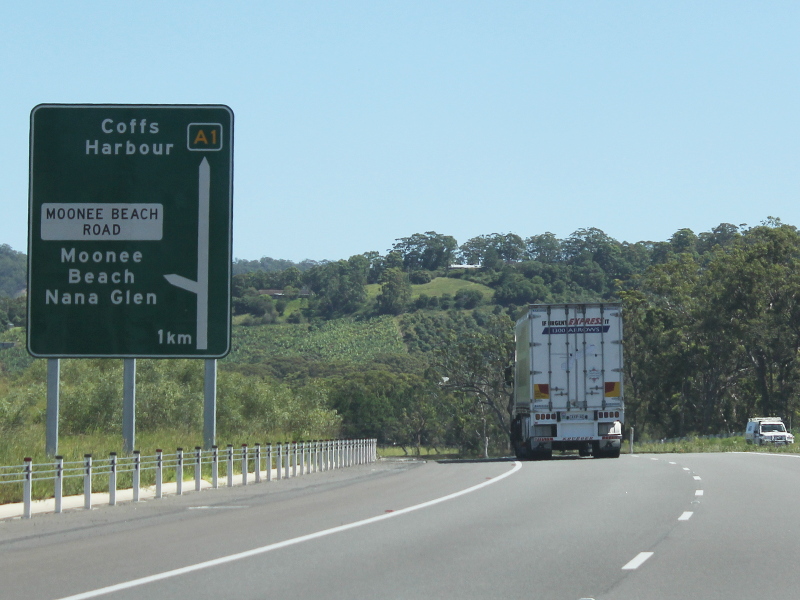 |
Advance Directional Sign: AD sign approaching Moonie Beach Rd interchange, Moonee Beach, February 2015. Image © Rob Tilley |
|
 |
Advance Directional Sign: AD sign at Korora approaching Bruxner Park Rd and James Small Dr, February 2015. Image © Rob Tilley |
 |
Intersection Directional Sign: ID sign at Moonie Beach Rd interchange, Moonee Beach, February 2015. Image © Rob Tilley |
|
 |
Bruxner Park Road: ID sign at the junction with Bruxner Park Rd at Korora, February 2015. Image © Rob Tilley |
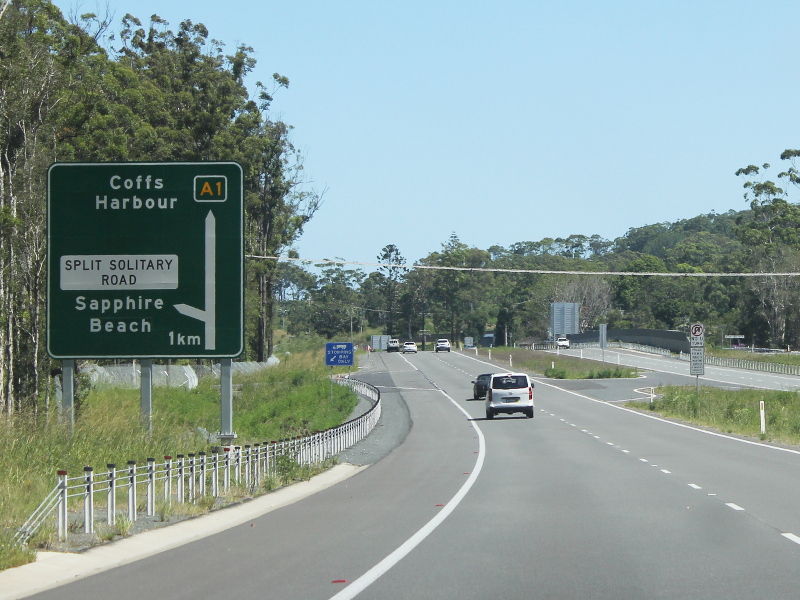 |
Advance Directional Sign: AD sign approaching Solitary Islands Way (note incorrect road name) at Sapphire Beach, February 2015. Image © Rob Tilley |
|
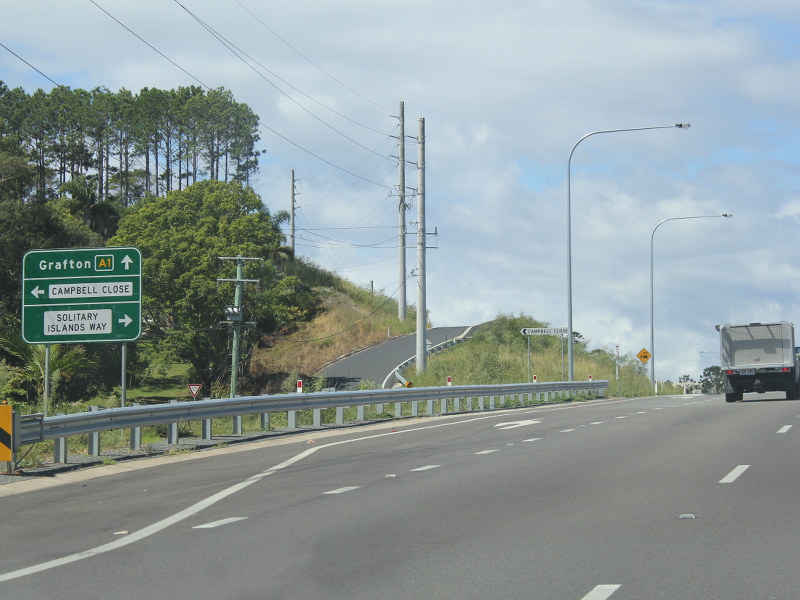 |
Advance Directional Sign: AD sign at Korora approaching Campbell Cl and Solitary Islands Way, February 2015. Image © Rob Tilley |
 |
Solitary Islands Way: Pacific Hwy (A1) at the Solitary Islands Way interchange at Sapphire Beach, February 2015. Image © Rob Tilley |
|
 |
Advance Directional Sign: AD sign at Korora approaching Solitary Islands Way, February 2015. Image © Rob Tilley |
 |
Old Coast Road: Pacific Hwy (A1) as it passes under Old Coast Rd at Sapphire Beach, February 2015. Image © Rob Tilley |
|
 |
Solitary Islands Way: Pacific Hwy (A1) at the Solitary Islands Way interchange at Sapphire Beach, February 2015. Image © Rob Tilley |
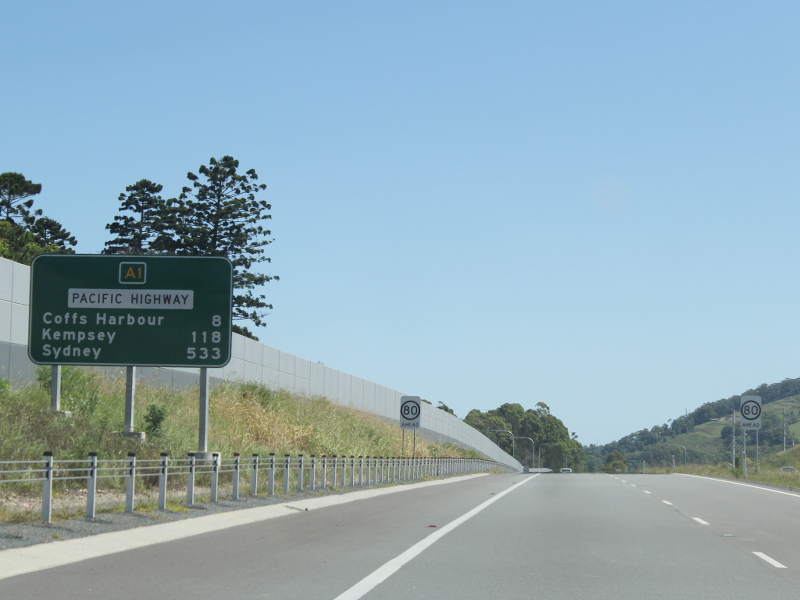 |
Distance Sign: RD sign at Korora, February 2015. Image © Rob Tilley |
|
 |
Distance Sign: RD sign at Moonee Beach, February 2015. Image © Rob Tilley |
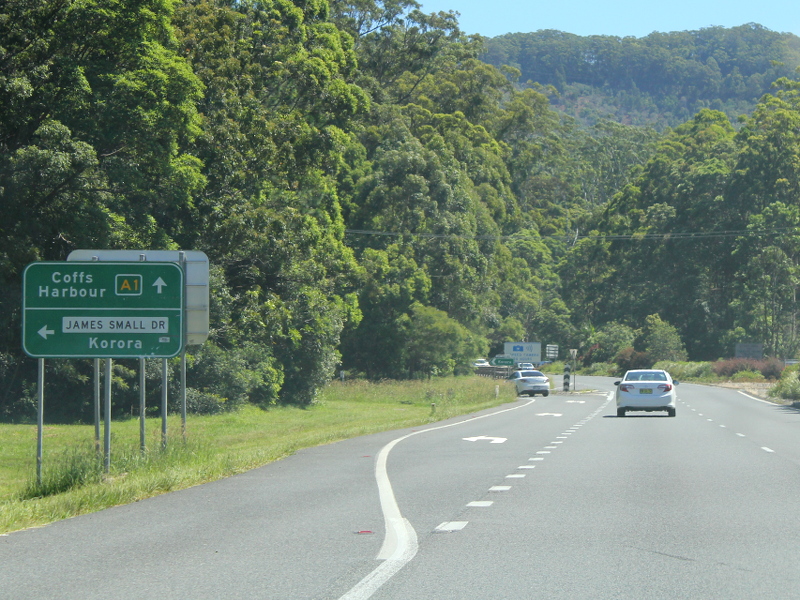 |
Advance Directional Sign: AD sign at Korora approaching James Small Dr, February 2015. Image © Rob Tilley |
|
 |
Advance Directional Sign: AD sign at Moonee Beach approaching Moonee Beach Rd, February 2015. Image © Rob Tilley |
 |
James Small Drive: Pacific Hwy (A1) at the junction with James Small Dr in Korora, February 2015. Image © Rob Tilley |
|
 |
Moonee Beach Road: Pacific Hwy (A1) approaching Moonee Beach Rd at Moonee Beach, February 2015. Image © Rob Tilley |
 |
Advance Directional Sign: AD sign approaching James Small Dr and Bruxner Park Rd at Korora, February 2015. Image © Rob Tilley |
|
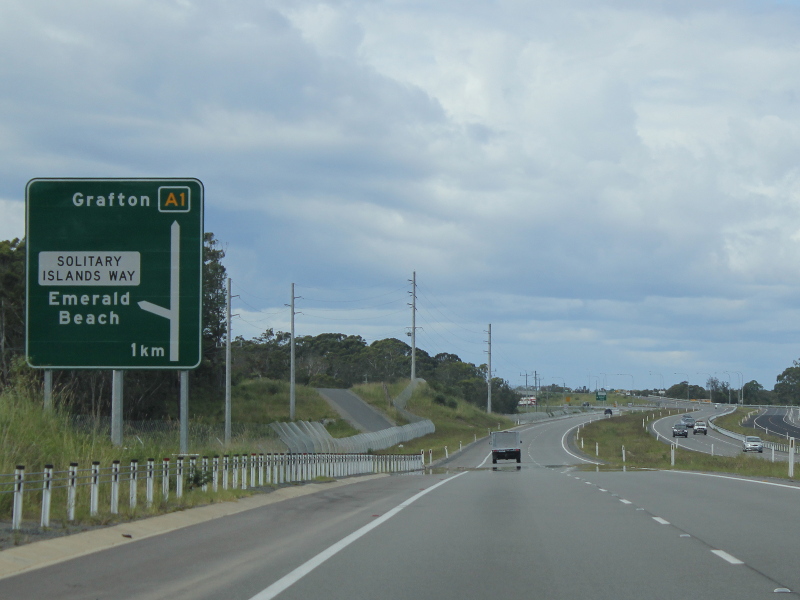 |
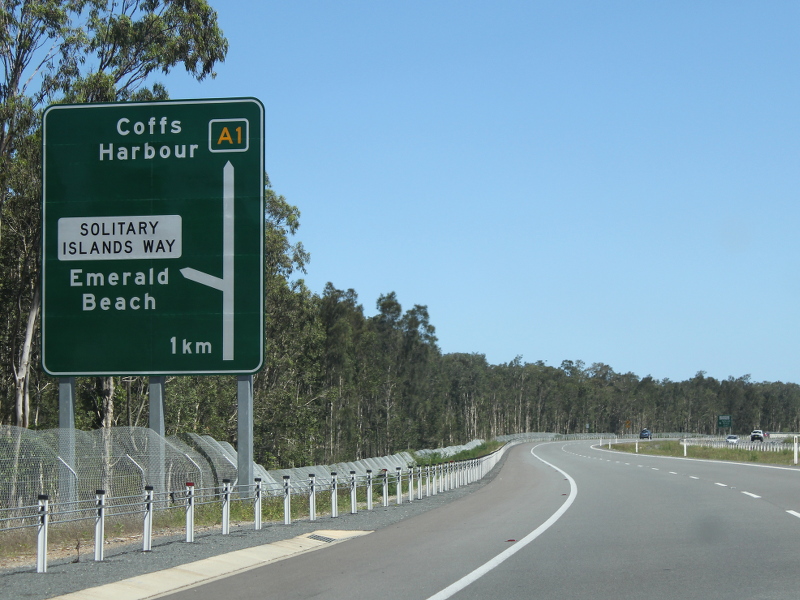
Advance Directional Sign: AD sign at Emerald Beach approaching Solitary Islands Way, February 2015. Image © Rob Tilley |
 |
Advance Directional Sign: AD sign approaching James Small Dr and Bruxner Park Rd at Korora, February 2015. Image © Rob Tilley |
|
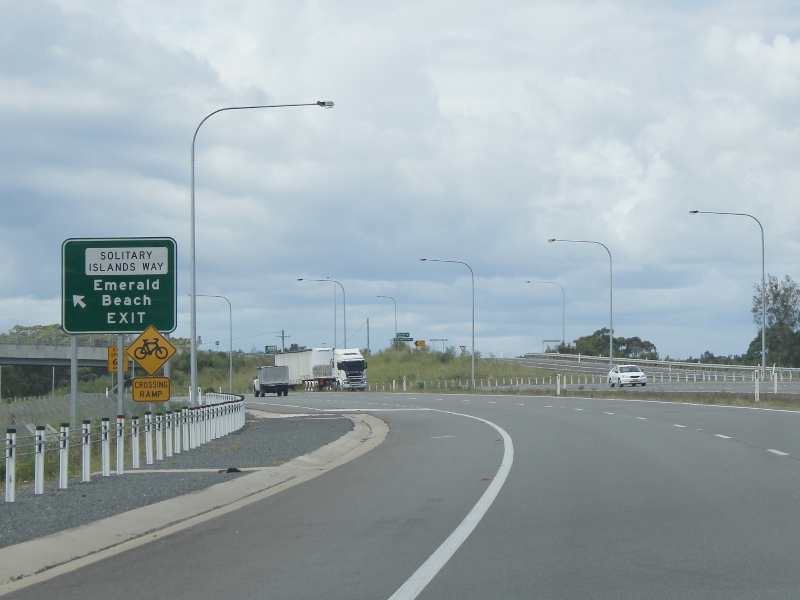 |
Solitary Islands Way: Pacific Hwy (A1) at the Solitary Islands Way interchange at Emerald Beach, February 2015. Image © Rob Tilley |
 |
James Small Drive: Pacific Hwy (A1) at the junction with James Small Dr in Korora, February 2015. Image © Rob Tilley |
|
 |
Advance Directional Sign: AD sign at Emerald Beach approaching Solitary Islands Way, February 2015. Image © Rob Tilley |
 |
Advance Directional Sign: AD sign at Coffs Harbour approaching Arthur St (TD18), February 2015. Image © Rob Tilley |
|
 |
Solitary Islands Way: Pacific Hwy (A1) at the Solitary Islands Way interchange at Emerald Beach, February 2015. Image © Rob Tilley |
 |
Advance Directional Sign: AD sign at Coffs Harbour on the off ramp to Arthur St (TD18), February 2015. Image © Rob Tilley |
|
 |
Advance Directional Sign: AD sign on the off ramp to Solitary Islands Way at Emerald Beach, February 2015. Image © Rob Tilley |
 |
Advance Directional Sign: AD sign at Coffs Harbour approaching Orlando St, February 2015. Image © Rob Tilley |
|
 |
Bypassed Town Sign: Bypassed town AD sign at Sandy Beach for Solitary Islands Way, February 2015. Image © Rob Tilley |
 |
Orlando Street: Corner of Pacific Hwy (A1) and Orlando St, Coffs Harbour, February 2015. Image © Rob Tilley |
|
 |
Advance Directional Sign: AD sign near Diamond Head Rd at Sandy Beach for Solitary Islands Way, February 2015. Image © Rob Tilley |
 |
Advance Directional Sign: AD sign at Boambee, approaching Sawtell Rd & Lindsays Rd interchange, February 2015. Image © Rob Tilley |
|
 |
Solitary Islands Way: Pacific Hwy (A1) at the Solitary Islands Way interchange at Woolgoolga, February 2015. Image © Rob Tilley |
 |
Distance Sign: AD sign at Boambee East, February 2015. Image © Rob Tilley |
|
 |
Distance Sign: RD sign at Woolgoolga, February 2015. Image © Rob Tilley |
 |
Advance Directional Sign: AD sign approaching Bruce King Dr at Boambee East, February 2015. Image © Rob Tilley |
|
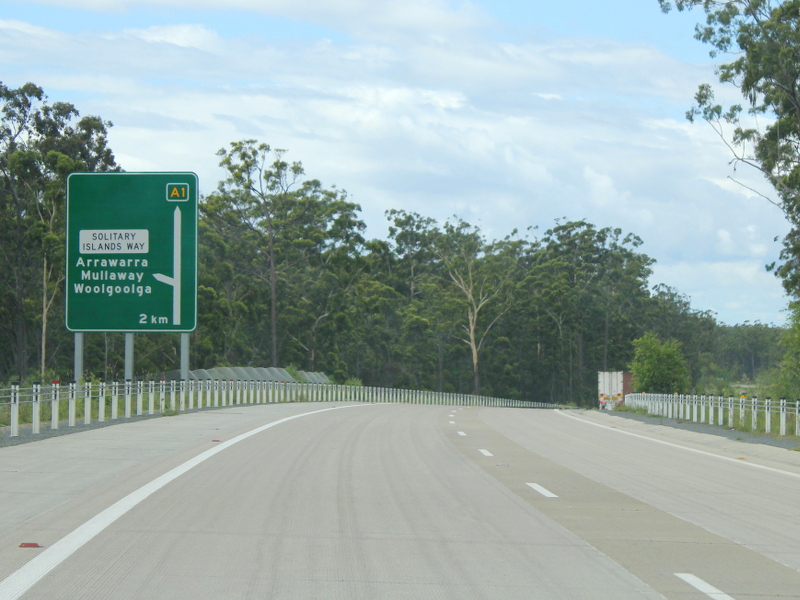 |
Advance Directional Sign: AD sign at Woolgoolga for the Solitary Islands Way interchange, February 2015. Image © Rob Tilley |
 |
Advance Directional Sign: AD sign at Boambee East approaching Lyons Rd and Pine Ck Way (TD18), December 2013. |
|
 |
Advance Directional Sign: AD sign at Woolgoolga for the Solitary Islands Way interchange, February 2015. Image © Rob Tilley |
 |
Services Sign: Services sign at Boambee East approaching Lyons Rd and Pine Ck Way (TD18), February 2015. Image © Rob Tilley |
|
 |
Solitary Islands Way: Pacific Hwy (A1) at the interchange with Solitary Islands Way at Woolgoolga, February 2015. Image © Rob Tilley |
 |
Lyons Road & Pine Creek Way Interchange: Pacific Hwy (A1) at the Lyons Rd & Pine Ck Way (TD18) interchange at Boambee East, February 2015. Image © Rob Tilley |
|
 |
Advance Directional Sign: AD sign at Woolgoolga approaching Sherwood Creek Rd, February 2015. Image © Rob Tilley |
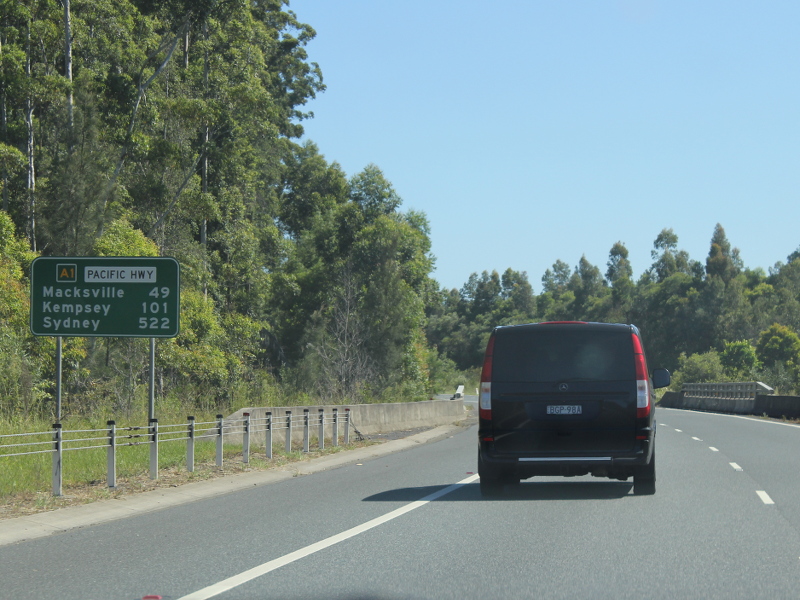 |
Distance Sign: RD sign at Bonville, February 2015. Image © Rob Tilley |
|
 |
Sherwood Creek Road: Corner of Pacific Hwy (A1) and Sherwood Ck Rd at Woolgoolga, February 2015. Image © Rob Tilley |
 |
Archville Station Road: Pacific Hwy (A1) at the Archville Stn Rd interchange at Bonville, February 2015. Image © Rob Tilley |
|
 |
Supplemental Advance Directional Sign: Supplemental AD sign at Corindi Beach approaching Tasman St, February 2015. Image © Rob Tilley |
 |
Distance Sign: RD sign at Bonville, February 2015. Image © Rob Tilley |
|
 |
Advance Directional Sign: AD sign at Corindi Beach approaching Tasman St, February 2015. Image © Rob Tilley |
 |
Advance Directional Sign: AD sign at Repton approaching Keevers Dr (TD18), February 2015. Image © Rob Tilley |
|
 |
Advance Directional Sign: AD sign at Corindi Beach approaching Coral St, February 2015. Image © Rob Tilley |
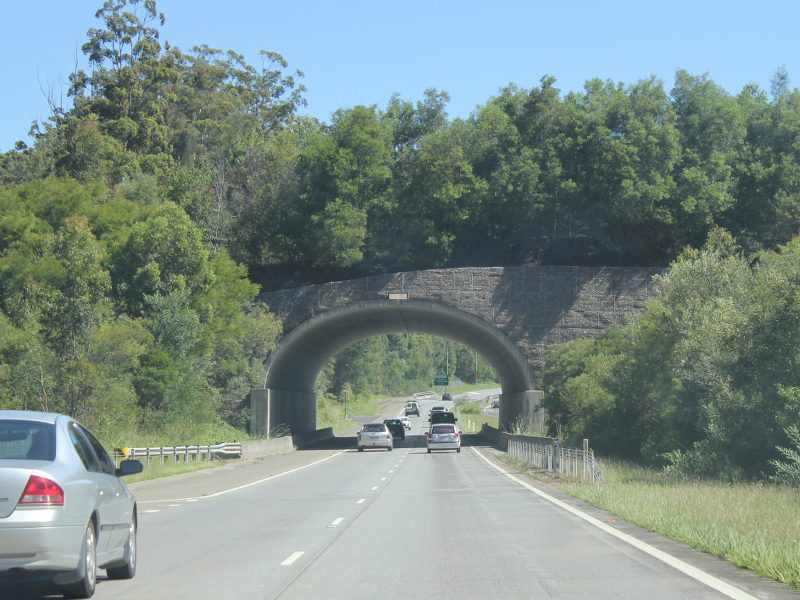 |
Land Bridge: Pacific Hwy (A1) as it passes under the land bridge at Repton, February 2015. Image © Rob Tilley |
|
 |
Coral Street: Corner of Pacific Hwy (A1) and Coral St at Corindi Beach, February 2015. Image © Rob Tilley |
 |
Keevers Drive: Pacific Hwy (A1) at the Keevers Dr interchange at Repton, February 2015. Note the missing TD18 shield. Image © Rob Tilley |
|
 |
Advance Directional Sign: AD sign at Halfway Creek approaching McPhillips Rd, February 2015. Image © Rob Tilley |
 |
Distance Sign: RD sign at Repton, February 2015. Image © Rob Tilley |
|
 |
McPhillips Road: Corner Pacific Hwy (A1) and McPhillips Rd at Halfway Creek, February 2015. Image © Rob Tilley |
 |
Supplemental Advance Directional Sign: Supplemental AD sign at Raleigh approaching Waterfall Way (B78), February 2015. Image © Rob Tilley |
|
 |
Advance Directional Sign: AD sign on Pacific Hwy (A1) approaching the divided section of highway at Glenugie, February 2015. Image © Rob Tilley |
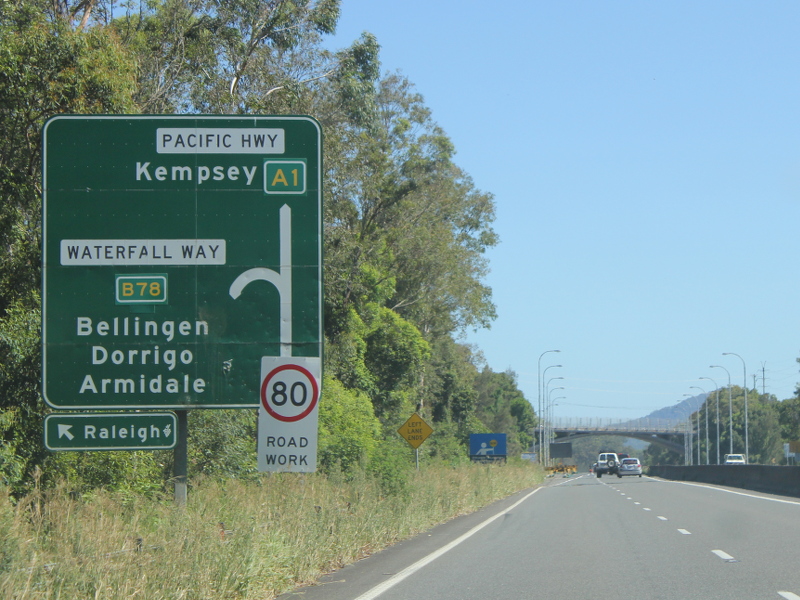 |
Advance Directional Sign: AD sign at Raleigh approaching Waterfall Way (B78), February 2015. Image © Rob Tilley |
|
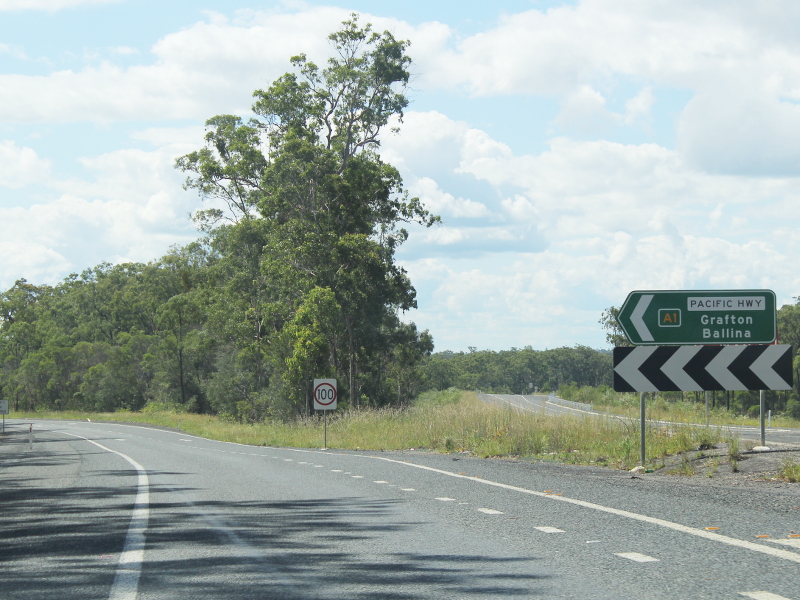 |
Start Divided Road: Intersection directional sign at the start of the divided section of the Pacific Hwy (A1) at Glenugie, February 2015. Image © Rob Tilley |
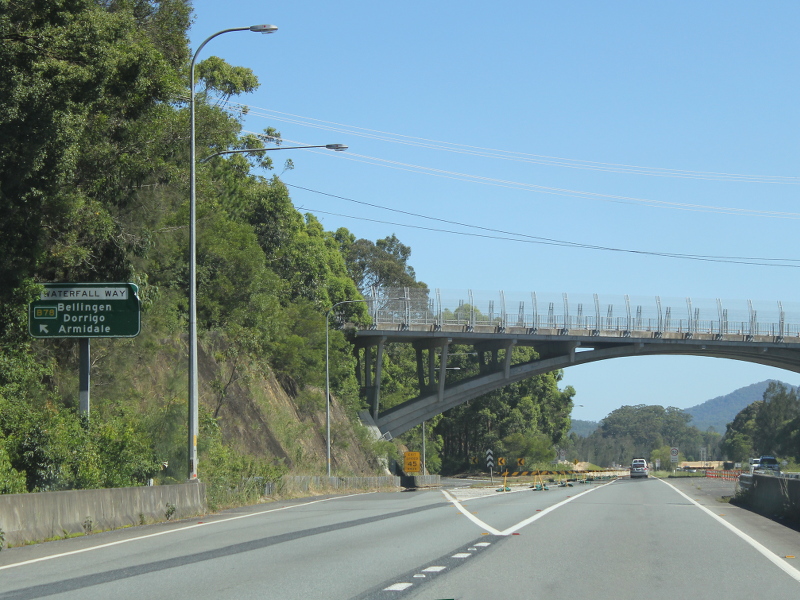 |
Waterfall Way: Pacific Hwy (A1) at the Waterfall Way (B78) interchange at Raleigh, February 2015. Image © Rob Tilley |
|
 |
Distance sign: RD sign at Glenugie, February 2015. Image © Rob Tilley |
 |
Distance Sign: RD sign at Raleigh, February 2015. Image © Rob Tilley |
|
 |
Advance Directional Sign: AD sign at Glenugie approaching Eight Mile Ln, February 2015. Image © Rob Tilley |
 |
Advance Directional Sign: AD sign on Pacific Hwy (A1) approaching Short Cut Rd, Raleigh, February 2015. Image © Rob Tilley |
|
 |
Rest Area Distance Sign Rest area RD sign at Glenugie, February 2015. Image © Rob Tilley |
|||
| Click
here for Princes Hwy (A1) between Urunga and Clybucca Click here for the continuation of Pacific Hwy (A1) between Maclean and South Grafton |
||||
1 Roads &
Maritime Services, Schedule of Classified Roads and Unclassified Regional
Roads, August 2013.
2 Department of Main Roads, The
Roadmakers, A History of Main Roads in New South Wales, ISBN 0 7240 0439
4.
3 Roads & Maritime Services,
Projects, Pacific Highway upgrade, Port Macquarie to Coffs Harbour,
Completed projects, Raleigh Deviation.
4 Roads and Maritime Services,
Projects, Pacific Highway upgrade, Port Macquarie to Coffs Harbour,
Completed projects, Bonville upgrade.
5 Roads & Maritime Services,
Projects, Pacific Highway, Coffs Harbour To Ballina.
Last updated: 21-Dec-2019 23:21
This site © Paul Rands. All rights reserved. Some portions © (copyright) by their respective and credited owners. Permission must be obtained before using any images from this site. For details, please email by clicking here.