|
|
|
|
|
| A20 | Sturt Highway (A20) |
Statistics:
Route Numbering:


General Information: 1
The Sturt Highway is 2 lane rural highway standard for most of its length and is named after Charles Sturt, who explored south western New South Wales, the Murrumbidgee and Murray rivers and also parts of the deserts of central Australia in the 1820s and 1830s.
The present Sturt Highway developed as a track along the bank of the Murrumbidgee River linking cattle runs in the 1840s.
Originally the area of the route was the territory of the Wiradjuri Aboriginal people, in whose language Wagga Wagga means 'place of crows'.
The Sturt Hwy is multiplexed with the following routes:
History: 1

| Tarcutta to Victoria Border | Victoria Border to Tarcutta | |||
| Preview: | Description: | Preview: | Description: | |
 |
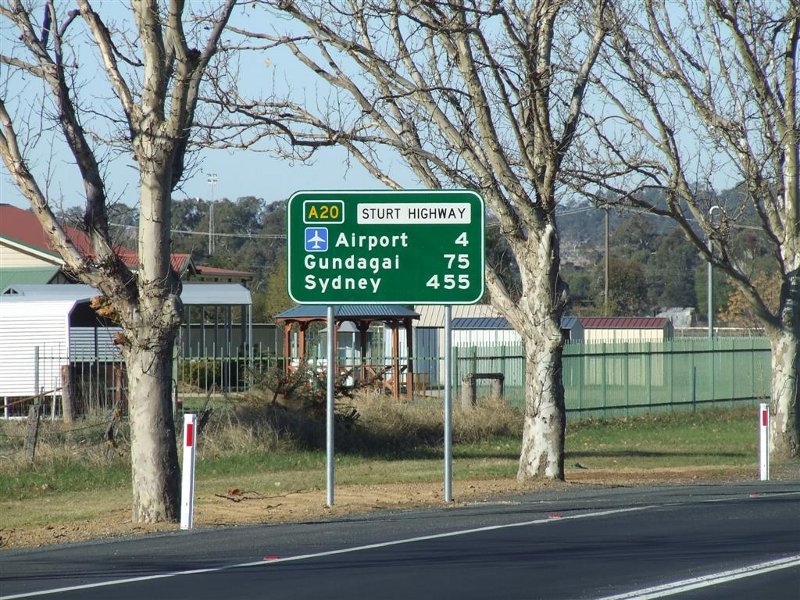
Reassurance Directional Sign: Distance sign at Tarcutta after the Hume Hwy (M31) interchange, October 2013. Image © Paul Rands |
 |
Balranald: Sturt Hwy (A20) as it passes through the Balranald town centre, near Mayall St, December 2013. Image © Michael Greenslade |
|
 |
AD Sign: Advance directional sign approaching Tasman Road and Eunony Bridge Road at Gumly Gumly, June 2008. Image © Michael Mak |
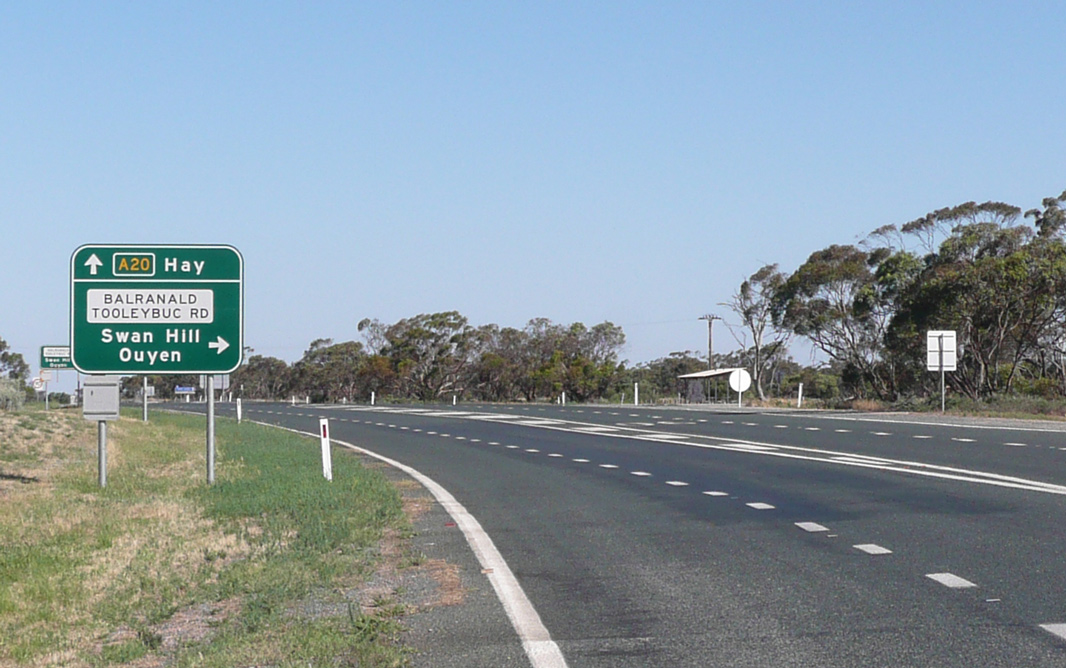 |
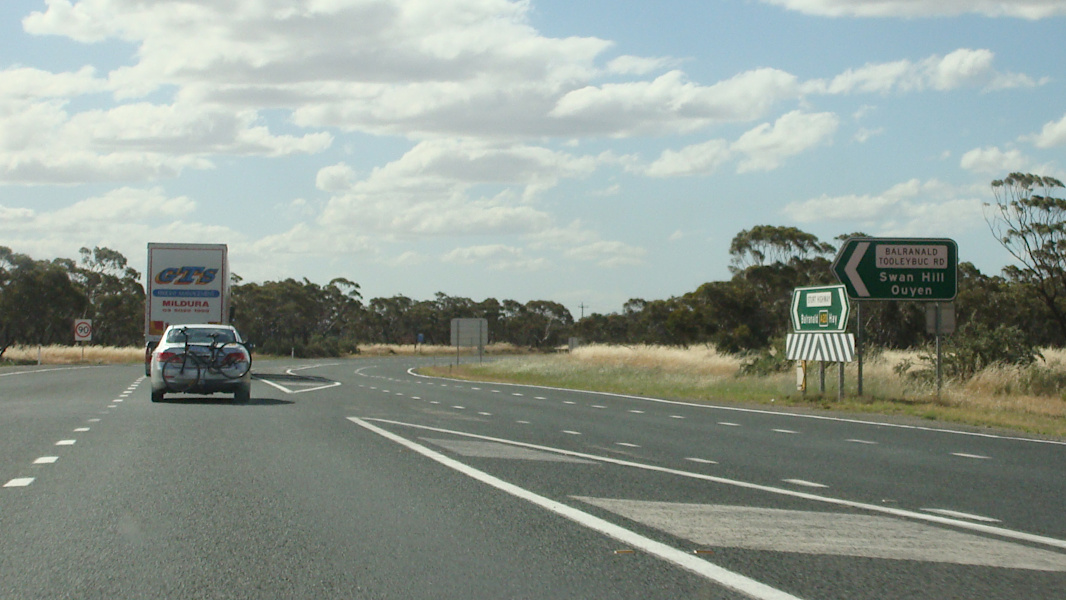
Advance Directional Sign: AD sign at Balranald approaching Balranald-Tooleybuc Rd, December 2013. Image © Michael Greenslade |
|
 |
ID Sign: Intersection directional sign on the corner of Tasman Road and Eunony Bridge Road at Gumly Gumly, June 2008. Image © Richard Wardle |
 |
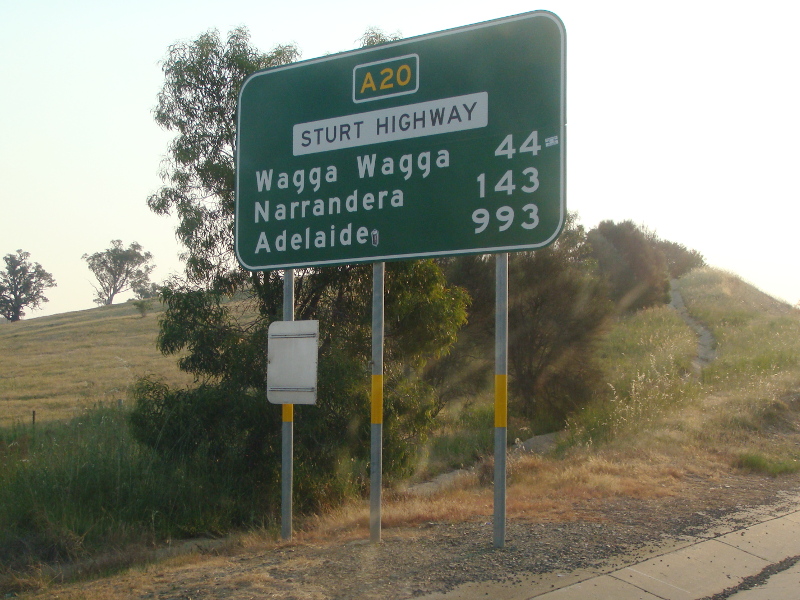
Reassurance Directional Sign: Distance sign at Balranald, December 2013. Image © Michael Greenslade |
|
 |
Intersection Directional Sign: ID sign facing Docker St, Wagga Wagga, July 2019. Image © Ben Winkler |
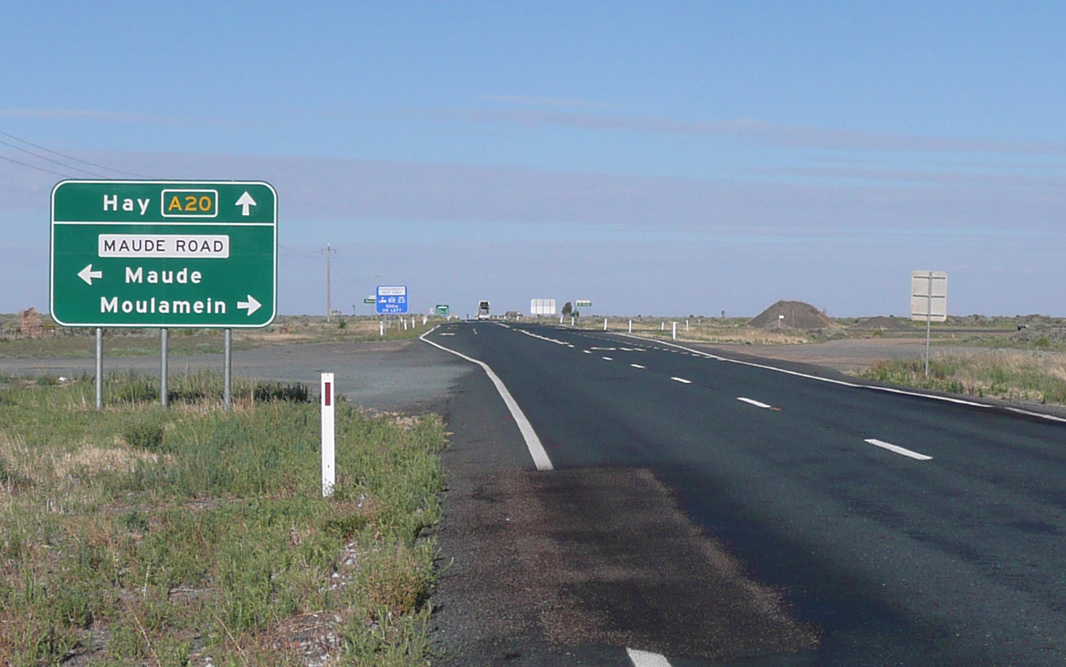 |
Advance Directional Sign: AD sign at Maude, approaching Maude Rd, December 2013. Image © Michael Greenslade |
|
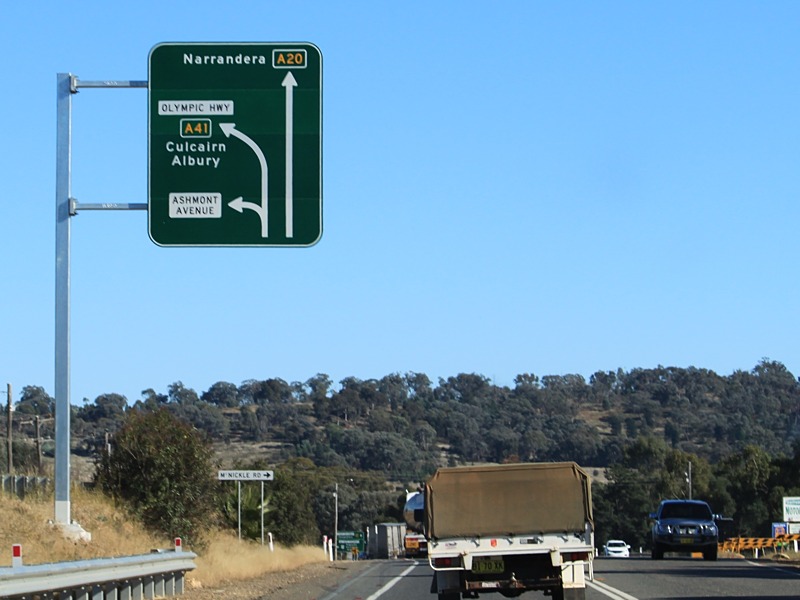 |
Advance Directional Sign: AD sign approaching Ashmont St and the Olympic Hwy (A41) and Sturt Hwy (A20) split at Moorong, May 2011. Image © Rob Tilley |
 |
Intersection Directional Sign: ID sign on the roundabout with Cobb Hwy (B75) at Hay South, November 2016. Image © Paul Rands |
|
 |
Distance Sign: RD sign, located after the Olympic Hwy intersection at Moorong, July 2010. Image © Richard Wardle |
 |
Intersection Directional Sign: ID sign on the roundabout with Cobb Hwy (B75) at Hay South, November 2016. Image © Paul Rands |
|
 |
Reassurance Directional Sign: Distance sign at Darlington Point, November 2016. Image © Paul Rands |
 |
Reassurance Directional Sign: Distance sign at Gillenbah, July 2019. Image © Ben Winkler |
|
 |
Carrathool Road: Sturt Hwy (A20) at the junction with Carrathool Rd, Carrathool, November 2016. Image © Paul Rands |
 |
Sandigo Road: Corner of Sturt Hwy (A20) and Sandigo Rd, Sandigo, July 2019. Image © Ben Winkler |
|
 |
Carrathool Road: Sturt Hwy (A20) at the junction with Carrathool Rd, Carrathool, November 2016. Image © Paul Rands |
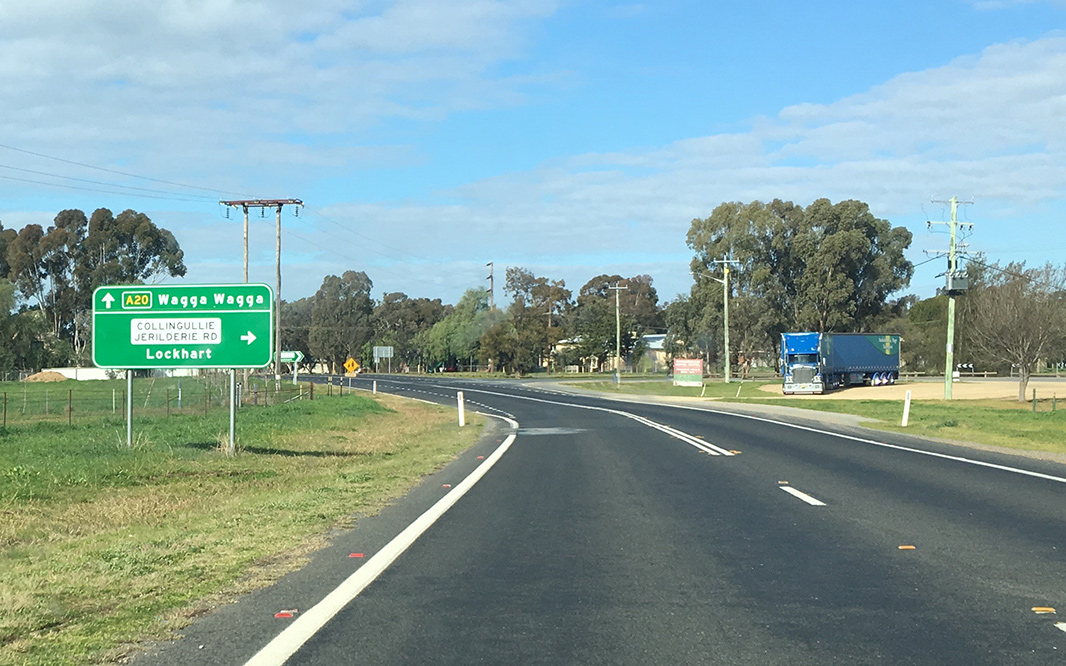 |
Advance directional Sign: AD sign at Collingullie approaching Collingullie-Jerilderie Rd, July 2019. Image © Ben Winkler |
|
 |
Intersection Directional Sign: ID sign on the roundabout with CobbHwy (B75) at Hay South, November 2016. Image © Paul Rands |
 |
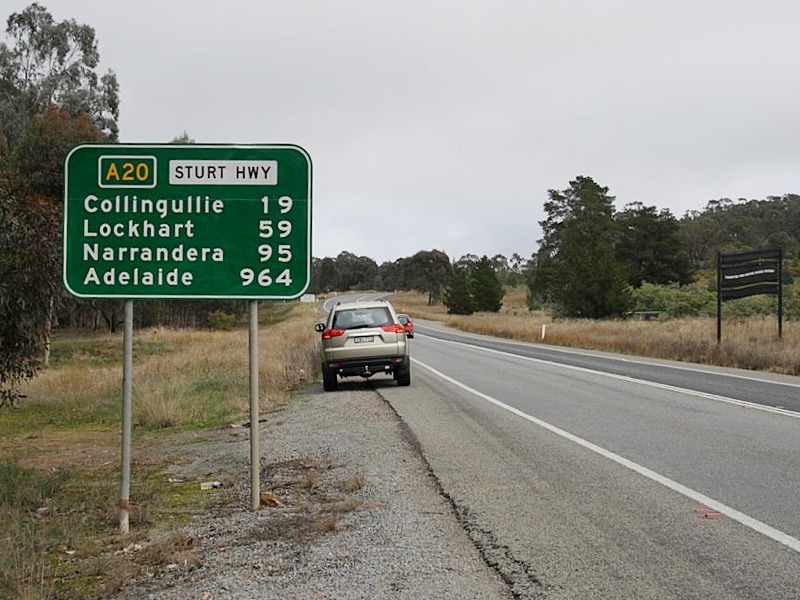
Reassurance Directional Sign: Distance sign at Collingullie, July 2019. Image © Ben Winkler |
|
 |
Reassurance Directional Sign: Distance sign at Hay South, November 2016. Image © Paul Rands |
 |
Kapooka Road: Corner of Sturt Hwy (A20) and Kapooka Rd at Sansidore, July 2019. Image © Ben Winkler |
|
 |
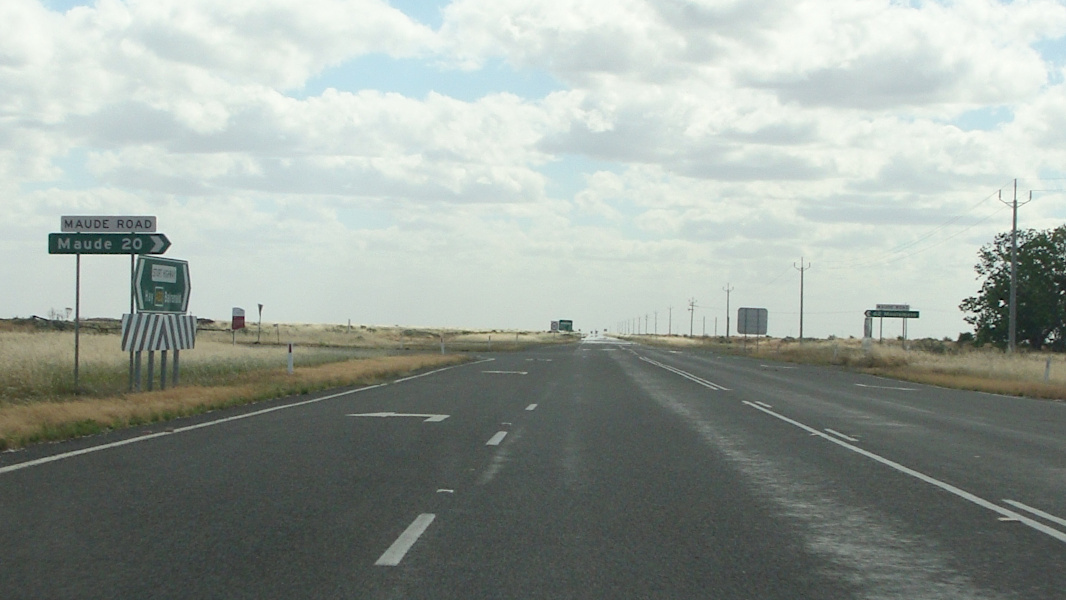
Advance Directional Sign: AD sign approaching Maude Rd, Maude, November 2016. Image © Paul Rands |
 |
Advance Directional Sign: AD sign at Wagga Wagga approaching Olympic Hwy and Pearson St, July 2019. The A41 duplex ends at this intersection. Image © Ben Winkler |
|
 |
Maude Road : Sturt Hwy (A20) at Maude Rd, Maude, November 2016. Image © Paul Rands |
 |
Advance Directional Sign: AD sign at Wagga Wagga approaching Docker St, July 2019. Image © Ben Winkler |
|
 |
Distance Sign: RD sign at Maude, November 2016. Image © Paul Rands |
 |
Advance Directional Sign: AD sign at Wagga Waga approaching Best St and Edmondson St, July 2019. Image © Ben Winkler |
|
 |
Advance Directional Sign: AD sign at Wakool approaching Homestead Access Rd, November 2016. Image © Paul Rands |
 |
Advance Directional Sign: AD sign at Wagga Wagga approaching Tarcutta St and Lake Albert Rd, July 2019. Image © Ben Winkler |
|
 |
Advance Directional Sign: AD sign at Wakool approaching Regatta Beach Access Rd, November 2016. Image © Paul Rands |
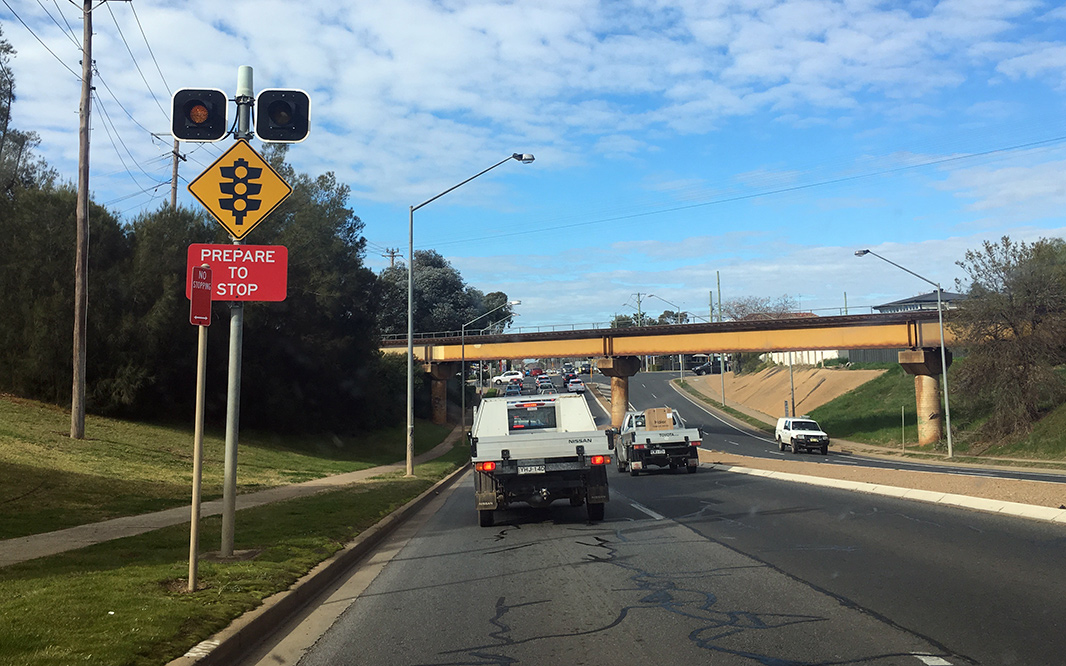 |
Main South Railway: Sturt Hwy (A20) passing under the Main South Railway at Wagga Wagga, July 2019. Image © Ben Winkler |
|
 |
Reassurance Directional Sign: Tourism-based distance sign at Wakool, November 2016. Image © Paul Rands |
 |
AD Sign: Advance directional sign approaching Tasman Road and Eunony Bridge Road at Gumly Gumly, June 2008. Image © Michael Mak |
|
 |
Safe-T-Cam: Safe-T-Cam at Balranald. Safe-T-Cam is a statewide network of cameras monitoring the movements of heavy vehicles in NSW, November 2016. Image © Paul Rands |
 |
ID Sign: Intersection directional sign on the corner of Tasman Road and Eunony Bridge Road at Gumly Gumly, June 2008. Image © Richard Wardle |
|
 |
Supplemental Advance Directional Sign: Supplemental AD sign at Balranald approaching a complex collection of roads through the town, November 2016. Image © Paul Rands |
 |
Distance Sign: RD sign after the intersection with Eunony Bridge Road and Tasman Road at Gumly Gumly, near Wagga Wagga. June 2008. Image © Richard Wardle |
|
 |
Advance Directional Sign: AD sign at Balranald approaching Balranald-Tooleybuc Rd, November 2016. Image © Paul Rands |
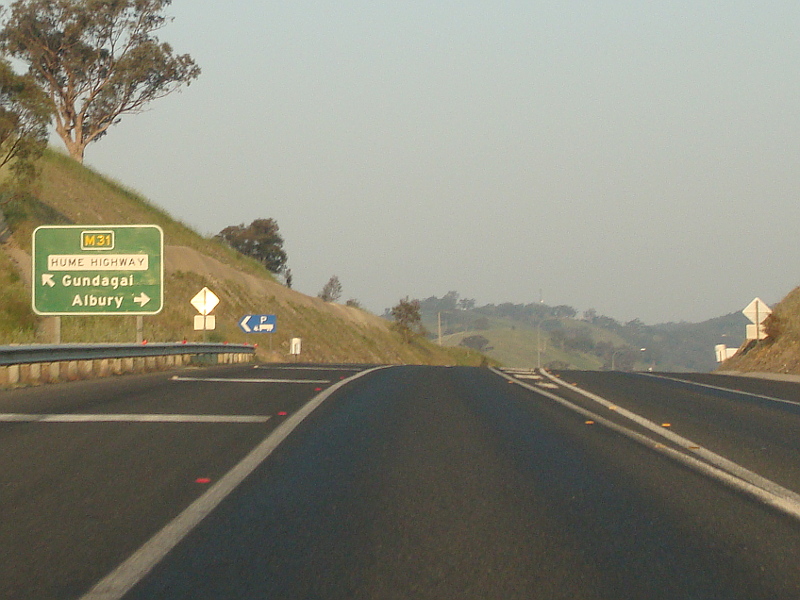 |
Advance Directional Sign: AD sign at Tarcutta approaching Hume Hwy (M31), October 2013. Image © Paul Rands |
|
 |
Balranald-Tooleybuc Road: Sturt Hwy (A20) at Balranald-Tooleybuc Rd, Balranald, November 2016. Image © Paul Rands |
 |
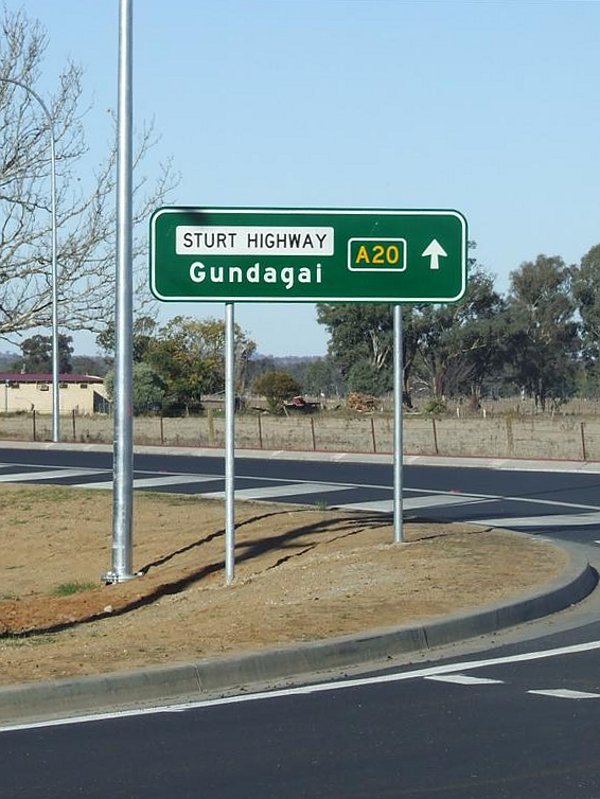
Hume Highway Interchange: Sturt Hwy (A20) at the Hume Hwy (M31) interchange at Tarcutta, October 2013. A20 terminates at this junction. Image © Paul Rands |
|
 |
Advance Directional Sign: AD sign Balranald-Tooleybuc Rd at Balranald approaching Sturt Hwy (A20), December 2013. Image © Michael Greenslade |
|||
 |
Entering Balranald: Sturt Hwy (A20) entering the town of Balranald, November 2016. Image © Paul Rands |
|||
 |
Distance Sign: Reassurance directional sign at Balranald, December 2013. Image © Michael Greenslade |
|||
 |
Advance Directional Sign: AD sign at Balaranald approaching Market St & McCabe St, December 2013. Image © Michael Greenslade |
|||
 |
Intersection Directiona Sign: Image © Paul Rands |
|||
 |
Advance Directional Sign: AD sign approaching Mayall St, Balranald, November 2016. Image © Paul Rands |
|||
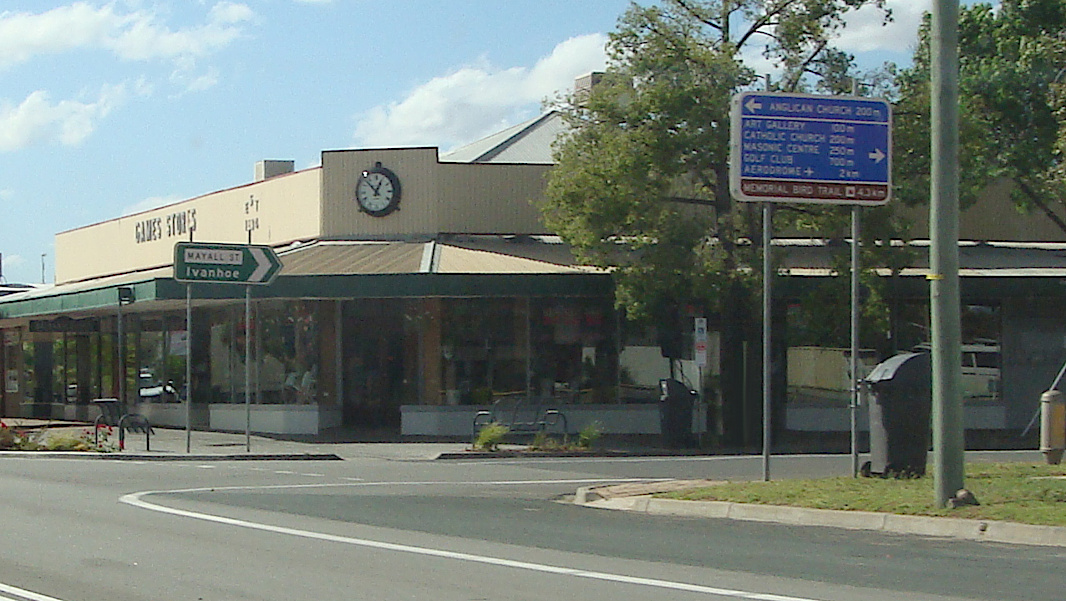 |
Mayall Street: Sturt Hwy (Market St) (A20) at Mayall St, Balranald, November 2016. Image © Paul Rands |
|||
 |
Distance Sign: Reassurance directional sign at Balranald, November 2016. Image © Paul Rands |
|||
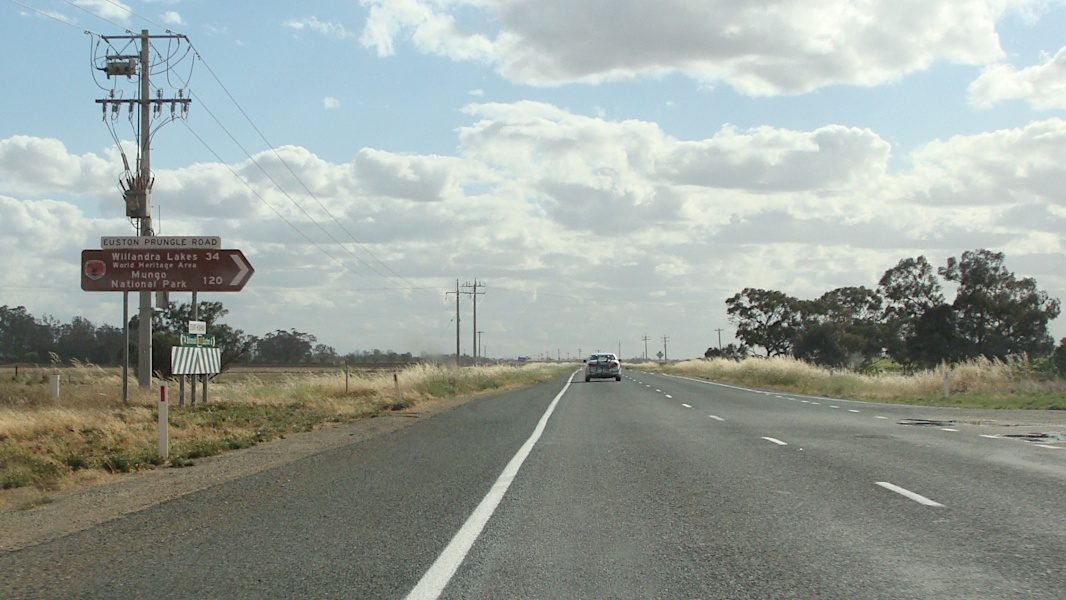 |
Euston-Prungle Road: Sturt Hwy (A20) at Euston-Prungle Rd, Euston, November 2016. Image © Paul Rands |
|||
 |
Murray Valley Highway: Sturt Hwy (A20) at Murray Valley Hwy at Euston, November 2016. Image © Paul Rands |
|||
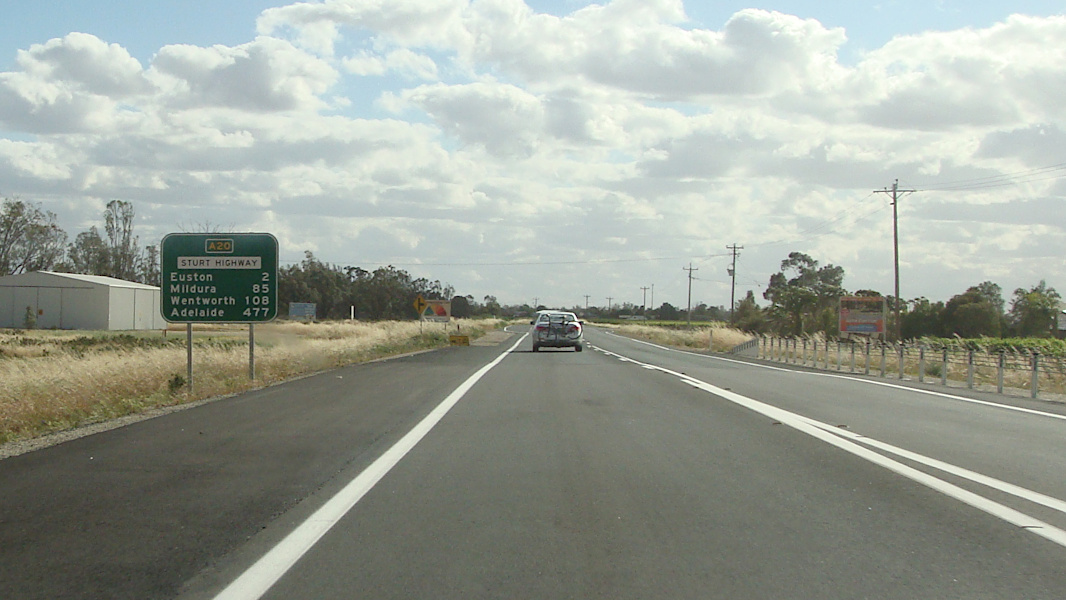 |
Distance Sign: Reassurance directional sign at Euston, November 2016. Image © Paul Rands |
|||
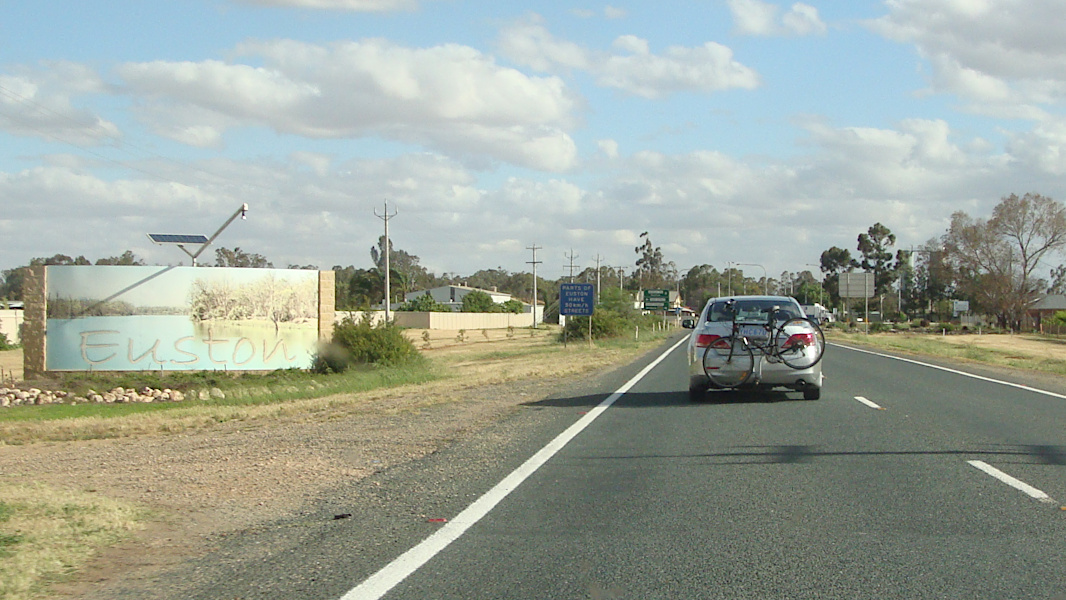 |
Entering Euston: Sturt Hwy (A20) as it enters the town of Euston, November 2016. Image © Paul Rands |
|||
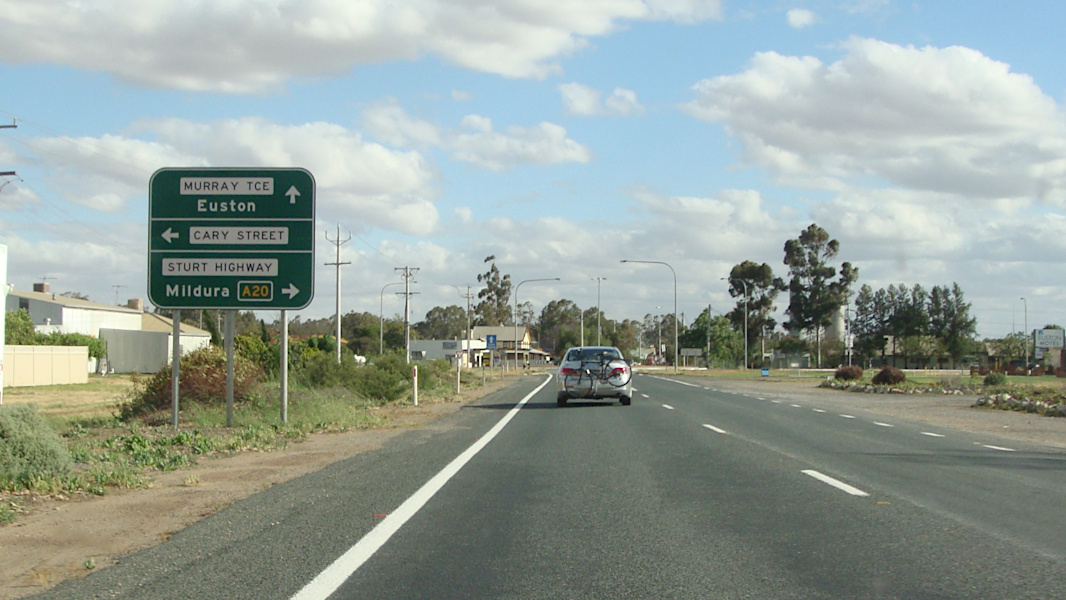 |
Advance Directional Sign: AD sign approaching Cary St & Murray Tce, Euston, November 2016. A20 turns right at this junction. Image © Paul Rands |
|||
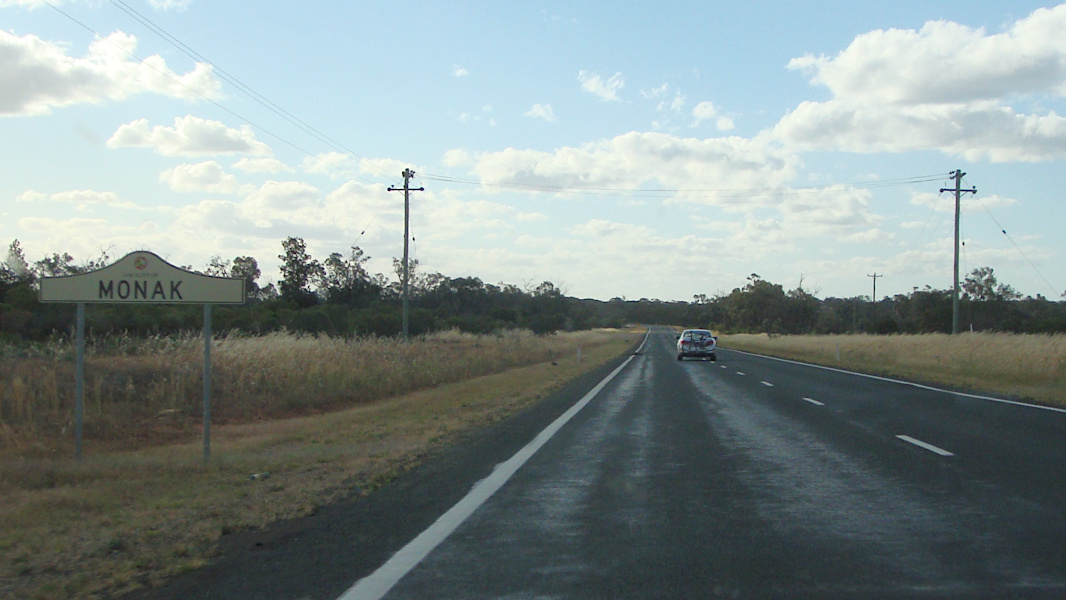 |
Entering Monak: Sturt Hwy (A20) as it enters the town of Monak, November 2016. Image © Paul Rands |
|||
 |
Advance Directional Sign: AD sign approaching Bottle Bend Rd, Monak, November 2016. Image © Paul Rands |
|||
 |
Entering Gol Gol: Sturt Hwy (A20) as it enters the town of Gol Gol, November 2016. Image © Paul Rands |
|||
 |
Distance Sign: Reassurance directional sign at Buronga, November 2016. Image © Paul Rands |
|||
 |
Murray River: Sturt Hwy (A20) as it crosses Murray River into Victoria, via George Chaffey Bridge at Buronga, November 2016. Image © Paul Rands |
|||
| Click here for the continuation of A20 in Victoria | ||||
1 Roads & Maritime Services
Last updated: 04-Jul-2020 9:54
This site © Paul Rands. All rights reserved. Some portions © (copyright) by their respective and credited owners. Permission must be obtained before using any images from this site. For details, please email by clicking here.