|
|
|
|
|
 |
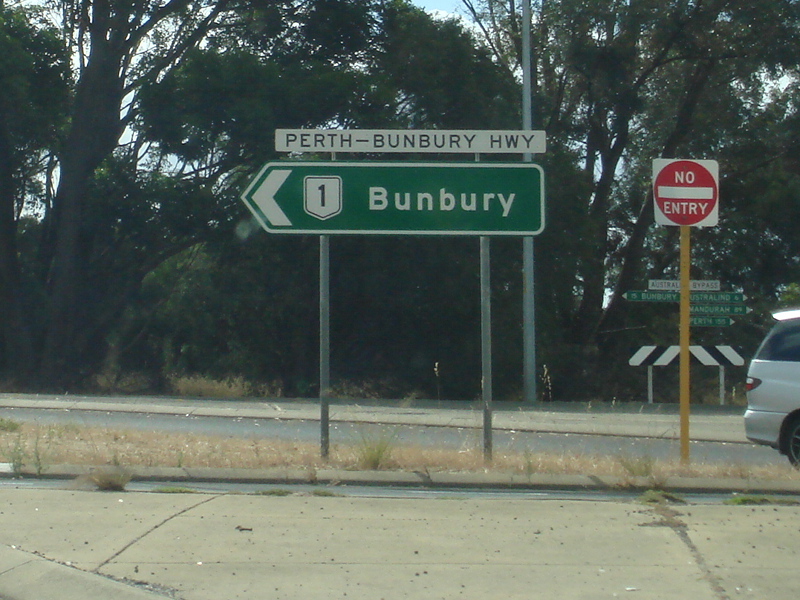
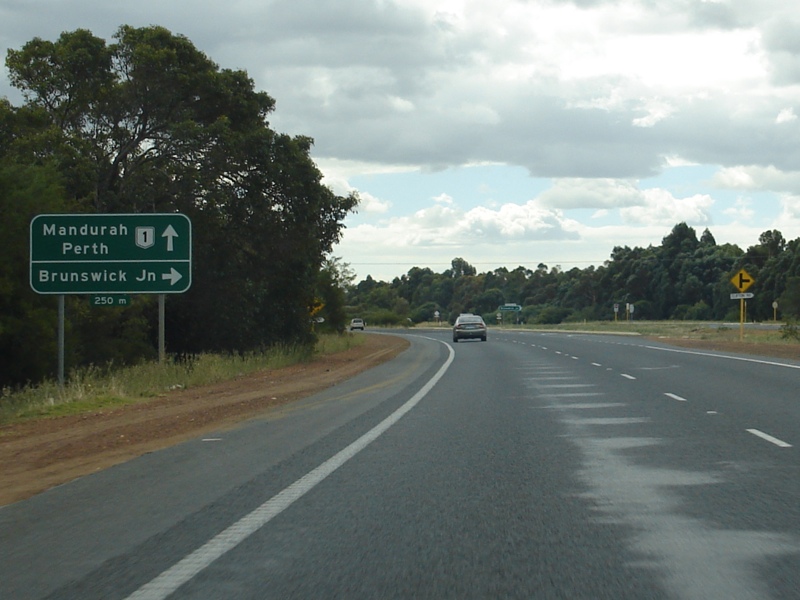
Coolgardie-Esperance Highway, South Coast Highway, Chester Pass Road, South Western Highway, Robertson Drive, Forrest Highway, Old Coast Road, Mandurah Road, Ennis Avenue, Patterson Road, Rockingham Road, Stock Road, Leach Highway, Kwinana Freeway, Canning Highway, Great Eastern Highway, Great Eastern Highway Bypass, Roe Highway, Great Northern Highway, Brand Highway & North West Coastal Highway (National Route 1) - Bunbury to Binningup |
Statistics:
Route Numbering:
General Information:
National Route 1 is a major route in WA.
The route varies in form from multi-laned arterial road, suburban road, to single carriageway rural highway. It passes through commercial, industrial, residential and agricultural land, and also through state forest and conservation areas.
History:
Forrest Highway:
Click here for the former alignment in the Australind, Eaton & Bunbury area.
| Binningup to Bunbury | Bunbury to Binningup | |||
| Preview: | Description: | Preview: | Description: | |
 |
Advance Direction Sign: AD sign on Forrest Hwy (NR1) approaching Binningup Rd and Wellesley Rd at Binningup, April 2016. Image © Paul Rands |
 |
Advance Directional Sign: AD sign approaching the South Western Hwy intersection from Robertson Drive / Bunbury Bypass at Davenport. Northbound, December 2007. Image © Paul Rands |
|
 |
Approaching Binningup Road & Wellesley Road: Forrest Hwy (NR1) approaching Binningup Rd and Wellesley Rd at Binningup, August 2009. Image © Paul Rands |
 |
Signals Ahead Sign: Unusual red signals ahead warning sign as you approach the level crossing on Robertson Drive / Bunbury Bypass at Davenport - this is the main Bunbury to Perth railway line. Northbound, December 2007. Image © Paul Rands |
|
 |
Advance Direction Sign: AD sign on Forrest Hwy (NR1) approaching Binningup Rd and Wellesley Rd at Binningup, August 2009. Image © Paul Rands |
 |
Level Crossing: The level crossing on Robertson Drive / Bunbury Bypass at Davenport - this is the main Bunbury to Perth railway line. Northbound, December 2007. Image © Paul Rands |
|
 |
Binningup Road: Corner of Forrest Hwy (NR1) and Binningup Rd at Binningup, April 2016. Image © Paul Rands |
 |
AD Sign: Advance directional sign approaching the Picton Road / South Western Highway (SR20) intersection at Glen Iris, Northbound, August 2009. Image © Paul Rands |
|
 |
Distance Sign: RD sign on Forrest Hwy (NR1) after Binningup Rd and Wellesley Rd at Parkfield, August 2009. Image © Paul Rands |
 |
Picton Road / South Western Highway Intersection: The traffic signals on the corner Picton Road and South Western Highway (SR20) at Glen Iris, in Bunbury, Northbound, December 2007. Image © Paul Rands |
|
 |
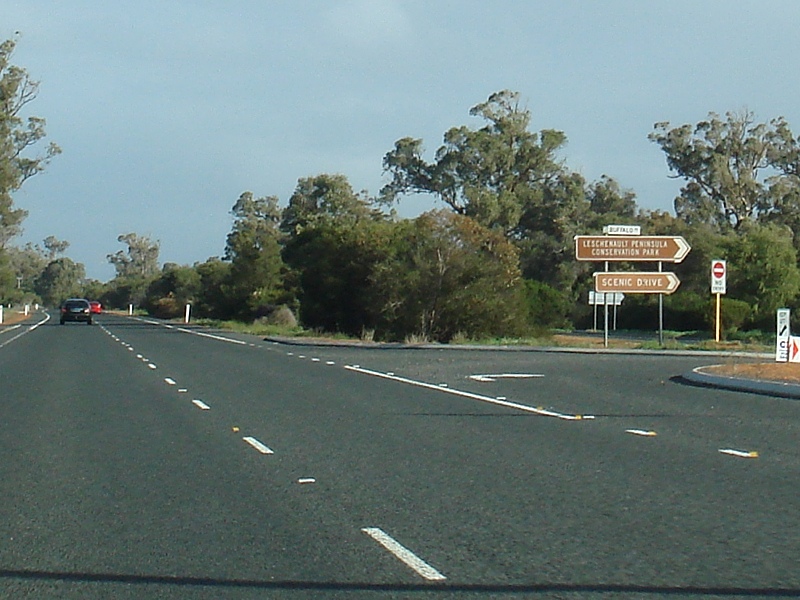
Advance Directional Sign: AD sign approaching Buffalo Rd at Parkfield, April 2016. Click here for a photo of this location by Paul Rands from August 2009. Image © Paul Rands |
 |
AD Sign: Advance directional sign on South Western Hwy approaching the Bunbury Bypass / Picton Rd intersection at Glen Iris. Northbound, December 2007. Image © Paul Rands |
|
 |
Approaching Buffalo Road: Forrest Hwy (NR1) approaching Buffalo Rd at Parkfield, August 2009. Image © Paul Rands |
 |
Reassurance Directional Sign : Distance sign on Robertson Dr (NR1) at East Bunbury , April 2016. Click here for a photo of this location by Paul Rands from August 2009. Image © Paul Rands |
|
 |
Buffalo Road: Corner of Forrest Hwy (NR1) and Buffalo Rd at Parkfield, April 2016. Click here for a photo of this location by Paul Rands from August 2009. Image © Paul Rands |
 |
Supplemental Advance Directional Sign: Supplemental AD sign approaching the Eelup Rotary at East Bunbury, Northbound, April 2016. Click here for a photo of this location by Paul Rands from November 2011. Click here for a photo of this location by Paul Rands from August 2009. Image © Paul Rands |
|
 |
Marriott Road: Corner of Forrest Hwy (NR1) and Marriott Rd at Leschenault, April 2016. Image © Paul Rands |
 |
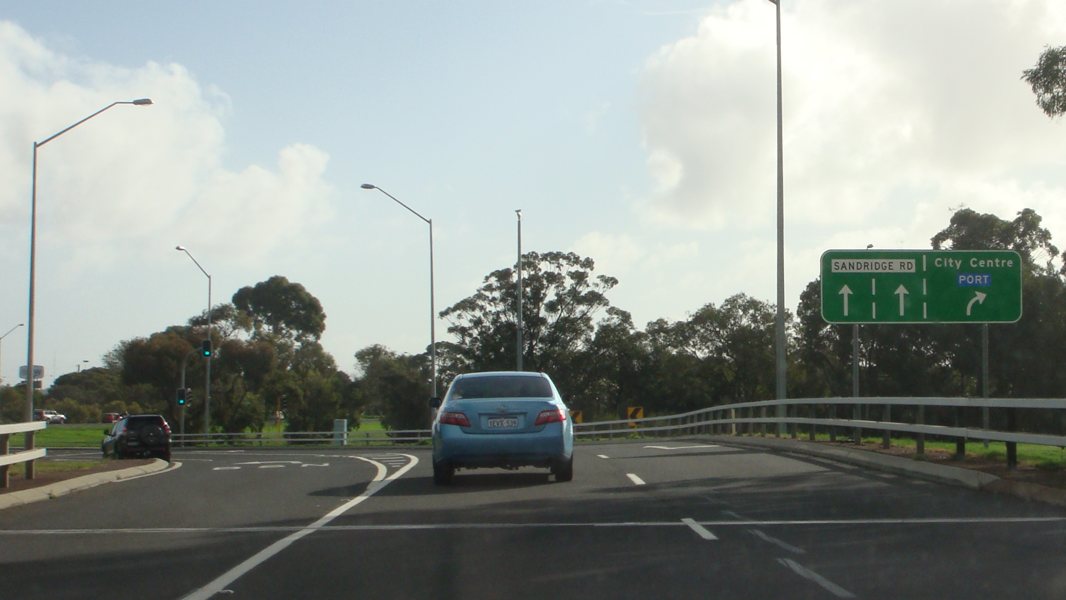
Advance Directional Sign: AD sign approaching the Eelup Rotary which controls Sandrige Road, Bunbury Bypass (Robertson Drive) and Australind Bypass, Northbound, November 2011. Click here for a photo of this location by Paul Rands from August 2009. Image © Paul Rands |
|
 |
Services Sign: Services sign on Forrest Hwy (NR1) at Leschenault, approaching Old Coast Rd (TD260 (formerly NR1)) and Forrest Hwy (NR1), April 2016. Image © Paul Rands |
 |
Lane Allocation Sign : Lane allocation sign on Eelup Rotary at East Bunbury, November 2012. Image © Paul Rands |
|
 |
Advance Directional Sign: AD sign on Forrest Hwy (NR1) at Leschenault, approaching Old Coast Rd (TD260 (formerly NR1)) and Forrest Hwy (NR1), April 2016. Click here for a photo of this location by Paul Rands from August 2009. Image © Paul Rands |
 |
Eelup Rotary: Corner of Sandridge Road approaching Koombana Dr (TD260), Robertson Dr (NR1) and Forrest Hwy (NR1) at East Bunbury. November 2011. Click here for a photo of this location by Paul Rands from December 2007. Image © Paul Rands |
|
 |
Approaching Old Coast Road: Forrest Hwy (NR1) at Leschenault, approaching Old Coast Rd (TD260 (formerly NR1)) and Forrest Hwy (NR1), August 2009. Image © Paul Rands |
 |
Eelup Rotary: Image © Paul Rands |
|
 |
Old Coast Road: Corner of Old Coast Road (TD260) and Forrest Hwy (NR1) at Leschenault, August 2009. Image © Paul Rands |
 |
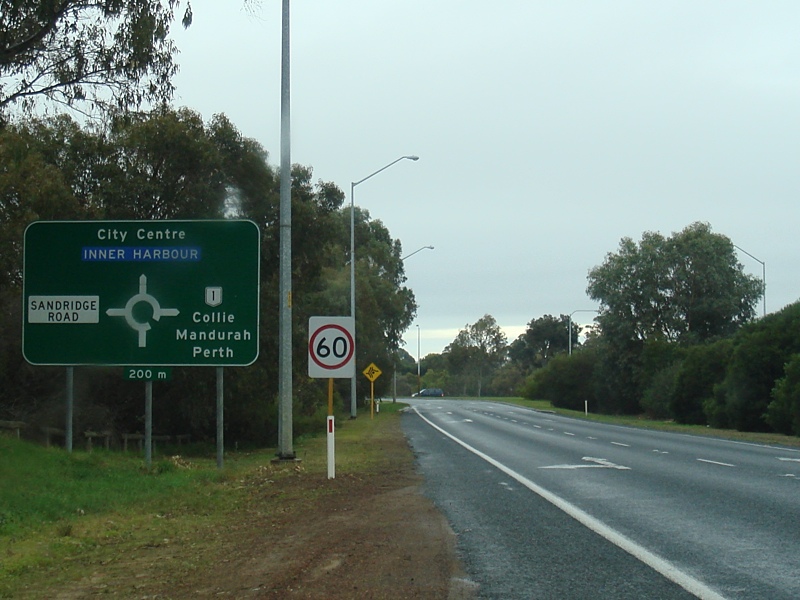
Advance Directional Sign: AD sign on Sandridge Road approaching Koombana Dr (TD260), Robertson Dr (NR1) and Forrest Hwy (NR1) at East Bunbury. November 2011. Click here for a photo of this location by Paul Rands from December 2007. Image © Paul Rands |
|
 |
Reassurance Directional Sign: Distance sign at Leschenault, April 2016. Image © Paul Rands |
 |
Intersection Directional Sign : ID sign on Sandridge Rd at the Eelup Rotary in East Bunbury, November 2012. Image © Paul Rands |
|
 |
Brunswick River: Forrest Hwy (NR1) crossing Brunswick River at Wellesley, April 2016. Image © Paul Rands |
 |
Lane Allocation Sign : Lane allocation sign on Sandridge Rd at the Eelup Rotary in East Bunbury, November 2012. Image © Paul Rands |
|
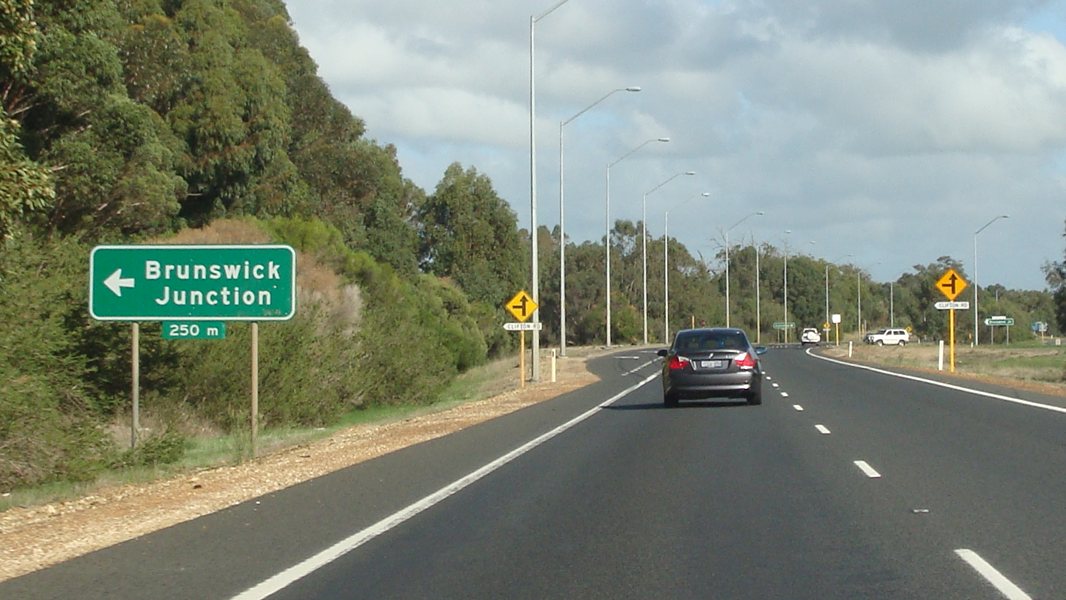 |
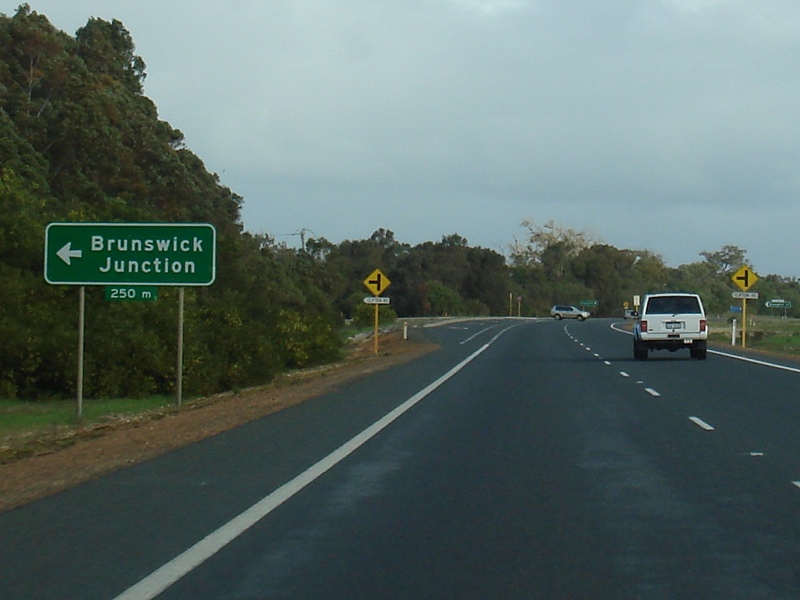
Advance Directional Sign: AD sign at Brunswick approaching Clifton Rd, April 2016. Click here for a photo of this location by Paul Rands from August 2009. Image © Paul Rands |
 |
Distance Sign: RD sign after the Eelup Rotary at Glen Iris, with Vittoria Road in the distance, Northbound, April 2016. Click here for a photo of this location by Paul Rands from November 2011. Click here for a photo of this location by Paul Rands from December 2007. Image © Paul Rands |
|
 |
Approaching Clifton Road: Forrest Hwy (NR1) approaching Clifton Rd at Brunswick, August 2009. Image © Paul Rands |
 |
Approaching Vittoria Road : Forrest Hwy (NR1) approaching Vittoria Rd in Glen Iris, November 2012. Image © Paul Rands |
|
 |
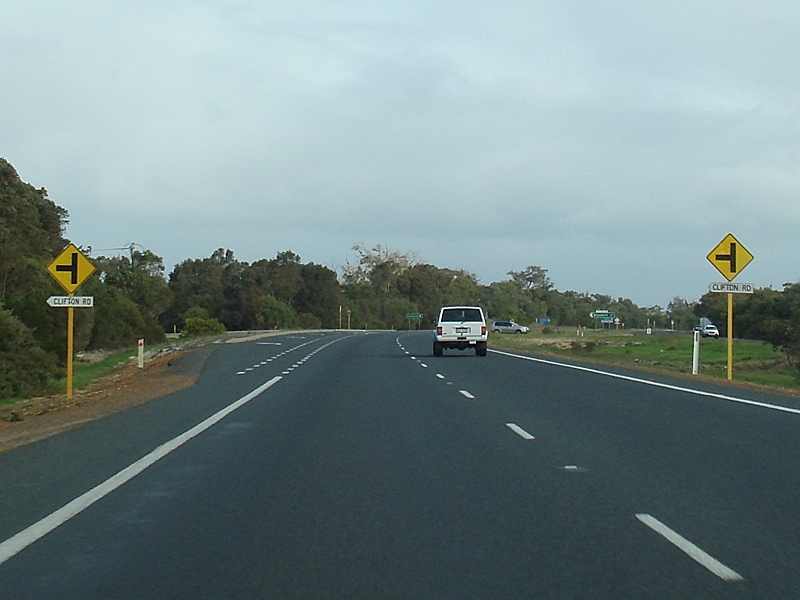
Intersection Directional Sign: ID sign assembly at the Clifton Rd intersection, April 2016. Click here for a photo of this location by Paul Rands from August 2009. Image © Paul Rands |
 |
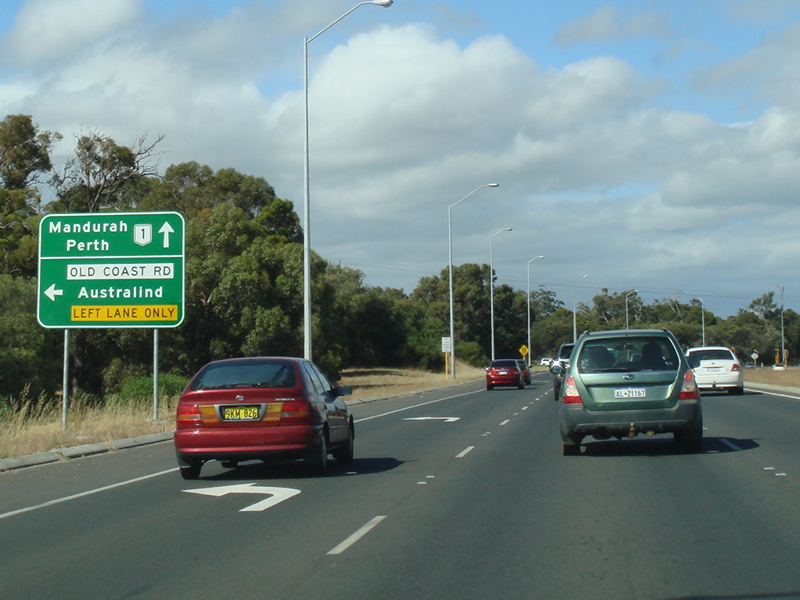
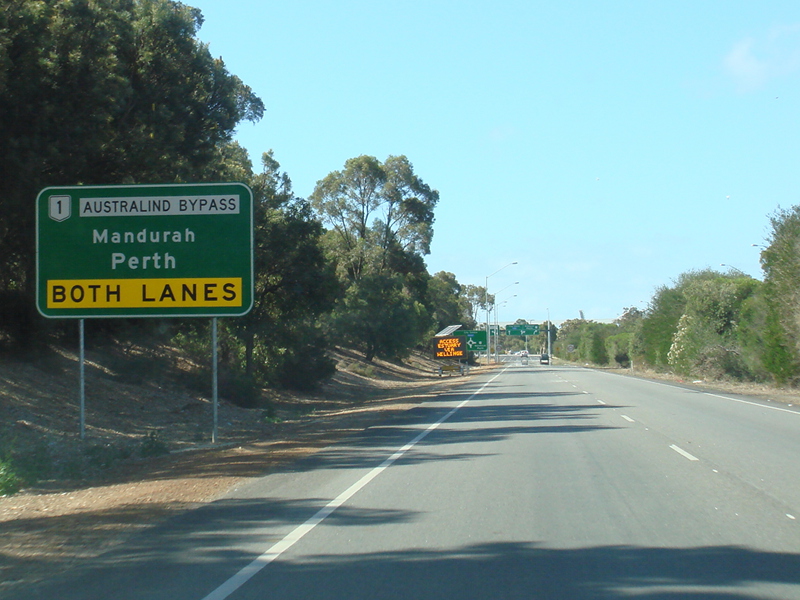
Services Sign: Northbound on the Australind Bypass at Glen Iris, Northbound, December 2007. Image © Paul Rands |
|
 |
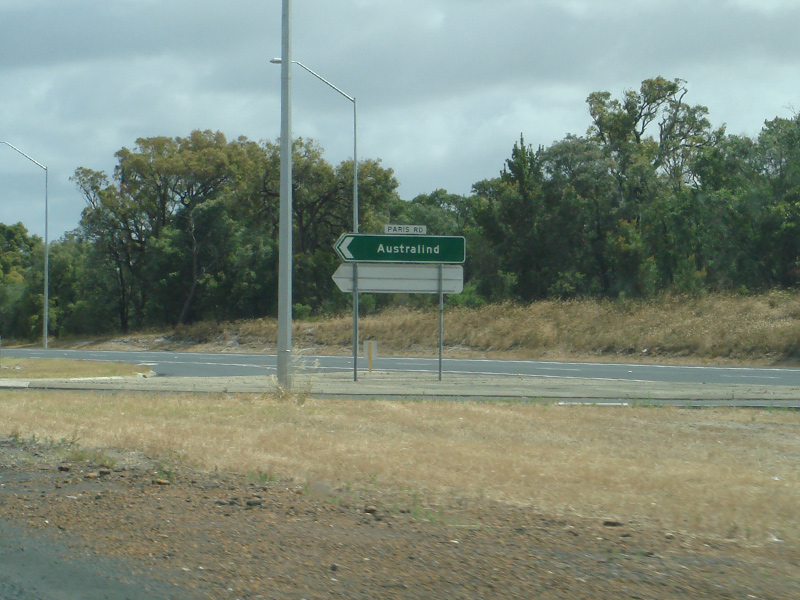
Advance Directional Sign: AD sign on Forrest Hwy (NR1) approaching Paris Rd at Brunswick, April 2016. Click here for a photo of this location by Paul Rands from August 2009. Image © Paul Rands |
 |
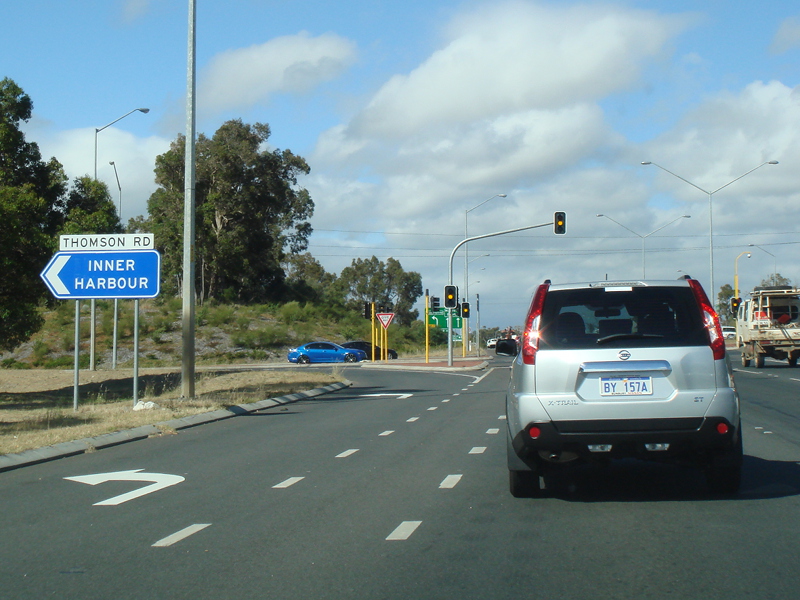
Advance Directional Sign : AD sign at Glen Iris approaching Alyxia Dr and Thomson Rd, April 2016. Click here for a photo of this location by Paul Rands from November 2012. Image © Paul Rands |
|
 |
Approaching Paris Road: Forrest Hwy (NR1) approaching Paris Rd at Brunswick, August 2009. Image © Paul Rands |
 |
Alyxia Drive & Thomson Road : Forrest Hwy (NR1) at the junction with Alyxia Dr and Thomson Rd in Glen Iris, April 2016. Click here for a photo of this location by Paul Rands from November 2012. Image © Paul Rands |
|
 |
Paris Road: Corner of Forrest Hwy (NR1) and Paris Rd at Brunswick, August 2009. Image © Paul Rands |
 |
Lane Allocation Sign : Unusually designed lane allocation sign approaching Old Coast Rd at Glen Iris, November 2012. Image © Paul Rands |
|
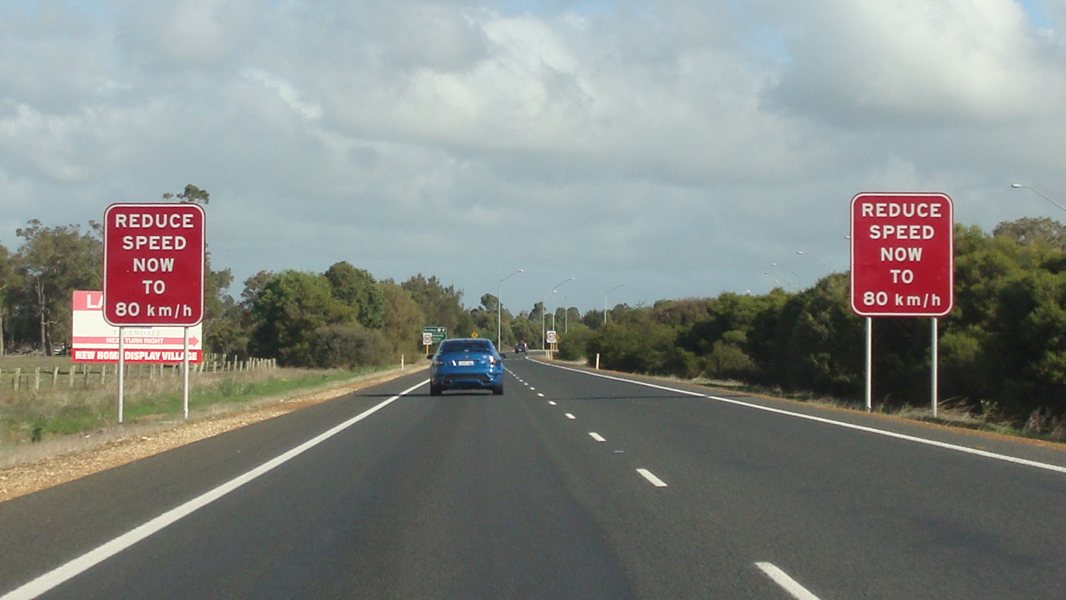 |
Speed Change Warning: Sign warning of speed change from 110 to 80 km/h at Roelands near Raymond Rd, April 2016. Image © Paul Rands |
 |
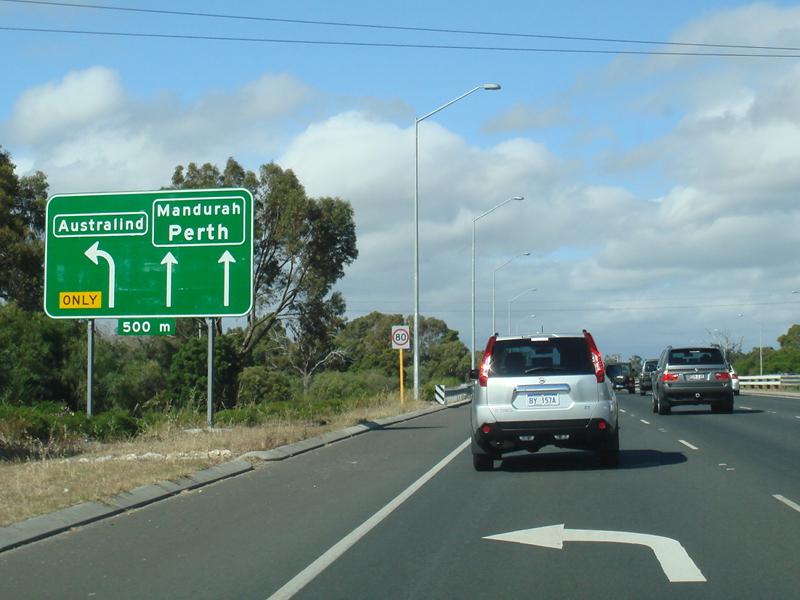
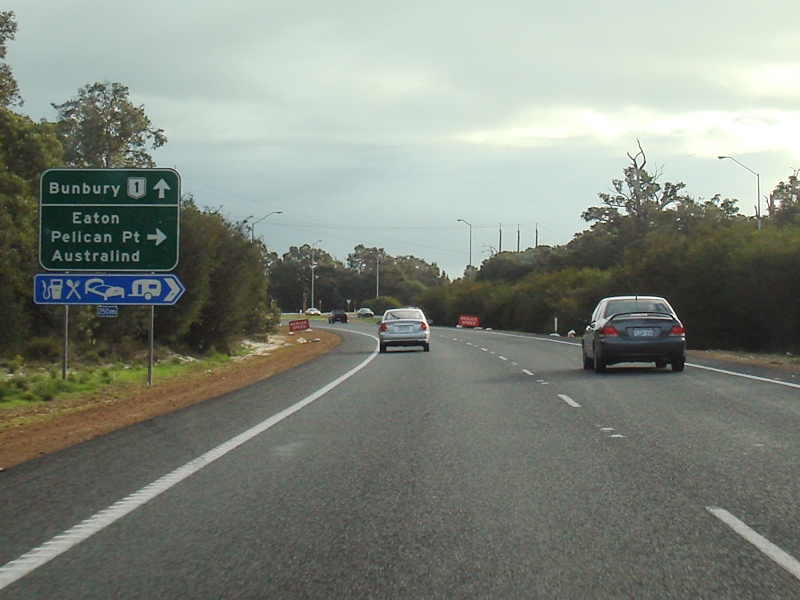
Advance Directional Sign: AD sign approaching Old Coast Road at Pelican Point, Northbound, November 2011. Click here for a photo of this location by Paul Rands from December 2007. Old Coast Road was once National Route 1 until the Australind Bypass opened in the late 1990s. Image © Paul Rands |
|
 |
Advance Directional Sign: AD sign approaching Raymond Rd at Roelands, April 2016. Image © Paul Rands |
 |
Old Coast Road Intersection: Approaching Old Coast Road at Pelican Point, Northbound, November 2012. |
|
 |
Raymond Road: Forrest Hwy (NR1) approaching Raymond Road at Roelands, August 2009. Image © Paul Rands |
 |
Advance Directional Sign: The unnumbered section of Old Coast Rd approaching Forrest Hwy (NR1) at Pelican Point, December 2007. Image © Paul Rands |
|
 |
Intersection Directional Sign: ID sign assembly at the Raymond Road junction at Millbridge, April 2016. Click here for a photo of this location by Paul Rands from August 2009. Image © Paul Rands |
 |
Advance Directional Sign: AD sign for the Easton Dr intersection, Eaton, December 2007. Image © Paul Rands |
|
 |
Intersection Directional Sign: ID sign assembly facing the Raymond Road junction at Millbridge, November 2012. Image © Paul Rands |
 |
Approaching Eaton Drive: Forrest Hwy (NR1) approaching Eaton Dr at Eaton, August 2009. Image © Paul Rands |
|
 |
Advance Directional Sign : AD sign at Millbridge approaching Grand Entrance, April 2016. Image © Paul Rands |
 |
Eaton Drive Intersection: The Australind Bypass as it travels by Eaton Dr in Eaton, Northbound, December 2007. Image © Paul Rands |
|
 |
Approaching Grand Entrance : Forrest Hwy (NR1) as it approaches Grand Entrance at Millbridge, November 2012. Image © Paul Rands |
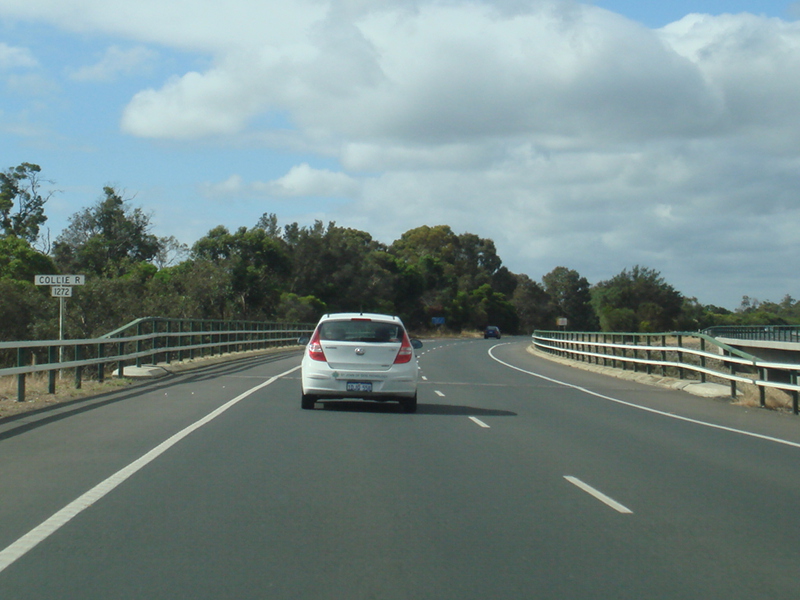 |
Collie River: Crossing the Collie River at Eaton, Northbound, November 2012. |
|
 |
Grand Entrance : Forrest Hwy (NR1) at the junction with Grand Entrance at Millbridge, November 2012. Image © Paul Rands |
 |
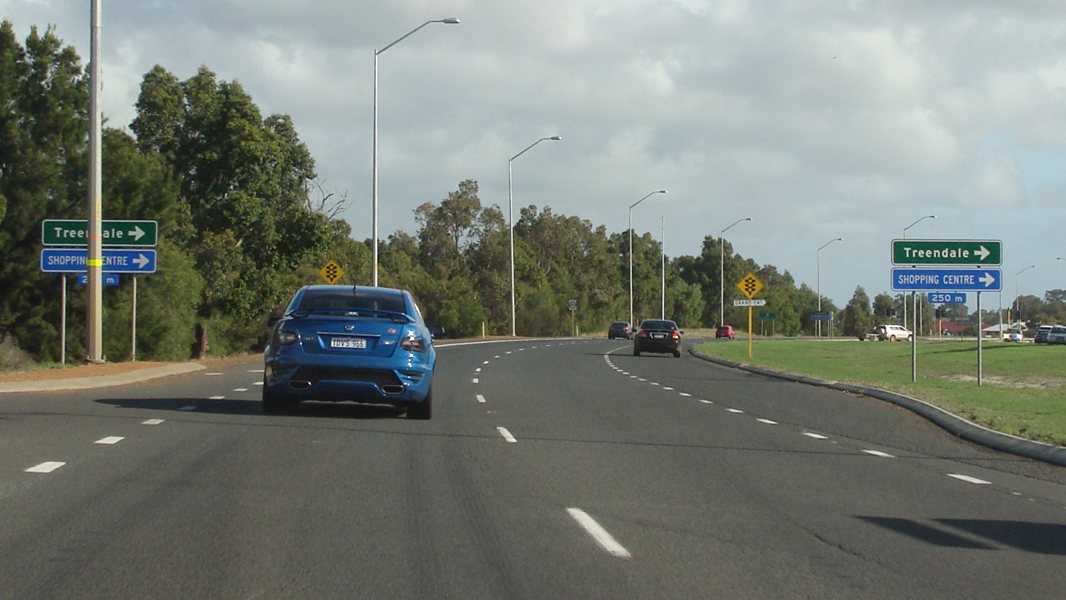
Speed Change Warning: Sign warning of speed change from 110 to 80 km/h at Treendale, April 2016. Image © Paul Rands |
|
 |
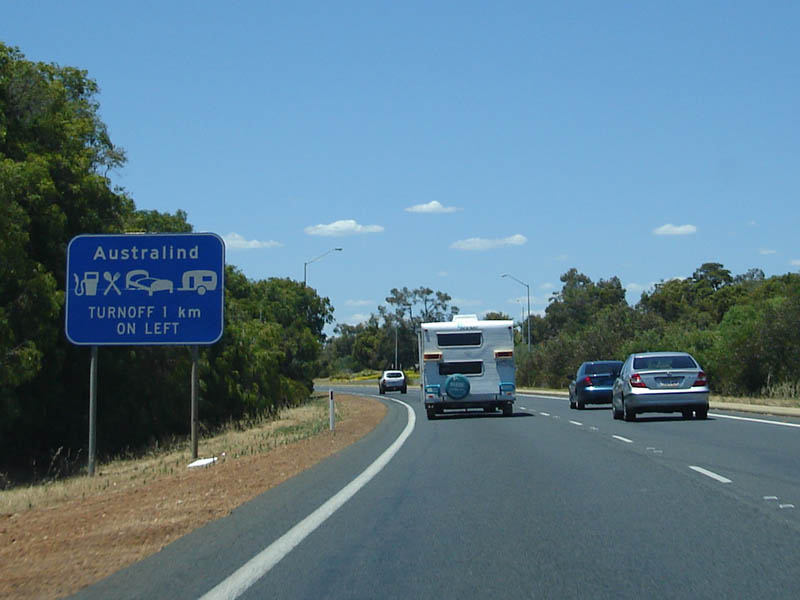
Distance Sign: RD sign at Australind, November 2011. Click here for a photo of this location by Paul Rands from August 2009. Image © Paul Rands |
 |
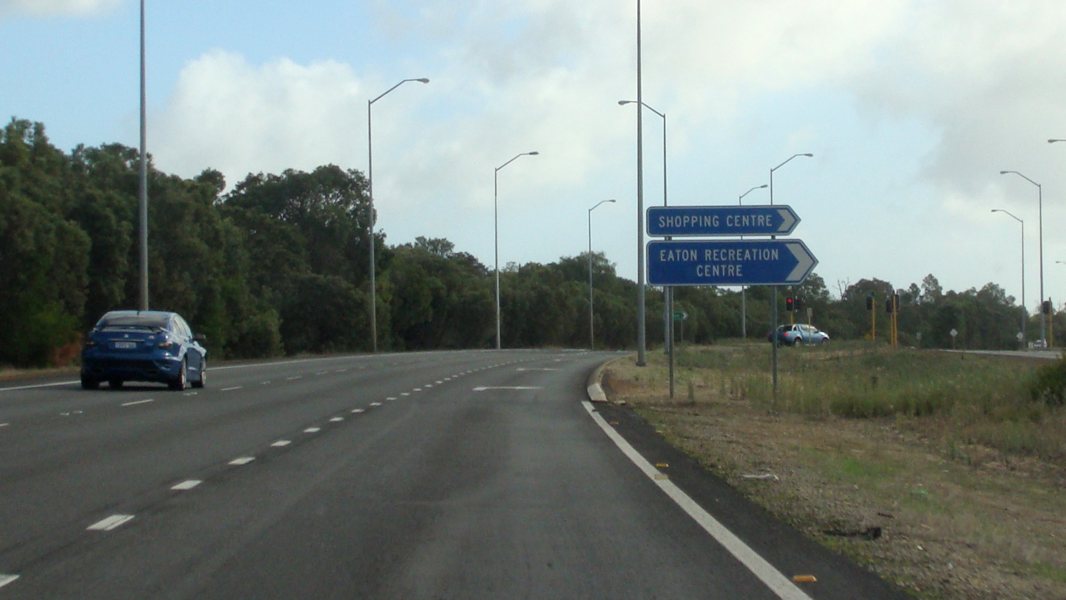
Advance Directional Sign : AD sign approaching Grand Entrance at Treendale, November 2012. Image © Paul Rands |
|
 |
Collie River: Forrest Hwy (NR1) at Australind as it crosses the Collie River, April 2016. Click here for a photo of this location by Paul Rands from August 2009. Image © Paul Rands |
 |
Flashing Warning Signs : Flashing warning signs approachin g the signalised junction with Grand Ent at Treendale, November 2012. Image © Paul Rands |
|
 |
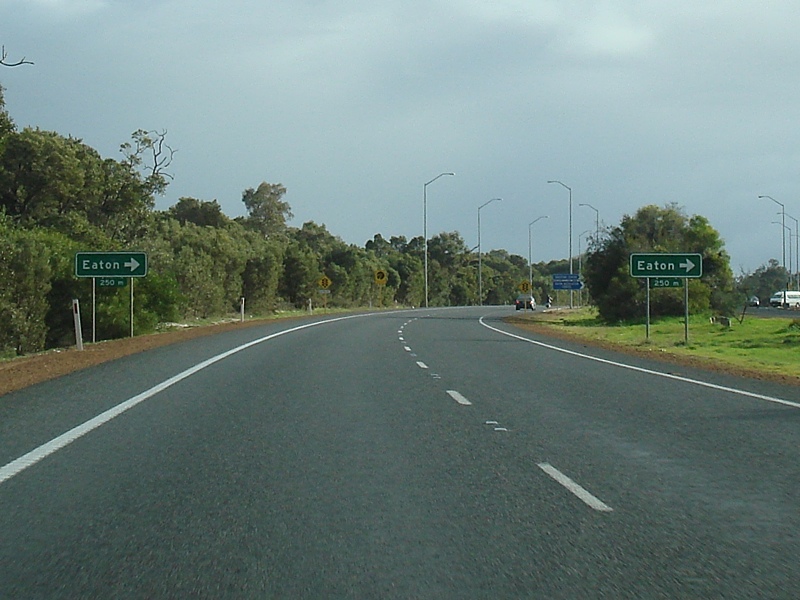
Advance Directional Sign: AD sign at Eaton approaching Eaton Dr, April 2016. Click here for a photo of this location by Paul Rands from August 2009. Image © Paul Rands |
 |
AD Sign: Advance directional sign at Millbridge approaching Raymond Road, on the Australind Bypass, Northbound, November 2012. |
|
 |
Intersection Directional Sign : ID sign assembly at Eaton Dr, Eaton, April 2016. Image © Paul Rands |
 |
Raymond Road Intersection: Passing through the Raymond Road intersection at Millbridge, Northbound, August 2009. Image © Paul Rands |
|
 |
Eaton Drive: Corner of Forrest Hwy (NR1) and Eaton Dr at Eaton, August 2009. Image © Paul Rands |
 |
RD Sign: Distance sign at Millbridge after the Raymond Road intersection, Northbound, November 2011. Click here for a photo of this location by Paul Rands from August 2009. Image © Paul Rands |
|
 |
Advance Directional Sign: AD sign on Forrest Hwy (NR1) approaching Old Coast Rd (former NR1) at Pelican Point, August 2009. Image © Paul Rands |
 |
AD Sign: Advance directional sign approaching Paris Drive at Millbridge, November 2012. |
|
 |
Old Coast Road: Corner of Forrest Hwy (NR1) and Old Coast Rd at Pelican Point, August 2009. Image © Paul Rands |
 |
Intersection Directional Sign : ID sign at the junction with Paris Rd in Millbridge, November 2012. Image © Paul Rands |
|
 |
Old Coast Road: Corner of Forrest Hwy (NR1) and Old Coast Rd at Pelican Point, April 2016. Image © Paul Rands |
 |
AD Sign: Advance directional sign approaching Clifton Road at Millbridge, August 2009. Image © Paul Rands |
|
 |
Entering The City of Bunbury: Forrest Hwy (NR1) at Glen Iris as it enters the City of Bunbury local government area, August 2009. Image © Paul Rands |
 |
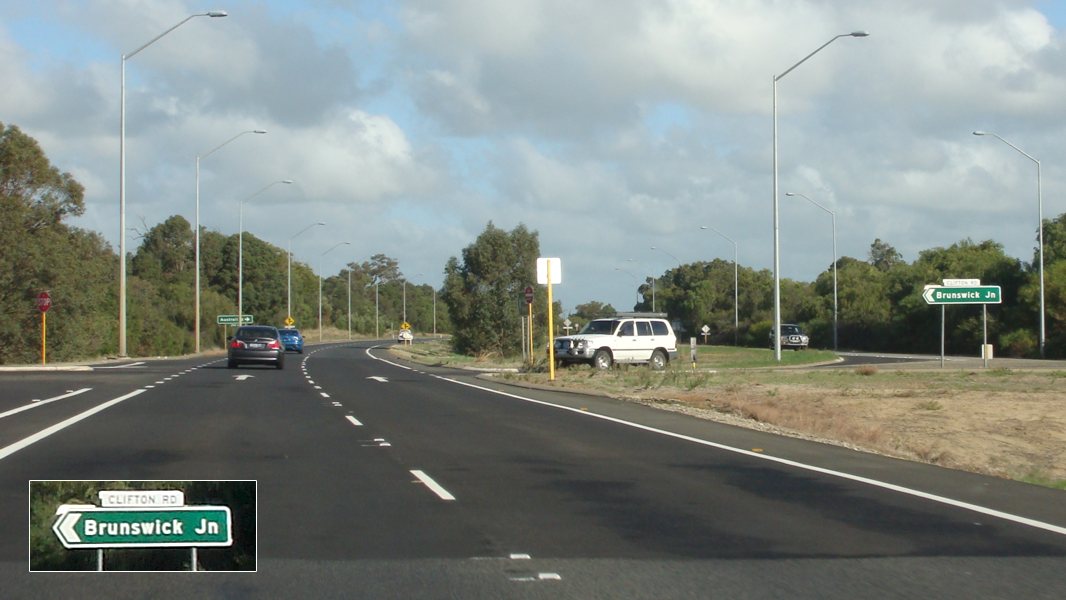
Clifton Road Junction: Looking northbound at Millbridge where NR1 passes Clifton Road, Northbound, November 2012. |
|
 |
Advance Directional Sign : AD sign approaching Thomson Rd & Alyxia Dr in Glen Iris, April 2016. Click here for a photo of this location by Paul Rands from November 2012. Image © Paul Rands |
 |
Brunswick River: Crossing the Brunswick River at Millbridge, Northbound, April 2016. Image © Paul Rands |
|
 |
Approaching Thomson Road & Alyxia Drive : Forrest Hwy (NR1) approaching Thomson Rd & Alyxia Dr in Glen Iris, November 2012. Image © Paul Rands |
 |
ID Sign: Intersection directional sign at the Old Coast Road intersection at Leschenault, April 2016. Click here for a photo of this location by Paul Rands from August 2009. Image © Paul Rands |
|
 |
Thomson Road & Alyxia Drive : Forrest Hwy (NR1) at the junction with Thomson Rd & Alyxia Dr in Glen Iris, April 2016. Click here for a photo of this location by Paul Rands from November 2012. Image © Paul Rands |
 |
RD Sign: Distance sign after the Old Coast Road junction, Leschenault, Northbound, April 2016. Click here for a photo of this location by Paul Rands from August 2009. Image © Paul Rands |
|
 |
Supplemental advance Directional Sign: |
 |
Marriott Road: Corner of Forrest Hwy (NR1) and Marriott Rd at Leschenault. November 2012. |
|
 |
Advance Directional Sign: Image © Paul Rands |
 |
Reassurance Marker: Trailblazer on the northbound carriageway of Old Coast Road at Leschenault, Northbound, August 2009. Image © Paul Rands |
|
 |
Supplemental Advance Directional Sign: Supplemental AD sign approaching the Eelup Rotary on Forrest Hwy (NR1), Glen Iris, April 2016. Image © Paul Rands |
 |
AD sign: Advance directional sign approaching Buffalo Rd at Leschenault, August 2009. Image © Paul Rands |
|
 |
Preston River: Forrest Hwy (NR1) as it crosses Preston River at Glen Iris, April 2016. Image © Paul Rands |
 |
Intersection Directional Sign : ID sign at Buffalo Rd at Leschenault, November 2012. Image © Paul Rands |
|
 |
Lane Allocation Sign : Lane allocation sign on the Australind Bypass approach to Eelup Rotary at Glen Iris, April 2016. Image © Paul Rands |
 |
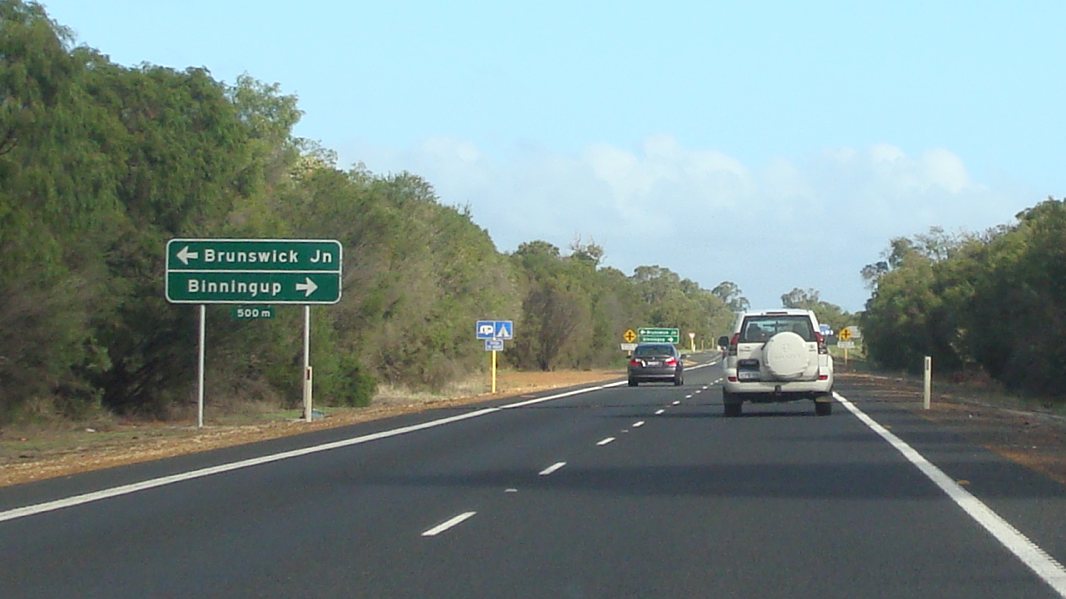
AD Sign: Advance directional sign approaching Binningup and Wellesley Road at Binningup, April 2016. Image © Paul Rands |
|
 |
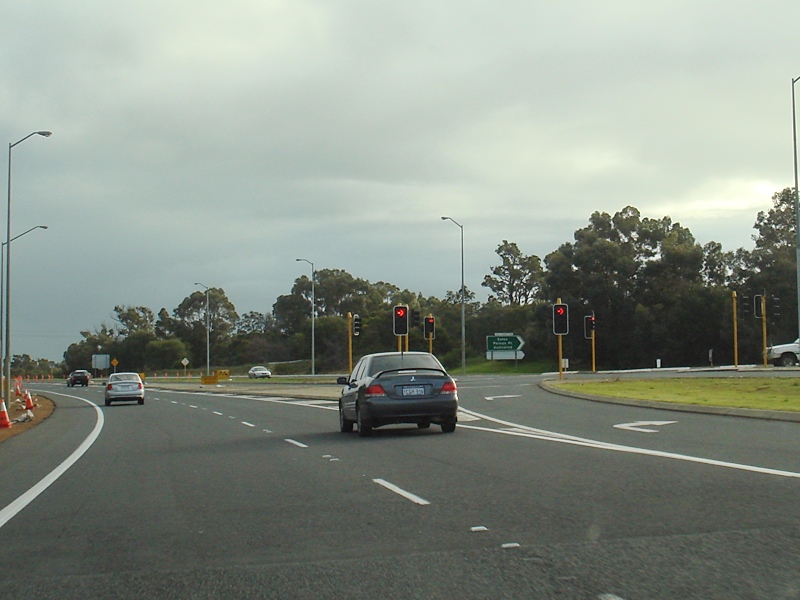
Eelup Rotary: The Eelup Rotary is the largest roundabout in Western Australia at 150 metres across the centre island. Prior to the installation of traffic lights on the roundabout, the Eelup Rotary was acknowledged as regional Western Australia's highest rating blackspot, with over 300 crashes in a five-year period. Image taken April 2016. Click here for a photo of this location by Paul Rands from December 2007. 1 Image © Paul Rands |
 |
AD Sign: Advance directional sign approaching Binningup and Wellesley Road at Binningup, Northbound, August 2009. Image © Paul Rands |
|
 |
Distance Sign: Southbound distance sign on the Bunbury Bypass after the Eelup Rotary. December 2007. Image © Paul Rands |
 |
Binningup Road & Wellesley Road Intersection: Sign assembly at the Binningup and Wellesley Road intersection at Binningup, Northbound, November 2012. |
|
 |
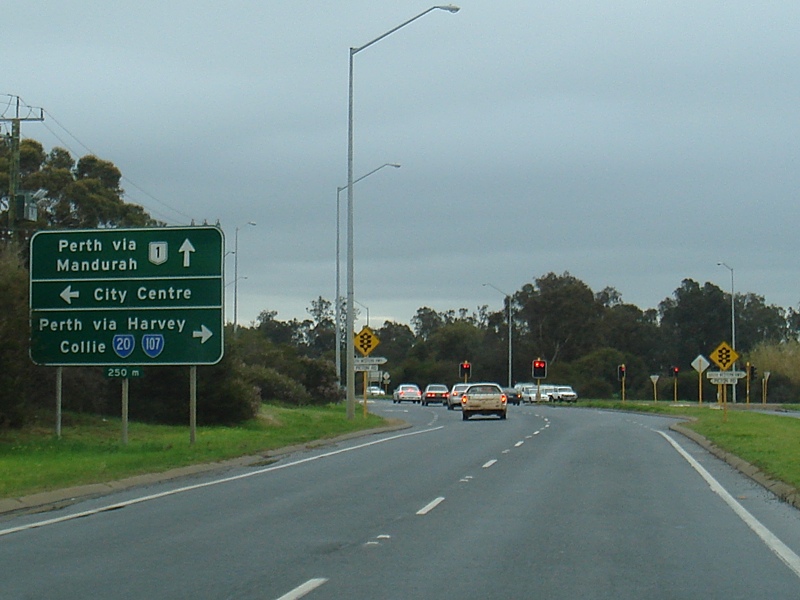
Advance Directional Sign: Southbound AD sign on the Bunbury Bypass approaching Picton Road / South Western Hwy. December 2007. Image © Paul Rands |
 |
RD Sign: Distance sign after the Binningup Road & Wellesley Road Intersection, Northbound, November 2011. Click here for a photo of this location by Paul Rands from December 2007. Image © Paul Rands |
|
| Click here for the continuation of NR1 between Binningup and Mandurah Click here for the continuation of NR1 between Balingup and Bunbury |
||||
1 Main Roads Western Australia
2 South West Focus Conference, Main Roads WA Linking the South West, May 2007
3 Government of Western Australia, Media Statements, Extension of SW dual carriageway to be constructed this year, 30 June 1995
4 Main Roads Western Australia, Network Changes: Rural, 19 March 2013
5 Government of Western Australia, Media Statements, Consultancy awarded for designing section of Old Coast Road (Preston), 19 January 1996
6 Government of Western Australia, Media Statements, Official opening of Australind Bypass duplication, 18 December 1997
7 Government of Western Australia, Media Statements, Work starts on $16million Eelup roundabout upgrade, 26 July 2011
8 Main Roads Western Australia, Completed Projects, Eelup Roundabout
9 Bunbury Herald, Highway now runs to Eelup roundabout, 17 June 2014
Last updated: 10-Jan-2019 12:24
This site © Paul Rands. All rights reserved. Some portions © (copyright) by their respective and credited owners. Permission must be obtained before using any images from this site. For details, please email by clicking here.