|
|
|
|
|
| M1 A1 | Princes Highway, West Gate Freeway, CityLink, Monash Freeway & Princes Freeway (M1 / A1) - Werribee to Hawthorn |
Statistics:
Route Numbering:

 1
1
General Information:
M1 / A1 is a major route that crosses roughly from east to west in Victoria. The standard varies from single carriageway rural highway to full freeway standard.
Multiplexes along the route include:
Princes Freeway:
The Princes Freeway is in 2 sections. The western section connects with the West Gate Freeway and extends to the Geelong area. The eastern section connects with the Monash Freeway and joins up with the Princes Highway (East) at Traralgon. There is also a small section of Princes Freeway, otherwise known as Orbost Bypass, at Orbost. It's not dual carriageway however. 1
West Gate Freeway:
The West Gate Freeway connects the Princes Freeway (West), with CityLink southern link. Forming a section of the West Gate Freeway is the West Gate Bridge. The West Gate Bridge is the second-longest bridge in Australia. It is a cable-stayed bridge and has a span of 2582.6 metres. The West Gate Bridge collapsed on 15 October 1970, resulting in the deaths of 35 people. The bridge was rebuilt and completed in 1978. 3
CityLink:
CityLink is in divided into 2 parts, the western section (Metropolitan Route 43) and the southern section (M1). The CityLink southern section features 2 tunnels, the Burnley and Domain Tunnels. The Burnley tunnel is approximately 3.5 kilometres in length. 4
History:
| Werribee to Hawthorn | Hawthorn to Werribee | |||
| Preview: | Description: | Preview: | Description: | |
 |
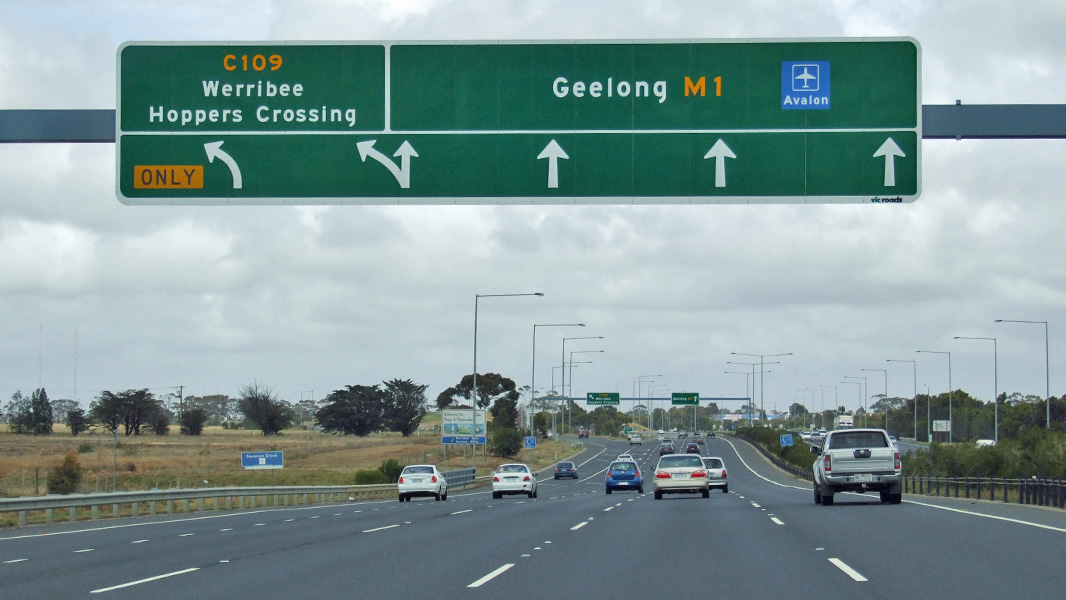
Supplemental Advance Directional Sign: Supplemental AD sign at Werribee approaching Geelong Rd (C109), January 2017. Image © Huang Milton Collection |
 |
Yarra Boulevard: Citylink (M1) at Burnley at Yarra Blvd (TD2) interchange, December 2013. Image © Michael Greenslade |
|
 |
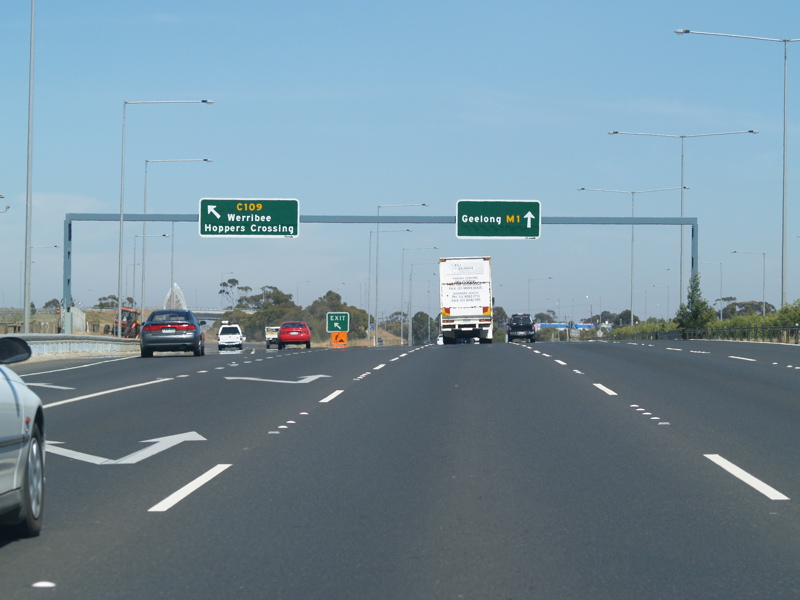
Advance Directional Sign: AD sign at Werribee approaching Geelong Rd (C109), January 2017. Image © Huang Milton Collection |
 |
Advance Directional Sign: AD sign approaching Punt Rd (MR29) at Richmond, December 2013. Image © Michael Greenslade |
|
 |
Advance Directional Sign: AD sign at Werribee approaching Geelong Rd (C109), January 2017. Image © Huang Milton Collection |
 |
Punt Road: Citylink (M1) at the Punt Rd (MR29) interchange at Melbourne, December 2013. Image © Michael Greenslade |
|
 |
Advance Directional Sign: AD sign at Werribee approaching Geelong Rd (C109), January 2017. Image © Huang Milton Collection |
 |
Batman Avenue: Citylink (M1) at Batman Av interchange, Melbourne, December 2013. Image © Michael Greenslade |
|
 |
Supplemental Advance Directional Sign: Supplemental AD sign at Werribee approaching Geelong Rd (C109), January 2017. Image © Huang Milton Collection |
 |
Advance Directional Sign: AD sign at Southbank approaching Montague St (MR30), December 2013. Image © Michael Greenslade |
|
 |
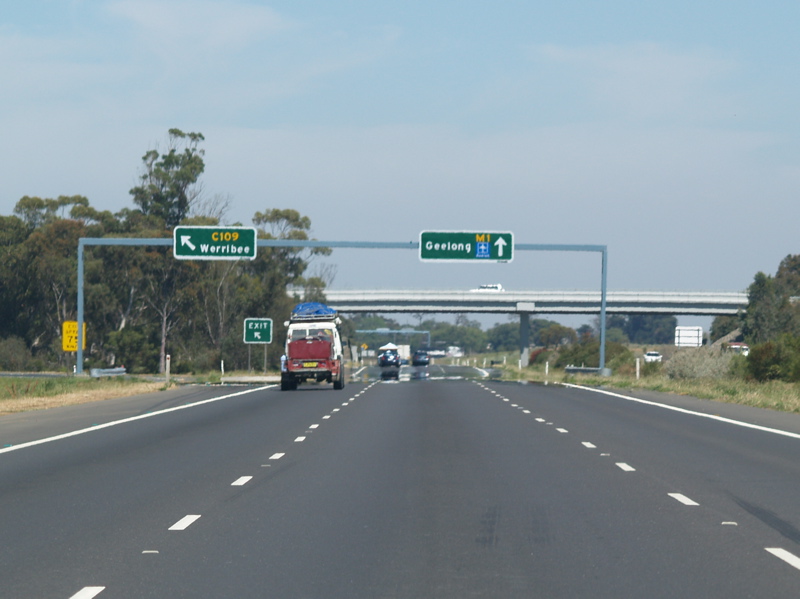
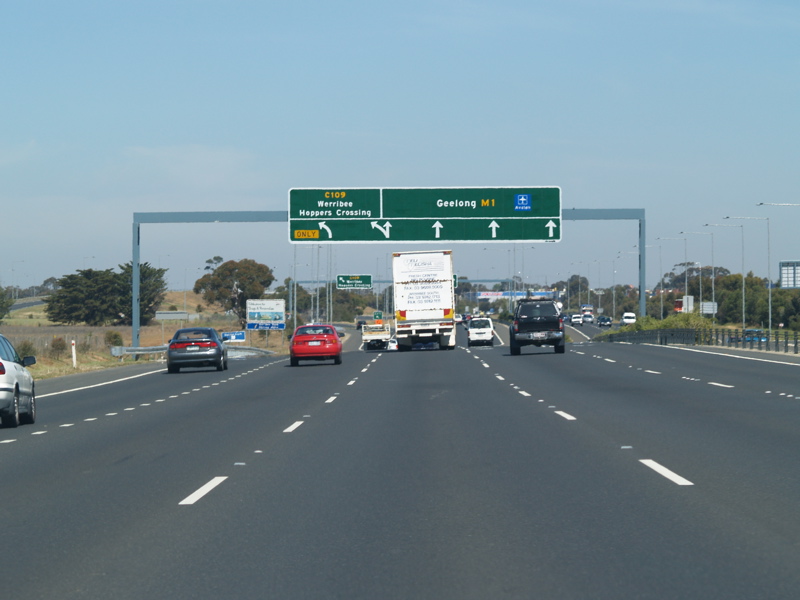
Geelong Road: Princes Fwy (M1) at Werribee at the Geelong Rd (C109) interchange, January 2017. Image © Huang Milton Collection |
 |
Montague Street: West Gate Fwy (M1) at South Wharf at the interchange with Montague St (MR30), December 2013. Click here for a photo of this location by Rob Tilley from November 2005. Image © Rob Tilley |
|
 |
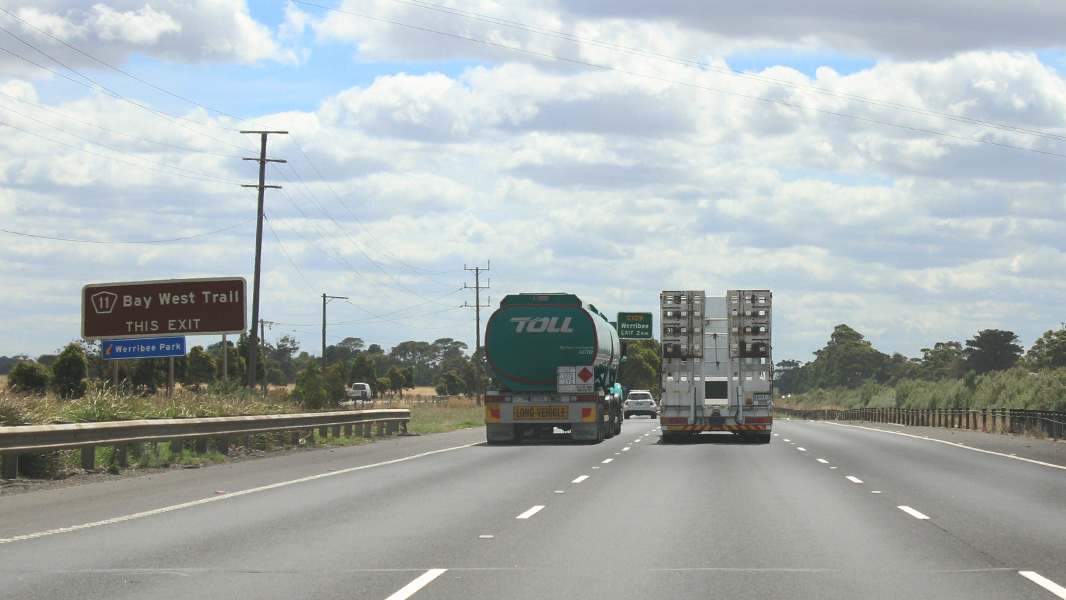
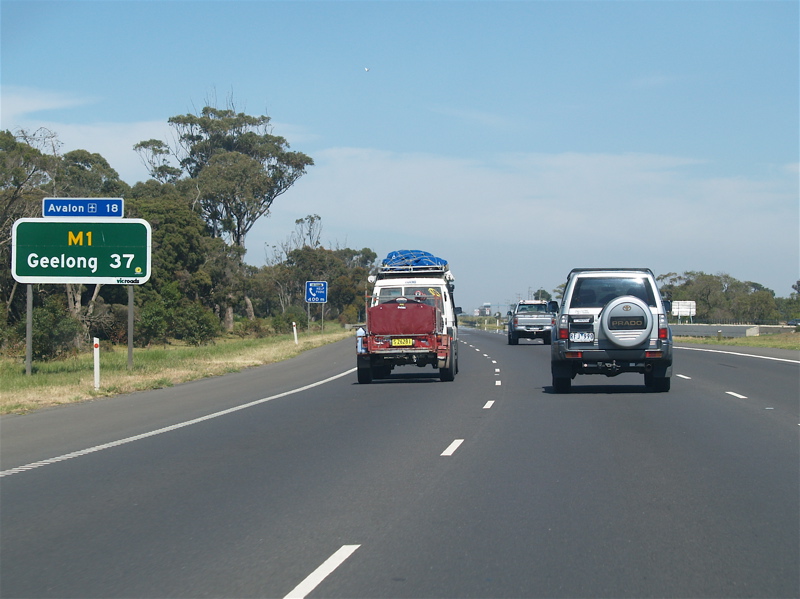
Reassurance Directional Sign: Distance sign at Werribee, January 2017. Image © Huang Milton Collection |
 |
Advance Directional Sign: AD sign on West Gate Fwy (M1) at Port Melbourne, approaching Citylink (MR43), November 2006. Image © Stuart Fox |
|
 |
Advance Directional Sign: AD sign approaching Sneydes Rd interchange, Werribee, January 2017. Image © Huang Milton Collection |
 |
Advance Directional Sign: West Gate Fwy (M1) at Spotswood approaching Williamstown Rd (MR37), December 2013. Image © Michael Greenslade |
|
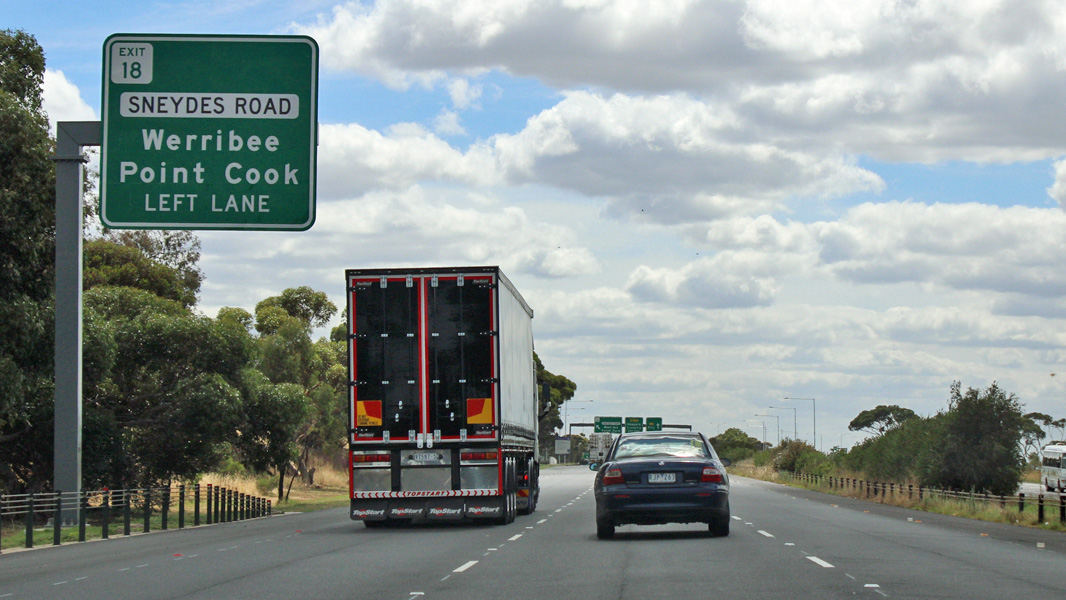 |
Advance Directional Sign: AD sign approaching Sneydes Rd interchange, Werribee, January 2017. Image © Huang Milton Collection |
 |
Millers Road: West Gate Fwy (M1) at Millers Rd (MR41) interchange, Altona North, December 2013. Image © Michael Greenslade |
|
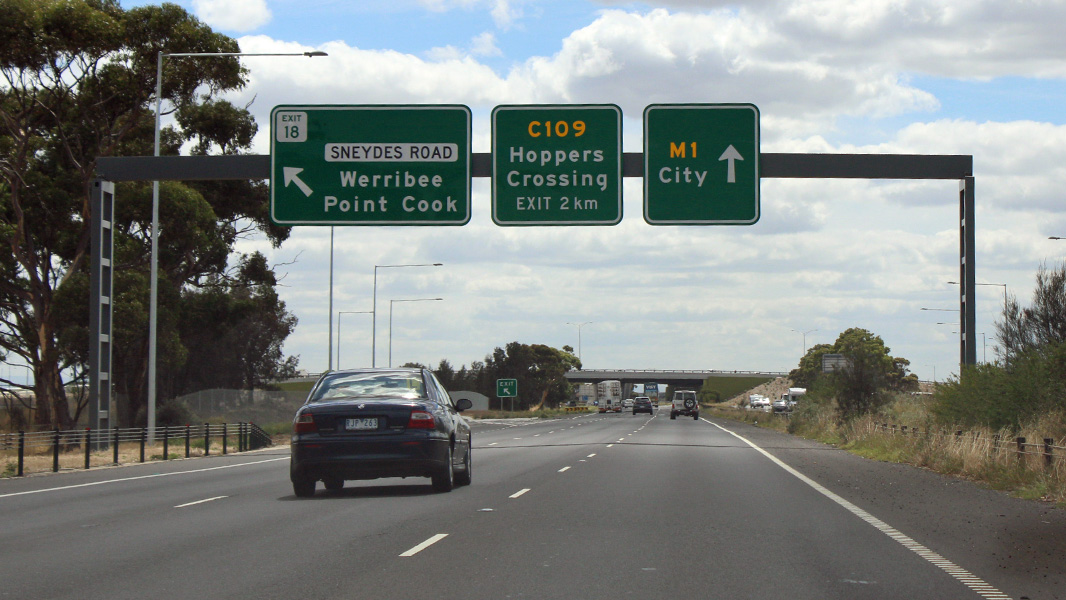 |
Sneydes Road: Princes Fwy (M1) at the Sneydes Rd interchange, Werribee, January 2017. Image © Huang Milton Collection |
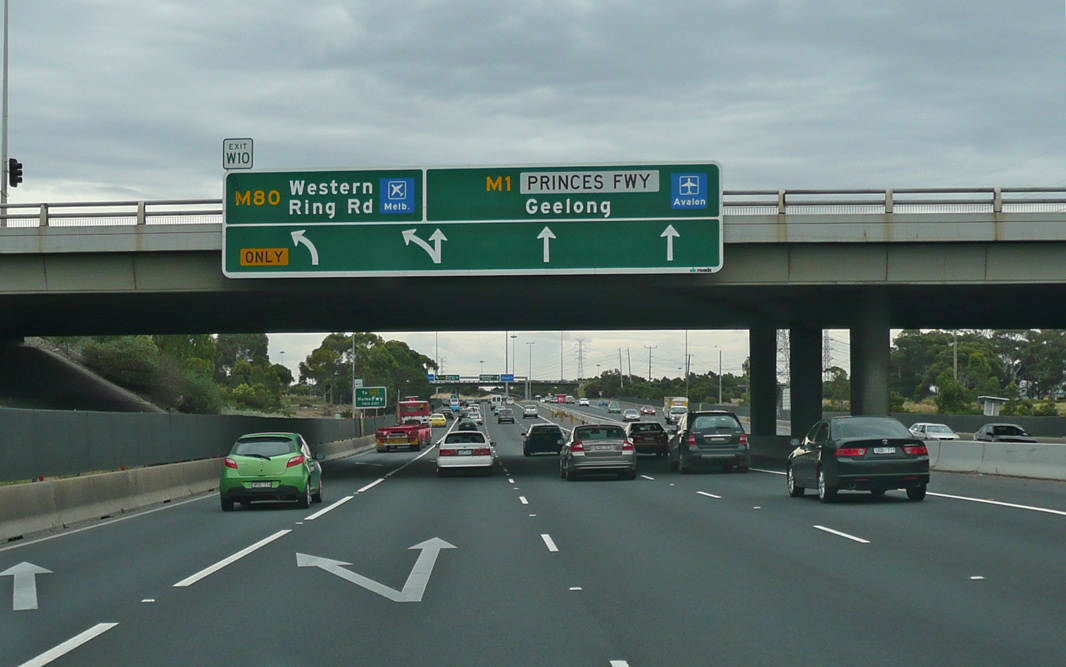 |
Western Ring Road: West Gate Fwy (M1) at the interchange with Western Ring Rd (M80) at Altona North, December 2013. M1 reverts back to Princes Fwy name at this location. Image © Michael Greenslade |
|
 |
Advance Directional Sign: AD sign at Werribee approaching Princes Hwy (C109) interchange, January 2017. Image © Huang Milton Collection |
 |
Advance Directional Sign: AD sign on Princes Fwy (M1) at Altona North approaching the interchange with Kororoit Creek Rd (MR35), December 2006. Image © Rob Tilley |
|
 |
Princes Highway: Princes Fwy (M1) at the Princes Hwy (C109) interchange, Werribee, January 2017. Image © Huang Milton Collection |
 |
Supplemental Advance Directional Sign: Supplemental AD sign on Princes Fwy (M1) at Altona North approaching the interchange with Kororoit Creek Rd (MR35), December 2006. Image © Rob Tilley |
|
 |
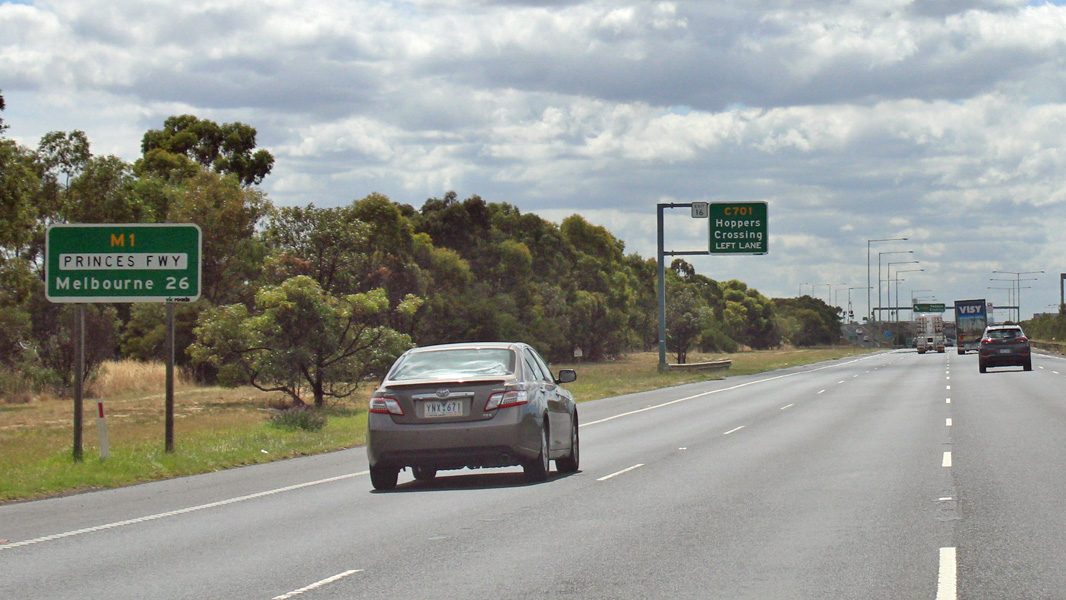
Advance Directional Sign: AD sign approaching Forsythe Rd (C701) at Hoppers Crossing, January 2017. Image © Huang Milton Collection |
 |
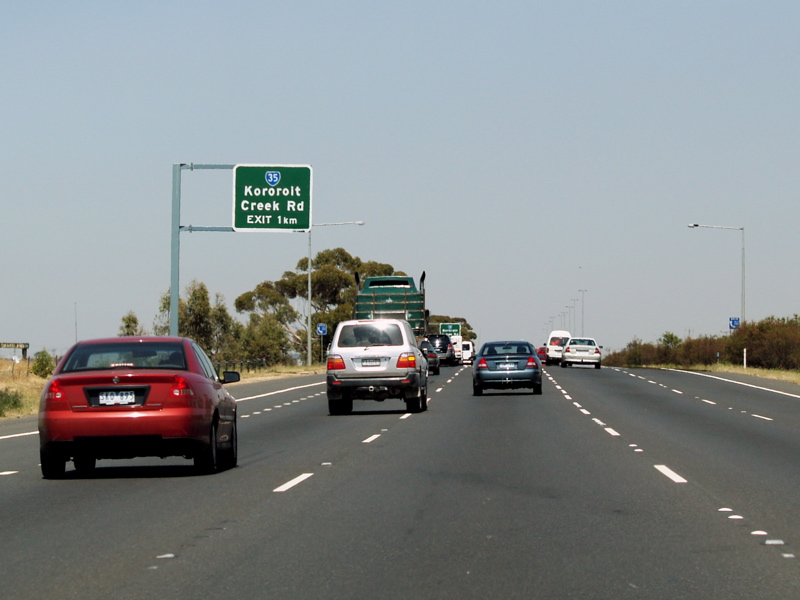
Kororoit Creek Road Interchange: Princes Fwy (M1) at the interchange with Kororoit Creek Rd (MR35) at Altona North, December 2006. Image © Rob Tilley |
|
 |
Tourism Sign: Sign welcoming people to Melbourne, Hoppers Crossing, January 2017. Image © Huang Milton Collection |
 |
Distance Sign: RD sign on Princes Fwy (M1) at Altona, October 2006. Image © Rob Tilley |
|
 |
Reassurance Directional Sign: Distance sign at Hoppers Crossing, January 2017. Image © Huang Milton Collection |
 |
Advance Directional Sign: AD sign on Princes Fwy (M1) at Altona approaching the interchange with Newland St, December 2006. Image © Rob Tilley |
|
 |
Advance Directional Sign: AD sign approaching Forsythe Rd (C701) at Hoppers Crossing, January 2017. Image © Huang Milton Collection |
 |
Supplemental Advance Directional Sign: Supplemental AD sign on Princes Fwy (M1) at Altona approaching the interchange with Newland St, December 2006. Image © Rob Tilley |
|
 |
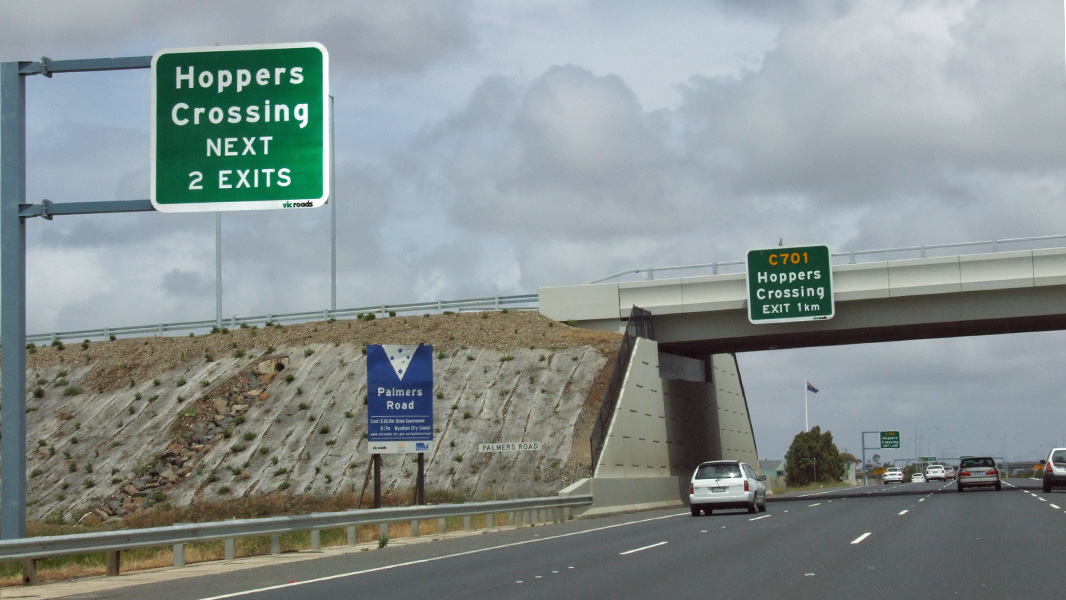
Forsythe Road: Princes Fwy (M1) at Forsythe Rd (C701) interchange, Hoppers Crossing, January 2017. Image © Huang Milton Collection |
 |
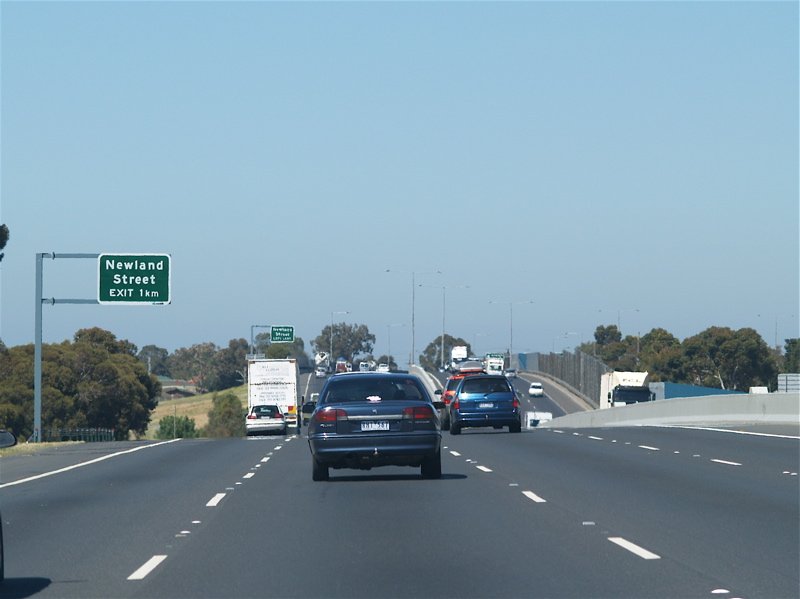
Newland Street Interchange: Princes Fwy (M1) at Altona at the Newland St interchange, October 2006. Image © Rob Tilley |
|
 |
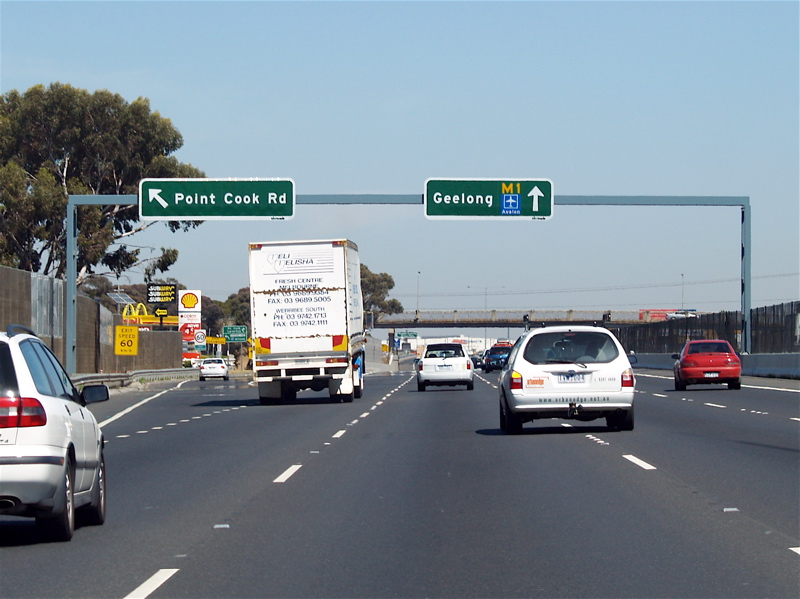
Point Cook Road: Princes Fwy (M1) at the Point Cook Rd interchange in Laverton, January 2017. Image © Huang Milton Collection |
 |
Supplemental Advance Directional Sign: Supplemental AD sign on Princes Fwy (M1) at Point Cook, approaching the Point Cook Rd interchange, October 2006. Image © Rob Tilley |
|
 |
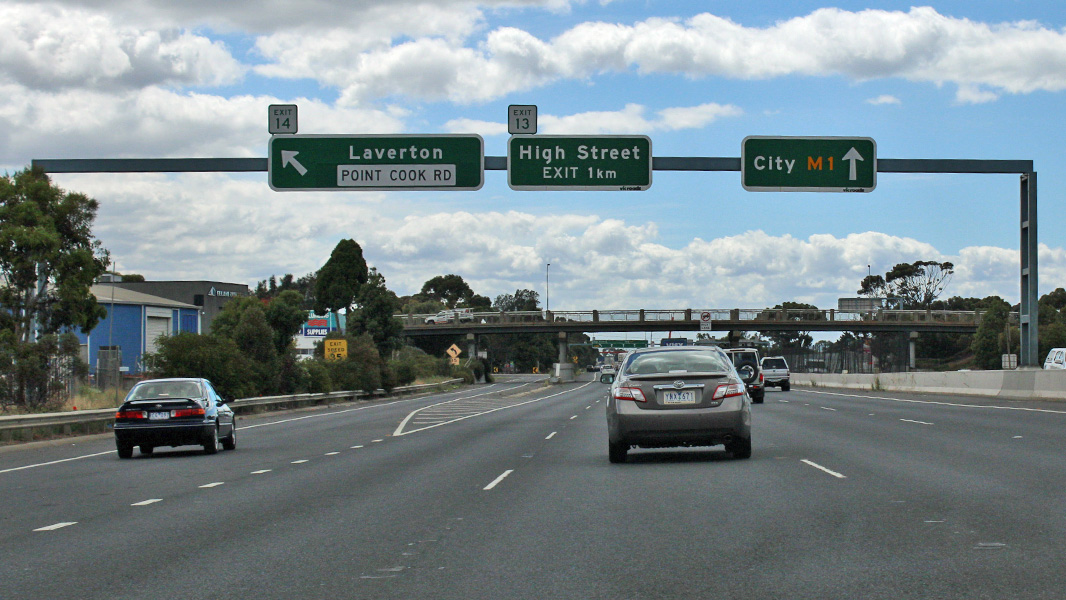
High Street: Princes Fwy (M1) at the High St interchange in Laverton, January 2017. Image © Huang Milton Collection |
 |
Point cook Road Interchange: Princes Fwy (M1) at Point Cook, at the Point Cook Rd interchange, October 2006. Image © Rob Tilley |
|
 |
Advance Directional Sign: AD sign at Laverton approaching Fitzgerald Rd (MR40) and Kororoit Creek Rd (MR35) interchange, January 2017. Image © Huang Milton Collection |
 |
Advance Directional Sign: AD sign at Point Cook approaching Palmers Rd, December 2012. Image © Tim Cole |
|
 |
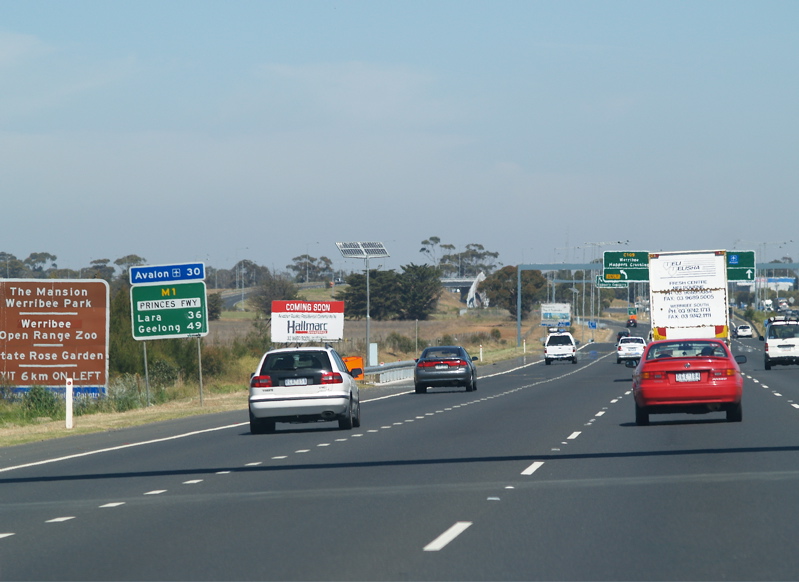
Reassurance Directional Sign: Distance sign at Laverton, January 2017. Image © Huang Milton Collection |
 |
Palmers Rd: Princes Fwy (M1) at the Palmers Rd interchange, Point Cook, December 2012. Image © Tim Cole |
|
 |
Advance Directional Sign: AD sign at Laverton approaching Fitzgerald Rd (MR40) and Kororoit Creek Rd (MR35) interchange, January 2017. Image © Huang Milton Collection |
 |
Supplemental Advance Directional Sign: Supplemental AD sign at Point Cook for exits to Hoppers Crossing, October 2006. This sign has since been removed. Image © Rob Tilley |
|
 |
Fitzgerald Road: Princes Fwy (M1) at the Fitzgerald Rd (MR40) interchange at Laverton, January 2017. Image © Huang Milton Collection |
 |
Distance Sign: RD sign at Point Cook, October 2006. This sign has since been removed. Image © Rob Tilley |
|
 |
Advance Directional Sign: AD sign at Laverton approaching Kororoit Creek Rd (MR35) interchange, January 2017. Image © Huang Milton Collection |
 |
Advance Directional Sign: AD sign on Princes Fwy (M1) for the Forsyth Rd (C701) interchange, Point Cook, December 2012. Click here for a photo by Rob Tilley of this location from October 2006. Image © Tim Cole |
|
 |
Kororoit Creek Road: Princes Fwy (M1) at the Kororoit Creek Rd (MR35) interchange at Laverton, January 2017. Image © Huang Milton Collection |
 |
Advance Directional Sign: AD sign on Princes Fwy (M1) for the Forsyth Rd (C701) interchange, Point Cook, October 2006. Image © Rob Tilley |
|
 |
Advance Directional Sign: AD sign approaching the Western Ring Road (M80) interchange, Laverton North, January 2017. Image © Huang Milton Collection |
 |
Forsyth Road Interchange: Princes Fwy (M1) at Hoppers Crossing at the Forsyth Rd (C701) interchange, October 2006. Image © Rob Tilley |
|
 |
Advance Directional Sign: AD sign approaching the Western Ring Road (M80) interchange, Laverton North, January 2017. Image © Huang Milton Collection |
 |
Advance Directional Sign: AD sign on Princes Fwy (M1) (Maltby Bypass) for the Princes Hwy (C109) interchange, Hoppers Crossing, December 2012. Image © Tim Cole |
|
 |
Supplemental Advance Directional Sign: Supplemental AD sign approaching the Western Ring Road (M80) interchange, Laverton North, January 2017. |
 |
Distance Sign: RD sign at Hoppers Crossing near the Princes Hwy (C109) interchange, October 2006. Image © Rob Tilley |
|
 |
Western Ring Road: Princes Fwy (M1) at the Western Ring Rd (M80) interchange, Laverton North, January 2017. Image © Huang Milton Collection |
 |
Princes Highway Interchange: Princes Fwy (M1) (Maltby Bypass) at the Princes Hwy (C109) interchange, Hoppers Crossing, December 2012. |
|
 |
Princes Highway: Princes Fwy (M1) at the Princes Hwy (MR83) interchange at Laverton North, January 2017. This is where M1 becomes West Gate Fwy. Image © Huang Milton Collection |
 |
Princes Highway Interchange: Princes Fwy (M1) (Maltby Bypass) at the Princes Hwy (C109) interchange, Hoppers Crossing, October 2006. Image © Rob Tilley |
|
 |
Princes Highway Interchange: Intersection directional signs over the Princes Fwy at Laverton North, at the interchange with the Princes Hwy (MR83), January 2017. This is where M1 becomes West Gate Fwy. Image © Huang Milton Collection |
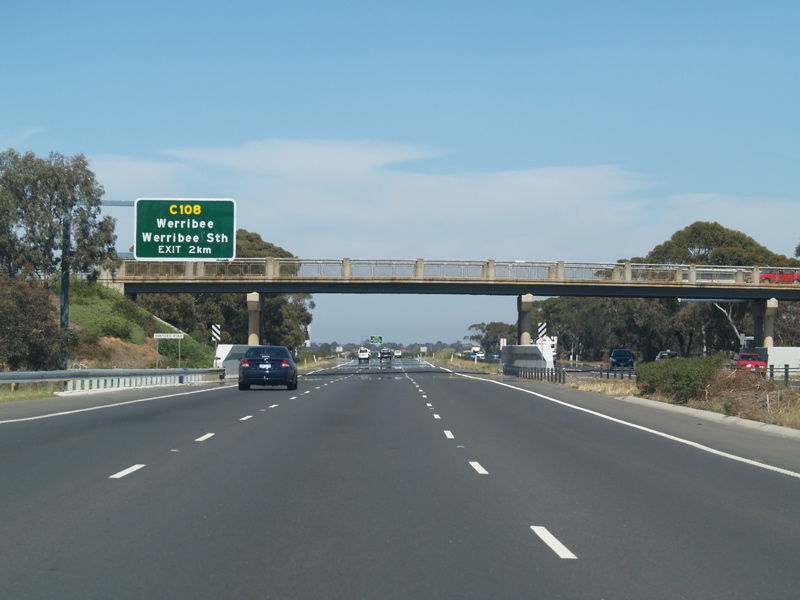 |
Advance Directional Sign: AD sign at Werribee South near the Sneydes Rd overpass for the Duncans Rd (C108 / TD11) interchange, October 2006. Image © Rob Tilley |
|
 |
Altona North: West Gate Fwy (M1) at Altona North, looking east, November 2006. Image © Stuart Fox |
 |
Advance Directional Sign: AD sign at Werribee South for the Duncans Rd (C108 / TD11) interchange, October 2006. Image © Rob Tilley |
|
 |
Advance Directional Sign: AD sign at Brooklyn approaching Millers Rd (MR41), January 2017. Image © Huang Milton Collection |
 |
Duncans Road Interchange: Princes Hwy (M1) at Werribee South at the Duncans Rd (C108 / TD11) interchange, October 2006. Image © Rob Tilley |
|
 |
Advance Directional Sign: AD sign at Brooklyn approaching Millers Rd (MR41), January 2017. Image © Huang Milton Collection |
 |
Advance Directional Sign: AD sign on Princes Fwy (M1) for the Princes Hwy (C109) (Geelong Rd) interchange, Werribee, October 2006. The overpass for New Farm Rd is in the distance Image © Rob Tilley |
|
 |
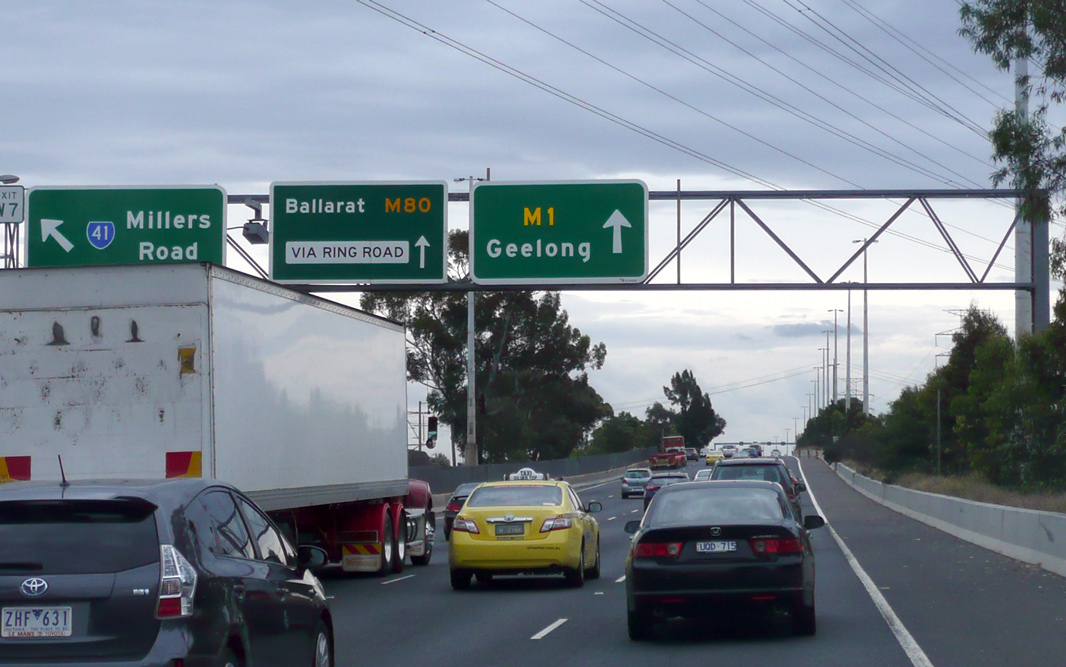
Millers Road: West Gate Fwy (M1) at Brooklyn at the Millers Rd (M41) interchange, January 2017. Note the freeway green ID sign. Image © Huang Milton Collection |
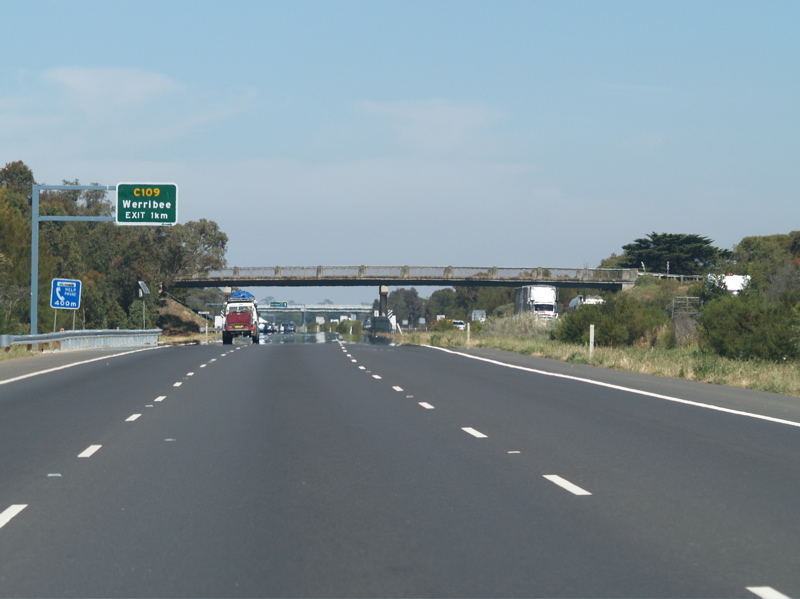 |
Advance Directional Sign: AD sign on Princes Fwy (M1) for the Princes Hwy (C109) (Geelong Rd) interchange, Werribee, October 2006. The overpass for New Farm Rd is in the distance Image © Rob Tilley |
|
 |
Freeway Green Advance Directional Sign: Freeway green AD sign at Brooklyn approaching Williamstown Rd (MR37), January 2017. Image © Huang Milton Collection |
 |
Princes Hwy Interchange: Princes Fwy (M1) at the Princes Hwy (C109) (Geelong Rd) interchange, Werribee, October 2006. Image © Rob Tilley |
|
 |
Supplemental Advance Directional Sign: Supplemental green AD sign at Yarravale approaching Williamstown Rd (MR37), January 2017. Image © Huang Milton Collection |
 |
Distance Sign: RD sign on Princes Fwy (M1) at Werribee, after the Princes Hwy (C109) (Geelong Rd) interchange, October 2006. Image © Rob Tilley |
|
 |
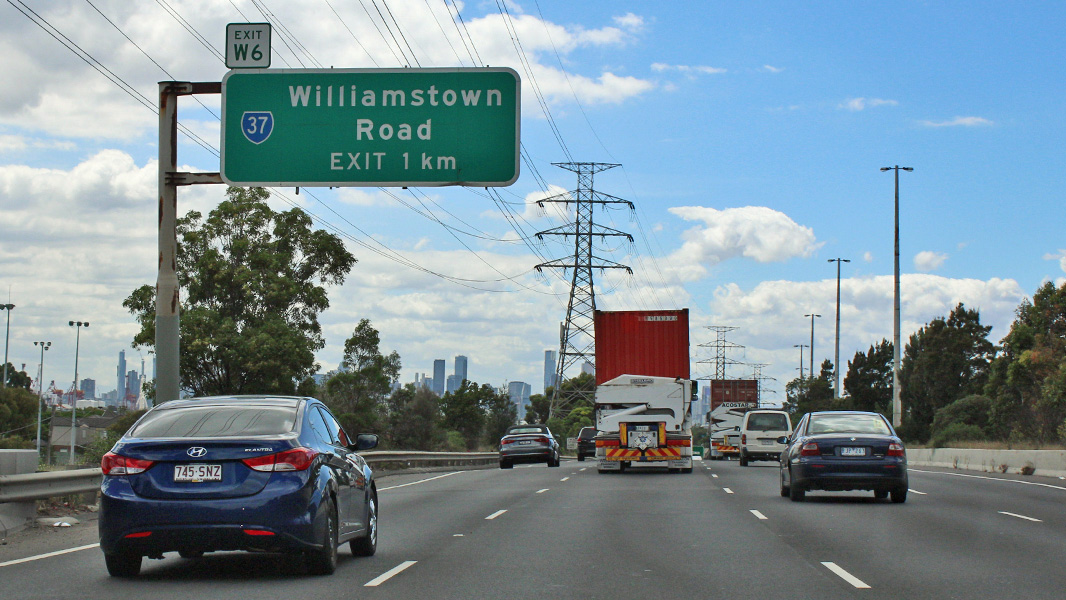
Williamstown Road: Freeway green signs at the Williamstown Rd (MR37) interchange at Yarravale, January 2017. Image © Huang Milton Collection |
|||
 |
Variable Speed Sign Explanation: Old style sign explaining flashing lights used for variable speed limits on the West Gate Bridge (M1 / TD2) over the Yarra River. Sign has since been removed. Port Melbourne, November 2006. Image © Stuart Fox |
|||
 |
Variable Speed Sign: Old style sign using flashing lights used for variable speed limits on the West Gate Bridge (M1 / TD2) over the Yarra River. Sign has since been updated with an electronic version. Port Melbourne, November 2006. Image © Stuart Fox |
|||
 |
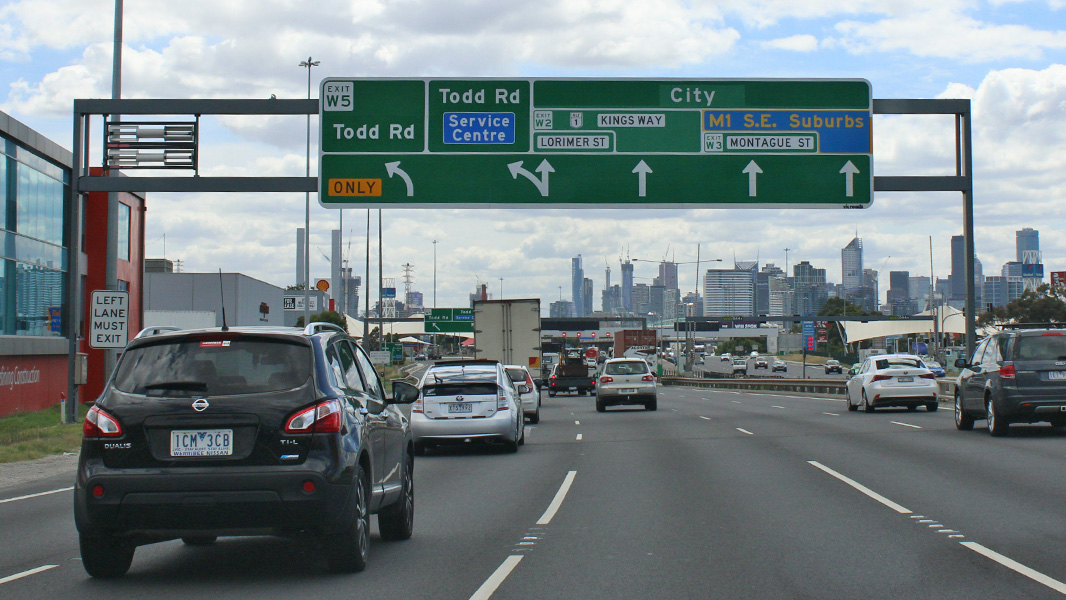
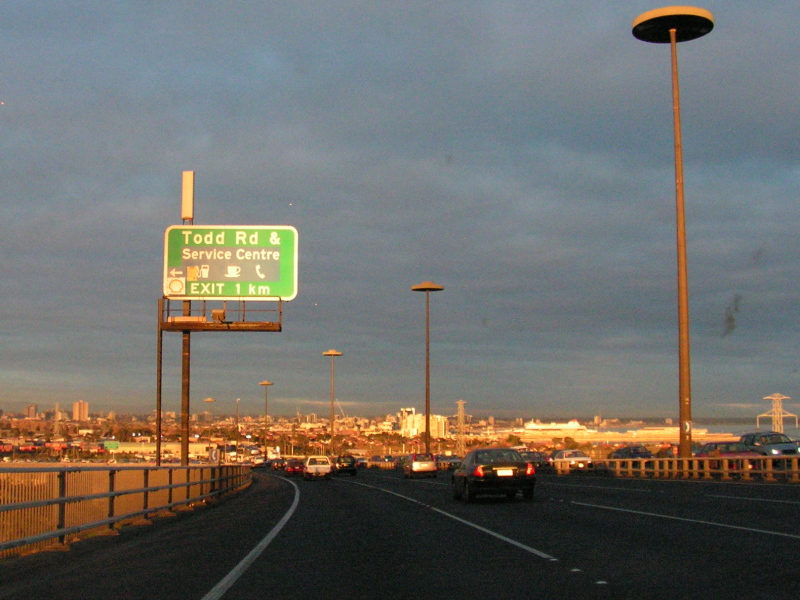
Advance Directional Sign: AD sign on the West Gate Bridge (M1 / TD2) at Port Melbourne for the Todd Road Interchange, January 2017. Click here for a photo by Darren Hodges of this location from June 2005. Image © Huang Milton Collection |
|||
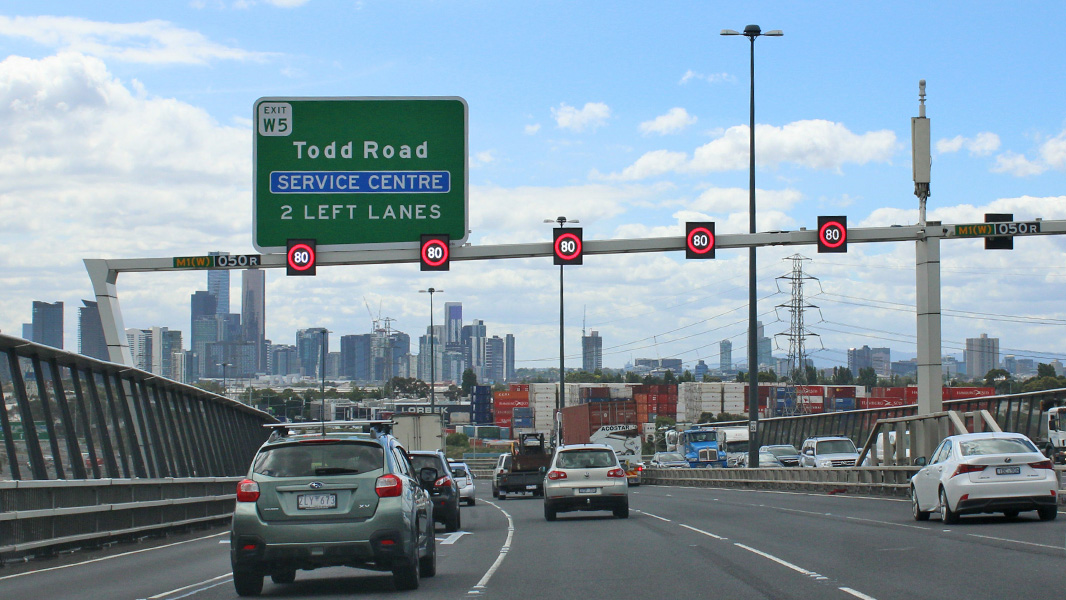 |
Advance Directional Sign: AD sign on the West Gate Bridge (M1 / TD2) at Port Melbourne for the Todd Road Interchange, January 2017. Click here for a photo by Darren Hodges of this location from June 2005. Image © Huang Milton Collection |
|||
 |
Melbourne CBD: Melbourne CBD and service centre viewed from the West Gate Bridge (M1 / TD2) at Port Melbourne, November 2006. Image © Stuart Fox |
|||
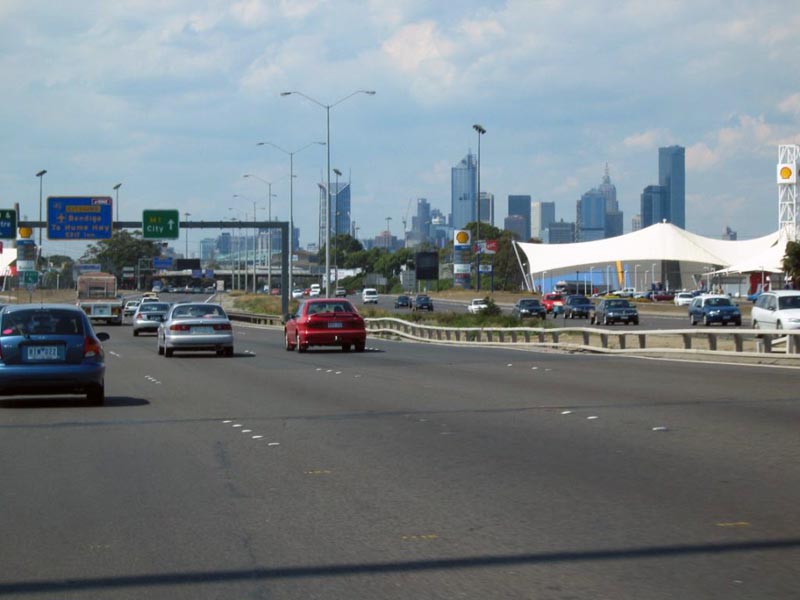 |
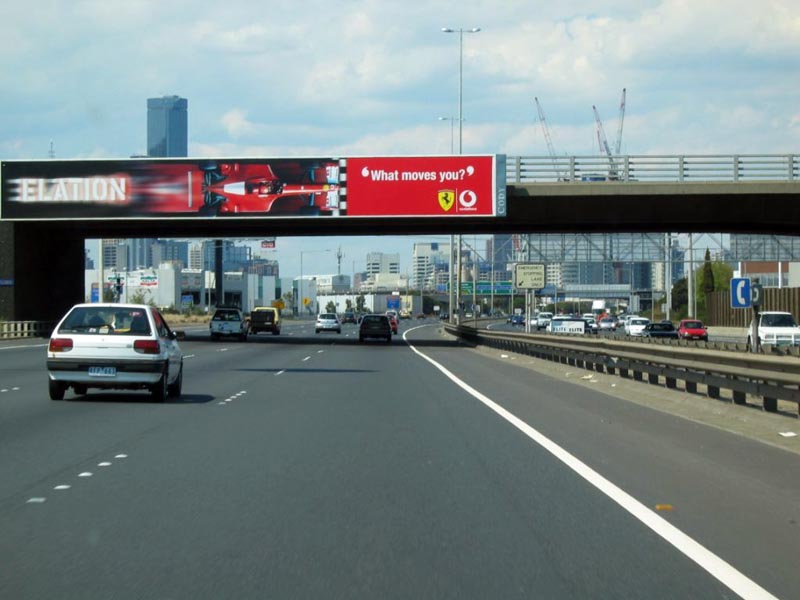
Melbourne CBD: Melbourne CBD and service centre viewed from the West Gate Freeway (M1 / TD2) at Port Melbourne, November 2006. Image © Stuart Fox |
|||
 |
Advance Directional Sign: AD sign at Port Melbourne approaching Todd Rd, January 2017. Image © Huang Milton Collection |
|||
 |
Todd Road: West Gate Fwy (M1) at the Todd Rd interchange, Port Melbourne, January 2017. Image © Huang Milton Collection |
|||
 |
Traffic Conditions Sign: Variable traffic conditions sign showing driving times to selected interchanges. Near the service centre at Port Melbourne, West Gate Fwy (M1 / TD2), November 2006. Image © Stuart Fox |
|||
 |
Intersection Directional Sign: ID sign assembly facing service centre traffic at Port Melbourne. Note the incorrect shaped and coloured TD 2 shield. November 2006. Image © Stuart Fox |
|||
 |
Supplemental Advance Directional Sign: Supplemental AD sign at Port Melbourne approaching Citylink (MR43), January 2017. Image © Huang Milton Collection |
|||
 |
Salmon Street Overpass: Salmon St overpass at Port Melbourne, November 2006. Image © Stuart Fox |
|||
 |
CityLink Interchange: CityLink (MR43) off ramp onto West Gate Fwy (M1) at Port Melbourne. September 2009. Image © Paul Rands |
|||
 |
Advance Directional Sign: AD sign approaching the Montague St (MR30) interchange, Port Melbourne. January 2017. Image © Huang Milton Collection |
|||
 |
Montague Street Interchange: West Gate Fwy (M1) at the Montague St (MR30) interchange at Port Melbourne. January 2017. The TD2 duplex ends at this interchange. Click here for a photo from November 2006 by Stuart Fox of the previous sign. |
|||
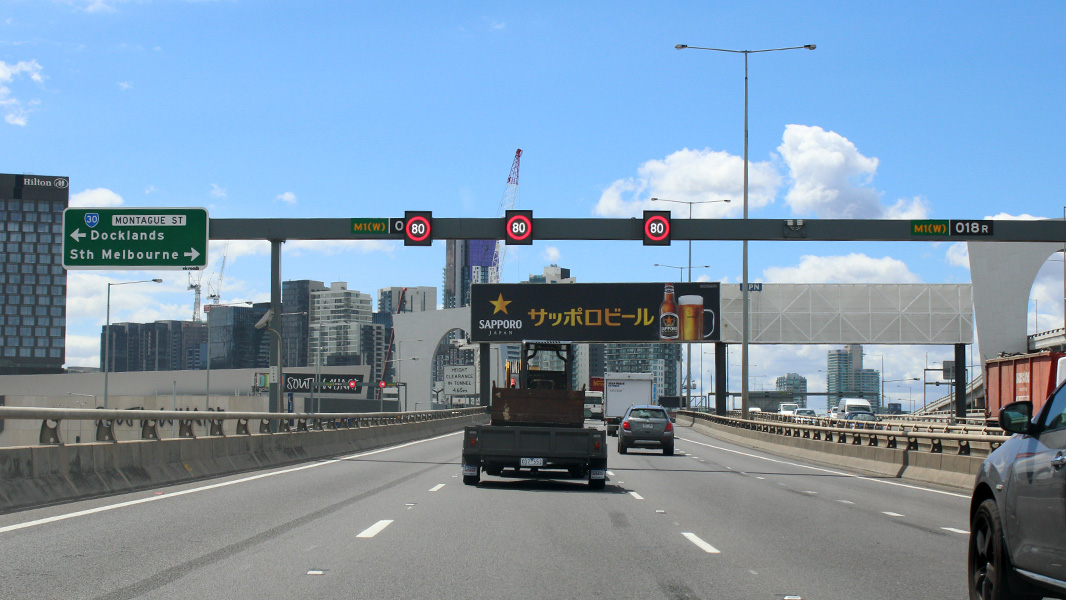 |
Montague Street Interchange: West Gate Fwy (M1) at the Montague St (MR30) interchange at Port Melbourne. January 2017. The TD2 duplex ends at this interchange. |
|||
 |
Tunnel Height Restriction Sign: Tunnel height restriction sign on West Gate Fwy (M1) at South Wharf. September 2009. Image © Paul Rands |
|||
 |
Tunnel Height Restriction Sign: Tunnel height restriction sign on West Gate Fwy (M1) at South Wharf. September 2009. Click here for a photo from November 2006 by Stuart Fox of the previous sign. Image © Paul Rands |
|||
 |
Advance Directional Sign: AD sign on West Gate Fwy (M1) at Southbank, for the Power St Interchange, September 2009. Image © Paul Rands |
|||
 |
Start CityLink Tollway 1km: Sign on West Gate Fwy (M1) indicating the beginning of the tolled CityLink Southern Link. January 2017. Image © Huang Milton Collection |
|||
 |
Supplemental Advance Directional Sign: Supplemental AD sign on West Gate Fwy (M1) at Southbank, approaching the Power St Interchange, January 2017. Image © Huang Milton Collection |
|||
 |
Kings Way Interchange: West Gate Fwy (M1) at the Kings Way (ALT-NR1) interchange at Southbank, September 2009. Image © Paul Rands |
|||
 |
Power Street Interchange: West Gate Fwy (M1) at the Power St Interchange, January 2017. Image © Huang Milton Collection |
|||
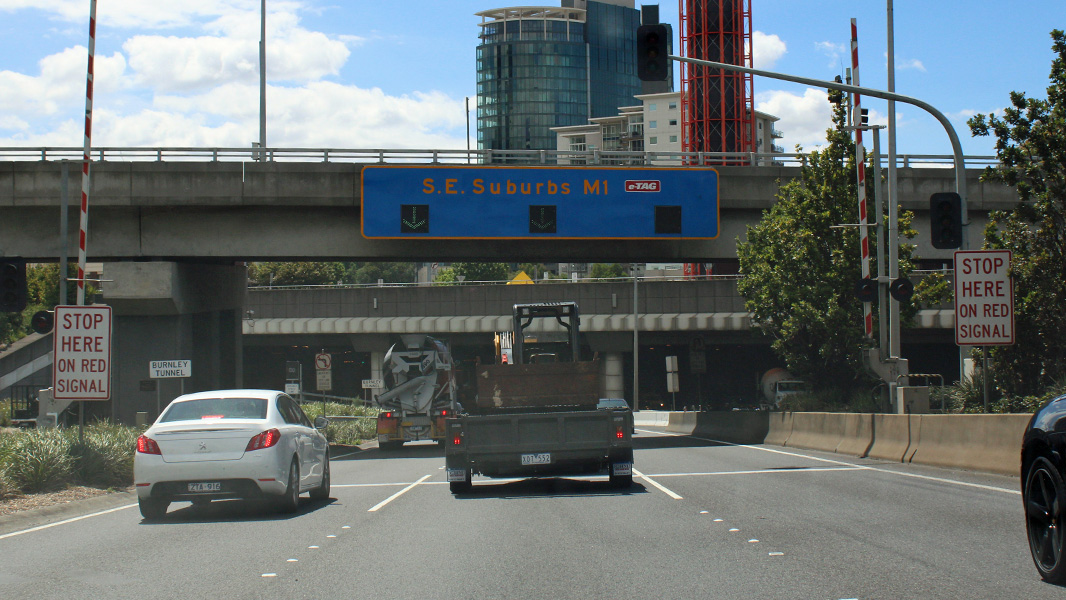 |
End West Gate Freeway: End West Gate Fwy (M1) and start CityLink at the entrance to the Burnley Tunnel at Southbank, January 2017. Image © Huang Milton Collection |
|||
 |
Burnley Tunnel: Inside the Burnley Tunnel (CityLink (M1)) at Southbank, September 2009. Image © Paul Rands |
|||
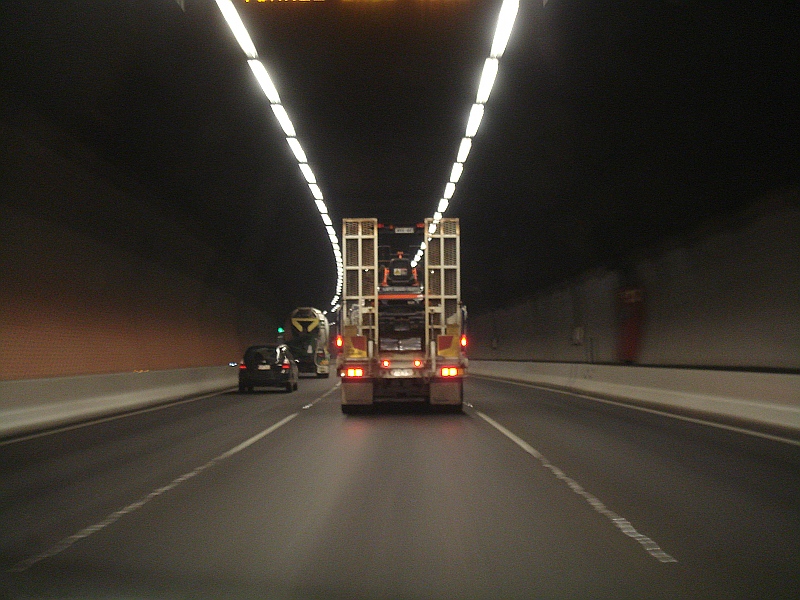 |
Burnley Tunnel: Inside the Burnley Tunnel (CityLink (M1)) at Richmond, September 2009. Image © Paul Rands |
|||
| Click here for the continuation of M1 between Hawthorn and Mt Waverley Click here for the continuation of M1 between Geelong and Werribee |
||||
1 Viseth Uch
2 Vicroads Road Management Plan, 30 October 2004
3 Victoria's Virtual Library, Victorian Biography Resource Centre, West Gate Bridge
4 CityLink, About the CityLink Roadway
5 State Library of Victoria: Princes Highway West Geelong Road
6 Office of the Minister For Transport, Media Release, New Geelong Road Lanes Open For Australia Day Weekend, 24 January 2002
7 ABC News, The West Gate Bridge collapsed 50 years ago. Can similar tragedies be prevented?, 15 October 2020
7
Picture Victoria, 2001 West Gate Bridge Memorial Plaque
9 Heritage Victoria, Victorian Hertiage Database, Williamstown Steam Ferry Landing, Wharf Western Shore
10 Disaster At West Gate, The Disaster
11 CityLink, About the CityLink Roadway
12 Environment Protection Authority, Information Bulletin, CityLink Burnley Tunnel, Publication 738, Decemeber 2000, Page 1
13 Minister for Roads & Ports, Memorial to Commemorate West Gate Bridge Accident, 15 October 2007
14 Office of the Minister For Public Transport, Media Release, Work Begins on New $26.8M Road for Point Cook, 21 July, 2006
Last updated: 15-Oct-2020 14:44
This site © Paul Rands. All rights reserved. Some portions © (copyright) by their respective and credited owners. Permission must be obtained before using any images from this site. For details, please email by clicking here.
