|
|
|
|
|
| B400 | Murray Valley Highway (B400) |
Statistics:
Route Numbering:
 1
1General Information:
Once known as Robinvale Hwy 3, Murray Valley Highway is a rural route that stretches across the north of the state, linking several Murray River communities to alpine regions in Victoria and New South Wales.
B400 is classed as a principal tourist route due to the high number of prominent tourist attractions dotted along the route. 3
Multiplexes along the route include:
History:

| Robinvale to Towong | Towong to Robinvale | |||
| Preview: | Description: | Preview: | Description: | |
 |
Reassurance
Directional Sign: Distance sign at Robinvale near Moore St, January 2004. Image © Michael Greenslade |
 |
Supplemental Advance
Directional Sign: Supplemental AD sign on Murray Valley Hwy (B400) at Rutherglen approaching Drummond St (C376), March 2015. The C376 duplex ends at this junction. Image © Paul Rands |
|
 |
Reassurance
Directional Sign: Distance sign at Rutherglen, March 2015. Image © Paul Rands |
 |
Advance Directional Sign: AD sign on Murray Valley Hwy (B400) at Rutherglen approaching Drummond St (C376), March 2015. The C376 duplex ends at this junction. Image © Paul Rands |
|
 |
Advance Directional
Sign: AD sign approaching Douglas St, Murphy St and Main St (C376 / C377) at Rutherglen, March 2015. Image © Paul Rands |
 |
Drummond Street: Corner of Murray Valley Hwy (B400) and Drummond St (C376) at Rutherglen, March 2015. Image © Paul Rands |
|
 |
Douglas Street,
Murphy Street and Main Street: Intersection directional sign at the roundabout with Douglas St, Murphy St and Main St (C376 / C377) in Rutherglen, March 2015. Image © Paul Rands |
 |
New South Wales Border: Murray Valley Hwy (B400) as it crosses the NSW Border and Murray River at Robinvale, 2003. B400 ends at the border and continues unnumbered in NSW to Sturt Hwy (A20) at Euston. Image © Jamie Scuglia |
|
 |
Douglas Street, Murphy Street and
Main Street: Intersection directional sign at the roundabout with Douglas St, Murphy St and Main St (C376 / C377) in Rutherglen, March 2015. Image © Paul Rands |
|||
 |
Gooramadda Road: Corner of Murray Valley Hwy (B400) and Gooramadda Rd at Rutherglen, March 2015. Image © Paul Rands |
|||
 |
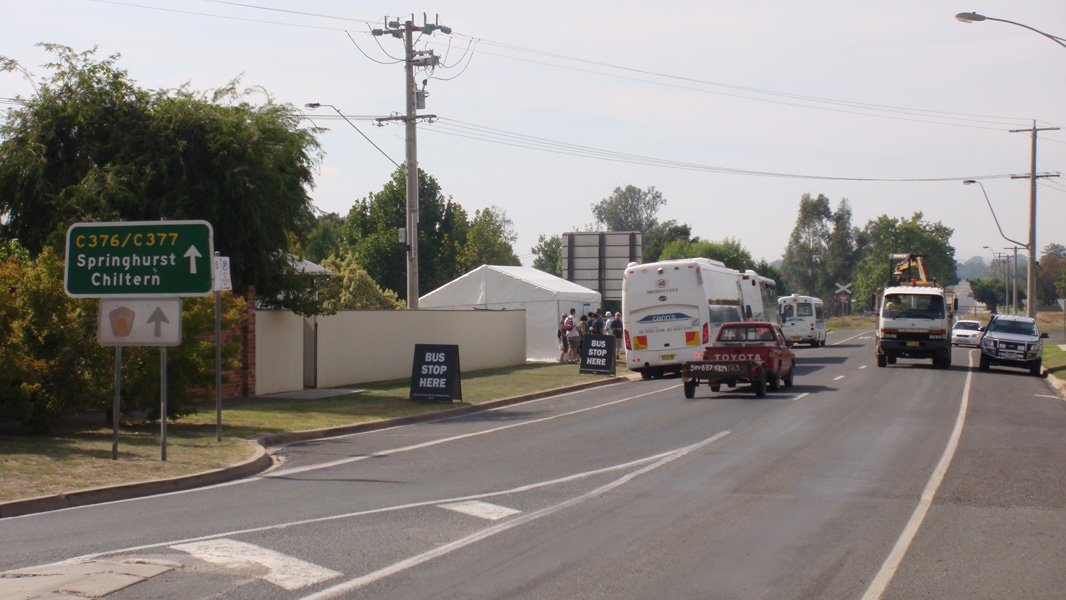
Advance Directional
Sign: AD sign at Browns Plains approaching Chiltern-Howlong Rd (C381), March 2015. Image © Paul Rands |
|||
 |
Chiltern-Howlong
Road: Corner of Murray Valley Hwy (B400) and Chiltern-Howlong Rd (C381) at Browns Plains, March 2015. Image © Paul Rands |
|||
 |
Chiltern-Howlong Road: Corner of Murray Valley Hwy (B400) and Chiltern-Howlong Rd (C381) at Browns Plains, March 2015. Image © Paul Rands |
|||
 |
Reassurance
Directional Sign: Distance sign at Browns Plains, March 2015. Image © Paul Rands |
|||
 |
Supplemental Advance
Directional Sign: Supplemental AD sign approaching Barnawathra Rd (C378) and Barnawartha-Howlong Rd at Barnawartha, March 2015. Image © Paul Rands |
|||
 |
Advance Directional Sign: AD sign approaching Barnawathra Rd (C378) and Barnawartha-Howlong Rd at Barnawartha, March 2015. Image © Paul Rands |
|||
 |
Barnawathra Road
& Barnawartha-Howlong Road: Corner of Murray Valley Hwy (B400), Barnawathra Rd (C378) and Barnawartha-Howlong Rd, Barnawartha, March 2015. Image © Paul Rands |
|||
 |
Reassurance
Directional Sign: Distance sign at Barnawartha, March 2015. Image © Paul Rands |
|||
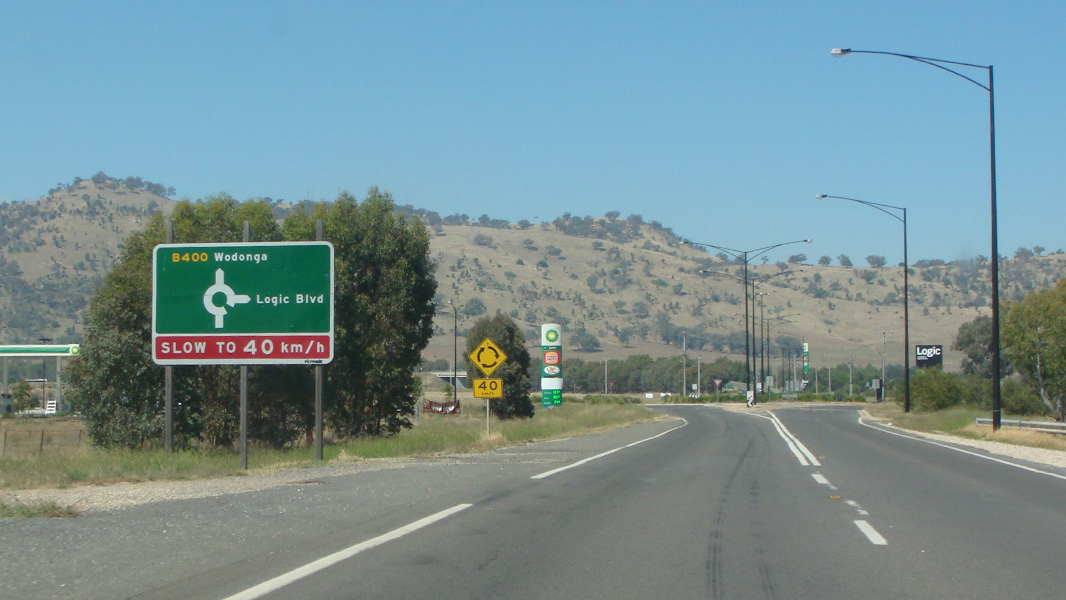 |
Advance Directional
Sign: AD sign at Barnawarth North approaching Logic Blvd, March 2015. Image © Paul Rands |
|||
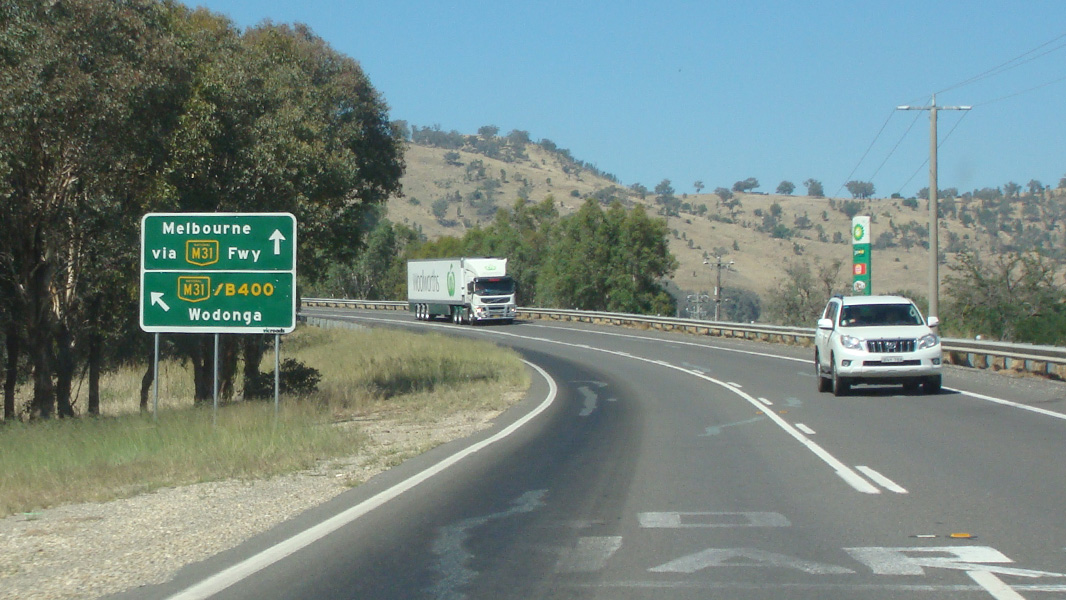 |
Advance Directional
Sign: AD sign at Barnawartha North approaching Hume Fwy (M31 / B400), March 2015. Image © Paul Rands |
|||
 |
Hume Freeway: Hume Fwy (M31 / B400) interchange at Barnawartha North, March 2015. The M31 duplex begins here. Image © Paul Rands |
|||
1 VicRoads,
Country Directory, First Edition, 1992-1993
2 VicRoads Road Management Plan, 30
October 2004
3 Main
Roads Victoria
4 Country Roads Board, Twentieth Annual
Report, for year ended 30th June 1933
5 Sam Laybutt (OzRoads, National Route
16, Murray
Valley Highway)
Last updated: 09-Dec-2020 0:31
This site © Paul Rands. All rights reserved. Some portions © (copyright) by their respective and credited owners. Permission must be obtained before using any images from this site. For details, please email by clicking here.