|
|
|
|
|
| B64 | Goyder Highway (B64) - Burra to Crystal Brook |
Statistics:
Route Numbering:


General Information:
B64 connects Monash, near the SA-Vic border town of Renmark to Crystal Brook and A1, acting as a by-pass route of greater Adelaide and other town centres south of the route. The route is entirely rural road / rural highway standard, consisting mostly of one lane in each direction. The route crosses the Mount Lofty Ranges.
The multiplexes are as follows:
History:
| Burra to Crystal Brook | Crystal Brook to Burra | |||
| Preview: | Description: | Preview: | Description: | |
 |
Advance Directional Sign: AD sign at Mt Bryan approaching the split from Barrier Hwy (A32), November 2016. Image © Paul Rands |
 |
Reassurance Directional Sign: Distance sign at Crystal Brook, December 2003. |
|
 |
Goyder Highway & Barrier Highway: Corner of Goyder Hwy (B64) and Barrier Hwy (A32) at Mt Bryan, November 2016. The A32 duplex ends here. Image © Paul Rands |
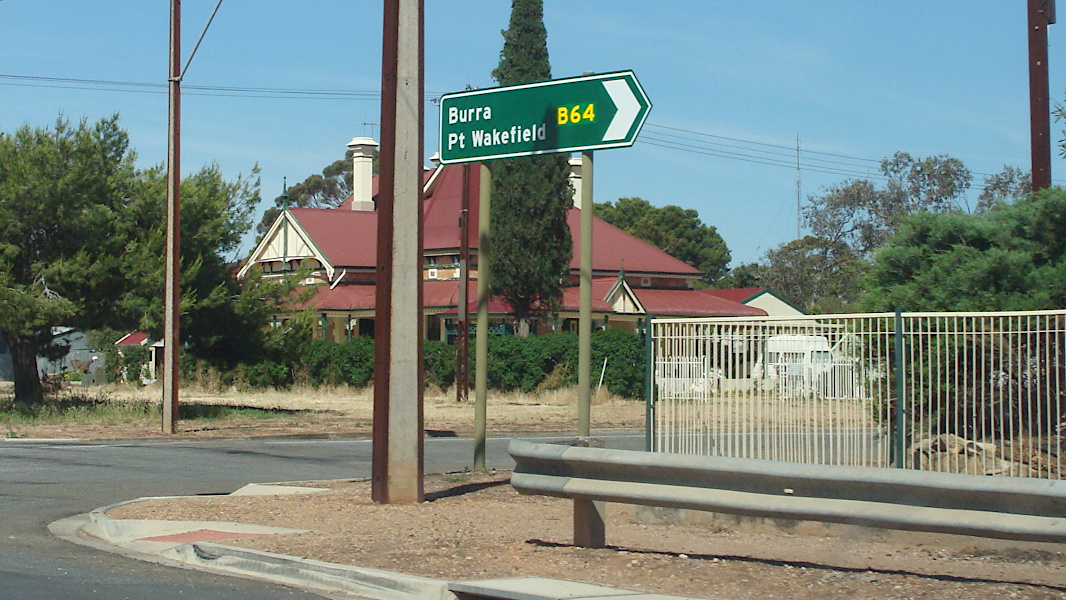 |
Intersection Directional Sign: ID sign at the junction with Cunningham St & Eyre Rd at Crystal Brook, November 2016. B64 turns right at this location Image © Paul Rands |
|
 |
Reassurance Directional Sign: Distance sign at Mt Bryan, October 2012. |
 |
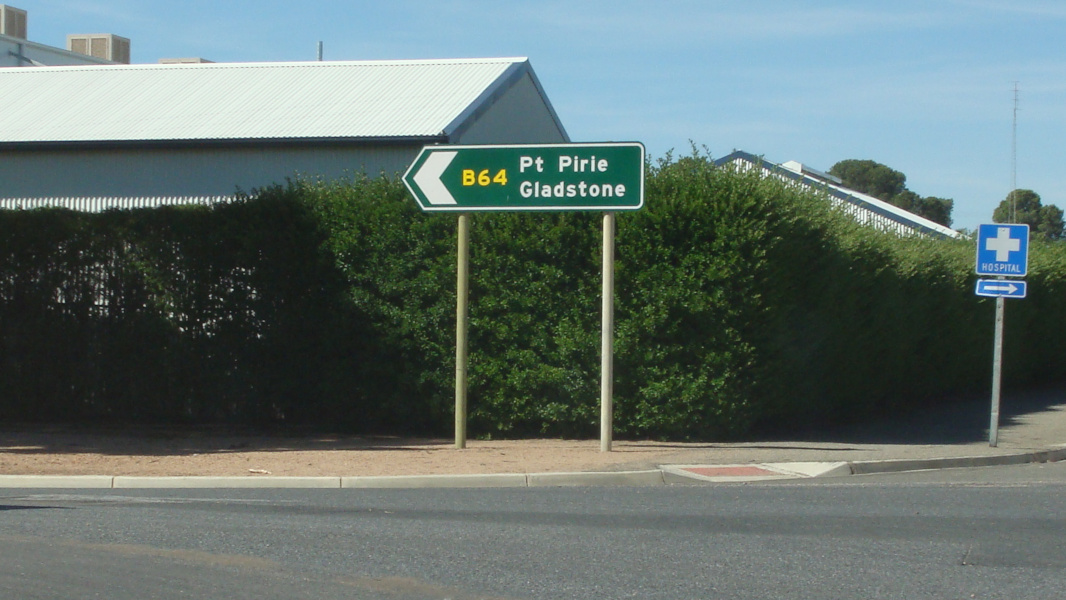
Advance Directional Sign: AD sign at Crystal Brook approaching Gadd Av and Darbon Tce, December 2003. B64 turns left at this intersection. Image © Michael Greenslade |
|
 |
Advance Directional Sign: AD sign at Booborowie approaching North Booborowie Rd, November 2016. Image © Paul Rands |
 |
Intersection Directional Sign: ID sign at the junction with RM Williams Way (B80) at Spalding, November 2016. B64 turns right here and the B80 duplex also starts here. Image © Paul Rands |
|
 |
North Booborowie Road: Corner of Goyder Hwy (B64) and North Booborowie Rd at Booborowie, November 2016. Image © Paul Rands |
 |
Reassurance Directional Sign: Distance sign at Spalding, October 2012. Image © Michael Greenslade |
|
 |
Services Sign: Services sign at Spalding, November 2016. Image © Paul Rands |
 |
Advance Directional Sign: AD sign at Booborowie, approaching North Booborowie Rd and Booborowie Rd, October 2012. Image © Michael Greenslade |
|
 |
Entering Spalding: Goyder Hwy (B64) as it enters the town of Spalding, November 2016. Image © Paul Rands |
 |
Reassurance Directional Sign: Distance sign at Booborowie, October 2012. Image © Michael Greenslade |
|
 |
Advance Directional Sign: AD sign approaching RM Williams Way (B80) at Spalding, November 2016. Image © Paul Rands |
 |
Advance Directional Sign: AD sign at Mt Bryan approaching Barrier Hwy (A32), October 2012. Image © Michael Greenslade |
|
 |
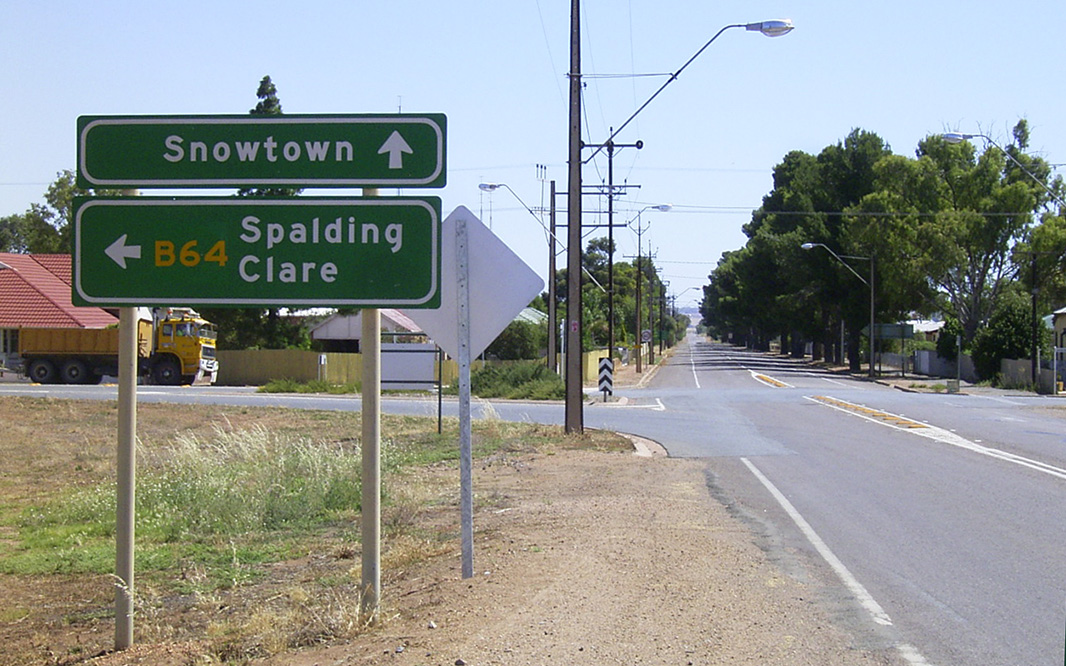
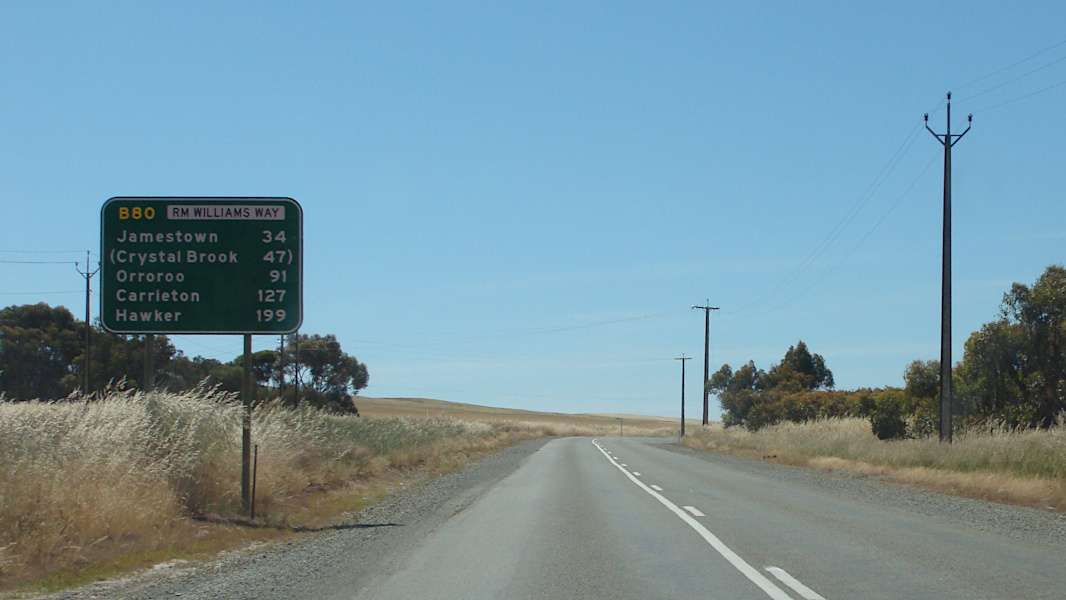
RM Williams Way: Corner of Goyder Hwy (B64) and RM Williams Way (B80) at Spalding, November 2016. B64 turns roght here and picks up the B80 duplex. Image © Paul Rands |
 |
Intersection Directional Sign: ID sign at the junction with Barrier Hwy (A32) at Mt Bryan, November 2016. B64 turns right here and the A32 duplex also starts here. Image © Paul Rands |
|
 |
Advance Directional Sign: AD sign at Spalding approaching Main St & Government Rd, November 2016. Image © Paul Rands |
|||
 |
Main Street & Government Road: Goyder Hwy (B64) at the junction with Main St & Government Rd in Spalding, November 2016. B64 turns left at this junction and note the old fingerboards. Image © Paul Rands |
|||
 |
Reassurance Directional Sign: Distance sign at Spalding, November 2016. Image © Paul Rands |
|||
 |
Advance Directional Sign: AD sign at Spalding approaching RM Williams Way (B80), November 2016. Image © Paul Rands |
|||
 |
Goyder Highway & RM Williams Way: Corner of Goyder Hwy (B64) and RM Williams Way (B80) at Spalding, November 2016. B64 turns left at this location and the B80 duplex ends here as well. Image © Paul Rands |
|||
 |
Reassurance Directional Sign: Distance sign at Spalding, October 2012. |
|||
 |
Entering Gulnare: Goyder Hwy (B64) as it enters the town of Gulnare, November 2016. Image © Paul Rands |
|||
 |
Advance Directional Sign: AD sign at Gulnare, approaching Horrocks Hwy (B82), November 2016. Image © Paul Rands |
|||
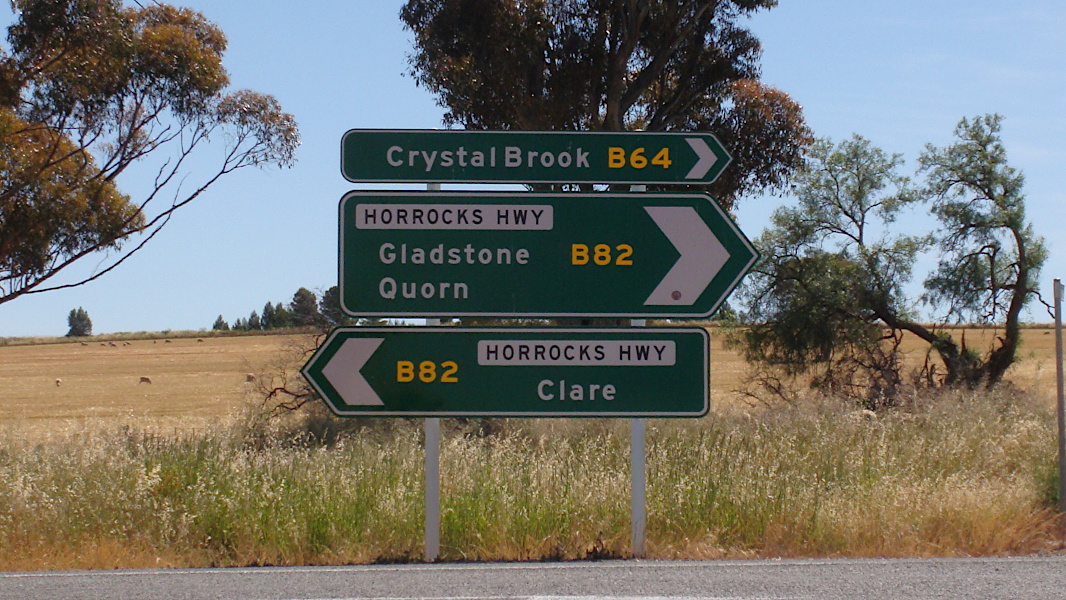 |
Horrocks Highway: ID sign assembly at the junction with Horrocks Hwy (B82) at Gulnare, November 2016. B64 turns right here and picks up the B82 duplex. Image © Paul Rands |
|||
 |
Reassurance Directional Sign: Distance sign at Gulnare, November 2016. Image © Paul Rands |
|||
 |
Supplemental Advance Directional Sign: Supplemental AD sign at Gulnare approaching the Horrocks Hwy (B82) split, November 2016. Image © Paul Rands |
|||
 |
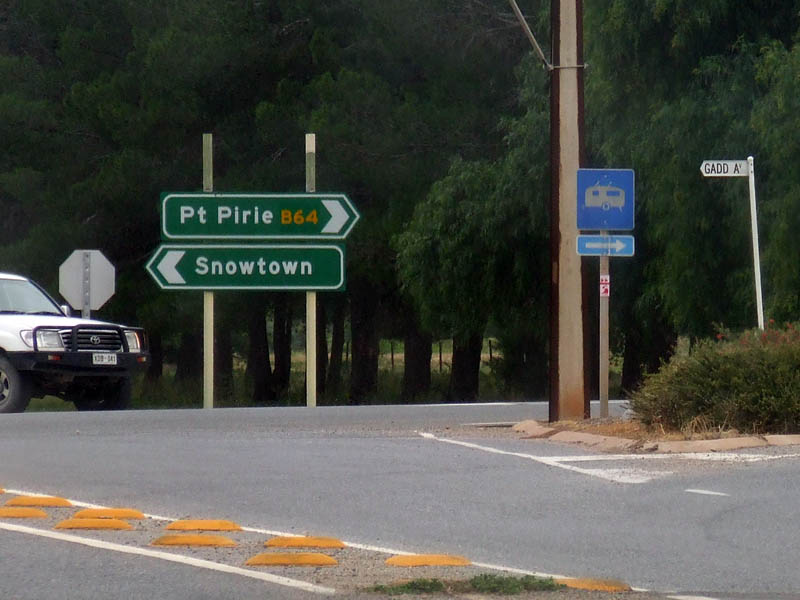
Advance Directional Sign: AD sign at Gulnare approaching the Horrocks Hwy (B82) split, November 2016. The B82 duplex ends here and B64 turns left. Image © Paul Rands |
|||
 |
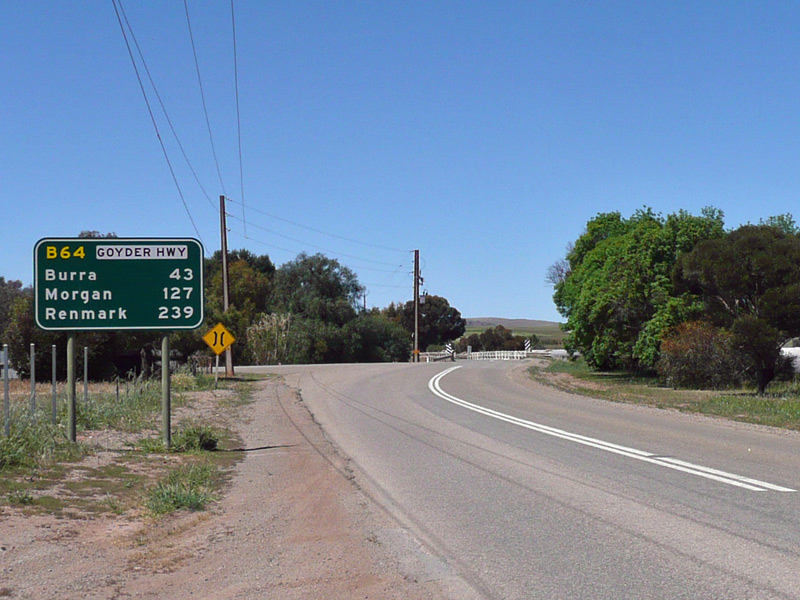
Distance Sign: RD sign heading westbound on Goyder Hwy (B64) at Gulnare, just after the Main North Rd (B82) intersection, November 2016. Click here for a photo of this location by Darrin Smith from June 2007. Image © Paul Rands |
|||
 |
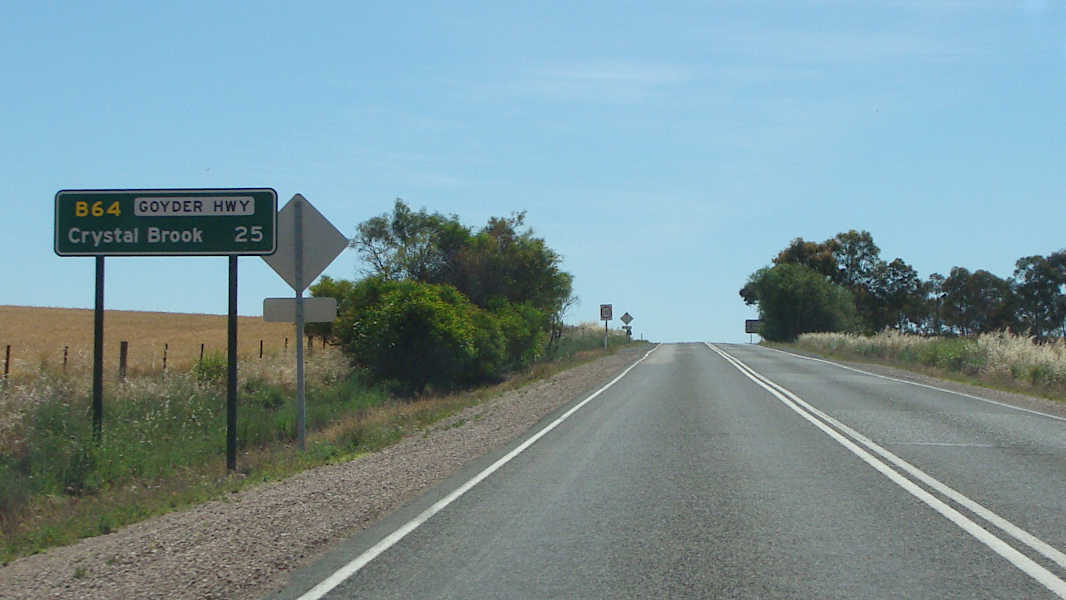
Entering Crystal Brook: Goyder Hwy (B64) as it enters the town of Crystal Brook, November 2016. Image © Paul Rands |
|||
 |
Approaching Gadd Av & Cunningham St: Travelling into Crystal Brook on Goyder Hwy (B64) / Darbon Tce, November 2016. Gadd Av and Cunningham St are part of the former Princes Hwy alignment. Click here for a photo of this location by Darrin Smith from June 2007. Image © Paul Rands |
|||
 |
Gadd Avenue / Cunningham Street Intersection: Crystal Brook, as you drive northwest on Darbon Tce. November 2016. Click here for a photo of this location by Darrin Smith from June 2007. Image © Paul Rands |
|||
 |
Approaching Railway Terrace: Image © Paul Rands |
|||
 |
Advance Directional Sign: Image © Paul Rands |
|||
 |
Cunningham Street & Eyre Road Intersection: Looking northwest on the corner of Cunningham St and Eyre Rd (B64), Crystal Brook, November 2016. Eyre Rd is part of the former Princes Hwy alignment. Click here for a photo of this location by Darrin Smith from June 2007. Image © Paul Rands |
|||
 |
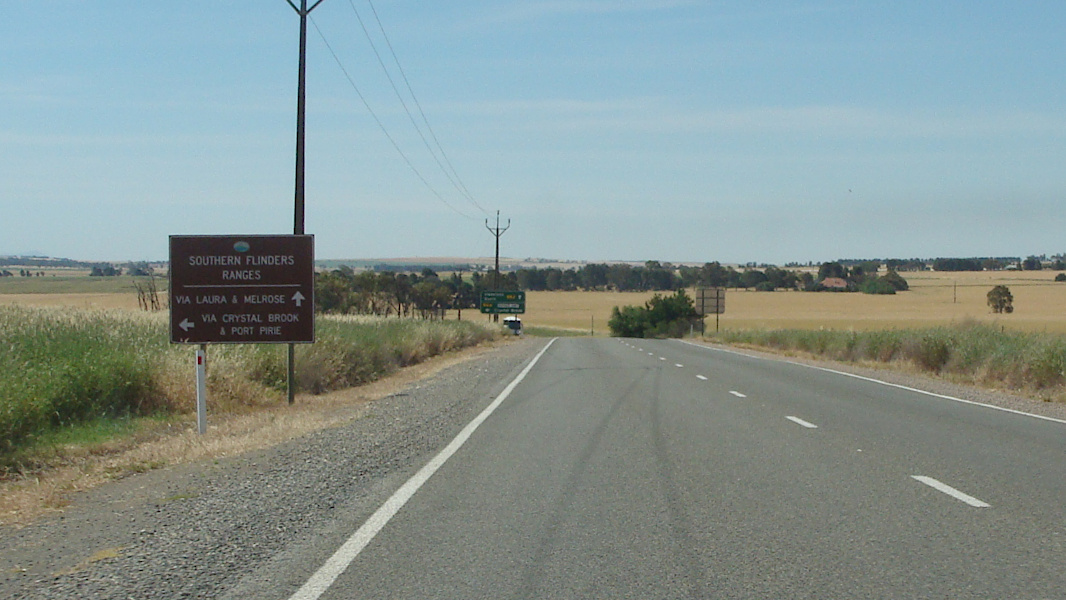
Approaching Gladstone Rd: Heading northwest at Crystal Brook on Old Princes Hwy (B64) approaching the junction with Gladstone Rd, June 2007. Image © Darrin Smith |
|||
 |
Distance Sign: RD sign as you leave Crystal Brook towards A1. November 2016. Click here for a photo of this location by Darrin Smith from June 2007. Image © Paul Rands |
|||
 |
Advance Directional Sign: AD sign at Crystal Brook approaching the junction with Augusta Highway (A1), June 2007. Image © Darrin Smith |
|||
 |
End B64: The western end of B64 - Augusta Highway (A1) at Crystal Brook, June 2007. Image © Darrin Smith |
|||
| Click here for the continuation of B64 between Monash and Burra | ||||
1 Location SA Map Viewer
Last updated: 07-Dec-2020 12:34
This site © Paul Rands. All rights reserved. Some portions © (copyright) by their respective and credited owners. Permission must be obtained before using any images from this site. For details, please email by clicking here.