|
|
|
|
|
 |
Western Distributor, Victoria Road, James Ruse Drive, Cumberland Highway, Old Windsor Road, Hawkesbury Valley Way, East Market Street, March Street, Kurrajong Road, Bells Line of Road, Chifley Road, Eddy Street, Lithgow Street, Mort Street & Main Street (State Route 40) - Windsor to Bilpin (Decommissioned) |
Statistics:
Route Numbering:

General Information:
State Route 40 is major route of New South Wales. The eastern section is an arterial road linking various western and inner western suburbs with Sydney's CBD. The western section is an alternative route over the Blue Mountains, connecting the state's west to Sydney.
The eastern part of the route has several features along it such as Iron Cove Bridge, Western Distributor (which is a series of viaducts connecting to several streets in the CBD of Sydney) and the Gladesville Bridge. Both the Western Distributor and Gladesville Bridge (and the associated Burns Bay Road (former SR21)) were to form part of the F3 Freeway from Sydney to the Hunter Region of NSW.
The western section of the route is quite windy and hilly once off the Cumberland Plain, as it crosses the Great Dividing Range. The line it follows dates back to the 1800s. The route passes through residential and commercial areas, as well as some rural and large tracts of forested areas.
The James Ruse Drive section of SR40 is named after the first landholder in the Parramatta area. 2
Multiplexes along the route include:
History:
| Windsor to Bilpin | Bilpin to Windsor | |||
| Preview: | Description: | Preview: | Description: | |
 |
George Street: Hawkesbury Valley Way (SR40) (formerly Richmond Road) outside the cemetery as you approach the George Street intersection in Windsor, December 2005. Image © Paul Rands |
 |
Mountain Lagoon Road: Bells Line of Road (SR40) at Mountain Lagoon Rd at Bilpin, November 2010. Image © Rob Tilley |
|
 |
Landing Lights Warning Sign: Warning sign at Windsor, for aircraft landing lights at the Richmond RAAF base. Westbound outside McQuade Park, December 2005. Image © Paul Rands |
 |
Advance Directional Sign: AD sign approaching Old Bells Line of Road, Kurrajong, November 2010. Image © Rob Tilley |
|
 |
Distance Sign: Westbound RD sign at Windsor near Rickaby's Creek, December 2005. This sign has since been updated to reflect the new name along this section of SR40. Image © Paul Rands |
 |
Advance Directional Sign: AD sign with mishapen route shield approaching Comleroy Rd at Kurrajong, November 2010. Image © Rob Tilley |
|
 |
Aircraft Landing Lights: Landing lights for RAAF planes landing at Richmond Air Force Base as you approach Percival Road at Clarendon. December 2005. Image © Paul Rands |
 |
Alphanumeric Intersection Directional Sign: Alphanumeric ID sign facing Comleroy Rd in Kurrajong, August 2011. Image © Paul Mech |
|
 |
Clarendon: Hawkesbury Valley Way (SR40) as it passes through Clarendon, December 2005. Image © Paul Rands |
 |
Distance Sign: Reassurance directional sign at Kurmond, November 2010. Image © Rob Tilley |
|
 |
Clarendon: Hawkesbury Valley Way (SR40) as it passes through Clarendon, December 2005. Image © Paul Rands |
 |
Intersection Directional Sign: ID sign at Kurmond Rd in Kurmond, November 2010. Image © Rob Tilley |
|
 |
Entering Richmond: Hawkesbury Valley Way (SR40) as it enters the town of Richmond, near Pitt Street. December 2005. Image © Paul Rands |
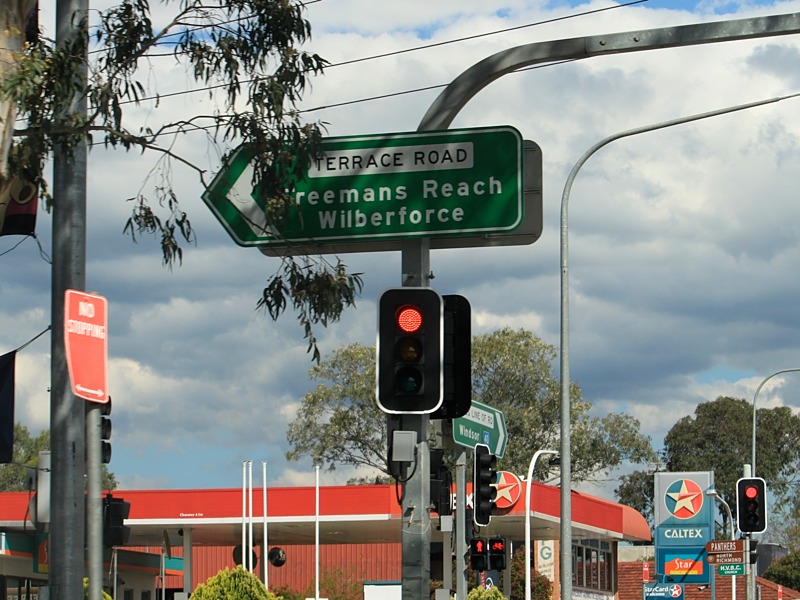 |
Terrace Road & Grose Vale Road: Intersection directional sign at the Terrace Rd and Grose Vale Rd intersection in North Richmond, November 2010. Image © Rob Tilley |
|
 |
Richmond CBD: Corner of Moray and Windsor Streets (SR40), December 2005. Image © Paul Rands |
 |
Terrace Road & Grose Vale Road: Intersection directional sign at the Terrace Rd and Grose Vale Rd intersection in North Richmond, November 2010. Image © Rob Tilley |
|
 |
Windsor Street & East Market Street: Corner of East Market Street and Windsor Street in Richmond. State Route 40 turns left here past Richmond Railway Station and Richmond Park. November 2010. Click here for a photo of this location from December 2005. Image © Rob Tilley |
 |
Terrace Road & Grose Vale Road: Intersection directional sign at the Terrace Rd and Grose Vale Rd intersection in North Richmond, November 2010. Image © Rob Tilley |
|
 |
Outside Richmond Railway Station: Looking south on East Market Street outside Richmond Railway Station. The railway once crossed here and through the park to eventually end at Kurrajong. December 2005. Image © Paul Rands |
 |
Advance directional Sign: AD sign on Kurrajong Rd (SR40) approaching Bosworth St in Richmond, November 2010. Image © Rob Tilley |
|
 |
March Street Westbound: March St (SR40) at Richmond between East & West Market Streets. December 2005. Image © Paul Rands |
 |
Intersection Directional Sign: ID sign at Bosworth St, Richmond, November 2010. Image © Rob Tilley |
|
 |
Distance Sign: RD sign on Kurrajong Rd (SR40) in Richmond, after Francis St. December 2005. Image © Paul Rands |
 |
Advance Directional Sign: AD sign approaching East Market St and the unnumbered section of March St in Richmond, November 2010. SR40 turns left at this junction. Image © Rob Tilley |
|
 |
Wooden Overpass: Heading west under the private access bridge at Richmond just before you cross the Hawkesbury River. December 2005. Image © Paul Rands |
 |
Intersection Directional Sign: ID sign at the junction with East Market St and March St, Richmond, November 2010. Image © Rob Tilley |
|
 |
Richmond Bridge: Crossing the Hawkesbury River at North Richmond. December 2005. Image © Paul Rands |
 |
Intersection Directional Sign: ID sign at East Market St and Windsor St, Richmond, November 2010. SR40 turns right at this junction. Image © Rob Tilley |
|
 |
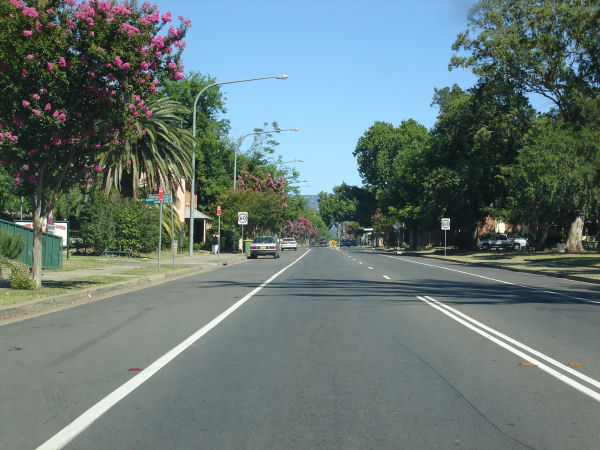
Corner of Terrace & Grose Vale Roads: Looking through North Richmond CBD on Bells Line of Road. December 2005. Image © Paul Rands |
 |
Distance Sign: RD sign leaving Richmond, November 2010. Image © Rob Tilley |
|
 |
Freemans Reach Road: Bells Line of Road (SR40) at the junction with Freemans Reach Rd at Kurmond. December 2005. Image © Paul Rands |
 |
Advance Directional Sign: AD sign approaching Percival St, Clarendon, November 2010. Image © Rob Tilley |
|
 |
Kurmond Town Centre: Looking west on Bells Line of Road near the Longleat Road intersection, December 2005. Image © Paul Rands |
 |
Intersection Directional Sign: ID sign at Percival St in Clarendon, November 2010. Image © Rob Tilley |
|
 |
Kurmond Town Centre: Looking west on Bells Line of Road between Longleat & Comleroy Roads, December 2005. Image © Paul Rands |
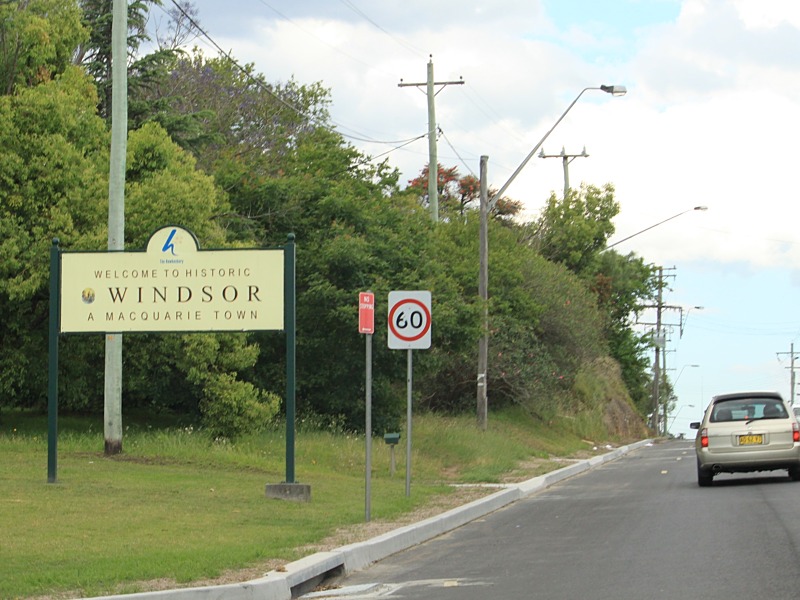 |
Entering Windsor: Hawkesbury Valley Way (SR40) as it enters the town of Windsor, November 2010. Image © Rob Tilley |
|
 |
Advance Directional Sign: AD sign for the Comleroy Road and Old Bells Line of Road intersection at Kurrajong. December 2005. Image © Paul Rands |
 |
Supplemental Advance Directional Sign: Supplemental AD sign for the Macquarie St (Metroad 9) and Hawkesbury Valley Way junction in Windsor, November 2010. Image © Rob Tilley |
|
 |
Advance Directional Sign: AD sign for the Comleroy Road intersection at Kurrajong. December 2005. Image © Paul Rands |
 |
George Street: Hawkesbury Valley Way (SR40) at the George St junction in Windsor, November 2010. Image © Rob Tilley |
|
 |
Advance Directional Sign: AD sign for the Old Bells Line of Road intersection at Kurrajong. December 2005. Image © Paul Rands |
|
Advance Directional Sign: AD sign approaching Macquarie St (Metroad 9) and the unnumbered section of Hawkesbury Valley Way in Windsor, November 2010. Image © Rob Tilley |
|
 |
Old Bells Line of Road: Corner of Bells Line of Rd (SR40) and Old Bells Line of Rd in Kurrajong. This junction is now signalised. December 2005. Image © Paul Rands |
 |
Macquarie Street & Hawkesbury Valley Way: The end of the western section of SR40 in Windsor, November 2010. It used to turn left here and duplex with Metroad 2 and 9. Image © Rob Tilley |
|
 |
Distance Sign: Reassurance directional sign on Bells Line of Road (SR40), west of the Old Bells Line of Road intersection, December 2005. Image © Paul Rands |
|||
 |
Little Wheeney Creek: Bells Line of Road (SR40) as it crosses Little Wheeny Creek at Kurrajong. December 2005. Image © Paul Rands |
|||
 |
Bellbird Hill: Bells Line of Road as it climbs Bellbird Hill at Kurrajong Heights, December 2005. Image © Paul Rands |
|||
 |
Bellbird Hill: Bells Line of Road as it climbs Bellbird Hill at Kurrajong Heights, December 2005. Image © Paul Rands |
|||
 |
Bellbird Hill: Bells Line of Road as it climbs Bellbird Hill at Kurrajong Heights, December 2005. Image © Paul Rands |
|||
 |
Warks Hill Road Intersection: Bells Line of Rd (SR40) near Warks Hill Rd in Kurrajong Heights. December 2005. Image © Paul Rands |
|||
 |
Corner of Pecks Road and Bells Line of Road: Kilometre plate as Bells Line of Road passes through Kurrajong Heights, December 2005. Image © Paul Rands |
|||
 |
Intersection Directional Sign: ID sign at Kurrajong Heights at the entrance to the Turpentine Tree Gallery, December 2005. Image © Paul Rands |
|||
 |
Bilpin: Bells Line of Road (SR40) entering the town of Bilpin, December 2005. Image © Paul Rands |
|||
 |
Bilpin: Bells Line of Road (SR40) as it passes through the town of Bilpin, December 2005. Image © Paul Rands |
|||
 |
Mountain Lagoon Road: Corner of Bells Line of Road (SR40) and Mountain Lagoon Road at Bilpin, December 2005. Image © Paul Rands |
|||
 |
Hanlons Road: Bells Line of Road (SR40) as it passes through Bilpin, near Hanlons Road, December 2005. Image © Paul Rands |
|||
 |
Distance Sign: All capitals tourist distance sign, westbound at Bilpin, December 2005. Image © Paul Rands |
|||
| Click here for the continuation of SR40 between Bilpin and Lithgow Click here for SR40 between Pyrmont and Rydalmere |
||||
1 Roads & Traffic Authority, Schedule of Classified Roads and State & Regional Roads, 31 January 2011
2 Sam Laybutt (OzRoads)
3 Department of Main Roads, The Roadmakers, A History of Main Roads in New South Wales, ISBN 0 7240 0439 4
4 Paul Mech
Last updated: 17-Dec-2019 0:55
This site © Paul Rands. All rights reserved. Some portions © (copyright) by their respective and credited owners. Permission must be obtained before using any images from this site. For details, please email by clicking here.