|
|
|
|
|
 |
Western Distributor, Victoria Road, James Ruse Drive, Cumberland Highway, Old Windsor Road, Hawkesbury Valley Way, East Market Street, March Street, Kurrajong Road, Bells Line of Road, Chifley Road, Eddy Street, Lithgow Street, Mort Street & Main Street (State Route 40) - Pyrmont to Rydalmere (Decommissioned) |
Statistics:
Route Numbering:

General Information:
State Route 40 is major route of New South Wales. The eastern section is an arterial road linking various western and inner western suburbs with Sydney's CBD. The western section is an alternative route over the Blue Mountains, connecting the state's west to Sydney.
The eastern part of the route has several features along it such as Iron Cove Bridge, Western Distributor (which is a series of viaducts connecting to several streets in the CBD of Sydney) and the Gladesville Bridge. Both the Western Distributor and Gladesville Bridge (and the associated Burns Bay Road (former SR21)) were to form part of the F3 Freeway from Sydney to the Hunter Region of NSW.
The western section of the route is quite windy and hilly once off the Cumberland Plain, as it crosses the Great Dividing Range. The line it follows dates back to the 1800s. The route passes through residential and commercial areas, as well as some rural and large tracts of forested areas.
The James Ruse Drive section of SR40 is named after the first landholder in the Parramatta area. 3
Multiplexes along the route include:
Gladesville Bridge is an arch bridge that spans the Parramatta River. At the time of its completion in 1964, Gladesville Bridge was the longest single span concrete arch ever constructed. Gladesville Bridge is the largest of a complex of three bridges, including Fig Tree Bridge and Tarban Creek Bridge, designed to carry a never built North West Freeway. 4
The current bridge replaced the original Gladesville Bridge, which was completed in 1881. It was about 300 metres to the west of the modern bridge. It featured a swing section on the southern end of the bridge that could be opened to permit sailing ships and steamers with high funnels to pass. It stood on iron cylinders with a sandstone pier at each end of the bridge. The sandstone piers are all that remain today of the original bridge. Construction on the new bridge started in 1959. 4
The original bridge was constructed of wrought iron lattice girders and opened in 1882 after four years of construction. The area was sparsely populated in the 1880s and the opening of the new bridge not only helped accessibility, it provided a new western route to Sydney via Balmain. 4
A decision to replace the original bridge was made in 1939 just prior to the outbreak of World War II. Design work began in 1942 and construction commenced in 1947. The bridge was officially opened by Hon. J.J. Cahill, MLA, Premier and Colonial Treasurer of NSW on the 30th July, 1955. 4
The ANZAC Bridge opened in 1995 and was formerly the Glebe Island Bridge. (ANZAC stands for Australian and New Zealand Army Corps). 2
The bridge is the longest cable-stayed bridge in Australia, with a main deck length of 805 metres, including a 345 metre span between the towers. The two 128 metre towers support 128 cables, and is eight lanes wide. 2
On Remembrance Day, 11 November 1998, the New South Wales Government bestowed the bridge to the NSW Returned Serviceman’s League for re-naming as ‘The Anzac Bridge’ and unveiled a monument of a digger bowed in silent reflection. The monument is located at the western end of the bridge on the northern side. A second bronze statue, of a New Zealand digger, followed on the southern side in April 2008. 2
A handful of sand from Gallipoli rests under the foot of the digger as a permanent connection with comrades who fell and remain at the Gallipoli Battlefield in Turkey. 2
The Western Distributor is a network of motorway feeder roads linking the Sydney Harbour Bridge, Sydney CBD, Cross City Tunnel to the main arterial roads to the Western suburbs of Sydney, such as Parramatta Road (via City West Link) and Victoria Road (SR40).
When it was built, it was intended to be the southern end of the F3 Freeway, as it was where the North West Freeway was planned to finish, however due to protests from inner city residents, this plan never came to fruition. The Western Distributor was opened in stages starting in September 1972 3
History:
| Pyrmont to Rydalmere | Rydalmere to Pyrmont | |||
| Preview: | Description: | Preview: | Description: | |
 |
ANZAC Bridge: Western Distributor near the Pyrmont Bridge Rd interchange approaching ANZAC Bridge in Pyrmont, September 2006. Image © Paul Rands |
 |
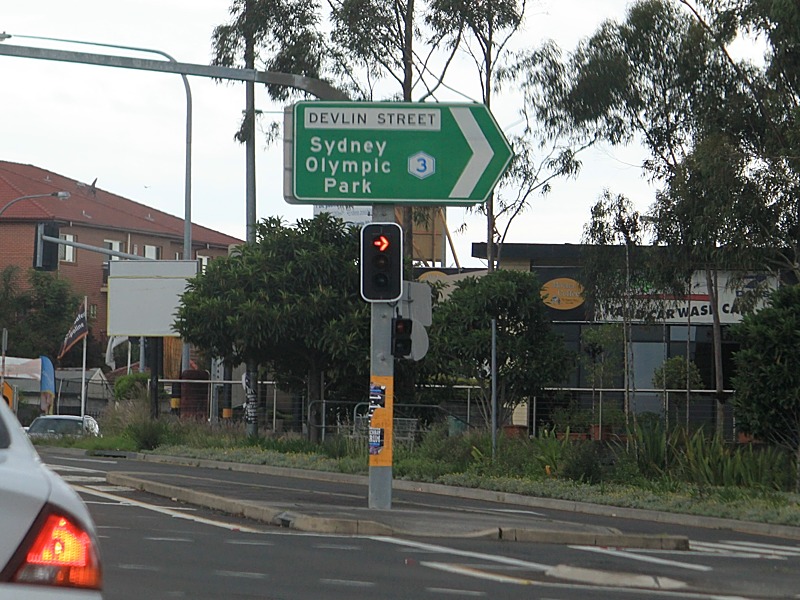
Advance Directional Sign: AD sign on Victoria Rd (SR40) at Ryde approaching Devlin St (Metroad 3), November 2010. Image © Rob Tilley |
|
 |
ANZAC Bridge: ANZAC Bridge over Johnstons Bay at Pyrmont, September 2006. Image © Paul Rands |
 |
Devlin Street: Intersection directional sign at the junction of Victoria Rd (SR40) and Devlin St (Metroad 3) at Ryde, November 2010. Image © Rob Tilley |
|
 |
Advance Directional sign: AD sign on Victoria Rd (SR40 / Metroad 4) at Rozelle approaching The Crescent, September 2006. The Metroad 4 duplex ends at this junction and SR40 turns right here. Image © Paul Rands |
 |
Devlin Street: Intersection directional sign at the junction of Victoria Rd (SR40) and Devlin St (Metroad 3) at Ryde, November 2010. Image © Rob Tilley |
|
 |
Victoria Road / The Crescent: Looking northeast at the interchange with The Crescent (Metroad 4) and Victoria Rd (SR40) at Rozelle, September 2006. Image © Paul Rands |
 |
Distance Sign: RD sign at Ryde, September 2006. Image © Paul Rands |
|
 |
Advance Directional Sign: AD sign approaching Darling St in Rozelle, September 2006. Image © Paul Rands |
 |
Gladesville: Victoria Rd (SR40) as it passes through the suburb of Gladesville, September 2006. Image © Paul Rands |
|
 |
Iron Cove Bridge: Victoria Rd (SR40) prior to the construction of the busway, approaching Iron Cove Bridge over Iron Cove at Rozelle, September 2006. Image © Paul Rands |
 |
Intersection Directional Sign: ID sign assembly at corner of Victoria Rd (SR40) and Pittwater Rd at Gladesville, November 2010. Image © Rob Tilley |
|
 |
Iron Cove Bridge: Victoria Rd (SR40) prior to the construction of the busway, as it crosses over Iron Cove via Iron Cove Bridge at Rozelle, September 2006. Image © Paul Rands |
 |
Advance Directional Sign: AD sign at Huntleys Cove approaching Huntleys Point Rd, November 2010. Click here for a photo of this location from September 2006. Image © Rob Tilley |
|
 |
Iron Cove Bridge: The add-on lane on Iron Cove Bridge. Heading northwest at Rozelle, September 2006. Image © Paul Rands |
 |
Advance Directional Sign: AD sign at Huntleys Cove for the interchange with Burns Bay Rd, November 2010. Click here for a photo of this location from September 2006. Image © Rob Tilley |
|
 |
Distance Sign: Reassurance directional sign at Drummoyne with Gladesville Bridge in the distance, September 2006. Image © Paul Rands |
 |
Advance Directional Sign: AD sign approaching Burns Bay Rd interchange at Huntleys Cove, November 2010. Image © Rob Tilley |
|
 |
Advance Directional Sign: AD sign on the Gladesville Bridge at Drummoyne for the interchange with Burns Bay Rd, September 2006. Image © Paul Rands |
 |
Burns Bay Road Interchange: Eastbound on Victoria Rd (SR40) at the Burns Bay Rd interchange at Huntleys Point, September 2006. Image © Paul Rands |
|
 |
Burns Bay Road Interchange: Northbound on Victoria Rd (SR40) at the Burns Bay Rd interchange at Huntleys Point, September 2006. Note the old orange Sydney Olympics route sign below the ID signs. Image © Paul Rands |
 |
Burns Bay Road Interchange: Southbound on Burns Bay Rd approaching the interchange with Victoria Rd (SR40) at Huntleys Point, September 2006. Image © Paul Rands |
|
 |
Burns Bay Road Interchange: Southbound on Burns Bay Rd at the interchange with Victoria Rd (SR40) at Huntleys Point, September 2006. Note the old orange Sydney Olympics route sign below the ID signs. Image © Paul Rands |
 |
Gladesville Bridge: The Gladesville Bridge at Huntleys Point as it crosses Parramatta River, September 2006. Image © Paul Rands |
|
 |
Gladesville Bridge: Gladesville Bridge from the western side at Huntleys Point, September 2006. Image © Paul Rands |
 |
Gladesville Bridge: The Gladesville Bridge at Huntleys Point as it crosses Parramatta River, September 2006. Image © Paul Rands |
|
 |
Advance Directional Sign: AD sign at Huntleys Cove approaching Huntleys Point Rd, September 2006. Image © Paul Rands |
 |
Gladesville Bridge: The Gladesville Bridge at Huntleys Point as it crosses Parramatta River, August 2007. Image © Dave Whiteman |
|
 |
Advance Directional Sign: AD sign on the Devlin St (Metroad 3) interchange at Ryde, April 2006. Image © Paul Rands |
 |
Approaching Westbourne St: Victoria Rd (SR40) at Drummoyne, approaching Westbourne St, November 2010. Image © Rob Tilley |
|
 |
Intersection Directional Sign: ID sign facing the Devlin St (Metroad 3) interchange at Ryde, April 2006. Image © Paul Rands |
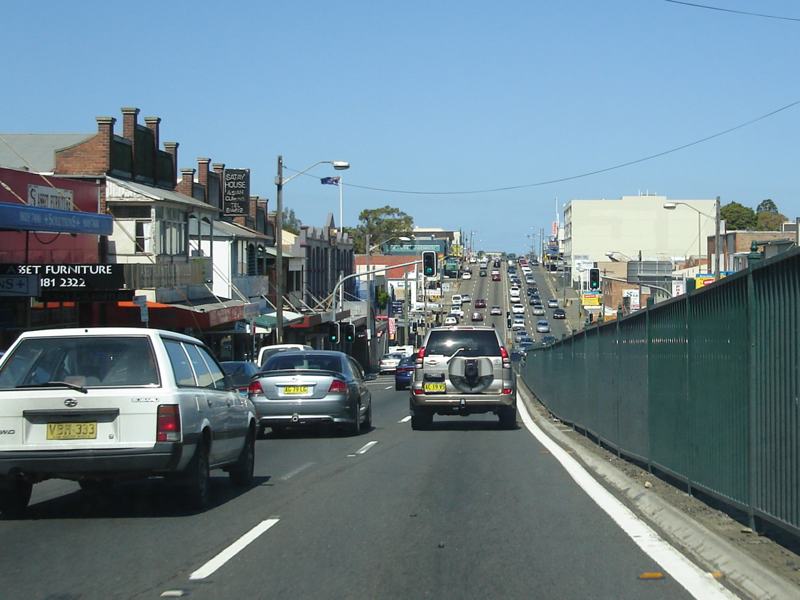 |
Drummoyne Town Centre: Victoria Rd (SR40) as it passes through the suburb of Drummoyne, September 2006. Image © Paul Rands |
|
 |
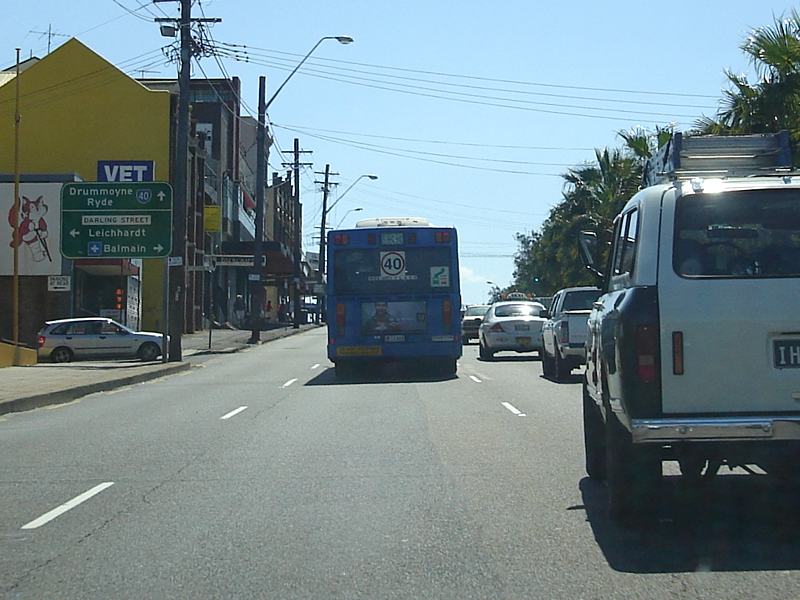
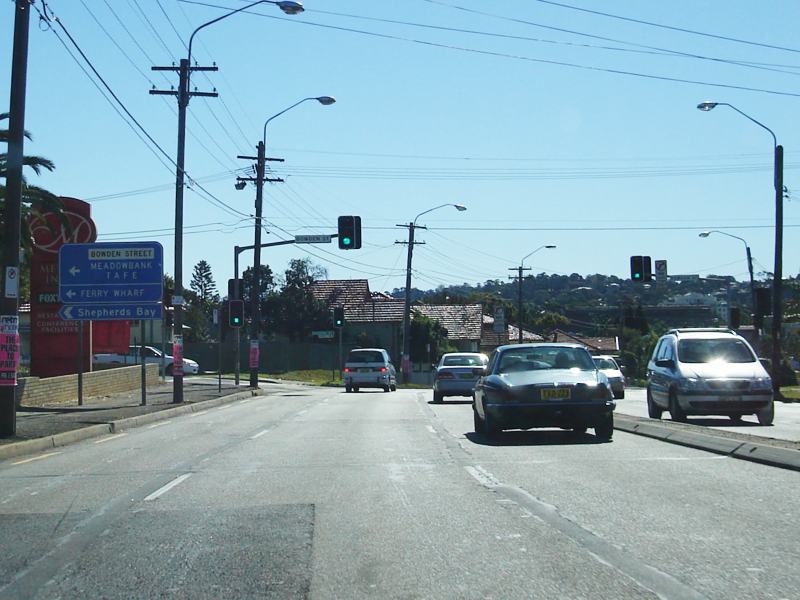
Advance Directional Sign: AD sign on Victoria Rd (SR40) at Ryde approaching Bowden St, November 2010. Click here for a photo of this location from April 2006. Image © Rob Tilley |
 |
Distance Sign: RD sign at Drummoyne, November 2010. Image © Rob Tilley |
|
 |
West Ryde Town Centre: Victoria Rd (SR40) at the West Pde intersection in the West Ryde town centre, April 2006. Image © Paul Rands |
 |
Intersection Directional Sign: ID sign near the Day St junction in Drummoyne, November 2010. Image © Rob Tilley |
|
 |
Advance Directional Sign: AD sign at West Ryde approaching Marsden Rd and Wharf Rd, April 2006. Image © Paul Rands |
 |
Iron Cove Bridge: Victoria Rd (SR40) prior to the construction of the busway, as it crosses over Iron Cove via Iron Cove Bridge at Drummoyne, September 2006. Image © Paul Rands |
|
 |
Marsden Road & Wharf Road: Victoria Rd (SR40) at the Marsden Rd & Wharf Rd junction, April 2006. Image © Paul Rands |
 |
Advance Directional Sign: AD sign approaching Darling St in Rozelle, November 2010. Click here for a photo of this location from September 2006. Image © Rob Tilley |
|
 |
Advance Directional Sign: AD sign near Spurway St in Ermington approaching Silverwater Rd (Metroad 6) interchange, April 2006. Image © Paul Rands |
 |
Advance Directional sign: AD sign on Victoria Rd (SR40) at Rozelle approaching The Crescent (Metroad 4), September 2006. The Metroad 4 duplex begins at this junction and SR40 turns left here. Image © Paul Rands |
|
 |
Silverwater Road: Victoria Rd (SR40) at the Silverwater Rd (Metroad 6) interchange in Ermington, April 2006. Image © Paul Rands |
 |
Victoria Road / The Crescent: The junction with The Crescent (Metroad 4) and Victoria Rd (SR40) at Rozelle, September 2006. Image © Paul Rands |
|
 |
Silverwater Road: Victoria Rd (SR40) at the Silverwater Rd (Metroad 6) interchange in Ermington, April 2006. Image © Paul Rands |
 |
ANZAC Bridge: ANZAC Bridge over Johnstons Bay at Pyrmont, June 2007. Image © David Whiteman |
|
 |
Distance Sign: RD sign at Rydalmere, April 2006. Image © Paul Rands |
|||
 |
Advance Directional Sign: AD sign on Victoria Rd (SR40) at Rydalmere approaching James Ruse Dr (SR40), April 2006. Image © Paul Rands |
|||
 |
James Ruse Drive Interchange: Victoria Road at the James Ruse Drive interchange in Rydalmere, April 2006. Image © Paul Rands |
|||
 |
James Ruse Drive Interchange: Victoria Road at the James Ruse Drive interchange in Rydalmere, April 2006. SR40 goes beyond this ramp and loops onto James Ruse Dr. Image © Paul Rands |
|||
| Click here for State Route 40 between Windsor and Bilpin | ||||
1 Roads & Traffic Authority, Schedule of Classified Roads and State & Regional Roads, 31 January 2011
2 Roads & Traffic Authority, Signposting Guidelines
3 Sam Laybutt (OzRoads)
4 Seven Bridges Walk, Bridge History
5 City of Ryde, Library
6 Roads & Traffic Authority, Anzac Bridge history
7 State Library of NSW, Arch of the Gladesville Bridge completed 1962
8 State Library of NSW, Safety scaffolding on Western Distributor
9 RTA Thematic History, A component of the RTA Heritage and Conservation Register, 2nd Edition, 2006
10 Roads & Traffic Authority
11 Roads & Traffic Authority, Inner West Busway Victoria Road
Last updated: 19-Sep-2016 14:15
This site © Paul Rands. All rights reserved. Some portions © (copyright) by their respective and credited owners. Permission must be obtained before using any images from this site. For details, please email by clicking here.