|
|
|
|
|
 |
Pennant Hills Road, Marsden Road, Stewart Street, Kissing Point Road, Silverwater Road, St Hilliers Road, Rawson Street, Olympic Drive, Joseph Street, Rookwood Road, Stacey Street, Fairford Road, Davies Road, Alfords Point Road, New Illawarra Road & Heathcote Road (Metroad 6) - Bankstown to Heathcote (Decommissioned) |
Statistics:
Route Numbering:
General Information:
Metroad 6 is a collection of local roads that form one large route, which is one of Sydney's major arterial roads.
The route is mostly suburban arterial standard. At the southern end around Lucas Heights through to Heathcote, it's mostly 2 to 3 lane single carrigeway. The rest of the route is mostly 4 to 6 lanes divided, however some of the route is 4 lane undivided around the northern end and in the Bankstown area.
History:
| Heathcote to Bankstown | Bankstown to Heathcote | |||
| Preview: | Description: | Preview: | Description: | |
 |
Toll Charges Sign: Metroad 5 toll charges sign at Padstow, approaching the interchange with South Western Mwy (Metroad 5), January 2010. Image © Michael Mak |
 |
Distance Sign: RD sign in Engadine after the Princes Hwy (NR1) junction, January 2010. Image © Michael Mak |
|
 |
M5 Motorway AD Sign on Fairford Road: Image © Paul Rands |
 |
Advance Directional Sign: AD sign on Heathcote Rd (Metroad 6) at Lucas Heights approaching the unnumbered section of Heathcote Rd and also New Illawarra Rd (Metroad 6), January 2010. Image © Michael Mak |
|
 |
M5 Interchange: Interchange with Fairford Road and the M5 South Western Motorway at Padstow, December 2005. Image © Paul Rands |
 |
Intersection Directional Sign: ID sign on the corner of Heathcote Rd (Metroad 6), the unnumbered section of Heathcote Rd and also New Illawarra Rd (Metroad 6) at Lucas Heights , January 2010. Image © Michael Mak |
|
 |
Corner of Truro Parade and Davies Road: Davies Road southbound at Padstow, December 2005. Image © Paul Rands |
 |
Distance Sign: RD sign near the Heathcote Rd junction at Lucas Heights, January 2010. Image © Michael Mak |
|
 |
AD Sign for Clancy Street Interchange: Heading south through Padstow, January 2010. Click here for a photo from December 2005 by Paul Rands of the old sign. Image © Michael Mak |
 |
Advance Directional Sign: AD sign on New Illawarrd Rd (Metroad 6) approaching Bangor Bypass at Barden Ridge, January 2010. Image © Michael Mak |
|
 |
Clancy Street, Davies Road and Alfords Point Road Interchange: Image © Paul Rands |
 |
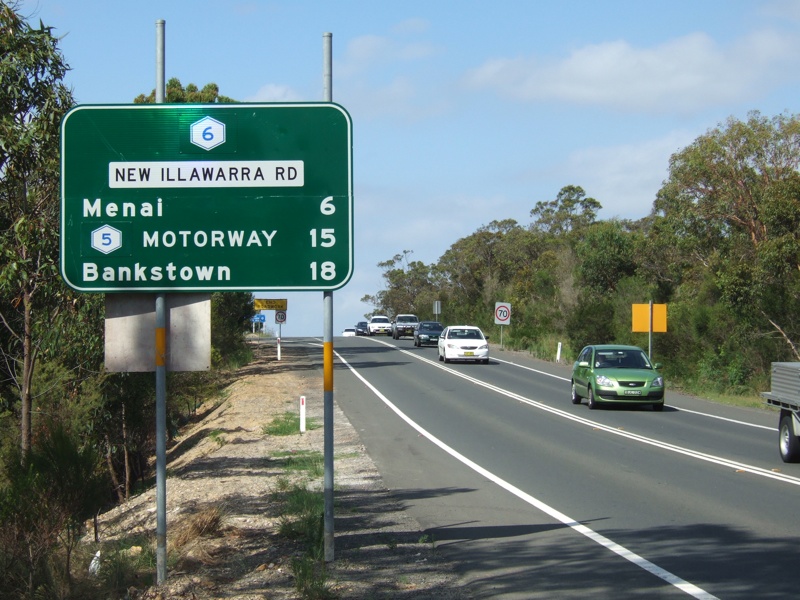
Distance Sign: RD sign on New Illawarra Rd (Metroad 6) at Menai, January 2010. Image © Michael Mak |
|
 |
Clancy Street Overpass: Passing under Clancy Street, which is part of the large Padstow interchange, December 2005. Image © Paul Rands |
 |
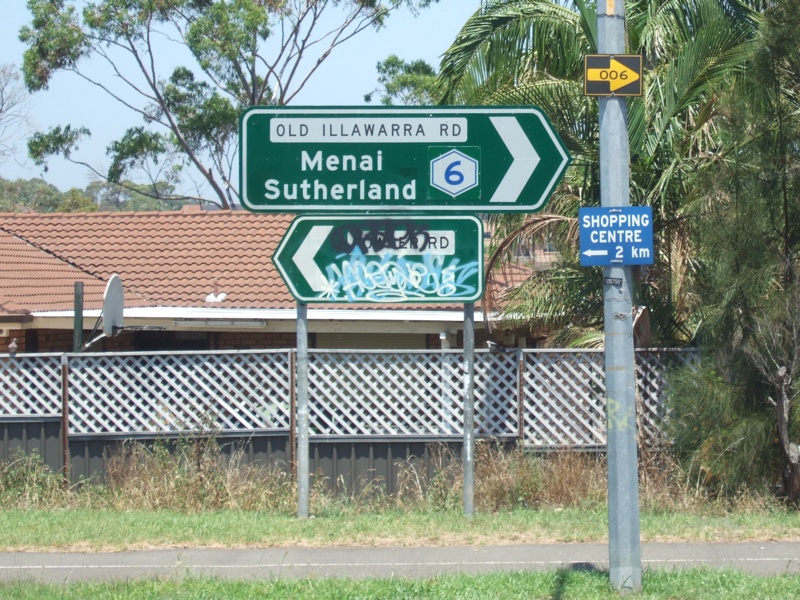
Advance Directional Sign: AD sign on New Illawarra Rd (Metroad 6) approaching Old Illawarra Rd, Menai Rd and Alfords Point Rd (Metroad 6) at Menai, January 2010. Image © Michael Mak |
|
 |
Advance Directional Sign: AD sign on Henry Lawson Dr in Padstow, approaching Clancy St, January 2010. Image © Michael Mak |
 |
Old Illawarra Road: AD sign on Old Illawarra Rd approaching Menai Rd, New Illawarra Rd (Metroad 6) and Alfords Point Rd (Metroad 6) at Menai, January 2010. Image © Michael Mak |
|
 |
Clancy Street Interchange: Looking west along Clancy St in Padstow at the interchange with Alfords Point Rd (Metroad 6) and Davies Rd (Metroad 6), January 2010. Image © Michael Mak |
 |
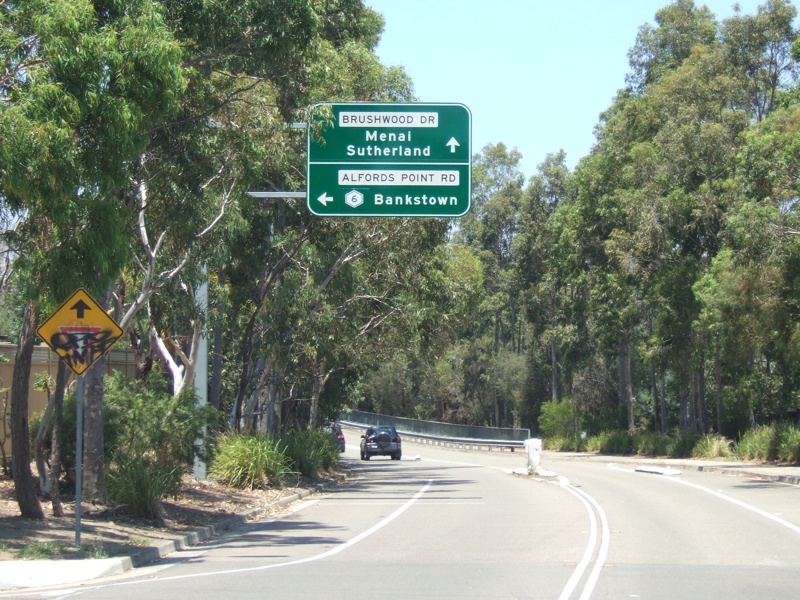
Advance Directional Sign: AD sign on Fowler Rd approaching Brushwood Rd and Alfords Point Rd (Metroad 6) at Alfords Point, January 2010. Image © Michael Mak |
|
 |
Alfords Point Road: Looking southbound along Alfords Point Rd (Metroad 6) from the Clancy St overpass, January 2010. Image © Michael Mak |
 |
Advance Directional Sign: AD sign on Brushwood Rd approaching Fowler Rd and Alfords Point Rd (Metroad 6) at Alfords Point, January 2010. Image © Michael Mak |
|
 |
Advance Directional Sign: AD sign on Clancy St in Padstow, approaching Alfords Point Rd (Metroad 6) and Davies Rd (Metroad 6), January 2010. Image © Michael Mak |
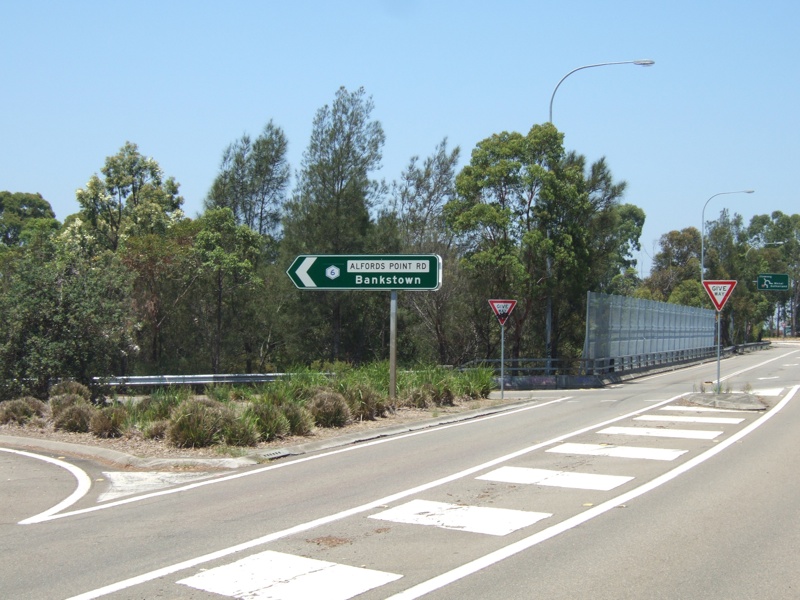 |
Intersection Directional Sign: ID sign on Brushwood Rd near Fowler Rd and Alfords Point Rd (Metroad 6) at Alfords Point, January 2010. Image © Michael Mak |
|
 |
Alfords Point Road / Henry Lawson Drive Interchange: Looking at the off ramp from Henry Lawson Drive at Padstow Heights, June 2008. Image © Michael Mak |
 |
Alfords Point Bridge: Alfords Point Rd as it crosses the Georges River via the Alfords Point Bridge at Alfords Point, January 2010. Image © Michael Mak |
|
 |
Advance Directional Sign: AD sign acting as an ID sign on the corner of Sewell Avenue and the ramp from Henry Lawson Drive onto Alfords Point Road at Padstow Heights. June 2008. Image © Michael Mak |
 |
Advance Directional Sign: AD sign at Padstow Heights approaching Clancy St, January 2010. Image © Michael Mak |
|
 |
Lane Configuration VMS on Alfords Point Road: Variable message sign for lane allocation, southbound at Padstow Heights, December 2005. Image © Paul Rands |
 |
Intersection Directional Sign: ID sign on Henry Lawson Dr (TD8) at the junction with Clancy St in Padstow Heights. The sign should have the word 'To' affixed to the Metroad 6 shield, January 2010. Image © Michael Mak |
|
 |
Clancy Street, Davies Road and Alfords Point Road Southbound Merge: Driving through the Padstow Heights Interchange, December 2005. Image © Paul Rands |
 |
Intersection Directional Sign: ID sign on Clancy St in Padstow Heights at the junction with Davies Rd (Metroad 6), January 2010. Image © Michael Mak |
|
 |
Alfords Point Bridge Northern Approach: Variable message sign for lane allocation as you approach Alfords Point Bridge over the Georges River, December 2005. Image © Paul Rands |
 |
Advance Directional Sign: AD sign for South Western Mwy (Metroad 5) on Davies Rd (Metroad 6) near Watson Rd in Padstow, January 2010. At this junction Metroad 6 becomes Fairford Rd Image © Michael Mak |
|
 |
RD Sign at Alfords Point Bridge: Distance sign near Alfords Point Bridge at Alfords Point, December 2005. Image © Paul Rands |
 |
Advance Directional Sign: AD sign on Fairford Rd in Padstow approaching the interchange with Canterbury Rd (SR54), January 2010. Image © Michael Mak |
|
 |
Alfords Point Bridge: Crossing Alfords Point Bridge over Georges River. December 2005. Image © Paul Rands |
|||
 |
Alfords Point Bridge Southern End: Image © Paul Rands |
|||
 |
Southbound near Great Moon Bay: Taken December 2005 near the truck parking area at Alfords Point. Image © Paul Rands |
|||
 |
AD Sign for Brushwood Drive, Fowler Road, Old Illawarra Road, and Alfords Point Road interchange: Image © Paul Rands |
|||
 |
Brushwood Drive, Fowler Road, Old Illawarra Road, and Alford's Point Road interchange: Image © Paul Rands |
|||
 |
Intersection Directional Sign: Old ID sign assembly at the interchange with Brushwood Dr, Fowler Rd, Old Illawarra Rd and Alfords Point Rd (Metroad 6) in Alfords Point, January 2010. Image © Michael Mak |
|||
 |
Alfords Point Road: Looking southbound along Alfords Point Rd (Metroad 6) from the interchange with Brushwood Dr, Fowler Rd & Old Illawarra Rd in Alfords Point, January 2010. Image © Michael Mak |
|||
 |
Advance Directional Sign: AD sign on Old Illawarra Rd approaching the interchange with Alfords Point Rd (Metroad 6) in Illawong, January 2010. Image © Michael Mak |
|||
 |
Old Illawarra Road Overpass: Passing under Old Illawarra Road in the Menai / Illawong area. December 2005. Image © Paul Rands |
|||
 |
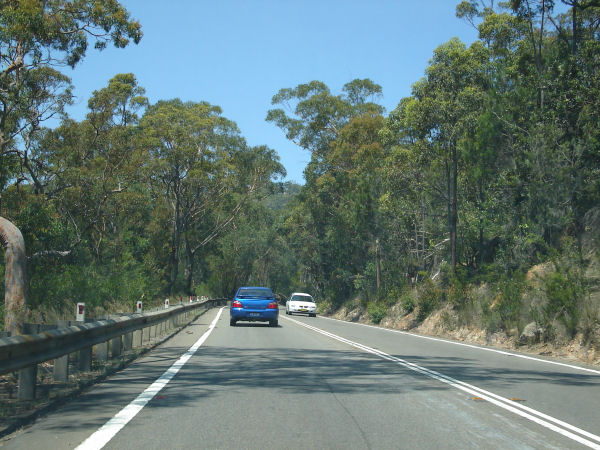
Alfords Point Road: Southbound as you enter Menai, December 2005. Image © Paul Rands |
|||
 |
AD Sign for Menai Road Intersection: Image © Paul Rands |
|||
 |
New Illawarra Road: Looking south at the Barry Road pedestrian signals at Menai. December 2005. Image © Paul Rands |
|||
 |
Bangor Bypass AD Sign: Advance directional sign for the Bangor Bypass. New Illawarra Road Menai, December 2005. Image © Paul Rands |
|||
 |
New Illawarra & Old Illawarra Roads Roundabout: Looking southwest at the roundabout at Barden Ridge, January 2010. Click here for a photo by Paul Rands from December 2005. Image © Paul Rands |
|||
 |
Intersection Directional Sign: ID sign at the junction New Illawarra Rd (Metroad 6) and Rutherford Rd in Lucas Heights, January 2010. Image © Michael Mak |
|||
 |
AD Sign for Heathcote Road: Advance directional sign detailing intersection options with Heathcote Road. New Illawarra Road, Lucas Heights, January 2010. Click here for a photo by Paul Rands from December 2005. Image © Paul Rands |
|||
 |
Heathcote Road Intersection: Directional signage on the corner of Heathcote and New Illawarra Roads at Lucas Heights. January 2010 Image © Michael Mak |
|||
 |
Heathcote Road Intersection: Directional signage on the corner of Heathcote and New Illawarra Roads at Lucas Heights. January 2010. Click here for a photo by Paul Rands from December 2005 showing the Liverpool ID sign with a remnant Metroad 7 shield. Until the 1994 opening of the Casula Bypass, Metroad 7's southern terminus was the intersection of Princes Hwy and Heathcote Rd at Heathcote. Image © Paul Rands |
|||
 |
Advance Directional Sign: AD sign on the unnumbered section of Heathcote Rd approaching New Illawarra Rd (Metroad 6) and Heathcote Rd (Metroad 6) at Lucas Heights, January 2010. Image © Michael Mak |
|||
 |
Heathcote Road Intersection: Corner of Heathcote and New Illawarra Roads at Lucas Heights. January 2010 Image © Michael Mak |
|||
 |
RD Sign Eastbound: Distance sign near the New Illawarra Road / Heathcote Road intersection, facing east, January 2010. Under the coverplate is the old SR45 and SR61 shields. Image © Paul Rands |
|||
 |
Eastbound Lucas Heights: Heading east with Melinga Molong Creek in the gully to the left of the road. December 2005. Image © Paul Rands |
|||
 |
Approaching Woronora River: Image © Paul Rands |
|||
 |
Crossing Woronora River: Bridge over the Woronora River, the bridge was built in 1941. Southbound near Engadine, December 2005. Image © Paul Rands |
|||
 |
Eastbound near Kallala Gully: Heading southeast towards the Princes Highway, Heathcote, December 2005. Image © Paul Rands |
|||
 |
Route End Signage: Image © Paul Rands |
|||
 |
AD Sign for Princes Highway: Directional sign detailing approaching intersection at the Metroad 6 southern terminus, Heathcote, August 2008. Click here for a photo from December 2005 of the sign this one replaced. Image © Michael Mak |
|||
 |
Metroad 6 Southern Terminus: Corner of Heathcote Road and the Princes Highway at Heathcote, December 2005. Image © Paul Rands |
|||
 |
Intersection Directional Signs: Sign assembly on the corner of Heathcote Road and the Princes Highway at Heathcote, August 2008. Image © Michael Mak |
|||
| Click here for the continuation of Metroad 6 between Bankstown and Carlingford | ||||
1 Roads and Traffic Authority
2 Sam Laybutt (Ozroads)
Last updated: 08 Nov 2019 01:09
This site © Paul Rands. All rights reserved. Some portions © (copyright) by their respective and credited owners. Permission must be obtained before using any images from this site. For details, please email by clicking here.