|
|
|
|
|
 |
Coolgardie-Esperance Highway, South Coast Highway, Chester Pass Road, South Western Highway, Robertson Drive, Forrest Highway, Old Coast Road, Mandurah Road, Ennis Avenue, Patterson Road, Rockingham Road, Stock Road, Leach Highway, Kwinana Freeway, Canning Highway, Great Eastern Highway, Great Eastern Highway Bypass, Roe Highway, Great Northern Highway, Brand Highway & North West Coastal Highway (National Route 1) - Rockingham to Como |
Statistics:
Route Numbering:
General Information:
National Route 1 is a major route in WA.
The route varies in form from multi-laned arterial road, suburban road, to single carriageway rural highway. It passes through commercial, industrial, residential and agricultural land, and also through state forest and conservation areas.
Multiplexes along the route include:
History:
Ennis Avenue, Patterson Road, Rockingham Road, Stock Road, Leach Highway, Kwinana Freeway & Canning Highway:
| Como to Rockingham | Rockingham to Como | |||
| Preview: | Description: | Preview: | Description: | |
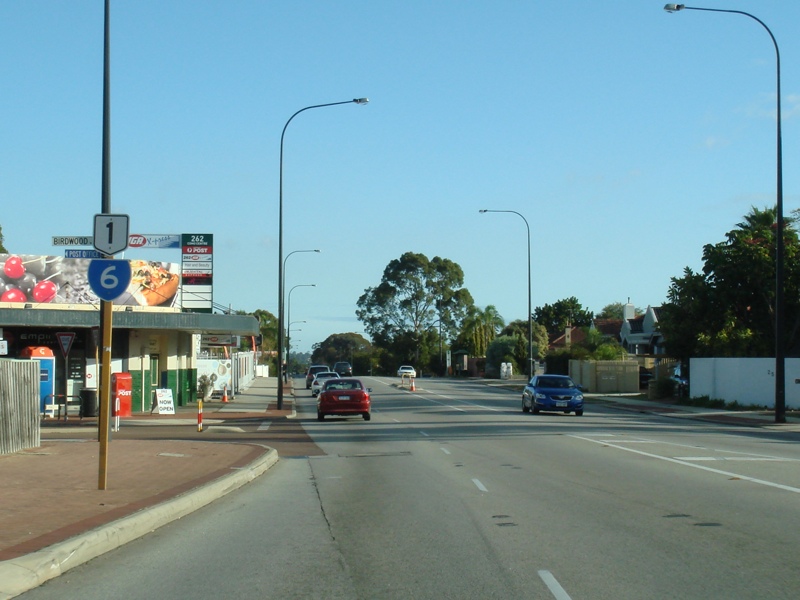 |
Trailblazer Assembly: SR6 / NR1 trailblazer at Como near Birdwood Av, June 2009. Image © Paul Rands |
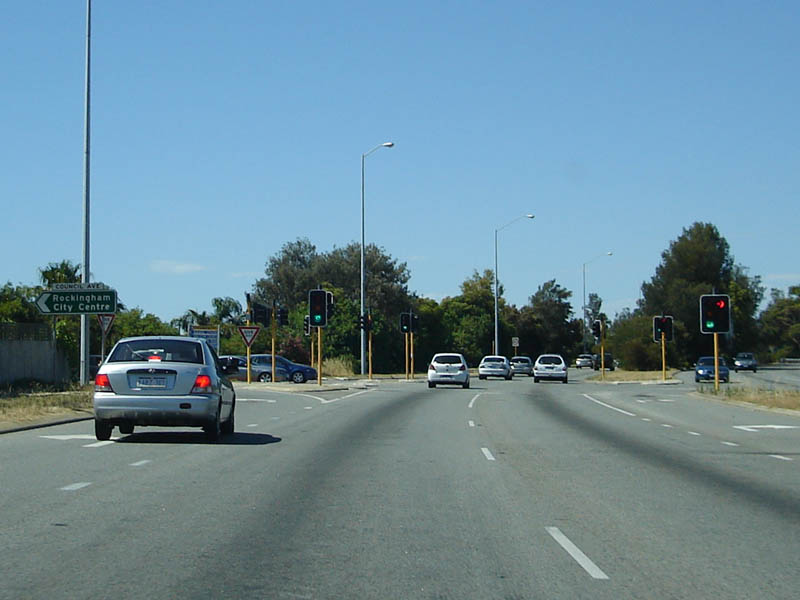 |
Council Av Intersection: Northbound at Rockingham at Council Avenue, December 2007. Image © Paul Rands |
|
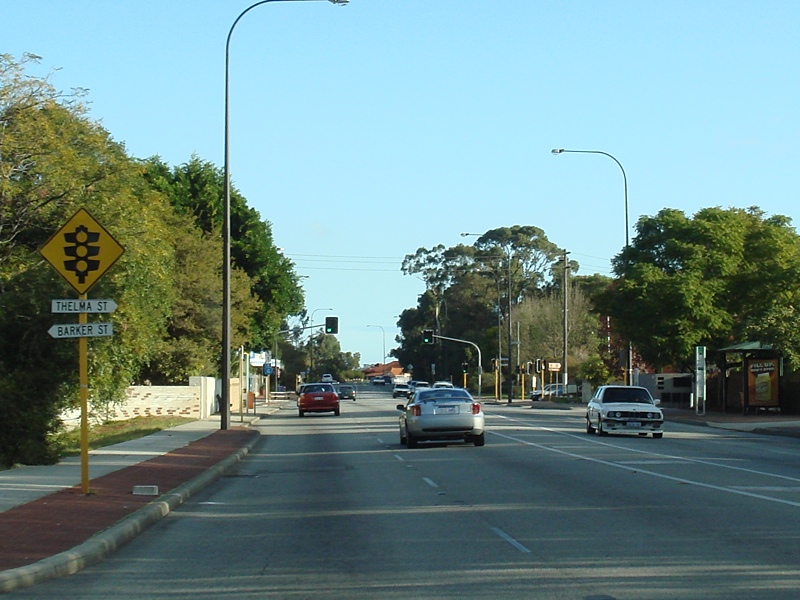 |
Approaching Barker & Thelma Streets: Canning Hwy approaching Thelma St and Barker St in Como, June 2009. Image © Paul Rands |
 |
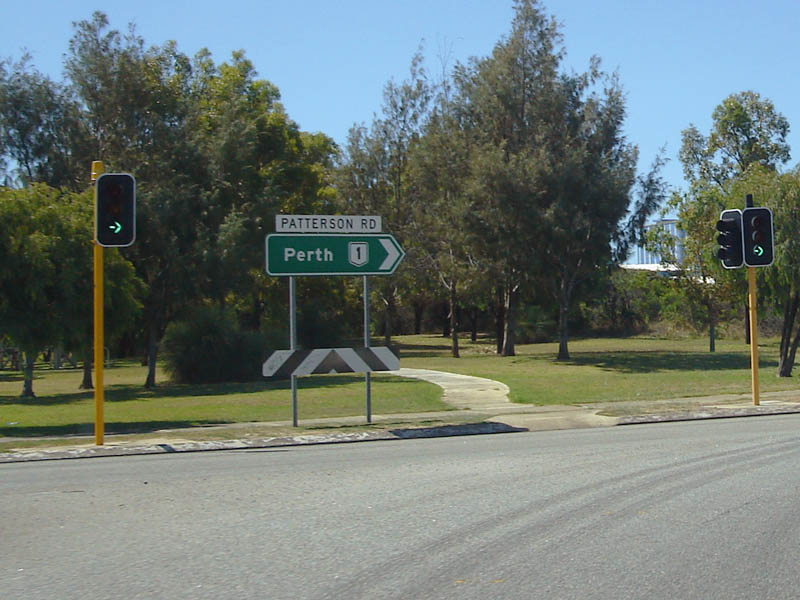
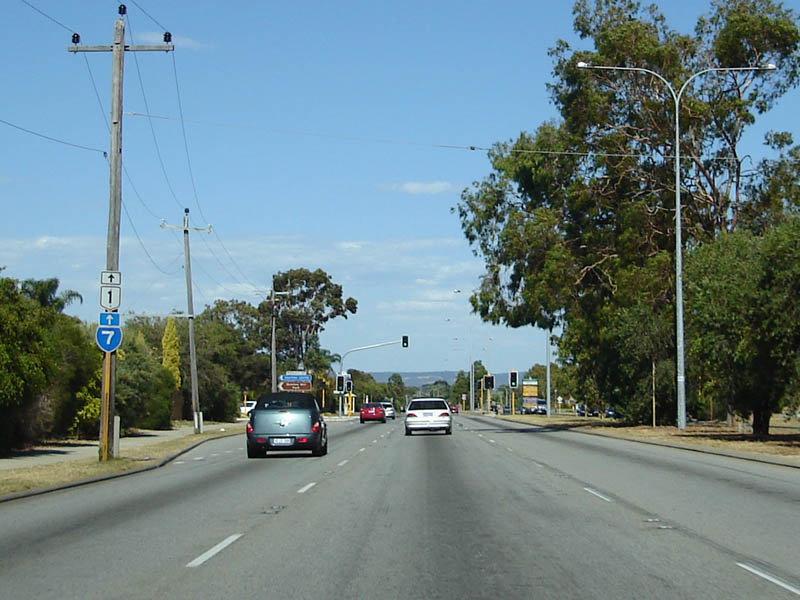
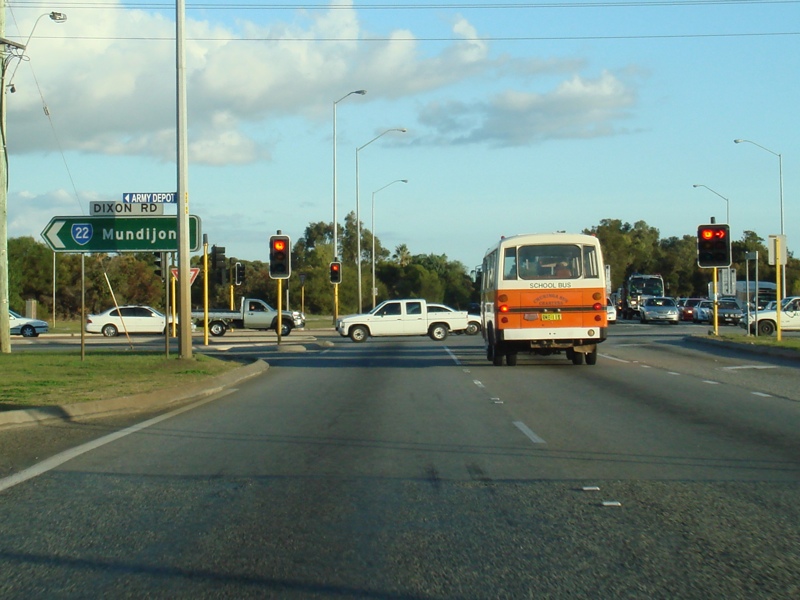
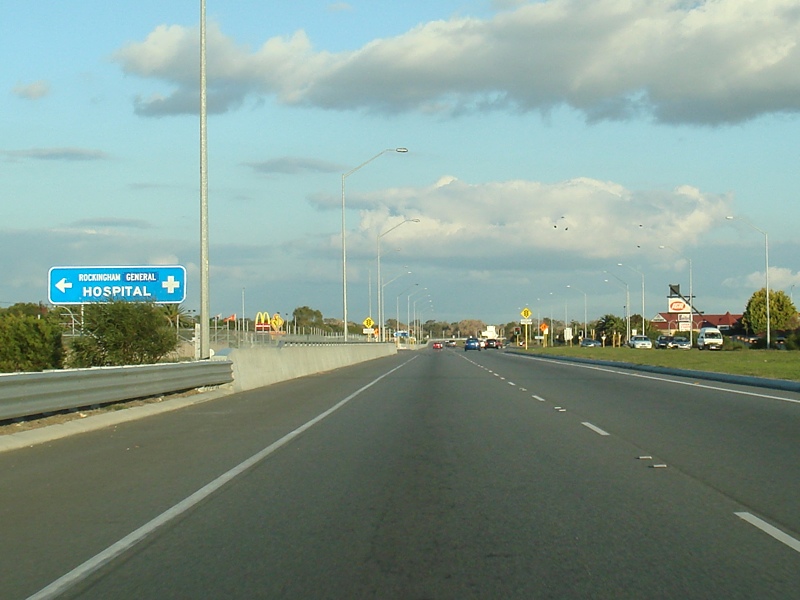
Advance Direcitonal Sign: Northbound AD sign approaching Dixon Road (SR22) at Rockingham, December 2007. Image © Paul Rands |
|
 |
Trailblazer Assembly: Image © Paul Rands |
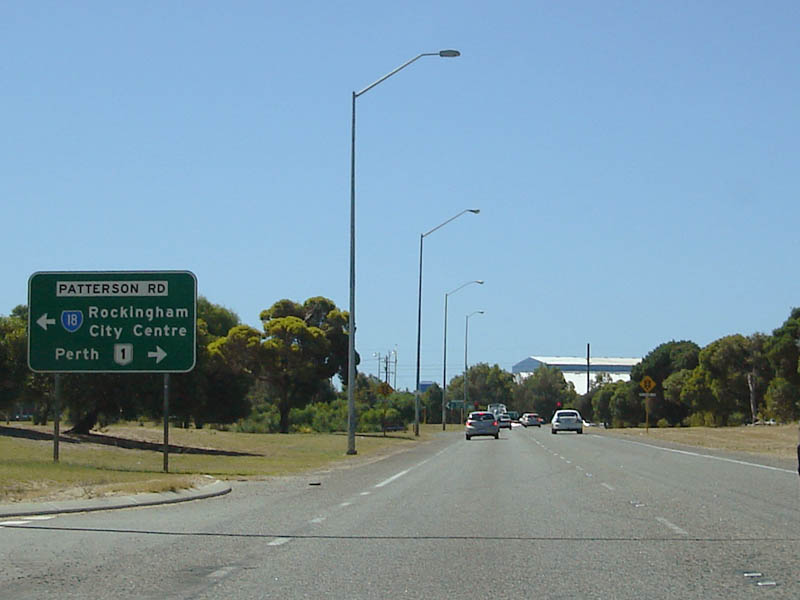 |
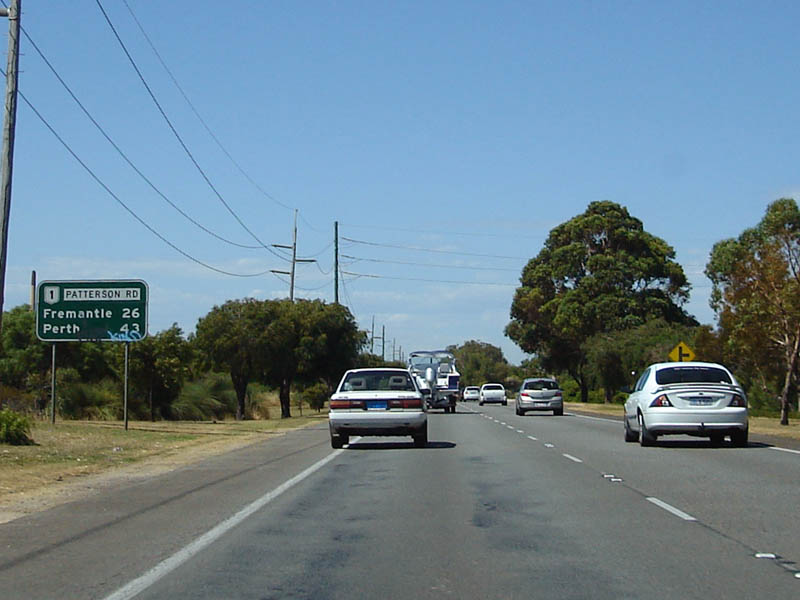
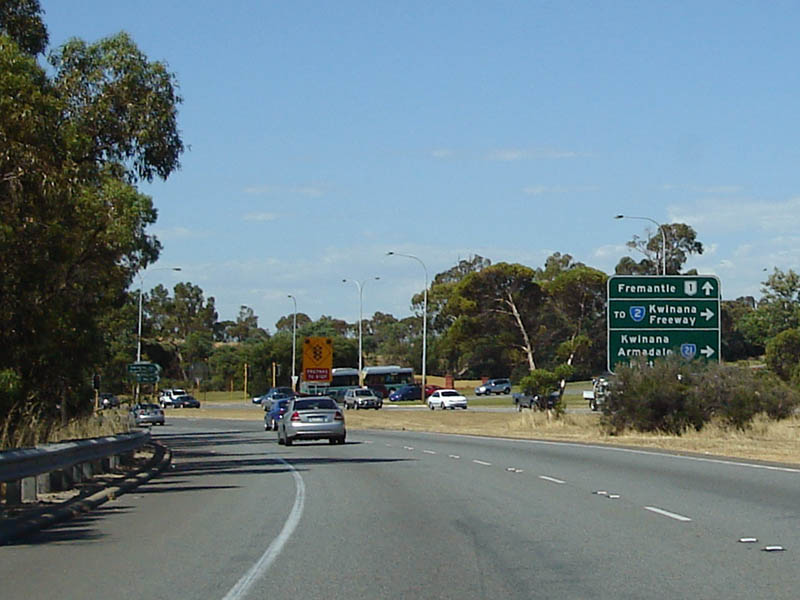
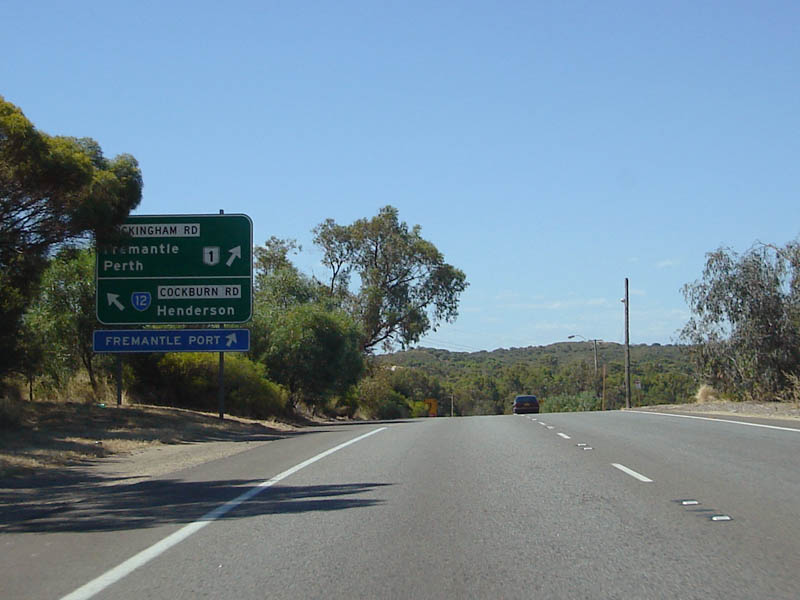
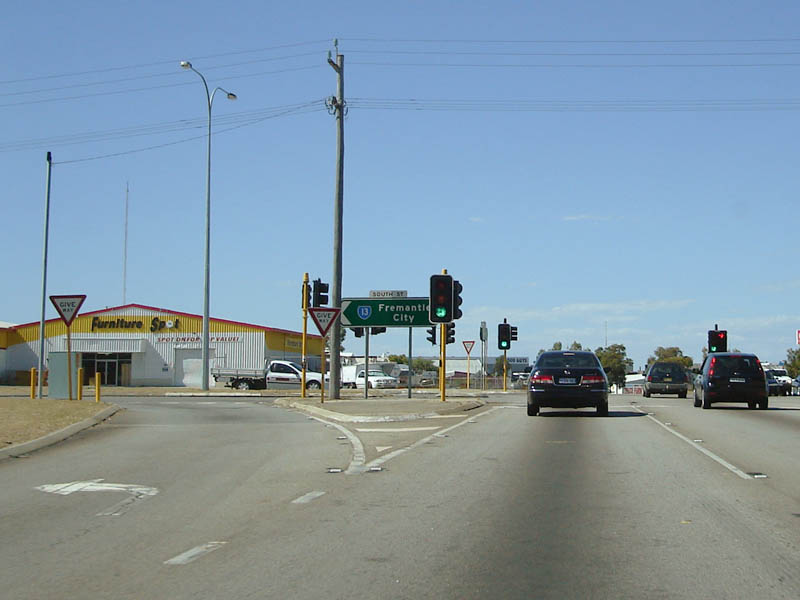
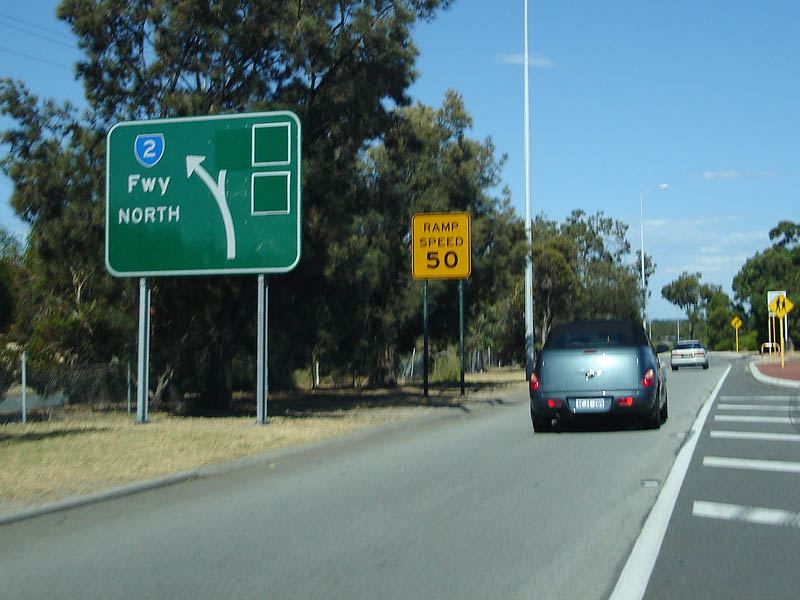
AD Sign: Northbound advance directional sign approaching Patterson Road (SR18). NR1 turns right at this intersection to continue onto Perth. December 2007. Image © Paul Rands |
|
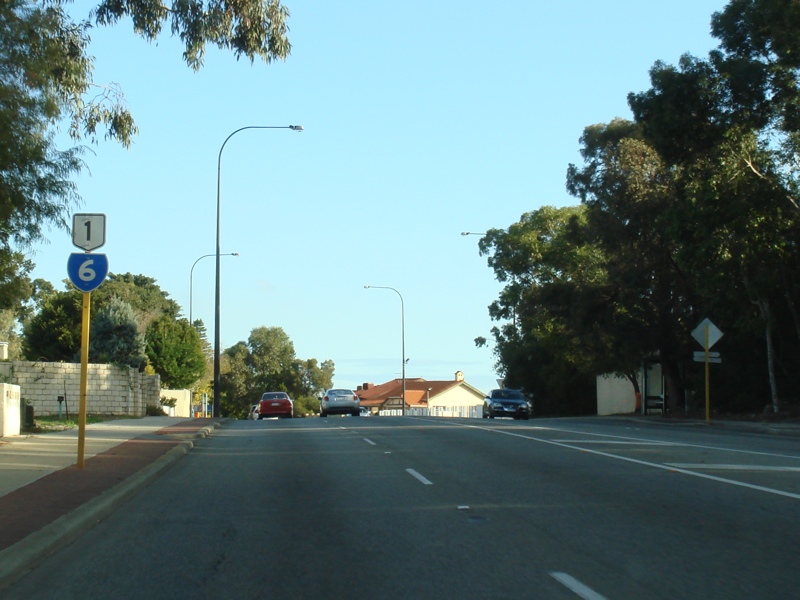 |
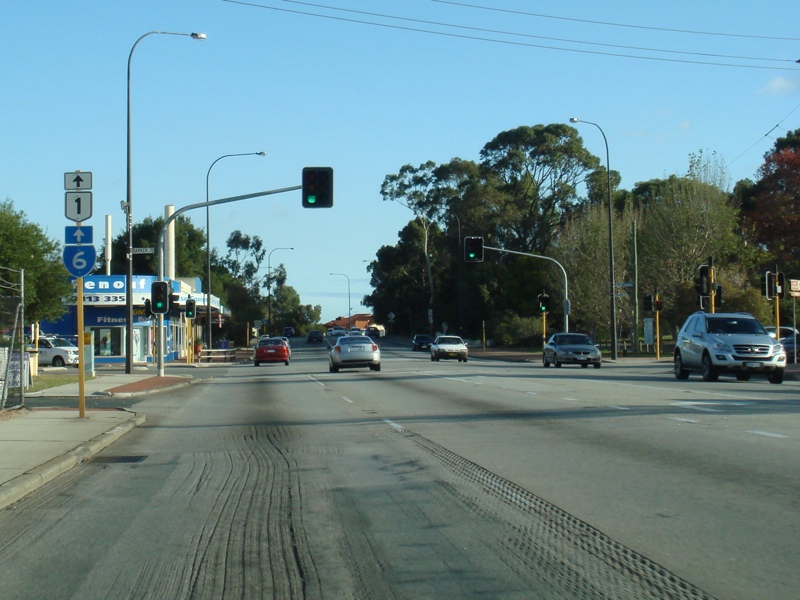
Trailblazer Assembly: SR6 / NR1 trailblazer at Como after Thelma St and Barker St, June 2009. Image © Paul Rands |
 |
Patterson Road Intersection: Approaching Patterson Road at Rockingham. December 2007. Image © Paul Rands |
|
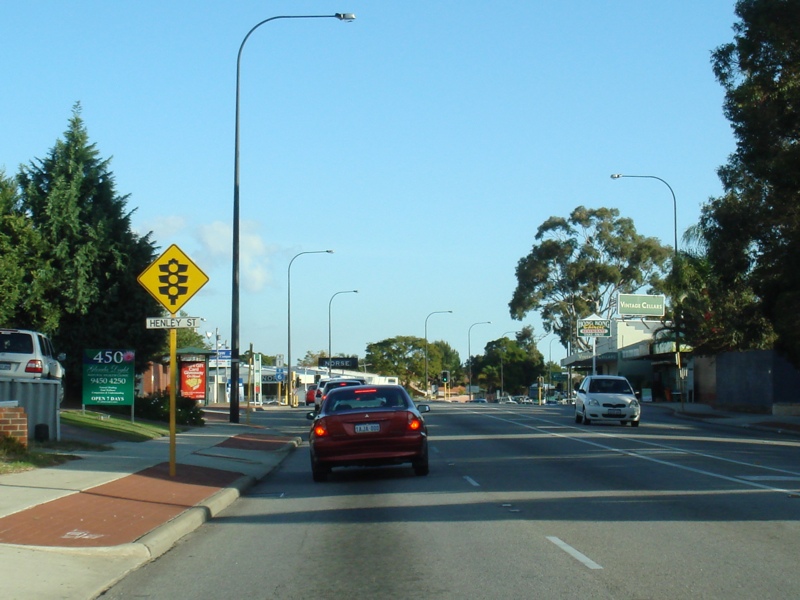 |
Approaching Henley Street: Canning Hwy at Como approaching Henley St, June 2009. Image © Paul Rands |
 |
Patterson Road: Perth orientated ID sign at the Patterson Road intersection in Rockingham, December 2007. Image © Paul Rands |
|
 |
Trailblazer Assembly: SR6 / NR1 trailblazer at Como near Henley St, June 2009. Image © Paul Rands |
 |
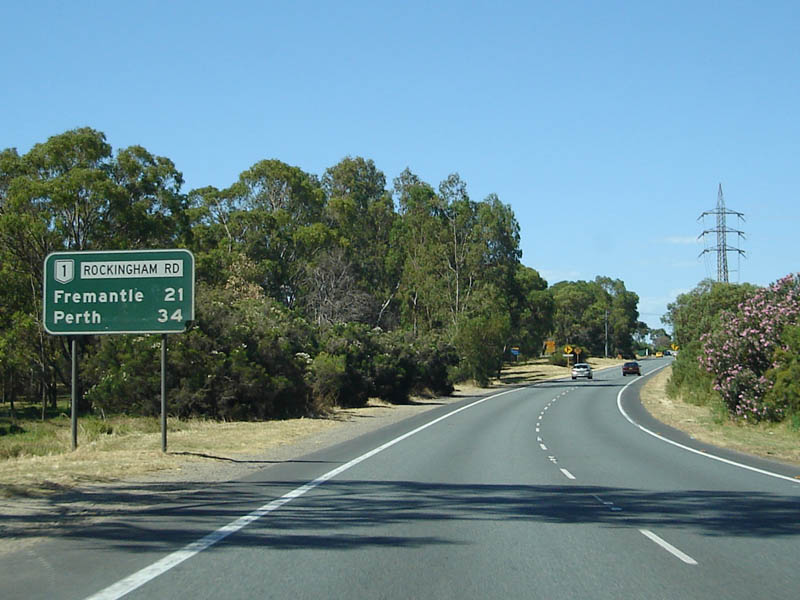
Distance Sign: Northbound RD sign at East Rockingham, December 2007. Image © Paul Rands |
|
 |
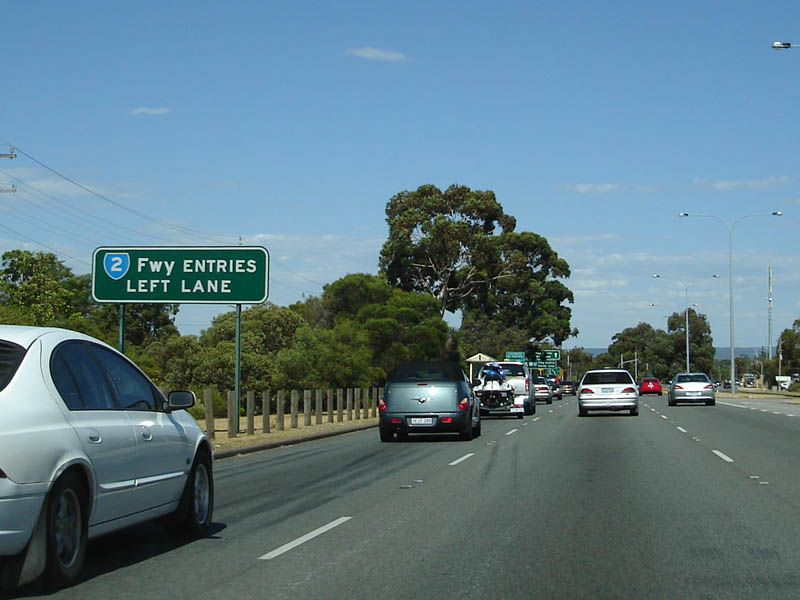
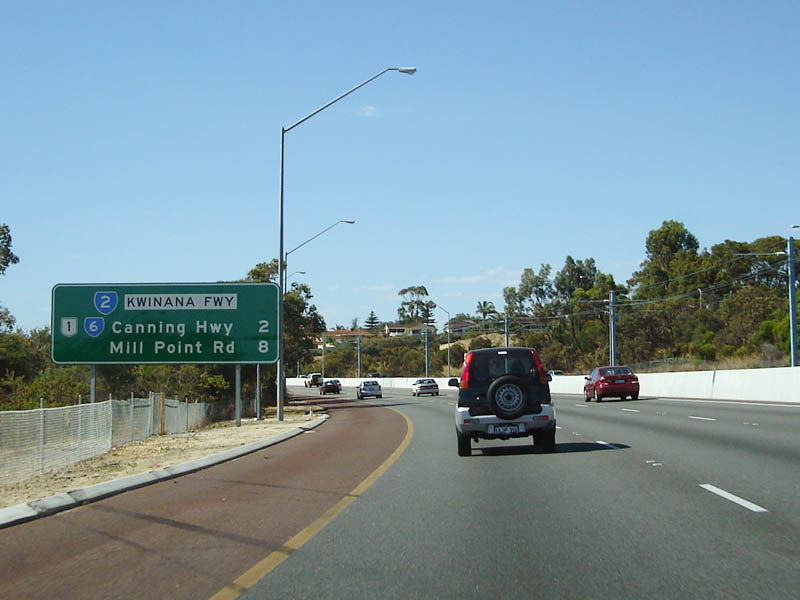
Advance Directional Sign: AD sign at Como approaching Kwinana Fwy (SR2), June 2009. The NR1 duplex ends as the Kwinana Fwy interchange. Image © Paul Rands |
 |
Speed Camera Signs: Signs indicating the use of speed cameras in the area. East Rockingham, December 2007. |
|
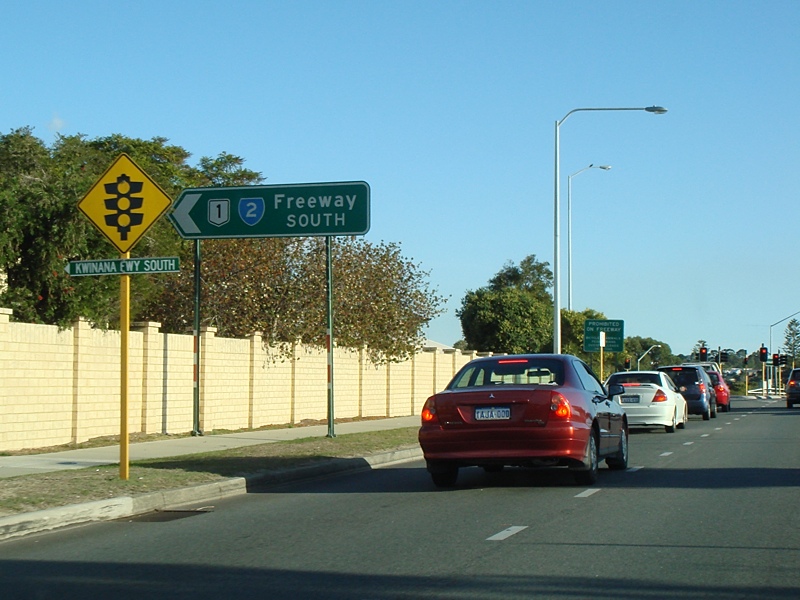 |
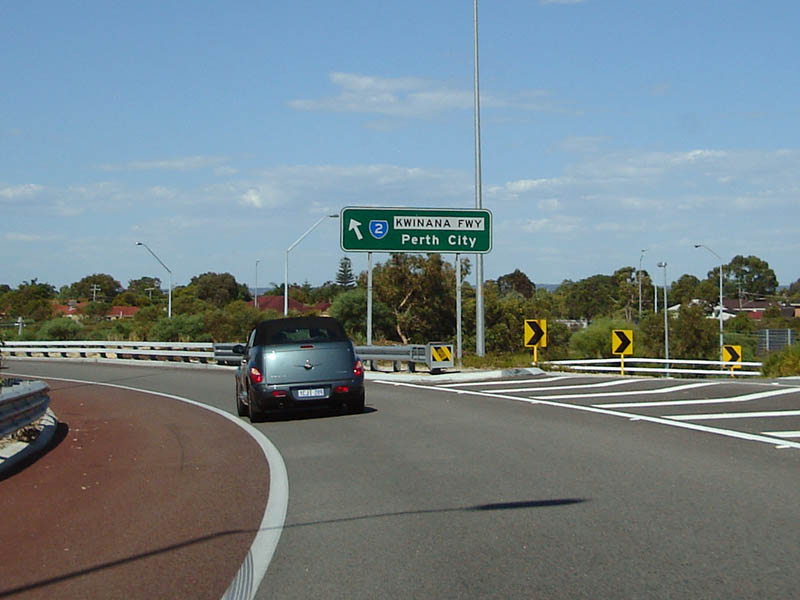
Approaching Kwinana Freeway: Canning Hwy (SR6 / NR1) approaching Kwinana Fwy (SR2 / NR1) at Como, June 2009. Image © Paul Rands |
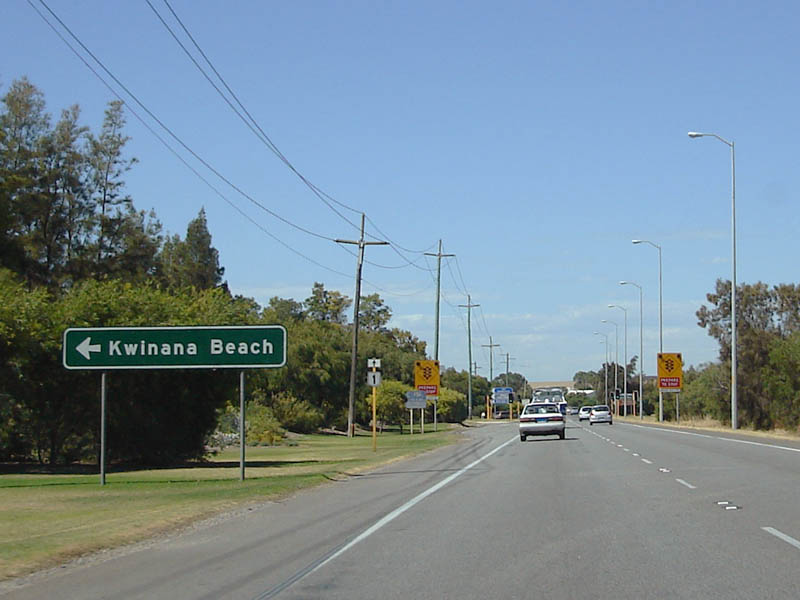 |
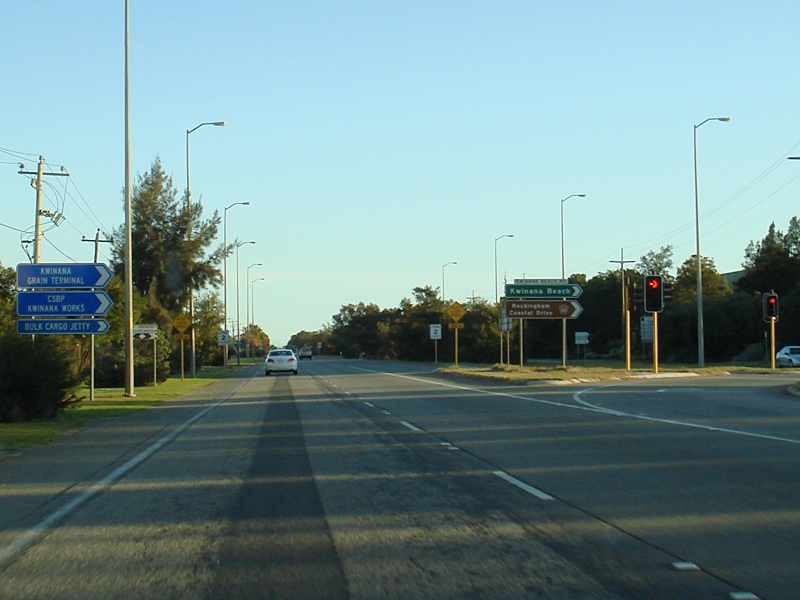
Advance Directional Sign: AD sign for Kwinana Beach Rd at Kwinana Beach, December 2007. Image © Paul Rands |
|
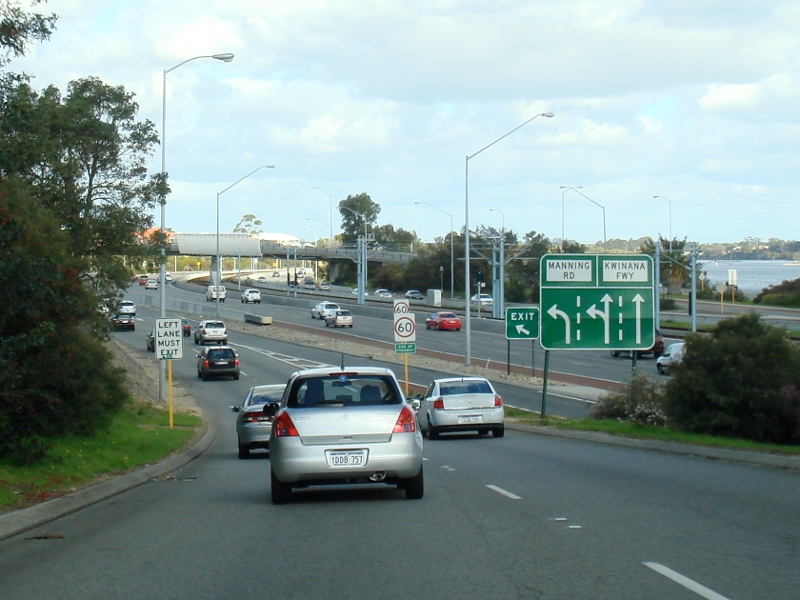 |
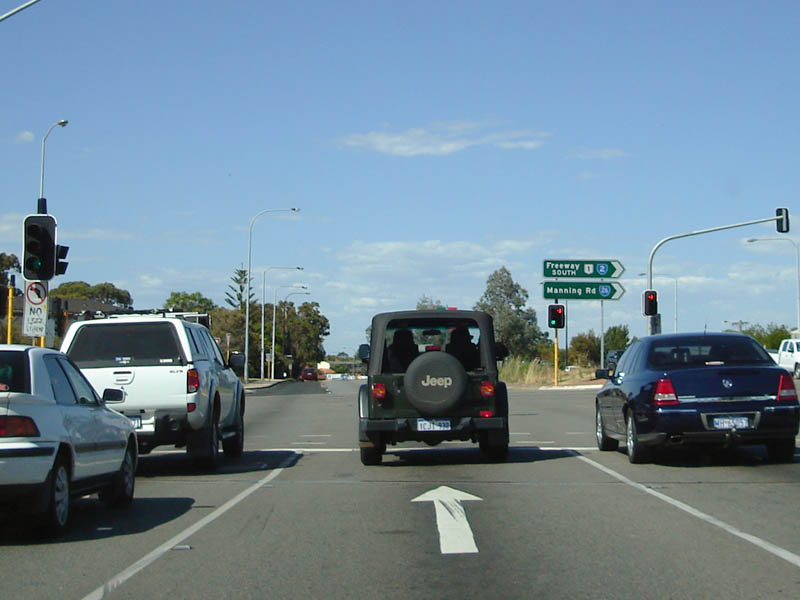
Kwinana Fwy / Manning Rd Interchange: Southbound at Como, at the Kwinana Freeway interchange, where it splits with Manning Road (SR26), July 2009. Image © Paul Rands |
 |
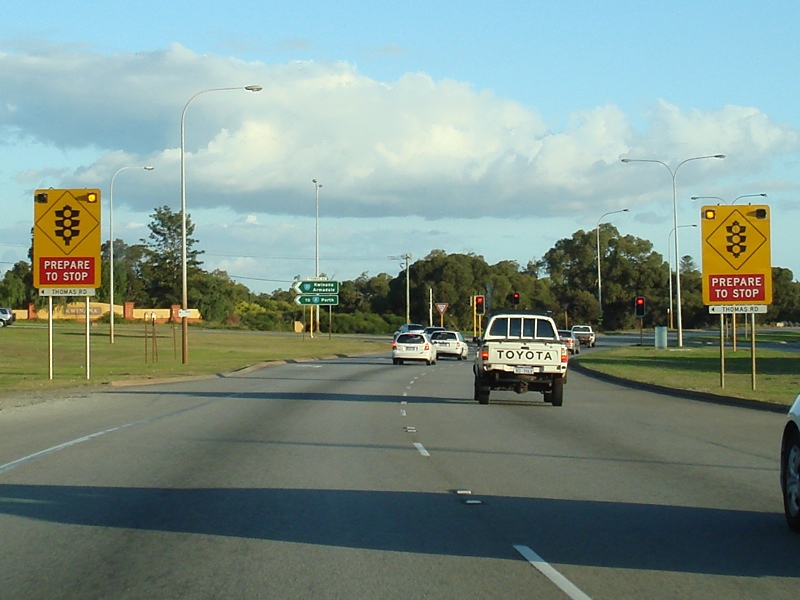
Advance Directional Sign: Inbound at Kwinana Beach approaching Thomas Road. December 2007. Image © Paul Rands |
|
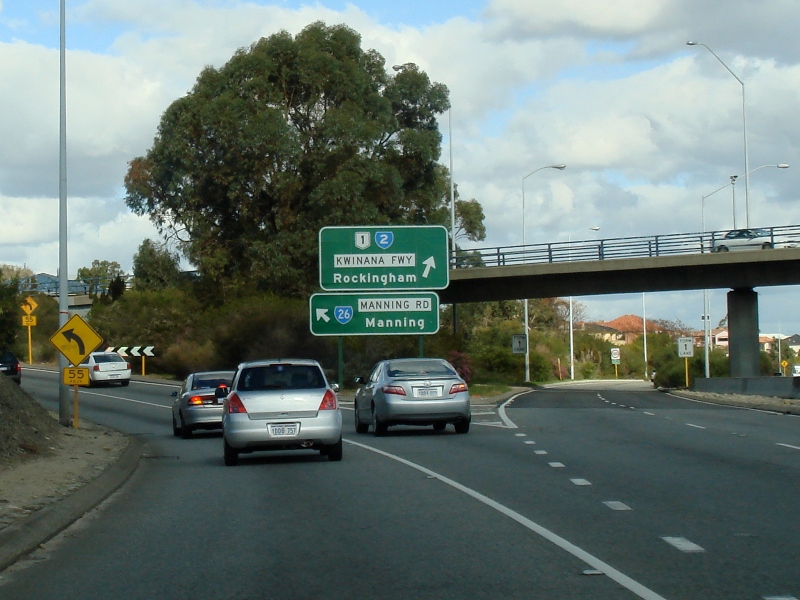 |
Kwinana Fwy / Manning Rd Interchange: Southbound at Como, at the Kwinana Freeway interchange, where it splits with Manning Road (SR26), July 2009. Image © Paul Rands |
 |
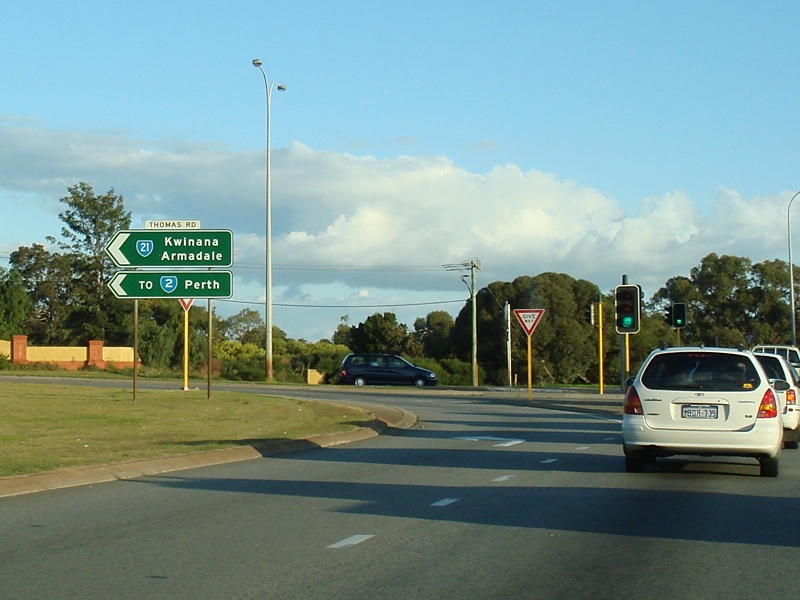
Thomas Road Intersection: Northbound at the Thomas Road intersection in Kwinana Beach, December 2007. Image © Paul Rands |
|
 |
Exit Distance Sign: Looking southbound on the section of the freeway that opened in 1982 at Como. December 2007. Image © Paul Rands |
 |
Advance Directional Sign: AD sign assembly approaching Cockburn Rd (SR12) at the suburb of Naval Base, December 2007. Image © Paul Rands |
|
 |
Advance Exit Sign: Advance exit sign for the Leach Hwy at Salter Point. December 2007. Image © Paul Rands |
 |
Rockingham & Cockburn Roads Intersection: Northbound at Naval Base, December 2007. Image © Paul Rands |
|
 |
Canning River: Crossing the Canning River via the Mount Henry Bridge at Salter Point. December 2007. Image © Paul Rands |
 |
Distance Sign: Northbound RD sign after the Cockburn Rd intersection at Naval Base, December 2007. Image © Paul Rands |
|
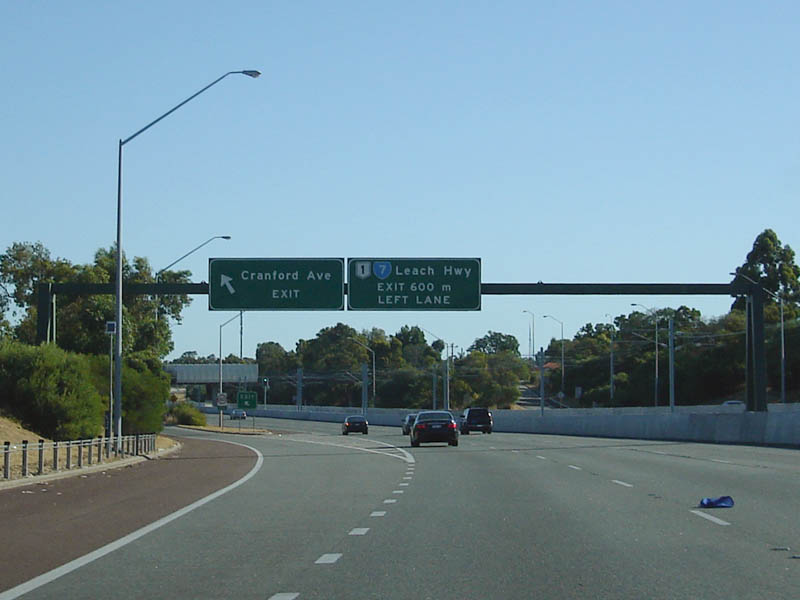 |
Cranford Av Exit: Cranford Av interchange at Mount Pleasant. December 2007. Image © Paul Rands |
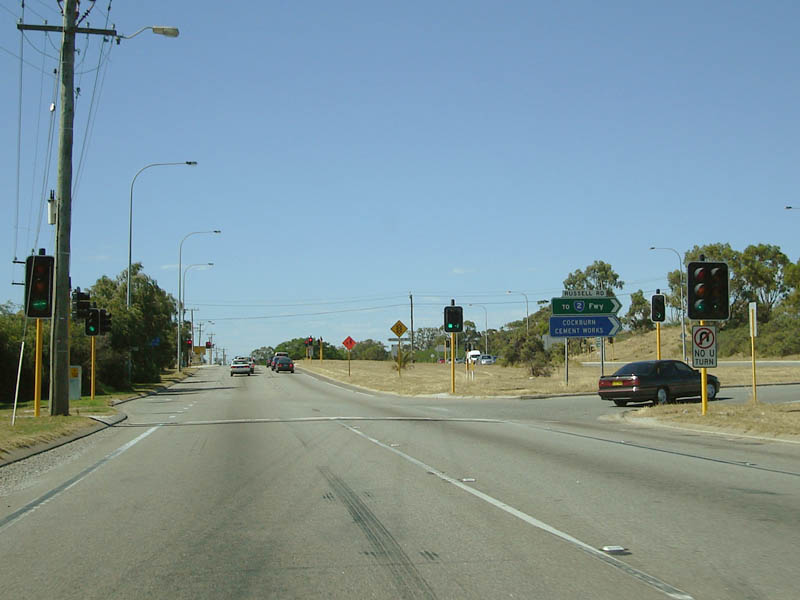 |
Russell Road Junction: Northbound at Russell Road in Henderson, December 2007. Prior to this intersection, the median between north and southbound carriageways is over 100 metres wide. This is due to duplication works which left the original alignment in tact whilst the newer carriageway was built on a more superior alignment. Image © Paul Rands |
|
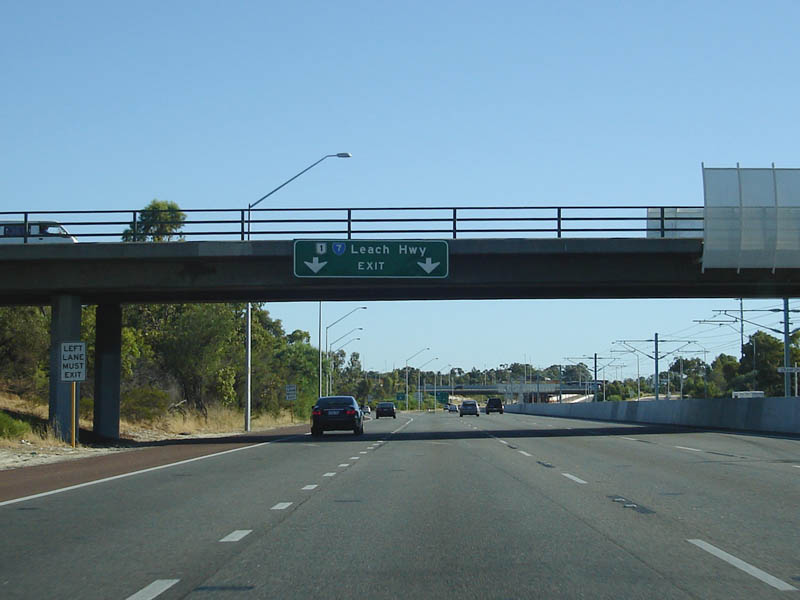 |
Leach Hwy Interchange: Southbound approaching the Leach Hwy exit, the NR1 duplex ends here in Brentwood. December 2007. Image © Paul Rands |
 |
AD Sign: Stack sign assembly at Munster approaching the Rockingham Rd / Stock Rd split. NR1 continues along Stock Rd from here. December 2007. Image © Paul Rands |
|
 |
Distance Sign: RD sign at Naval Base on Rockingham Rd (NR1) after the Cockburn Rd (SR12), June 2009. Image © Paul Rands |
 |
Forrest Road Intersection: Northbound approaching SR14, Forrest Road, in Hamilton Hill, December 2007. Image © Paul Rands |
|
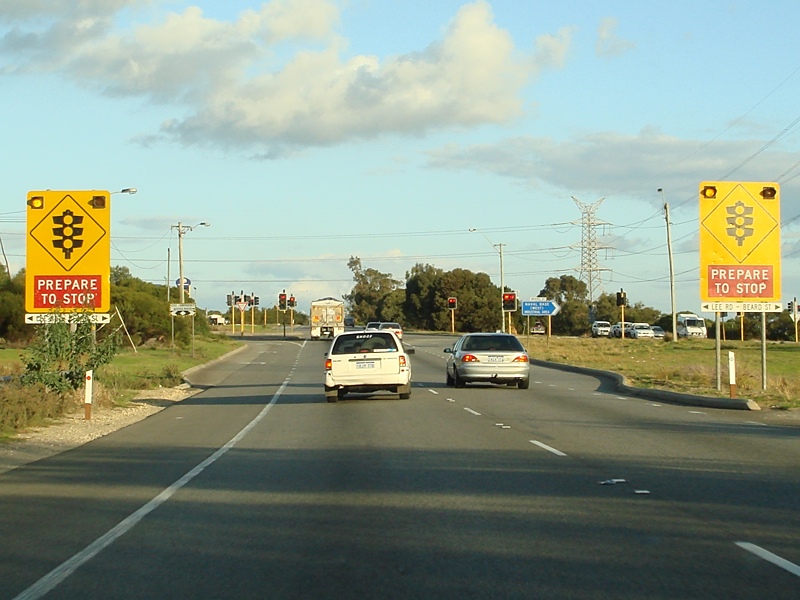 |
Approaching Lee Road & Beard Street: Rockingham Rd (NR1) at Naval Base approaching Lee Rd & Beard St, June 2009. Image © Paul Rands |
 |
ID Sign: Northbound ID sign at Forrest Road at Hamilton Hill, December 2007. Image © Paul Rands |
|
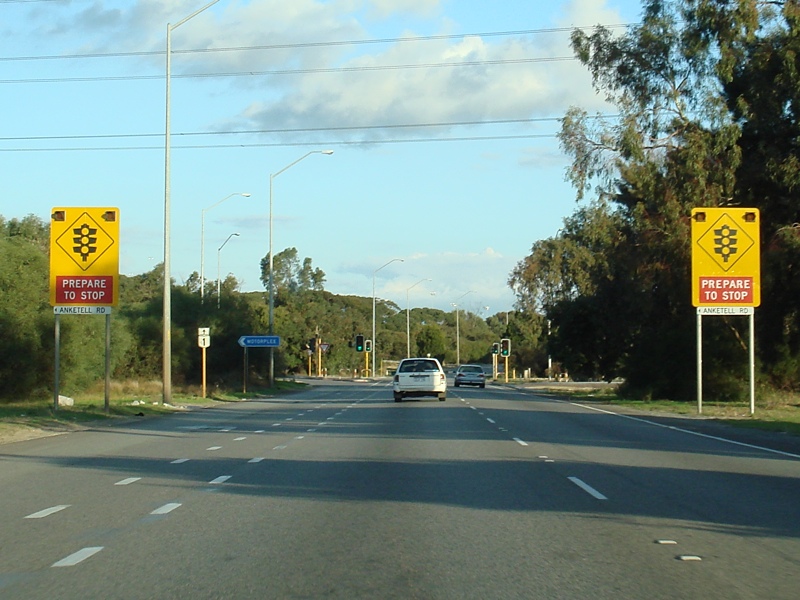 |
Approaching Anketell Road: Rockingham Rd (NR1) at Naval Base approaching Anketell Rd, June 2009. Image © Paul Rands |
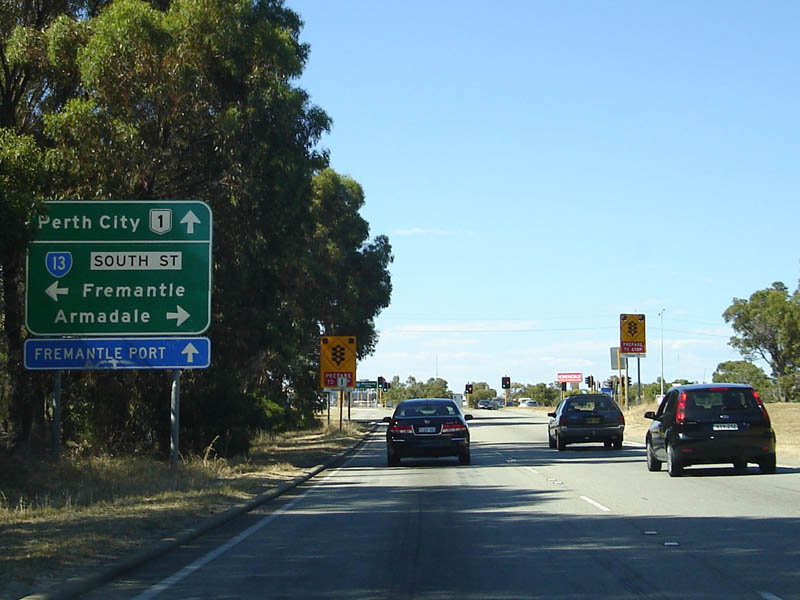 |
AD Sign: Northbound at Hilton approaching SR13, South Street, December 2007. Image © Paul Rands |
|
 |
Advance Directional Sign: AD sign at Kwinana Beach approaching Thomas Rd (SR21), June 2009. Image © Paul Rands |
 |
South Street Intersection: Northbound through South Street in Hilton, December 2007. Image © Paul Rands |
|
 |
Approaching Thomas Road: Rockingham Rd (NR1) at Kwinana Beach approaching Thomas Rd (SR21), June 2009. Image © Paul Rands |
 |
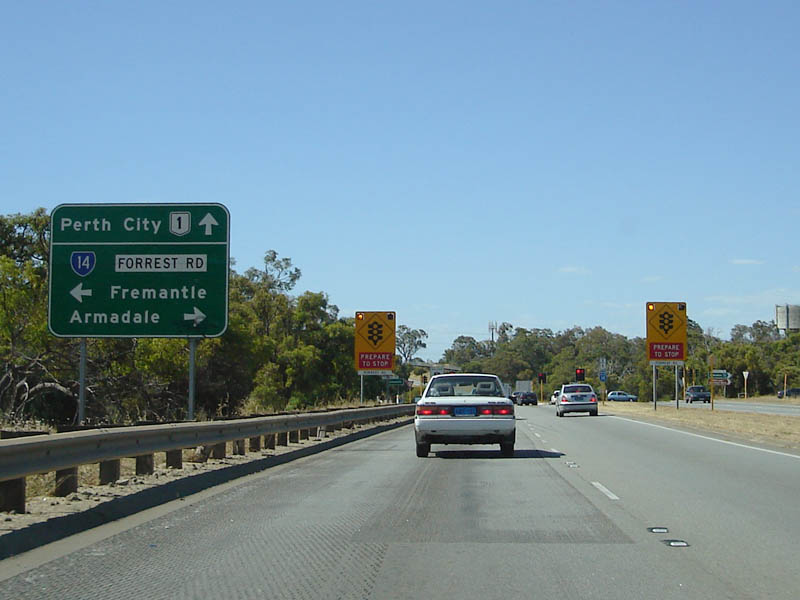
Advance Directional Sign: AD sign for the Leach Hwy intersection at O'Connor. Northbound at Absolon Street, December 2007. NR1 shares the route with SR7 from this intersection, it turns right at the traffic signals at the bottom of the hill. Image © Paul Rands |
|
 |
Thomas Road: Corner of Rockingham Rd (NR1) and Thomas Rd (SR21) at Kwinana Beach, June 2009. Image © Paul Rands |
 |
Eastbound on Leach Hwy: Heading east along Leach Hwy at Melville. December 2007. Image © Paul Rands |
|
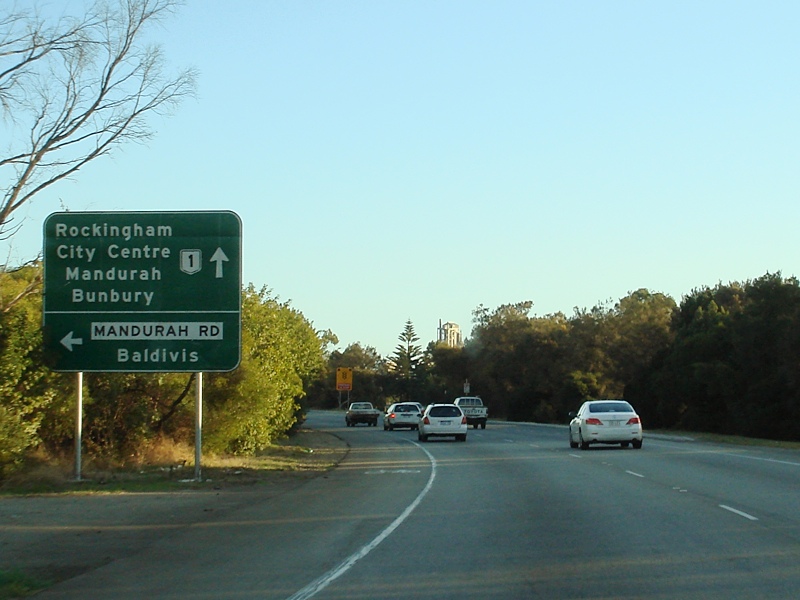 |
Advance Directional Sign: AD sign at Kwinana Beach approaching Mandurah Rd and Mason Rd, June 2009. NR1 changes to Patterson Rd at this junction. Image © Paul Rands |
 |
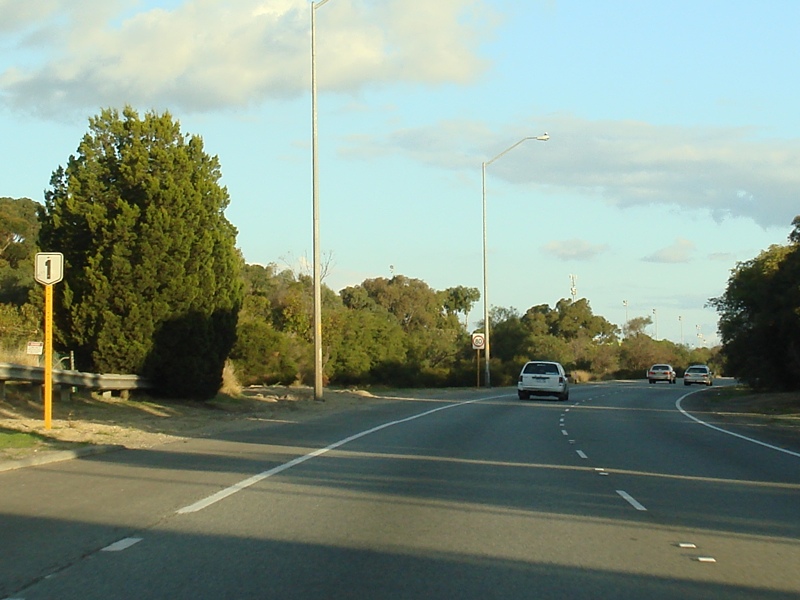
Reassurance Marker: Eastbound reassurance marker at Myaree near the North Lake Rd intersection. December 2007. Image © Paul Rands |
|
 |
Approaching Mandurah Road, Mason Road & Patterson Road: Image © Paul Rands |
 |
Supplemental Advance Directional Sign: Sign approaching the Kwinana Freeway at Brentwood. NR1 spilts from SR7 / Leach Hwy and travels a few kilometres along the Kwinana Fwy. December 2007. Image © Paul Rands |
|
 |
Advance Directional Sign: AD sign on Patterson Rd (NR1) approaching Kwinana Beach Rd (TD202), June 2009. Image © Paul Rands |
 |
Kwinana Hwy Interchange: Looking east as NR1 leaves Leach Hwy and joins the Kwinana Freeway. December 2007. Image © Paul Rands |
|
 |
Kwinana Beach Road: Corner of Patterson Rd (NR1) and Kwinana Beach Rd (TD202), June 2009. Image © Paul Rands |
 |
Diagrammatic Sign: Coverplated AD sign on the ramp to the Kwinana Freeway. The coverplates are most likely covering directions to railway station and parking access. December 2007 at Brentwood. Image © Paul Rands |
|
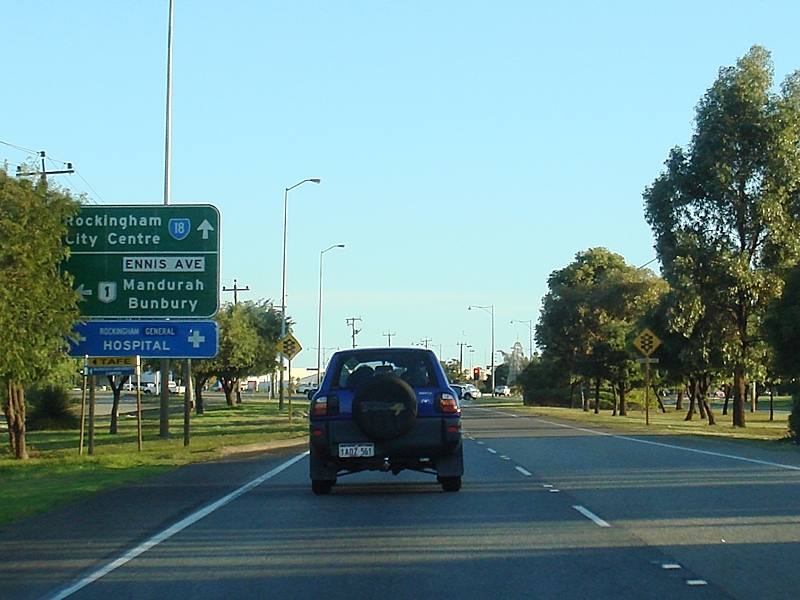 |
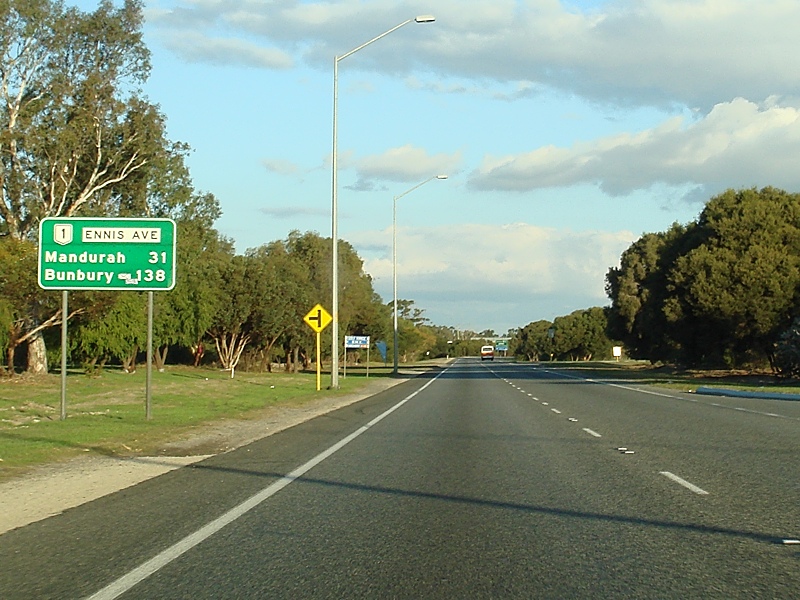
Advance Directional Sign: AD sign on Patterson Rd (NR1) at East Rockingham approaching Ennis Av (NR1) and Patterson Rd (SR18), June 2009. Image © Paul Rands |
 |
ID sign: ID sign indicating the direction to the northboun carriageway of the freeway at Brentwood, December 2007. Image © Paul Rands |
|
 |
Patterson Road & Ennis Avenue Junction: Corner of Patterson Road (NR1 & SR18) and Ennis Av (NR1) at East Rockingham, June 2009. Image © Paul Rands |
 |
Canning River: Northbound on Kwinana Fwy crossing the Canning River via Mt Henry Bridge, December 2007. Image © Paul Rands |
|
 |
National Route 1 Trailblazer: Image © Paul Rands |
 |
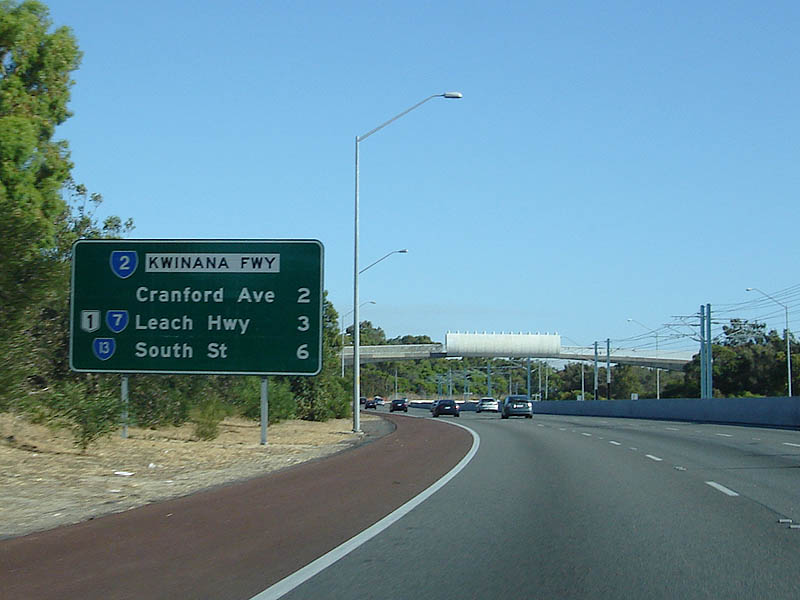
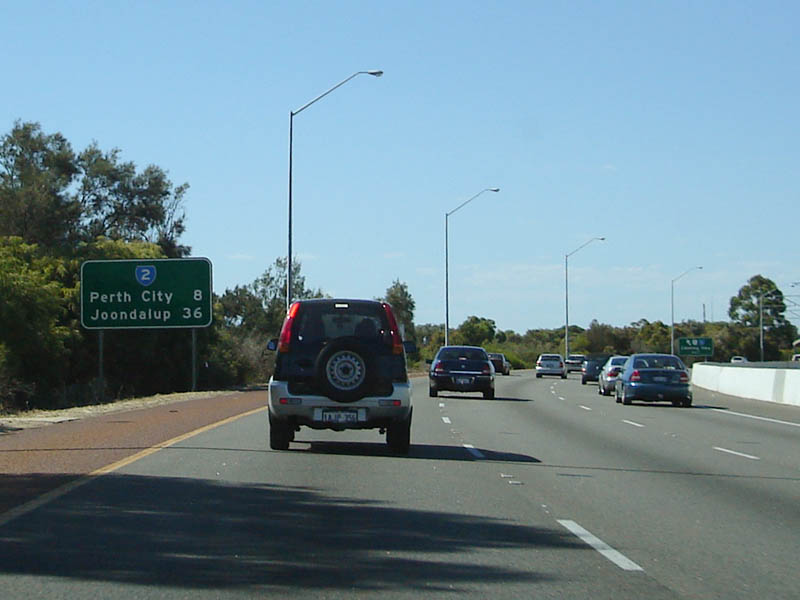
Distance Sign: RD sign northbound on the Kwinana Fwy at Salter Point. This sign uses road names / exits for its focal points, it supplements the standard suburb / town name focals on other distance signs along the route. December 2007. Image © Paul Rands |
|
 |
RD Sign: Image © Paul Rands |
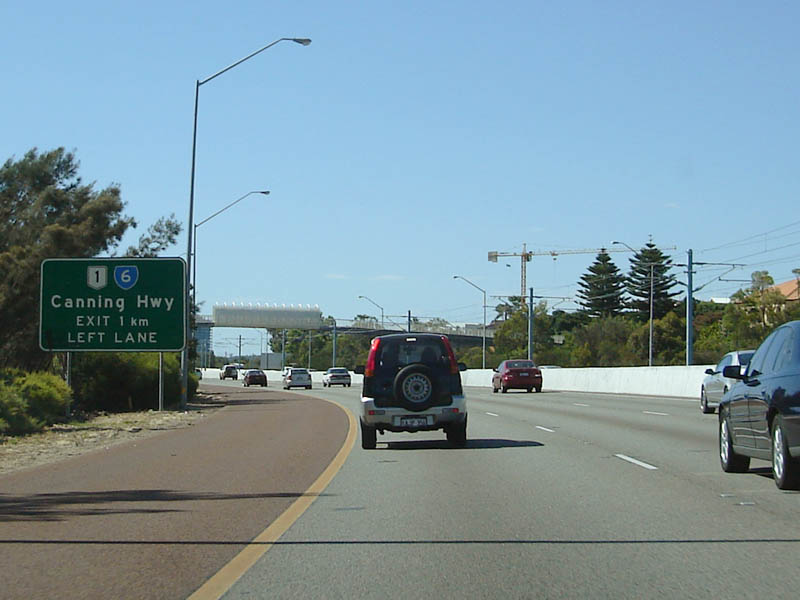 |
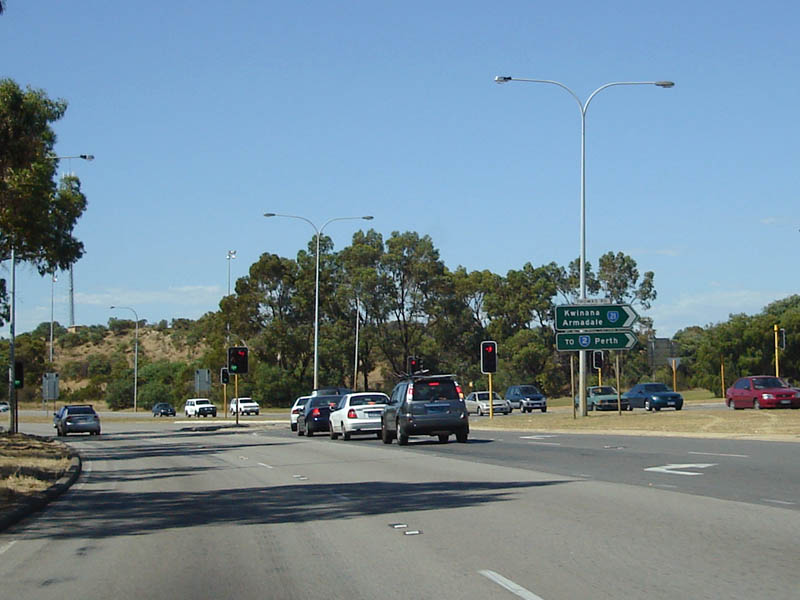
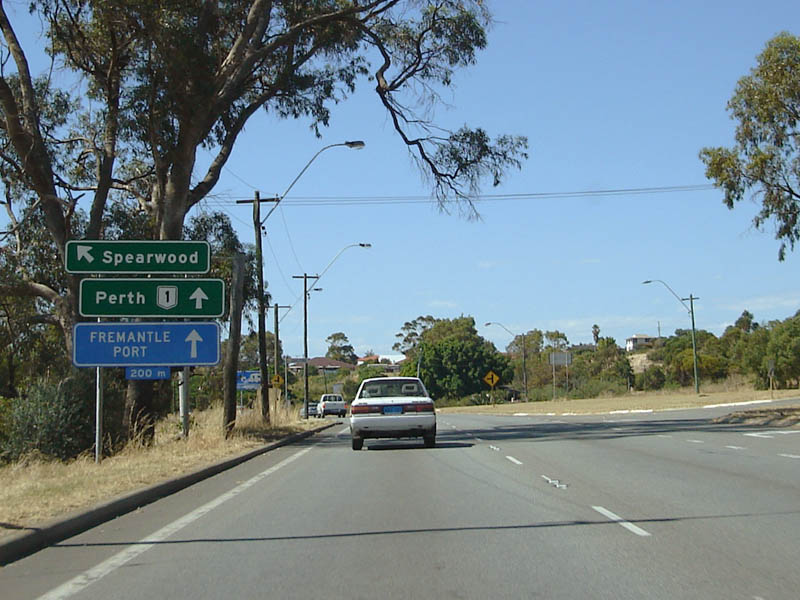
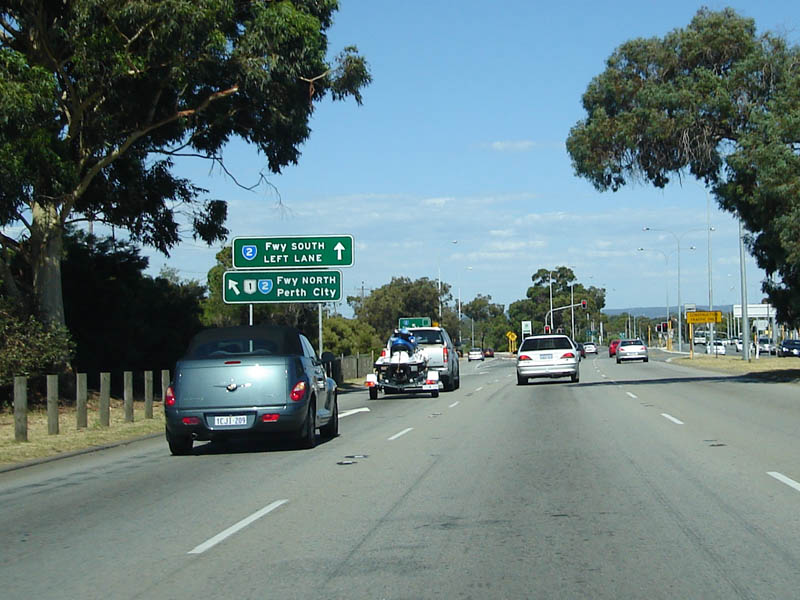
AD sign: Northbound advance drectioanal sign located in Salter Point, approaching the Canning Hwy exit, NR1 splits from SR2 here at this interchange. December 2007. Image © Paul Rands |
|
 |
Approaching Dixon Road: Image © Paul Rands |
 |
Distance Sign: Northbound RD sign just before the Canning Hwy exit, December 2007 at Como. Image © Paul Rands |
|
 |
Approaching Dixon Road: Image © Paul Rands |
 |
Canning Hwy Interchange: Northbound at Como. The Canning Highway interchange opened to traffic in 1979. Image taken December 2007. The interchange features a series of bridges and ramps that connect the Canning Highway, Manning Road and the Kwinana Freeway. Image © Paul Rands |
|
 |
Dixon Road Intersection: Image © Paul Rands |
 |
Canning Highway Interchange: Advance directional sign approaching the Canning Hwy at Como. The ramp to the right of shot is the ramp from Manning Road to the Kwinana Freeway. December 2007, northbound. Image © Paul Rands |
|
 |
Advance Directional Sign: Image © Paul Rands |
 |
Lane Allocation Sign: Typical lane allocation sign approaching Canning Hwy traffic signals at Como, December 2007. Image © Paul Rands |
|
 |
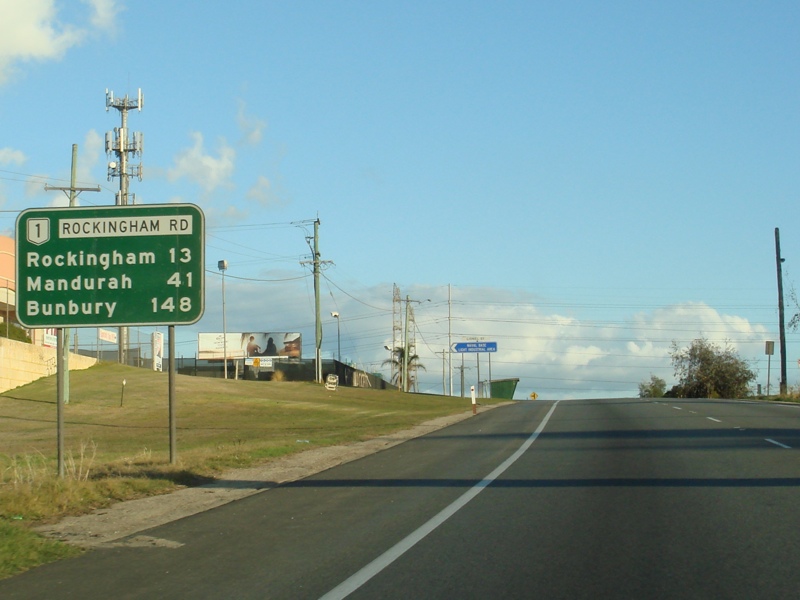
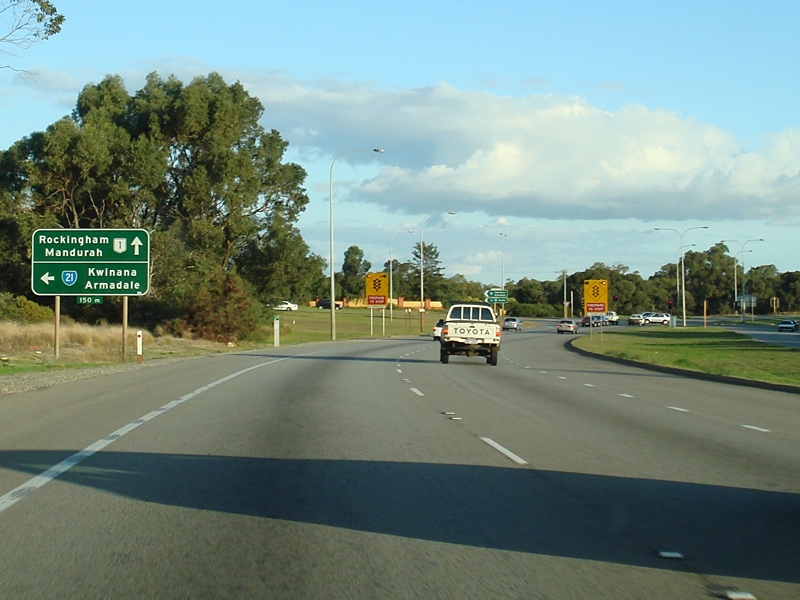
Advance Directional Sign: AD sign at Hillman approaching Rae Rd and the entrance to Rockingham railway station, June 2009. Image © Paul Rands |
 |
Canning Highway Junction: The traffic signals facing the off ramp from the Kwinana Fwy at Como, December 2007. NR1 now shares SR6 to Burswood from here. Image © Paul Rands |
|
 |
Approaching Elanor Drive & Grange Drive: Image © Paul Rands |
 |
Kwinana Fwy Interchange: Looking northeast on the Canning Hwy at the Kwinana Fwy interchange at Como, December 2007. Canning Highway is named for Alfred Canning, a pioneer West Australian pastoralist and late 19th century settler in the area that is now part of the City of Melville. Image © Paul Rands |
|
 |
Approaching Elanor Drive & Grange Drive: Ennis Av (NR1) at Cooloongup approaching Elanor Dr and Grange Dr, June 2009. Image © Paul Rands |
|||
 |
Elanor Drive & Grange Drive: Ennis Av (NR1) at Cooloongup at Elanor Dr and Grange Dr, June 2009. Image © Paul Rands |
|||
| Click here for the continuation of NR1 between Como and Burswood Click here for the continuation of NR1 between Mandurah and Rockingham |
||||
1 Main Roads Western Australia
2 Government of Western Australia, Media Statements, $1.2million to improve Leach Highway and Stock Road intersection, 21 August 2007
3 Main Roads Western Australia, Completed Projects, Ennis Avenue Intersection Upgrades
4 Main Roads Western Australia, Completed Projects, Leach Highway and Norma Road Intersection Upgrade, 23 July 2018
Last updated: 10-Jan-2019 20:17
This site © Paul Rands. All rights reserved. Some portions © (copyright) by their respective and credited owners. Permission must be obtained before using any images from this site. For details, please email by clicking here.