|
|
|
|
|
 |
Pacific Highway, New England Highway, John Renshaw Drive, Southern Freeway, Mount Ousley Road & Princes Highway (National Route 1) (Decommissioned) - Cobargo to Bega |
Statistics:
Route Numbering:
General Information:
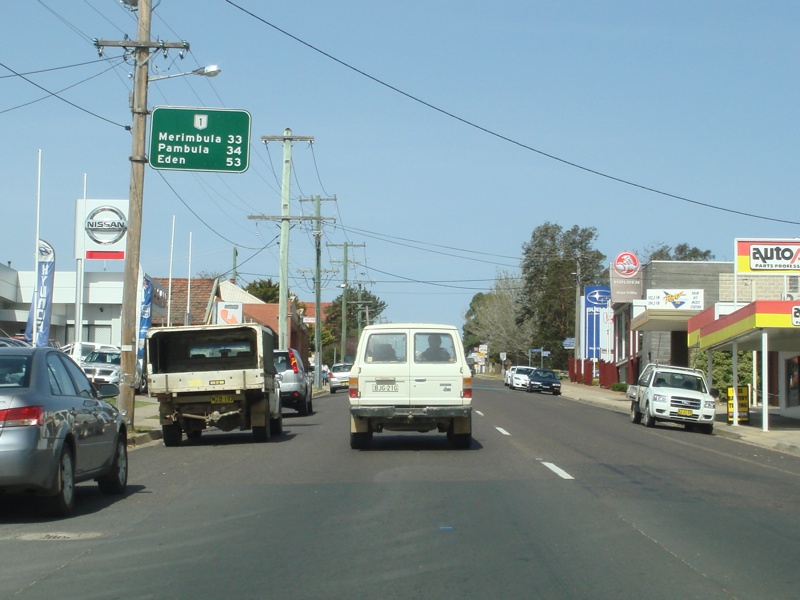
National Route 1 forms part of the main coastal route between Victoria and Queensland. The route features a mix of rural highway, arterial and freeway design standards. The route forms part of what is collectively known as Highway 1. It is Australia's coastal highway joining all mainland's state capitals and coastal towns circumnavigating the entire Australian continent. It is also the longest numbered highway in the world, covering more than 14 500 km.
In New South Wales, National Route 1 was truncated by National Highway 1 between Beresfield and Wahroonga, by Metroad 1 between Wahroonga and Waterfall and by M1 at Tweed Heads West.
Southern Section:
The southern section of National Route 1 is formed by 2 separate sections of the Southern Freeway, linked by dual carriageway Mt Ousley Road. At the end of southern segment of the Southern Freeway, National Route continues as Princes Highway. The route from Kiama to Sydney is a mix of divided road and freeway, the majority of the route from Gerringong to the Victorian border is undivided rural highway standard and undivided urban arterial within some towns, with some dual carriageway sections sporadically placed between Bomaderry and tourist areas immediately south of Nowra.
The Princes Highway was formed from a string of roads linking Sydney to the Illawarra, which later was renumbered from National Route 1 to Metroad 1 in the Sydney area during the 1990s.
The Princes Highway section of NR1 formed a coastal route from Yallah, in Wollongong's southern suburbs to Melbourne and into South Australia. The route is a mix of urban arterial road, dual carriageway and also rural highway.
History:
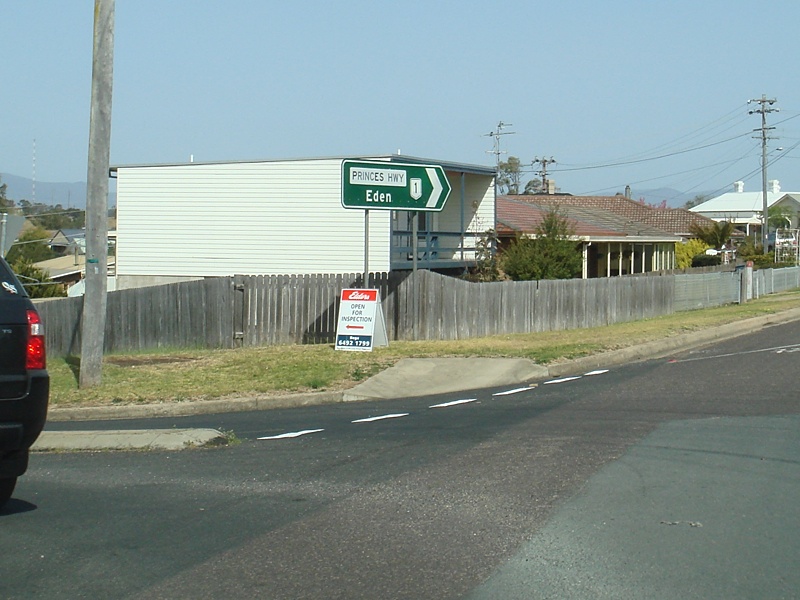
Princes Highway:
Click here for historic photos of Princes Highway between Cobargo and Bega.
Click here for construction photos of Princes Highway between Cobargo and Bega.
| Bega to Cobargo | Cobargo to Bega | |||
| Preview: | Description: | Preview: | Description: | |
 |
Supplemental Advance Directional Sign: Supplemental AD sign on Princes Hwy (NR1) (Gipps St) at Bega, approaching Carp St (TD9 & TD11) (former NR18) and the unnumbered section of Gipps St, September 2009. Image © Paul Rands |
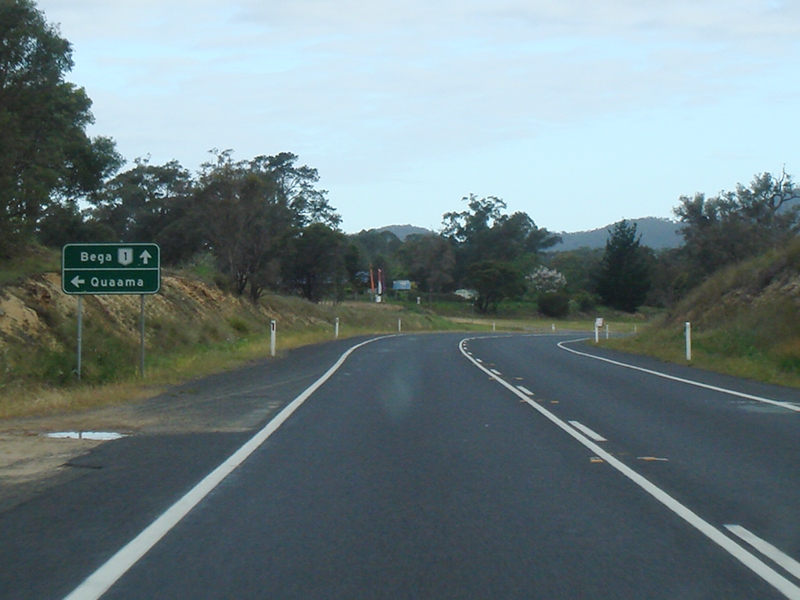 |
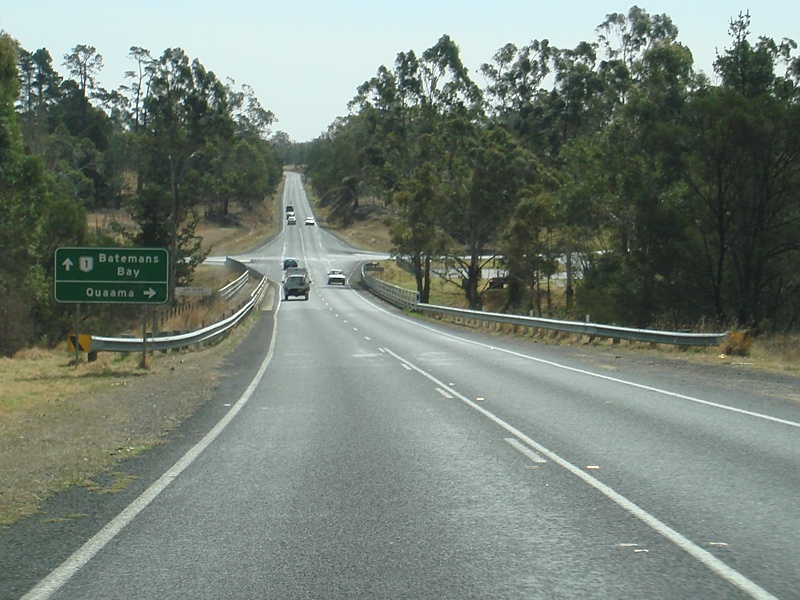
Advance Directional Sign: AD sign approaching Cobargo St in Quaama, October 2010. Image © Paul Rands |
|
 |
Advance Directional Sign: AD sign on Princes Hwy (NR1) (Gipps St) at Bega, approaching Carp St (TD9 & TD11) (former NR18) and the unnumbered section of Gipps St, March 2011. Image © Paul Rands |
 |
Cobargo Street: Corner of Princes Hwy (NR1) and Cobargo St, Quaama, October 2010. Image © Paul Rands |
|
 |
Carp Street & Gipps Street: Princes Hwy (NR1) at the junction with Carp St (TD9 / TD11) and Gipps St in Bega, March 2011. NR1 turns left at this junction. Image © Paul Rands |
 |
Dry River: Princes Hwy (NR1) crossing Dry River, Quaama, October 2010. Image © Paul Rands |
|
 |
Advance Directional Sign: AD sign on Carp St (TD9 & TD11) (former NR18) at Bega, approaching Princes Hwy (NR1) (Gipps St) and the unnumbered section of Gipps St, September 2009. Image © Paul Rands |
 |
Entering Brogo: Princes Hwy (NR1) as it enters the village of Brogo, October 2010. Image © Paul Rands |
|
 |
Intersection Directional SIgn: ID sign at the corner of Princes Hwy (NR1), Gipps St and Carp St (TD9 / TD11) at Bega, September 2009. Image © Paul Rands |
 |
Browns Gully: Princes Hwy (NR1) approaching Browns Gully at Brogo, October 2010. Image © Paul Rands |
|
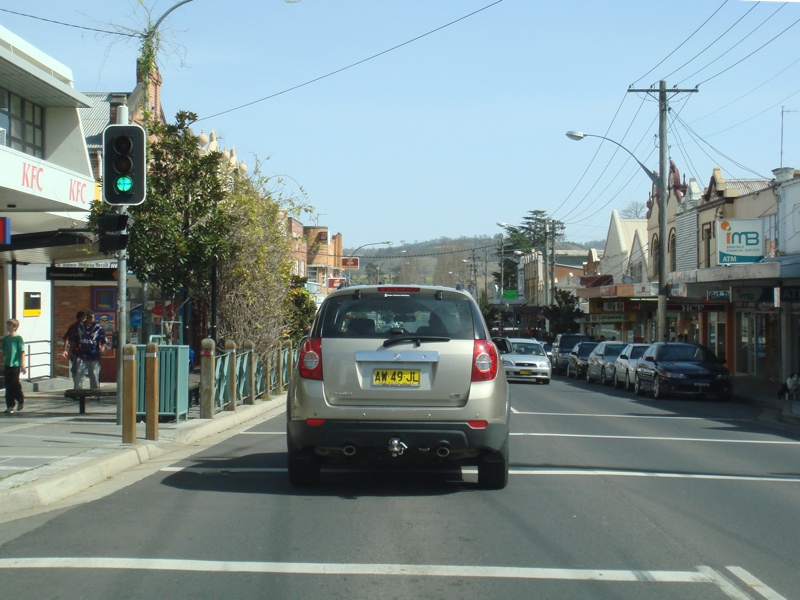 |
Bega Town Centre: Princes Hwy (NR1) as it passes through Bega, September 2009. Image © Paul Rands |
 |
Brogo River: Princes Hwy (NR1) approaching Brogo River at Brogo, October 2010. Image © Paul Rands |
|
 |
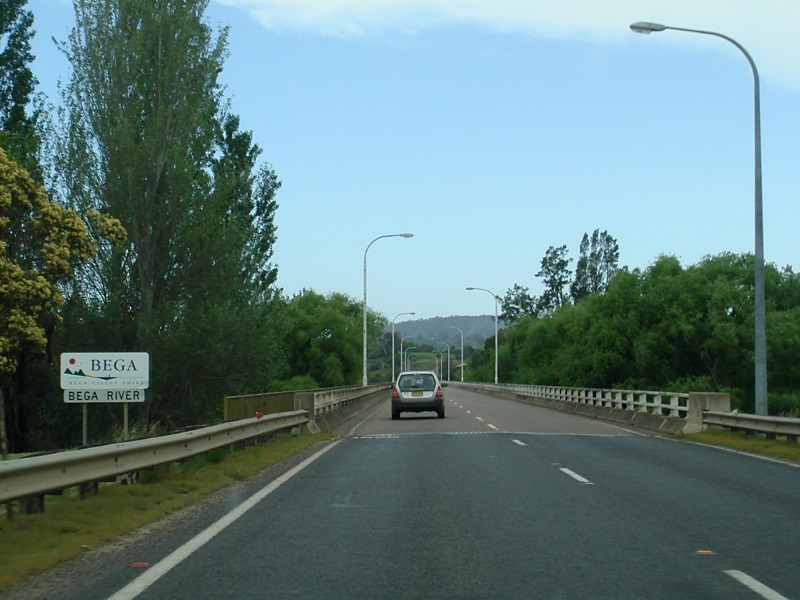
Bega River: Princes Hwy (NR1) as it crosses Bega River at Bega, September 2009. Image © Paul Rands |
 |
Brogo River: Princes Hwy (NR1) crossing Brogo River at Brogo, October 2010. Image © Paul Rands |
|
 |
Advance Directional Sign: AD sign at North Bega, approaching West St and Bridge St, September 2009. Image © Paul Rands |
 |
Advance Directional Sign: AD sign at Brogo approaching Warringal Range Rd, October 2010. Image © Paul Rands |
|
 |
Intersection Directional Sign: ID sign assembly on the roundabout with West St and Bridge St in North Bega, September 2009. Image © Paul Rands |
 |
Jews Creek Road: Corner of Princes Hwy (NR1) and Jews Ck Rd at Stoney Creek, October 2010. Image © Paul Rands |
|
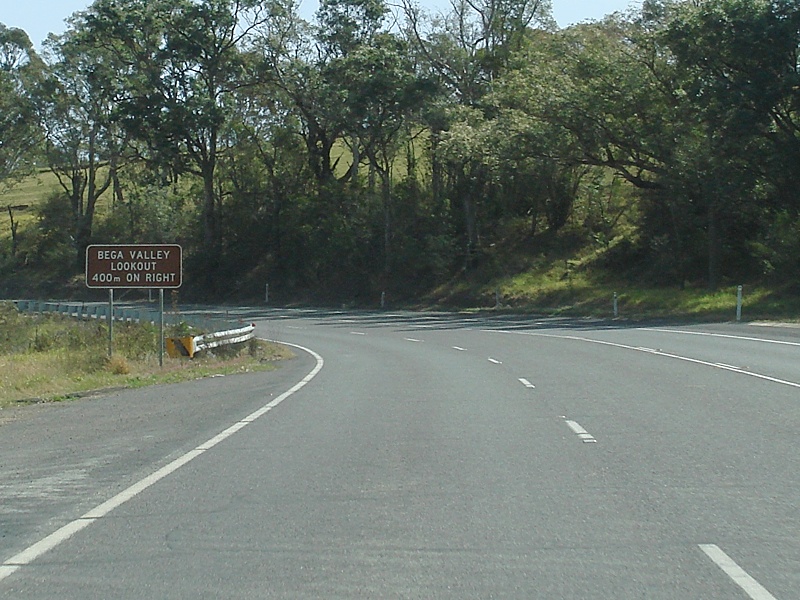 |
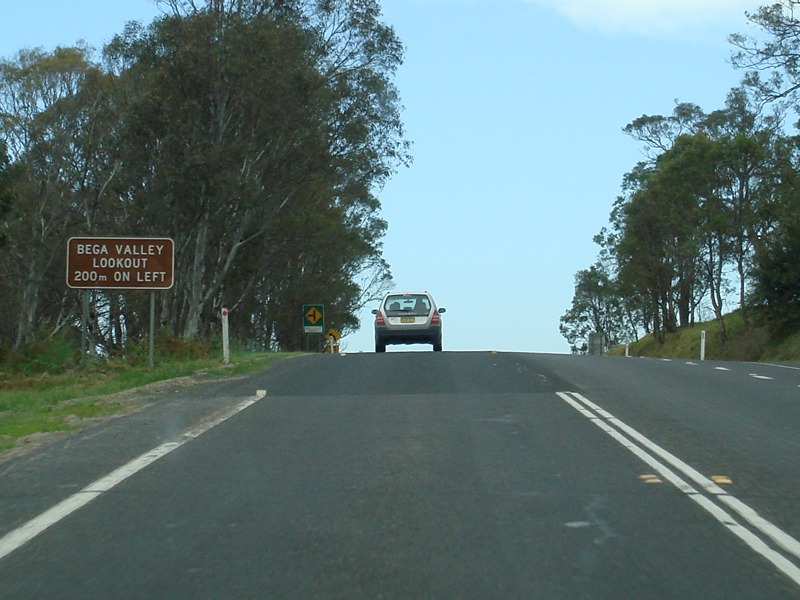
Advance Directional Sign: AD sign at North Bega approaching Bega Valley Lookout, September 2009. Image © Paul Rands |
 |
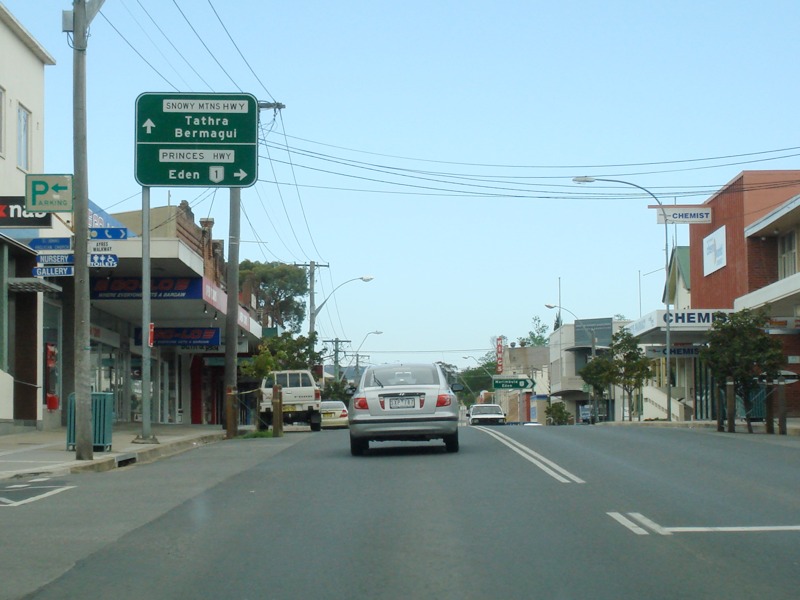
Advance Directional Sign: AD sign approaching Snowy Mountains Hwy (NR18) at Stoney Creek, October 2010. Image © Paul Rands |
|
 |
Advance Directional Sign: AD sign at Stony Creek, approaching Snowy Mountains Hwy (NR18), September 2009. Image © Paul Rands |
 |
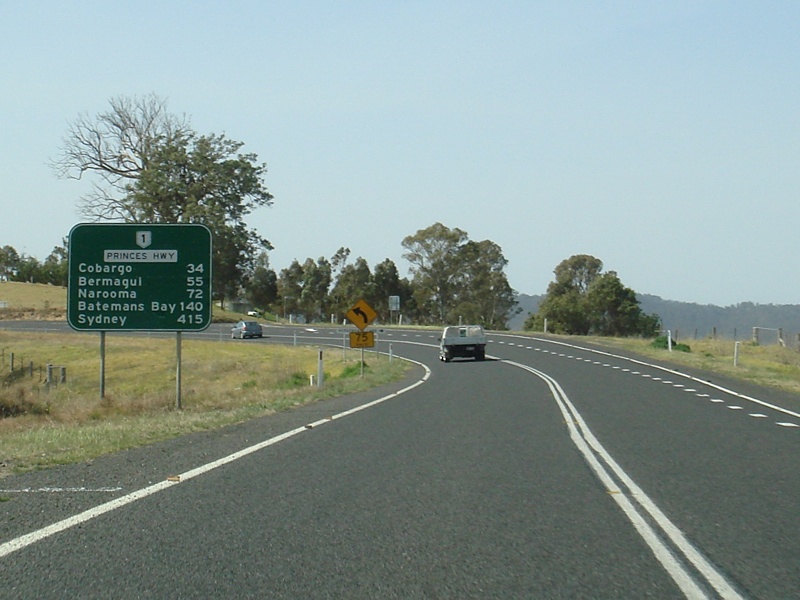
Reassurance Directional Sign: Distance sign at Stoney Creek, October 2010. Image © Paul Rands |
|
 |
Intersection Directional Sign: ID sign at the corner of Princes Hwy (NR1) and Snowy Mtns Hwy (NR18) at Stony Ck, October 2009. Image © Paul Rands |
 |
Advance Directional Sign: AD sign at Coopers Gully, approaching Bega Valley Lookout, October 2009. Image © Paul Rands |
|
 |
Reassurance Directional Sign: Distance sign at Stony Ck, September 2009. Image © Paul Rands |
 |
Entering North Bega: Princes Hwy (NR1) as it enters North Bega, October 2009. Image © Paul Rands |
|
 |
Greendale Road: Corner of Princes Hwy (NR1) and Greendale Rd at Brogo, September 2009. Image © Paul Rands |
 |
Advance Directional Sign: AD sign at North Bega approaching Bridge St and West St, October 2009. Image © Paul Rands |
|
 |
Entering Brogo: Princes Hwy (NR1) as it enters the town of Brogo, September 2009. Image © Paul Rands |
 |
Intersection Directional Sign: ID sign at the roundabout with Bridge St and West St, North Bega, October 2010. Image © Paul Rands |
|
 |
Advance Directional Sign: AD sign at Brogo, approaching Warrigal Range Rd, September 2009. Image © Paul Rands |
 |
Intersection Directional Sign: ID sign at the roundabout with Bridge St and West St, North Bega, October 2009. Image © Paul Rands |
|
 |
Warrigal Range Road: Corner of Princes Hwy (NR1) and Warrigal Range Rd at Brogo, September 2009. Image © Paul Rands |
 |
Entering Bega: Princes Hwy (NR1) entering the town of Bega and crossing the Bega River, October 2009. Image © Paul Rands |
|
 |
Approaching Brogo River: Approaching the Brogo River near Blanchards Rd at Brogo, September 2009. Image © Paul Rands |
 |
Advance Directional Sign: AD sign approaching East St, Bega, October 2010. Image © Paul Rands |
|
 |
Approaching Brogo River: Approaching the Brogo River at Brogo, September 2009. Image © Paul Rands |
 |
Advance Directional Sign: AD sign approaching Auckland St, Bega, October 2010. Image © Paul Rands |
|
 |
Brogo River: Princes Hwy (NR1) crossing Brogo River at Brogo, September 2009. Image © Paul Rands |
 |
Bega Town Centre: Princes Hwy (NR1) passing through Bega, October 2009. Image © Paul Rands |
|
 |
Advance Directional Sign: AD sign at Quaama, approaching Verona Rd and Gordon St, September 2009. Image © Paul Rands |
 |
Advance Directional Sign: AD sign approaching Carp St (TD9 / TD11) and Gipps St at Bega, October 2009. Image © Paul Rands |
|
 |
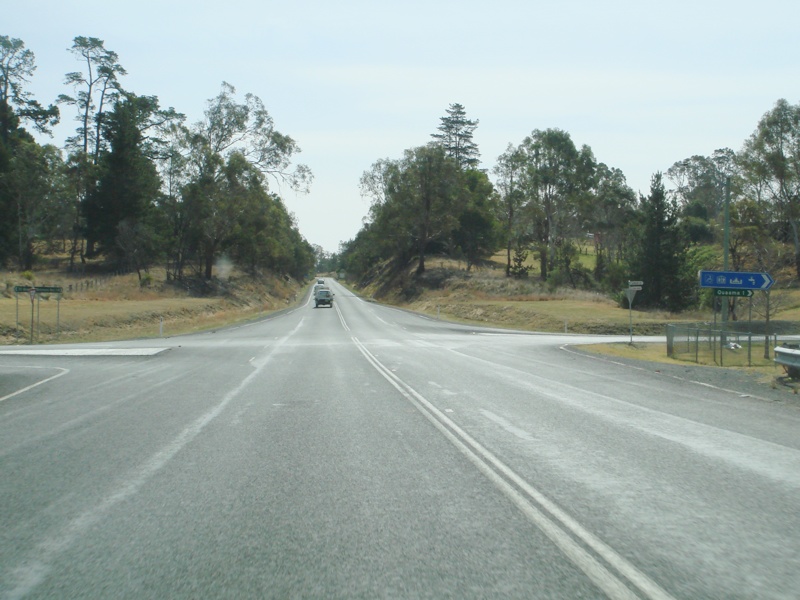
Dry River: Princes Hwy (NR1) crossing Dry River at Quaama, September 2009. Image © Paul Rands |
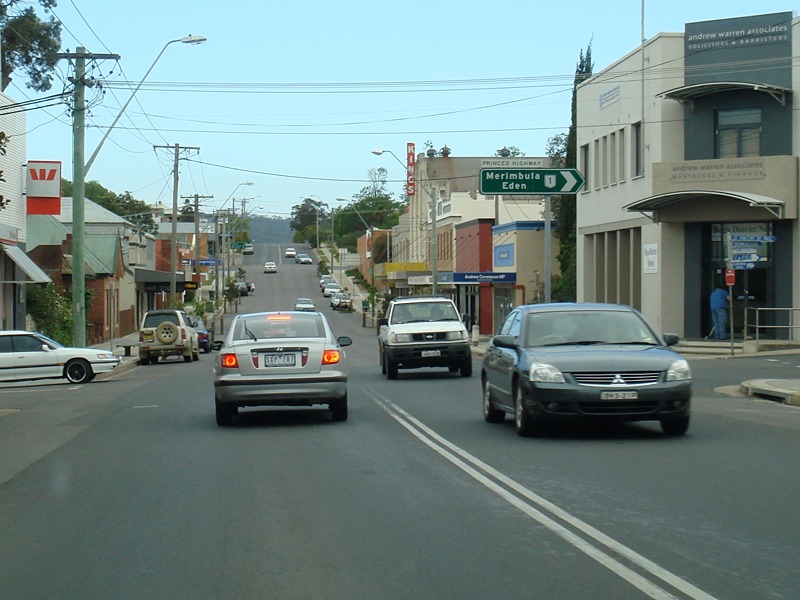 |
Intersection Directional Sign: ID sign at the corner of Princes Hwy (NR1), Carp St (TD9 / TD11) and Gipps St, Bega, October 2009. NR1 turns right at this junction. Image © Paul Rands |
|
 |
Verona Road and Gordon Street: Princes Hwy (NR1) at the junction with Verona Rd and Gordon St, Quaama, September 2009. Gordon St used to be part of the Princes Hwy. Image © Paul Rands |
 |
Reassurance Directional Sign: Distance sign at Bega. September 2009. Image © Paul Rands |
|
 |
Reassurance Directional Sign: Rest area distance sign at Quaama, September 2009. Image © Paul Rands |
 |
Intersection Directional Sign: ID sign at the corner of Princes Hwy (NR1) and Auckland St, Bega, September 2009. Image © Paul Rands |
|
 |
Cobargo Street: Corner of Princes Hwy (NR1) and Cobargo St, Quaama, September 2009. Cobargo St used to be part of the Princes Hwy. Image © Paul Rands |
|||
|
Click here for the continuation of National Route 1 between Bega and the Victorian Border Click here for the continuation of National Route 1 between Cobargo and Bega |
||||
1 Roads and Traffic Authority, Schedule of Classified Roads and State & Regional Roads, 31 January 2011
2 Department of Main Roads, Annual Report, 1932-33
3 Department of Main Roads, Annual Report, 1933-34
4 Department of Main Roads, Annual Report, 1934-35
5 RTA Thematic History, 2nd Edition, 2006
6 Department of Main Roads, Annual Report, 1936-37
7 Department of Main Roads, Annual Report, 1949-50
8 Department of Main Roads, Annual Report, 1955-56
9 Department of Main Roads, Annual Report, 1956-57
10 Department of Main Roads, Annual Report, 1958-59
11 Department of Main Roads, Annual Report, 1959-60
12 Department of Main Roads, Annual Report, 1963-64
13 Department of Main Roads, Annual Report, 1970-71
14 Department of Main Roads, Annual Report, 1971-72
15 Department of Main Roads, Annual Report, 1972-73
16 Department of Main Roads, Annual Report, 1976-77
17 Bega Daily News, Road Work At Alsops Creek, 11 October 2002
18 Bega Daily News, 2 August 2011
Last updated: 13-Aug-2020 22:03
This site © Paul Rands. All rights reserved. Some portions © (copyright) by their respective and credited owners. Permission must be obtained before using any images from this site. For details, please email by clicking here.