|
|
|
|
|
 |
Pacific Highway, New England Highway, John Renshaw Drive, Southern Freeway, Mount Ousley Road & Princes Highway (National Route 1) (Decommissioned) - Gwynneville to Yallah |
Statistics:
Route Numbering:

General Information:
National Route 1 forms part of the main coastal route between Victoria and Queensland. The route features a mix of rural highway, arterial and freeway design standards. The route forms part of what is collectively known as Highway 1. It is Australia's coastal highway joining all mainland's state capitals and coastal towns circumnavigating the entire Australian continent. It is also the longest numbered highway in the world, covering more than 14 500 km.
In New South Wales, National Route 1 was truncated by National Highway 1 between Beresfield and Wahroonga, by Metroad 1 between Wahroonga and Waterfall and by M1 at Tweed Heads West.
Southern Section:
The southern section of National Route 1 is formed by 2 separate sections of the Southern Freeway, linked by dual carriageway Mt Ousley Road. At the end of southern segment of the Southern Freeway, National Route continues as Princes Highway. The route from Kiama to Sydney is a mix of divided road and freeway, the majority of the route from Gerringong to the Victorian border is undivided rural highway standard and undivided urban arterial within some towns, with some dual carriageway sections sporadically placed between Bomaderry and tourist areas immediately south of Nowra.
The Southern Expressway (later Freeway) and also Mount Ousley Road, ran between Waterfall in Sydney's south, bypassing Wollongong and ending at Yallah, in the Illawarra's southern suburbs. It is the main route between Sydney and Wollongong, and crosses the Illawarra Escarpment to the narrow coastal strip on which most of the Illawarra suburbs are built.
History:
Southern Freeway:
Click here for historic photos between Gwynneville and Yallah
| Gwynneville to Yallah | Yallah to Gwynneville | |||
| Preview: | Description: | Preview: | Description: | |
 |
Reserve Street: Southern Fwy (NR1) as it passes under Reserve St in West Wollongong, November 2009. Image © Paul Rands |
 |
Haywards Bay Drive: Advance directional sign on Princes Hwy (NR1) at Yallah, at Haywards Bay Dr & Yallah Rd interchange, December 2012. Image © Paul Rands |
|
 |
Supplemental Advance Directional Sign: Supplemental AD sign at West Wollongong (near the old Phillips Av off ramp) approaching Princes Hwy (SR60), November 2009. Image © Paul Rands |
 |
Advance Directional Sign: AD sign at Yallah, approaching Princes Hwy (SR60), December 2012. Image © Paul Rands |
|
 |
Advance Directional Sign: AD sign at West Wollongong approaching Princes Hwy (SR60), December 2012. Click here for a photo of this location by Paul Rands from November 2009 and click here for a photo of this location by Paul Rands from June 2006. Image © Paul Rands |
 |
Princes Highway: Princes Hwy (NR1) near Duck Ck at Yallah, at the Princes Hwy (SR60) interchange, December 2012. NR1 becomes Southern Fwy at this point. Image © Paul Rands |
|
 |
Mt Keira Road: Intersection directional sign for Princes Hwy (SR60) exit on the Mt Keira Rd (TD11) overpass at West Wollongong, December 2012. Click here for a photo of this location by Paul Rands from November 2009 and click here for a photo of this location by Paul Rands from June 2006. Image © Paul Rands |
 |
Prohibition Sign: Sign listing vehicles prohibited on the freeway, Southern Fwy (NR1) at Mt Brown, December 2012. Image © Paul Rands |
|
 |
Princes Highway: Southern Fwy (NR1) at the Princes Hwy (SR60) interchange at West Wollongong, November 2009. Click here for a photo of this location by Paul Rands from June 2006. Image © Paul Rands |
 |
Start Freeway: Freeway green start freeway sign from the 1980s, Mt Brown, December 2012. Image © Paul Rands |
|
 |
Princes Highway: Southern Fwy (NR1) at the Princes Hwy (SR60) interchange (Ghosts Ck Bridge) at West Wollongong, November 2009. Image © Paul Rands |
 |
Mount Brown: Southern Fwy (NR1) as it passes under the footbridge linking Laver Rd and Compton St at Mt Brown, December 2012. Image © Paul Rands |
|
 |
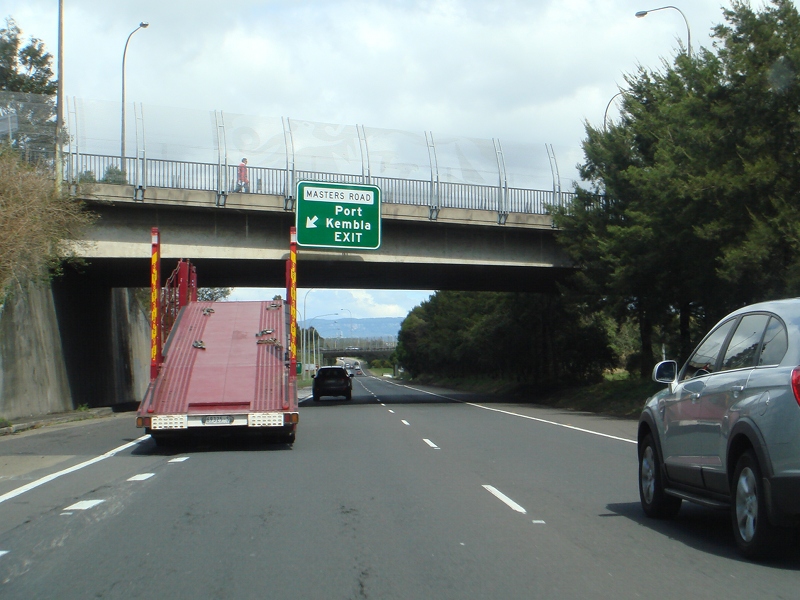
Supplemental Advance Directional Sign: Supplemental AD sign at Mangerton, approaching Masters Rd (SR153) interchange, December 2012. Image © Paul Rands |
 |
Emerson Road: Southern Fwy (NR1) as it passes under Emerson Rd at Dapto, December 2012. Image © Paul Rands |
|
 |
Supplemental Advance Directional Sign: Supplemental AD sign at Mangerton, approaching Masters Rd (SR153) interchange, September 2010. Image © Paul Rands |
 |
Fowlers Road: Southern Fwy (NR1) as it passes under Fowlers Rd at Koonawarra, December 2012. Image © Paul Rands |
|
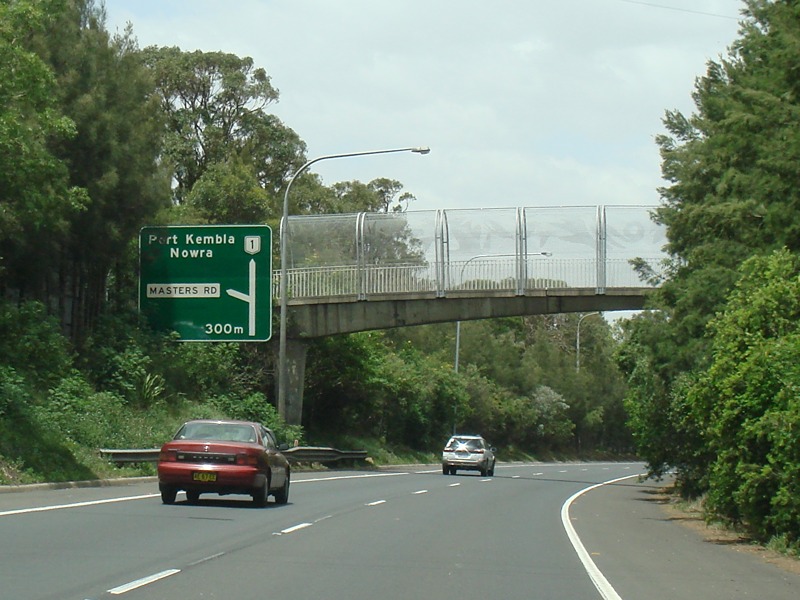 |
Advance Directional Sign: AD sign at Mangerton, approaching Masters Rd (SR153) interchange, November 2009. Click here for a photo of this location by Paul Rands from June 2006. Image © Paul Rands |
 |
Harvey Street: Southern Fwy (NR1) as it passes under Harvey St at Dapto, December 2012. Image © Paul Rands |
|
 |
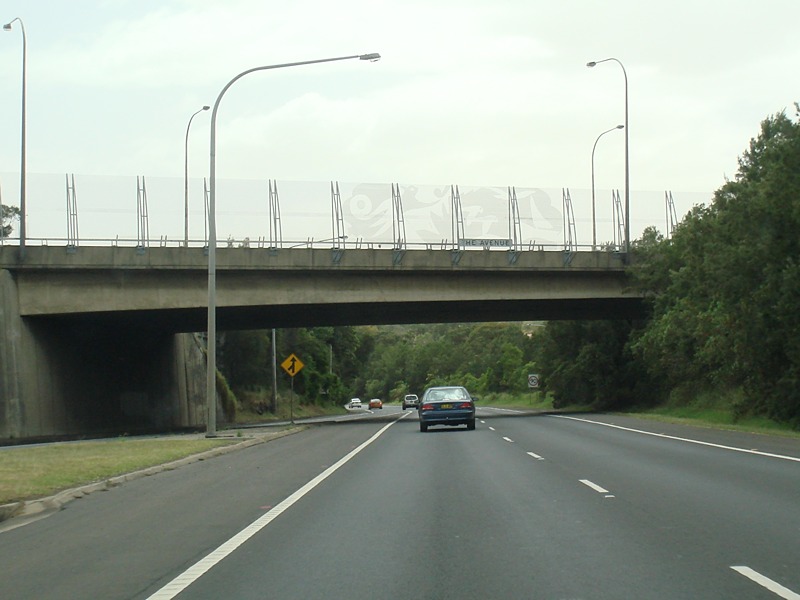
The Avenue & Masters Road Interchange: Intersection directional sign for Masters Rd (SR153) interchange on the The Avenue bridge at Mt St Thomas, December 2012. Click here for a photo of this location by Paul Rands from December 2010. Click here for a photo of this location by Paul Rands from September 2010 and click here for a photo of this location by Paul Rands from November 2009. Image © Paul Rands |
 |
Kanahooka Road: Southern Fwy (NR1) at the Kanahooka Rd interchange at Dapto, December 2012. Image © Paul Rands |
|
 |
Advance Directional Sign: AD sign near Masters Rd (SR153) overpass at Mt St Thomas for Five Islands Rd (SR155), December 2012. Click here for a photo of this location by Paul Rands from November 2009. Image © Paul Rands |
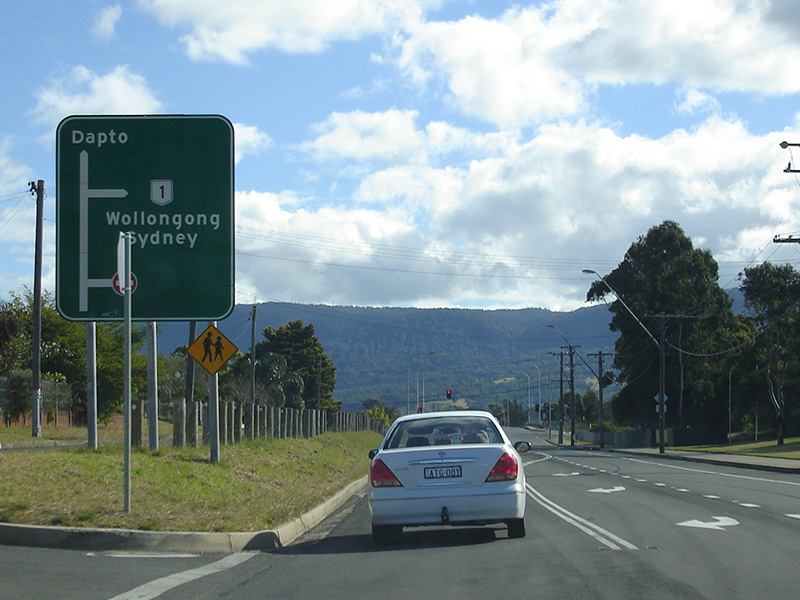 |
Advance Directional Sign: AD sign on Kanahooka Rd at Kanahooka, approaching Southern Fwy (NR1), June 2006. Image © Paul Rands |
|
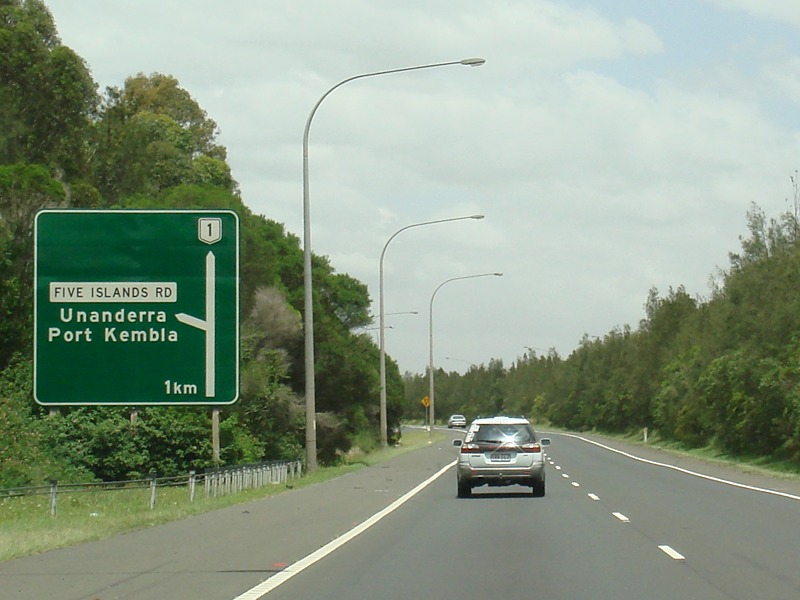 |
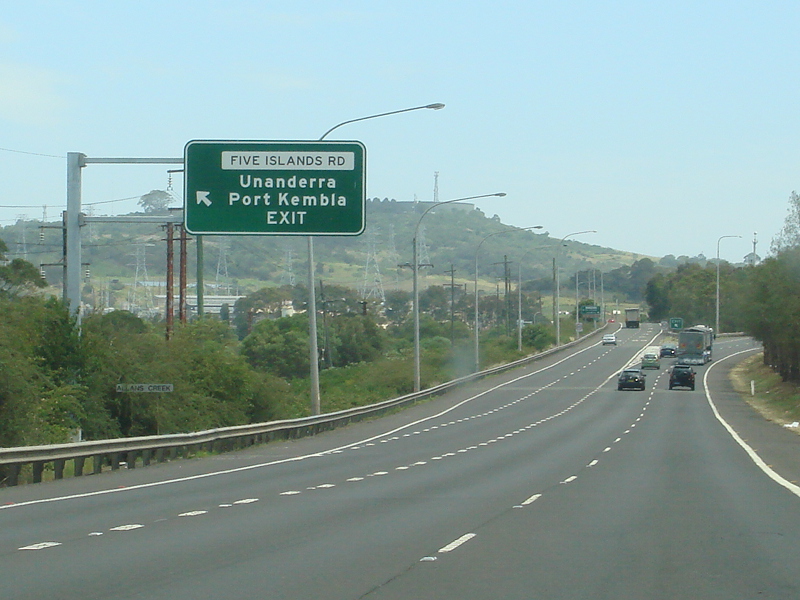
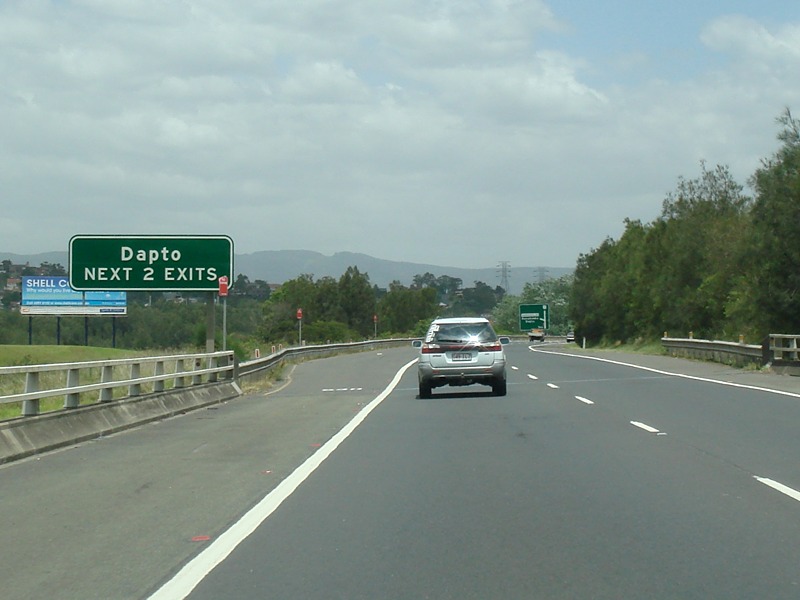
Advance Directional Sign: AD sign at Unanderra approaching Five Islands Rd (SR155), November 2009. Click here for a photo of this location by Paul Rands from June 2006. Image © Paul Rands |
 |
Intersection Directional Sign: ID sign on Kanahooka Rd at Brownsville at the on ramp to Southern Fwy (NR1), September 2010. Image © Paul Rands |
|
 |
Advance Directional Sign: AD sign at Unanderra approaching Five Islands Rd (SR155), December 2012. Click here for a photo of this location by Paul Rands from November 2009. Image © Paul Rands |
 |
Advance Directional Sign: AD sign on Kanahooka Rd at Brownsville, approaching Southern Fwy (NR1), November 2009. Image © Paul Rands |
|
 |
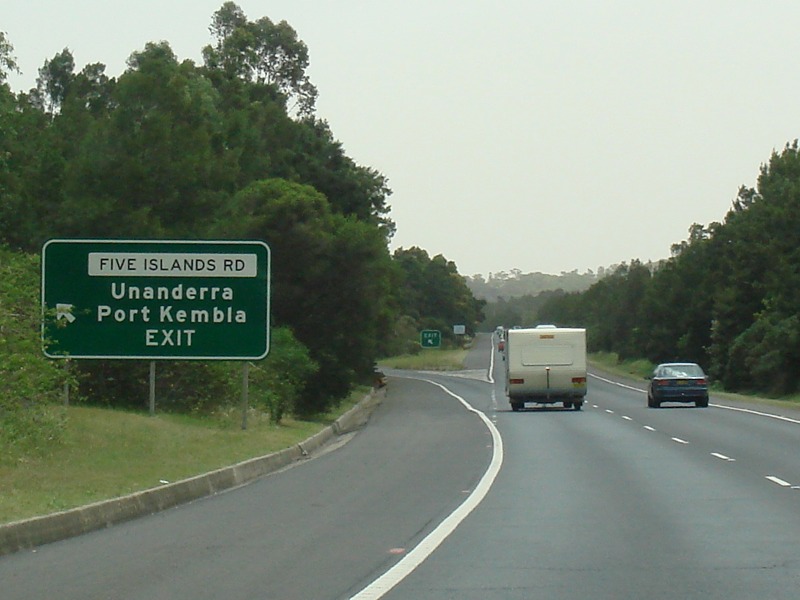
Five Islands Road: Southern Fwy (NR1) at the Five Islands Rd (SR155) interchange at Unanderra, December 2012. Click here for a photo of this location by Paul Rands from November 2009 and click here for a photo of this location by Paul Rands from Date. Image © Paul Rands |
 |
Intersection Directional Sign: ID sign on Kanahooka Rd at Brownsville at the on ramp to Southern Fwy (NR1), November 2009. Image © Paul Rands |
|
 |
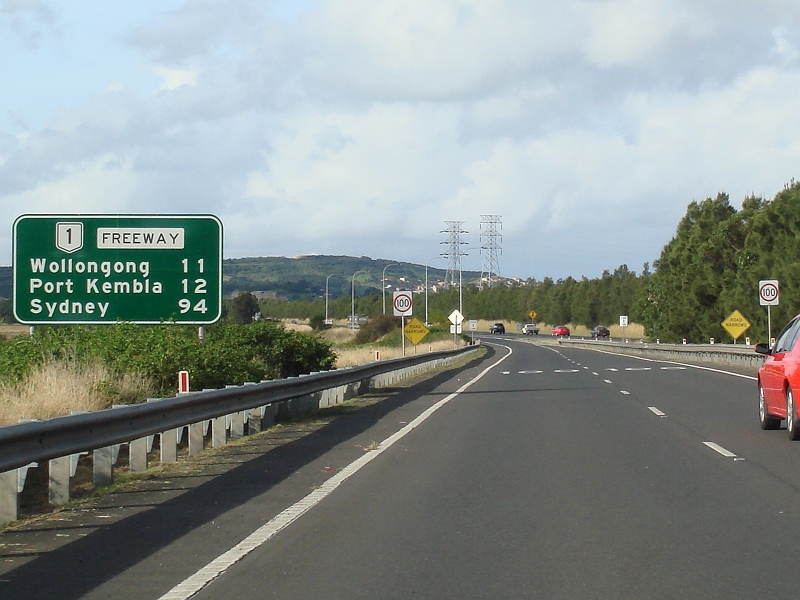
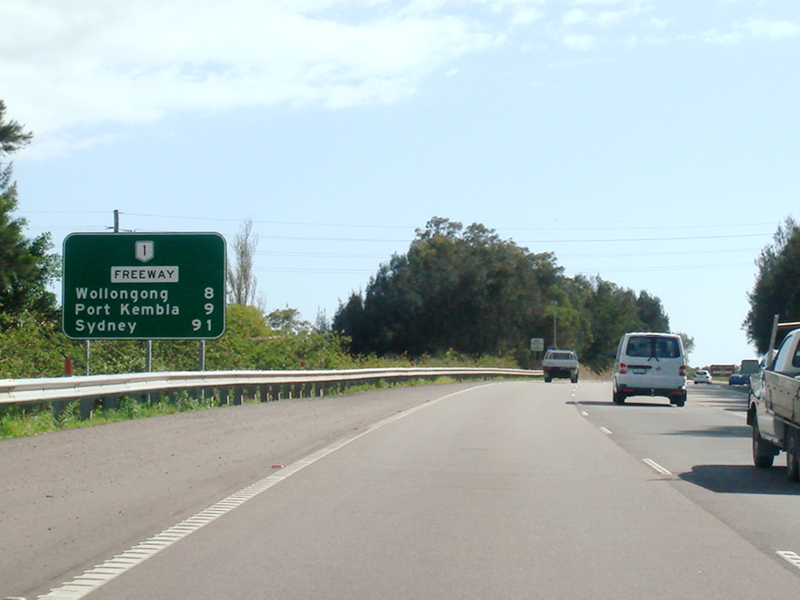
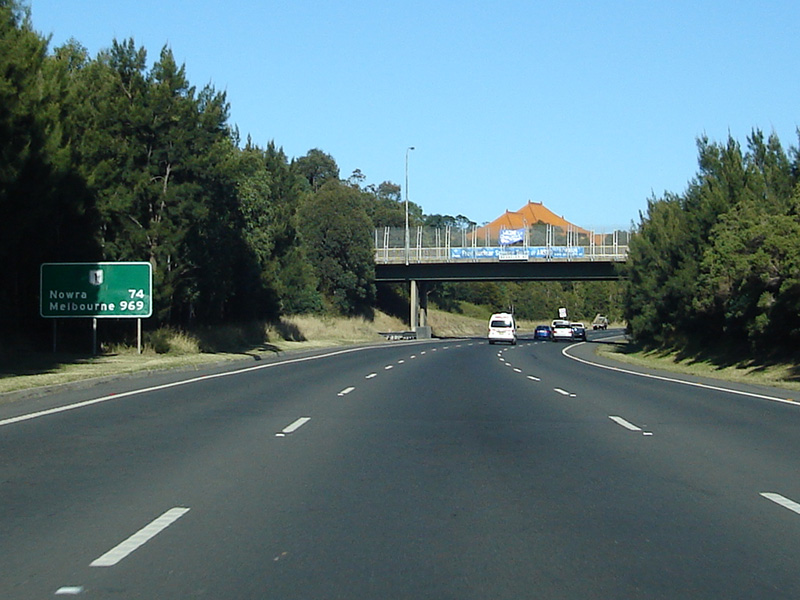
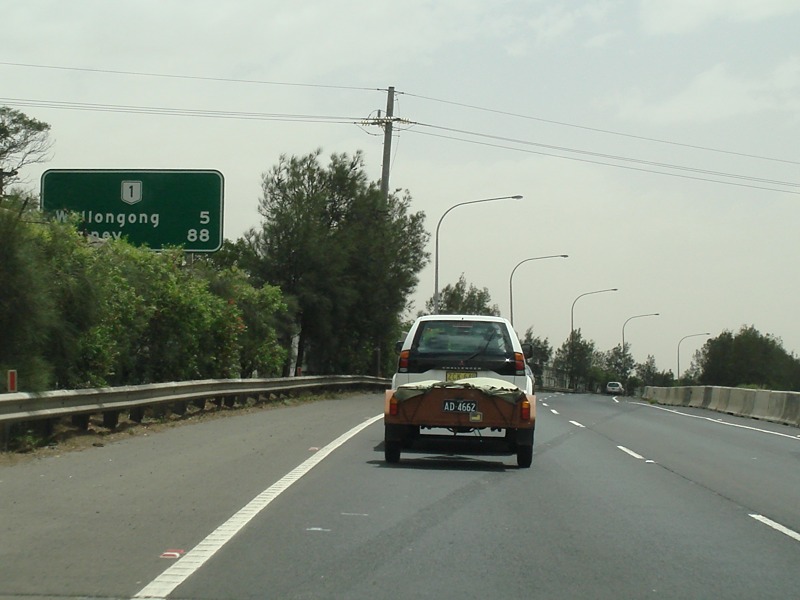
Reassurance Directional Sign: Distance sign at Unanderra, December 2012. Click here for a photo of this location by Paul Rands from November 2009 and click here for a photo of this location by Paul Rands from June 2006. Image © Paul Rands |
 |
Reassurance Directional Sign: Distance sign on the ramp from Kanahooka Rd onto Southern Fwy (NR1) at Brownsville, June 2010. Image © Paul Rands |
|
 |
Berkeley Road: Southern Fwy (NR1) as it passes under Berkeley Rd at Unanderra, November 2009. Image © Paul Rands |
 |
Advance Directional Sign: AD sign at Kembla Grange approaching Northcliffe Dr (SR155), December 2012. Click here for a photo of this location by Paul Rands from Date. Image © Paul Rands |
|
 |
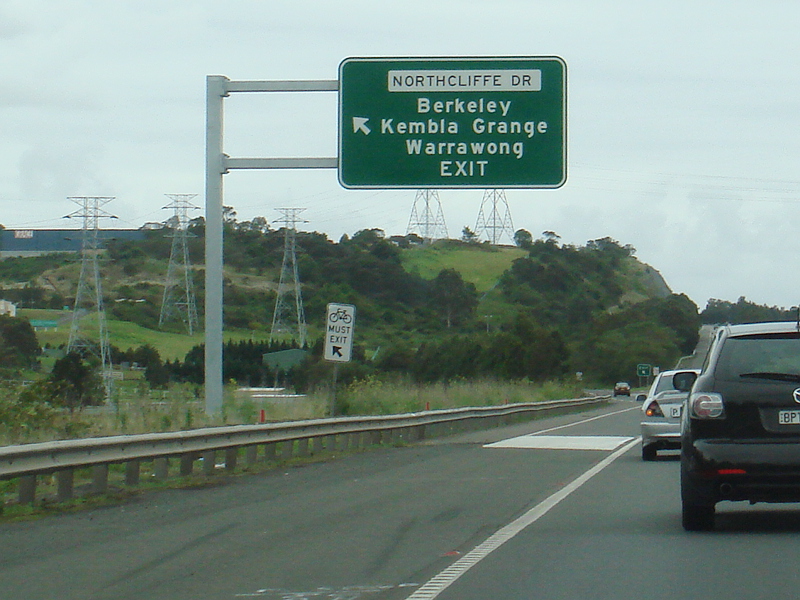
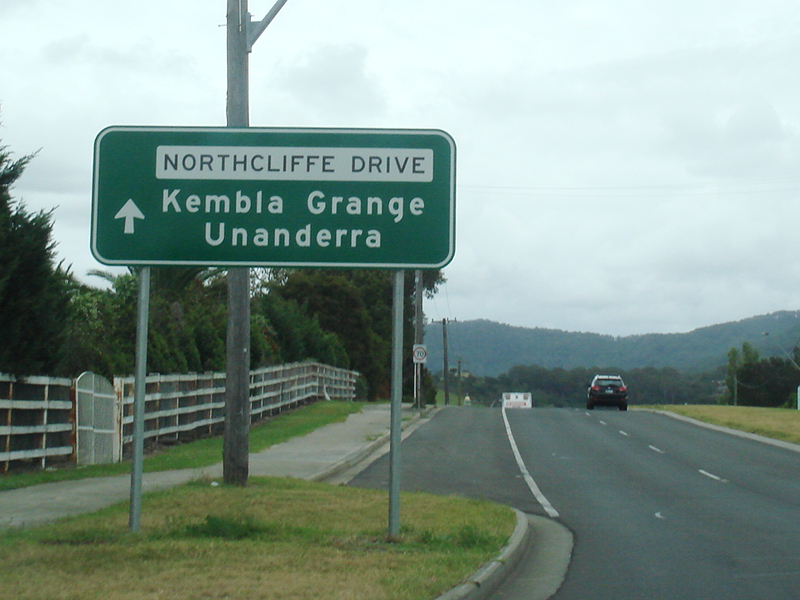
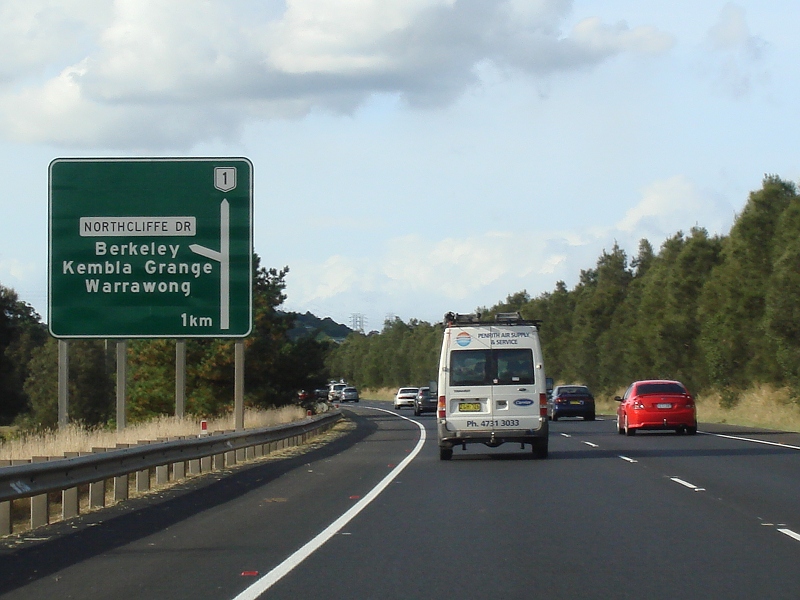
Advance Directional Sign: AD sign at Unanderra approaching Northcliffe Dr (SR155), December 2012. Click here for a photo of this location by Paul Rands from November 2009 and click here for a photo of this location by Paul Rands from June 2006. Image © Paul Rands> |
 |
Advance Directional Sign: AD sign at Kembla Grange approaching Northcliffe Dr (SR155), December 2012. Image © Paul Rands |
|
 |
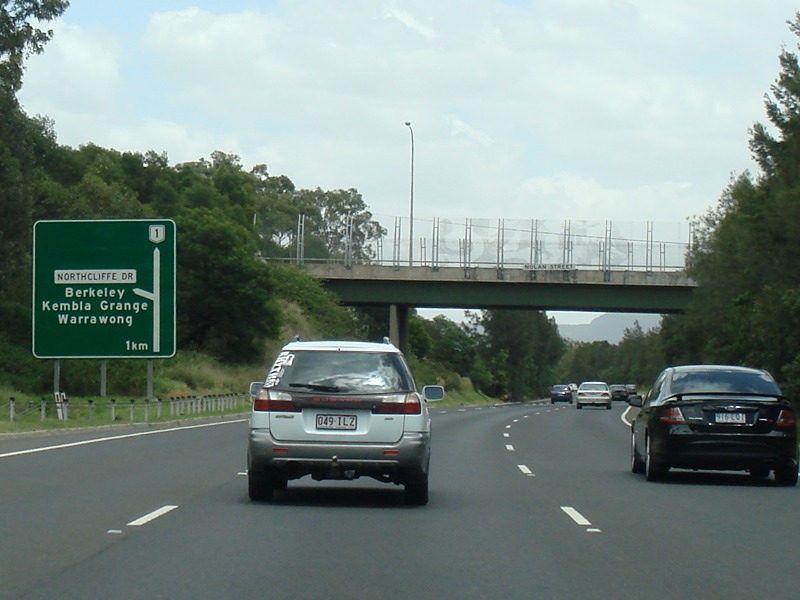
Nolan Street: Southern Fwy (NR1) as it passes under Nolan St, Unanderra, November 2009. Image © Paul Rands |
 |
Advance Directional Sign: AD sign at Kembla Grange approaching Northcliffe Dr (SR155), November 2009. This sign has since been removed. Image © Paul Rands |
|
 |
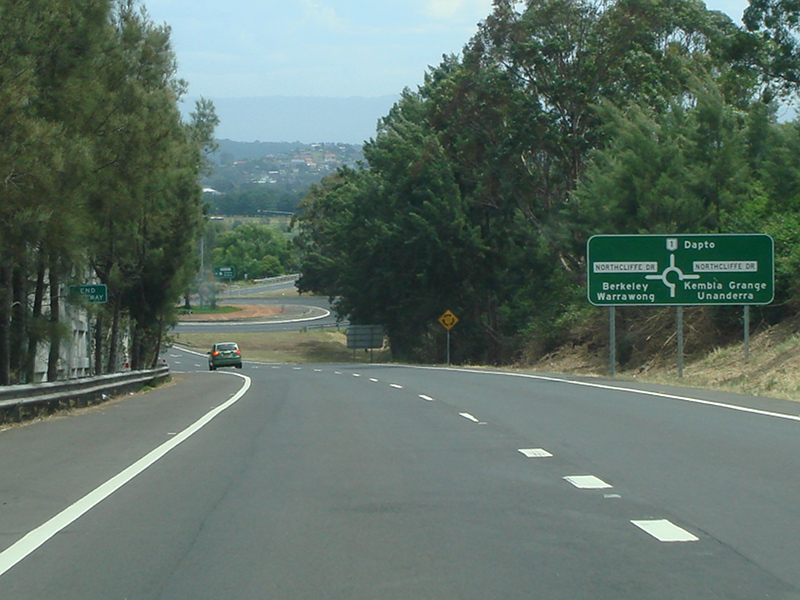
Advance Directional Sign: AD sign at Berkeley approaching Northcliffe Dr (SR155), December 2012. Click here for a photo of this location by Paul Rands from November 2009 and click here for a photo of this location by Paul Rands from June 2006. Image © Paul Rands |
 |
Northcliffe Drive: Southern Fwy (NR1) at Kembla Grange at the Northcliffe Dr (SR155) interchange, December 2012. Click here for a photo of this location by Paul Rands from November 2009. Image © Paul Rands |
|
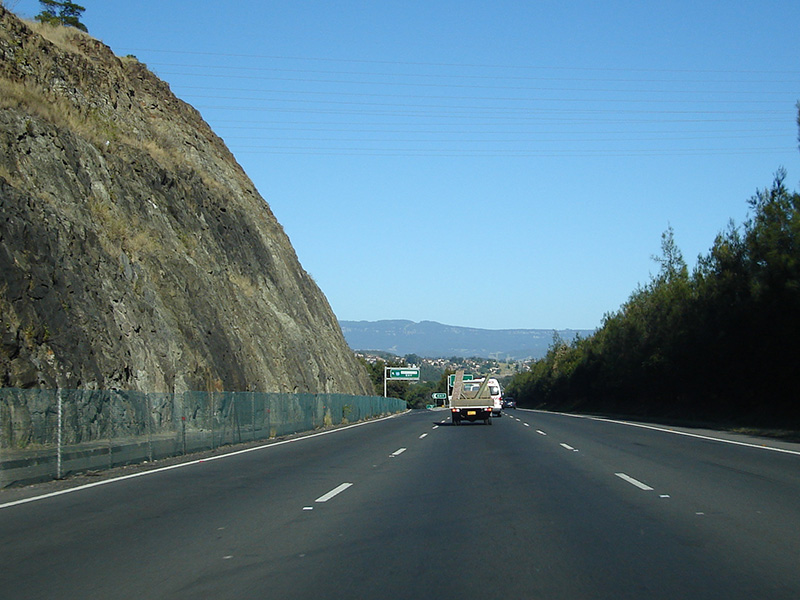 |
Flagstaff Hill: Large cutting at Berkeley through the western side of Flagstaff Hill, June 2006. Image © Paul Rands |
 |
Advance Directional Sign: AD sign on the off ramp to Northcliffe Dr (SR155) at Kembla Grange, December 2012. Image © Paul Rands |
|
 |
Northcliffe Drive: Southern Fwy (NR1) at Berkeley at the Northcliffe Dr (SR155) interchange, November 2009. Click here for a photo of this location by Paul Rands from June 2006. Image © Paul Rands |
 |
Intersection Directional Sign: ID sign on the roundabout with the off ramp to Northcliffe Dr (SR155) at Kembla Grange, December 2012. Image © Paul Rands |
|
 |
Advance Directional Sign: AD sign on the off ramp to Northcliffe Dr (SR155) at Berkeley, December 2012. The ramp was once controlled with traffic signals, which replaced with roundabouts. Image © Paul Rands |
 |
Intersection Directional Sign: ID sign on the roundabout with the off ramp to Northcliffe Dr (SR155) at Kembla Grange, December 2012. Image © Paul Rands |
|
 |
Advance Directional Sign: AD sign at the Northcliffe Dr (SR155) interchange at Berkeley, September 2010. This sign has since been removed. Image © Paul Rands |
 |
Flagstaff Hill: Large cutting at Unanderra through the western side of Flagstaff Hill, June 2010. Image © Paul Rands |
|
 |
Supplemental Advance Directional Sign: Supplemental AD sign at Kembla Grange, approaching Kanahooka Rd, May 2012. Click here for a photo of this location by Paul Rands from November 2009. Image © Paul Rands |
 |
Reassurance Directional Sign: Distance sign at Unanderra, December 2012. Click here for a photo of this location by Paul Rands from Date. Image © Paul Rands |
|
 |
Advance Directional Sign: AD sign at Kanahooka, approaching Kanahooka Rd, November 2009. Image © Paul Rands |
 |
Supplemental Advance Directional Sign: Supplemental AD sign at Unanderra approaching Five Islands Rd (SR155), December 2012. Image © Paul Rands |
|
 |
Advance Directional Sign: AD sign at Kanahooka, approaching Kanahooka Rd, May 2012. Image © Paul Rands |
 |
Advance Directional Sign: AD sign at Unanderra approaching Five Islands Rd (SR155), December 2012. Click here for a photo of this location by Paul Rands from November 2009. Image © Paul Rands |
|
 |
Advance Directional Sign: AD sign at Kanahooka, approaching Kanahooka Rd, November 2009. This sign has since been removed. Image © Paul Rands |
 |
Advance Directional Sign: AD sign at Unanderra approaching Five Islands Rd (SR155), November 2009. Image © Paul Rands |
|
 |
Load Restrictions Sign: Load restrictions sign at Kanahooka, approaching Kanahooka Rd interchange, December 2012. Image © Paul Rands |
 |
Berkeley Road: Southern Fwy (NR1) as it passes under Berkeley Rd at Unanderra, November 2009. Image © Paul Rands |
|
 |
Kanahooka Road: Southern Fwy (NR1) at the Kanahooka Rd interchange at Kanahooka, May 2012. Click here for a photo of this location by Paul Rands from November 2009. Image © Paul Rands |
 |
Five Islands Road: Southern Fwy (NR1) at the Five Islands Rd (SR155) interchange at Unanderra, December 2012. Click here for a photo of this location by Paul Rands from November 2009. Image © Paul Rands |
|
 |
Advance Directional Sign: AD sign on the Kanahooka Rd off ramp at Kanahooka, September 2010. Image © Paul Rands |
 |
Reassurance Directional Sign: Distance sign at Unanderra, December 2012. Click here for a photo of this location by Paul Rands from November 2009. Image © Paul Rands |
|
 |
Kanahooka Road: ID signs on the Kanahooka Rd off ramp at Kanahooka, September 2010. Image © Paul Rands |
 |
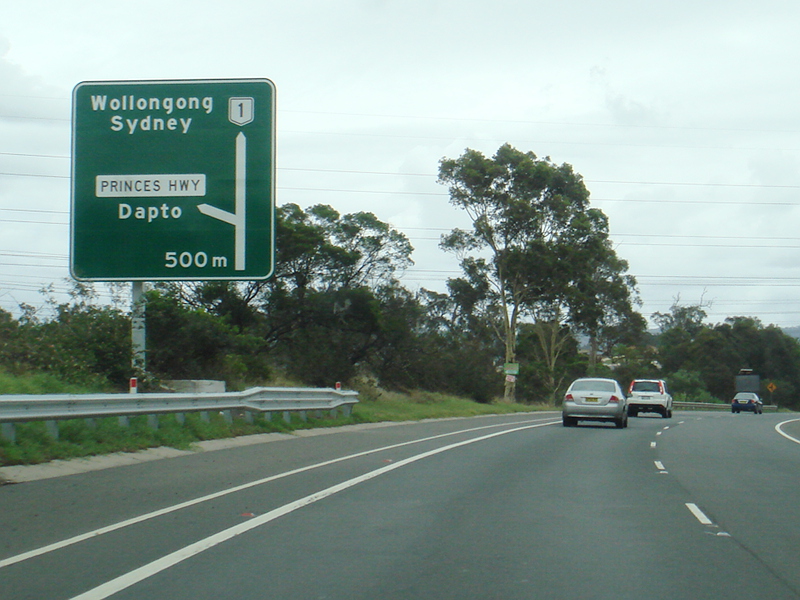
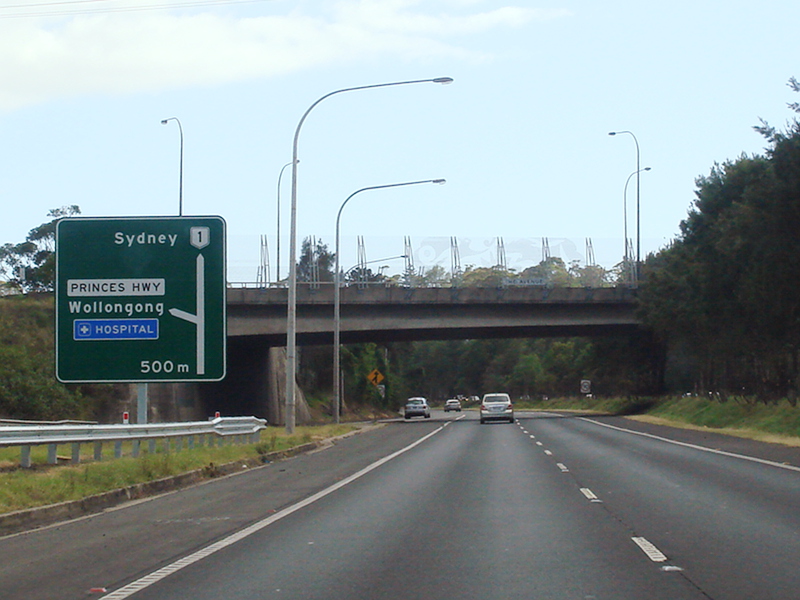
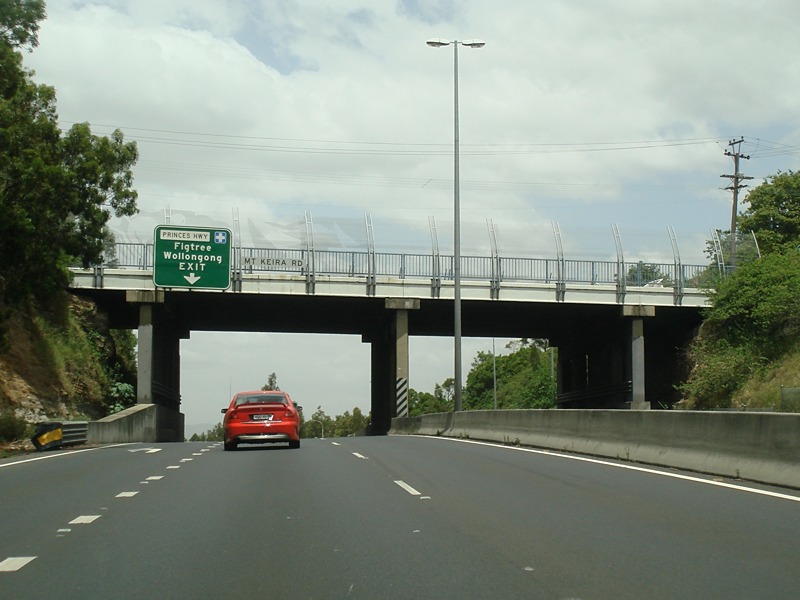
Advance Directional Sign: AD sign at Figtree for the Princes Hwy (SR60) interchange, December 2012. Click here for a photo of this location by Paul Rands from November 2009. Image © Paul Rands |
|
 |
Odometer Check Length Ahead: Sign approaching the start of the odometer check length at Kanahooka, November 2009. Image © Paul Rands |
 |
Supplemental Advance Directional Sign: Supplemental AD sign at Figtree for the Princes Hwy (SR60) interchange, November 2009. Image © Paul Rands |
|
 |
Harvey Street: Southern Fwy (NR1) as it passes under Kanahooka at Kanahooka, December 2012. Image © Paul Rands |
 |
Supplemental Advance Directional Sign: Supplemental AD sign at Figtree for the Princes Hwy (SR60) interchange, November 2009. Image © Paul Rands |
|
 |
Odometer Check Length Start: Beginning of odometer check length at Kanahooka, November 2009. Image © Paul Rands |
 |
Advance Directional Sign: AD sign at Figtree for the Princes Hwy (SR60) interchange, December 2012. Click here for a photo of this location by Paul Rands from November 2009. Image © Paul Rands |
|
 |
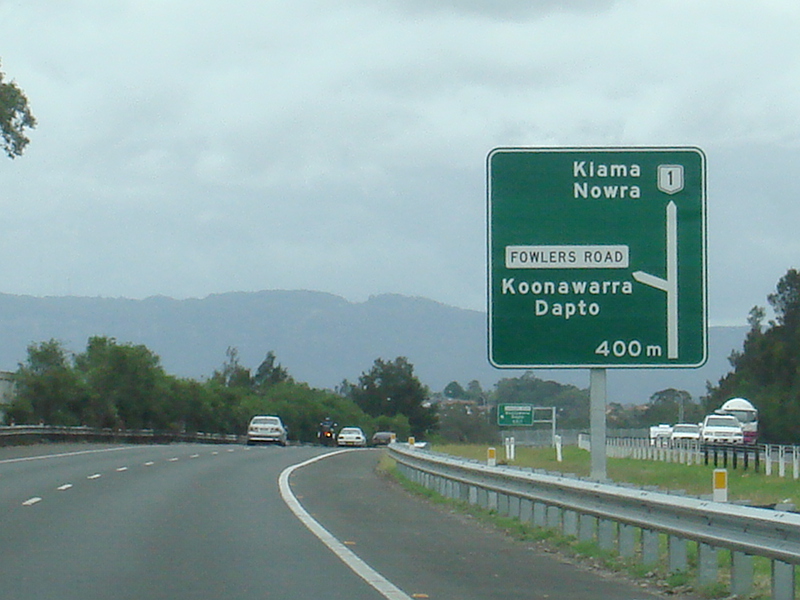
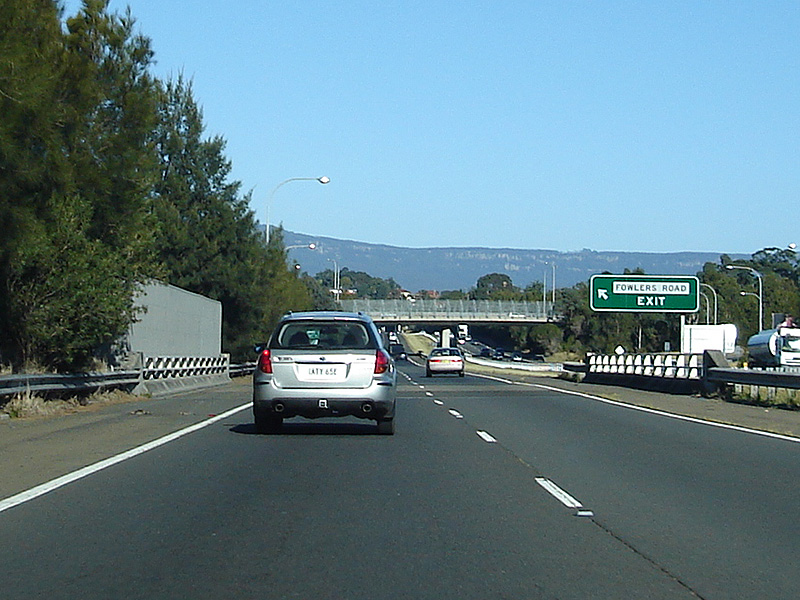
Advance Directional Sign: AD sign approaching Fowlers Rd at Kanahooka, December 2012. Click here for a photo of this location by Paul Rands from November 2009 and click here for a photo of this location by Paul Rands from June 2006. Image © Paul Rands |
 |
Supplemental Advance Directional Sign: Supplemental AD sign at Figtree for the Princes Hwy (SR60) interchange, November 2009. Image © Paul Rands |
|
 |
Harvey Street: Southern Fwy (NR1) as it passes under Harvey St at Kanahooka, December 2012. Image © Paul Rands |
 |
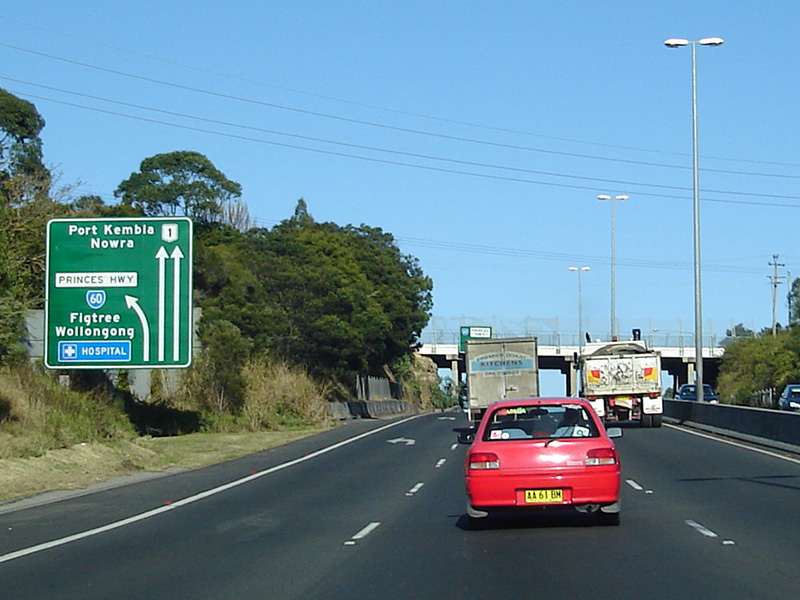
Princes Highway: Southern Fwy (NR1) at the Princes Hwy (SR60) interchange at Figtree, December 2012. Click here for a photo of this location by Paul Rands from November 2009. Image © Paul Rands |
|
 |
Advance Directional Sign: AD sign approaching Fowlers Rd at Koonawarra, December 2012. Image © Paul Rands |
 |
Princes Highway: Southern Fwy (NR1) at the Princes Hwy (SR60) interchange (Ghosts Ck Bridge) at Figtree, November 2009. Image © Paul Rands |
|
 |
Fowlers Road: Southern Fwy (NR1) at Fowlers Rd interchange at Koonawarra, December 2012. Click here for a photo of this location by Paul Rands from May 2012, click here for a photo of this location by Paul Rands from November 2009 and click here for a photo of this location by Paul Rands from June 2006. Image © Paul Rands |
 |
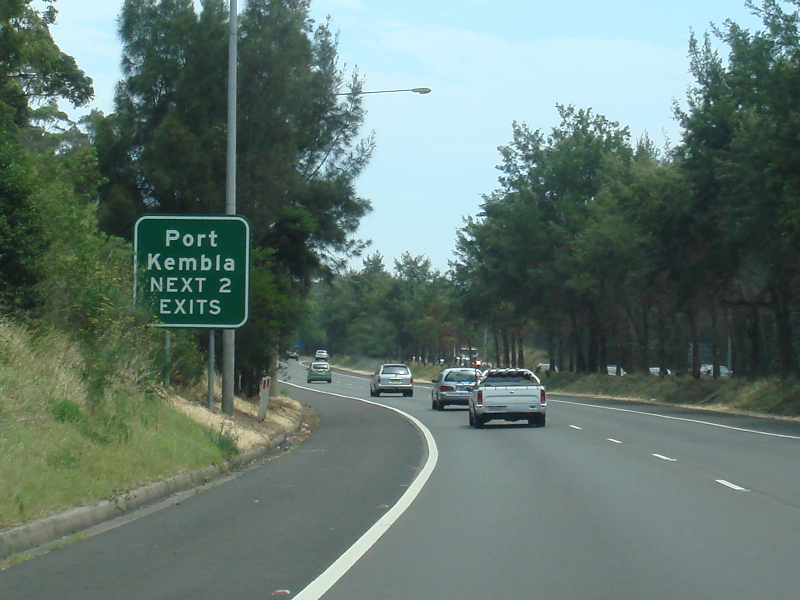
Advance Directional Sign: AD sign at Figtree approaching Memorial Dr (formerly Northern Distributor), December 2012. Image © Paul Rands |
|
 |
Advance Directional Sign: AD sign on the off ramp to Fowlers Rd at Koonawarra, December 2012. Image © Paul Rands |
 |
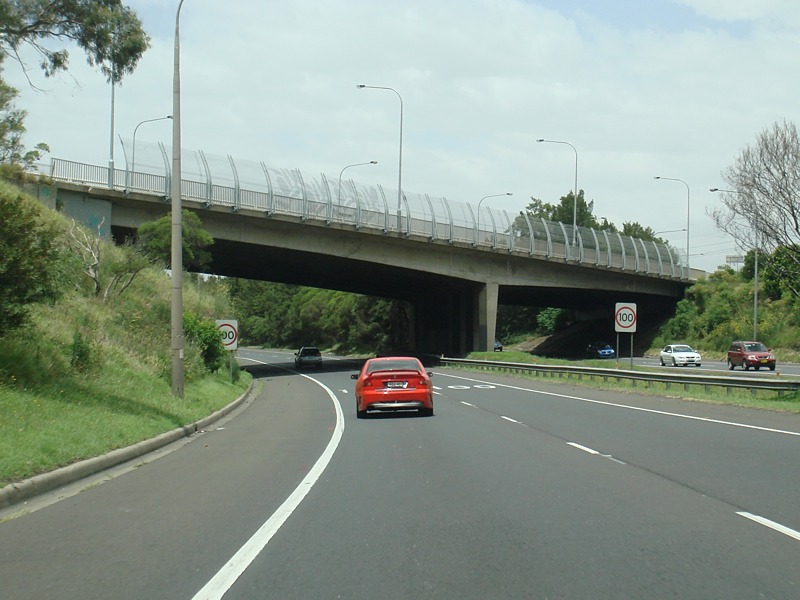
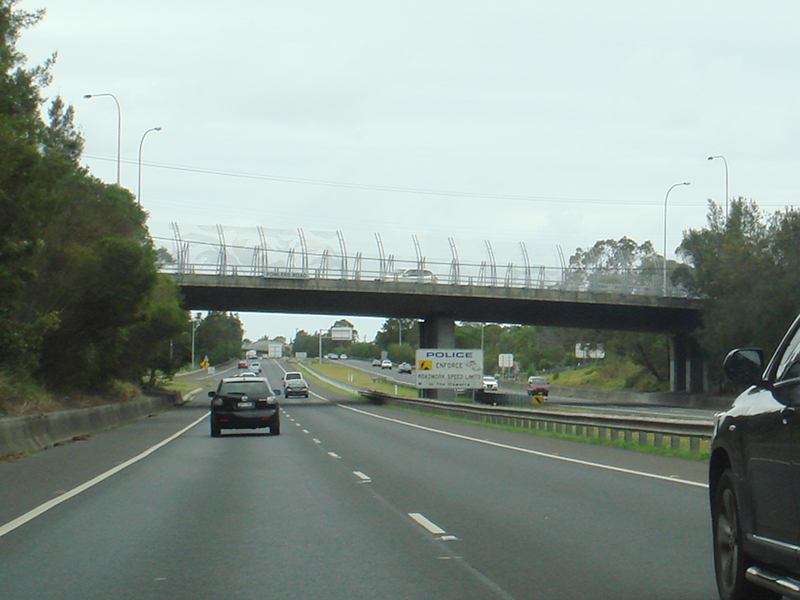
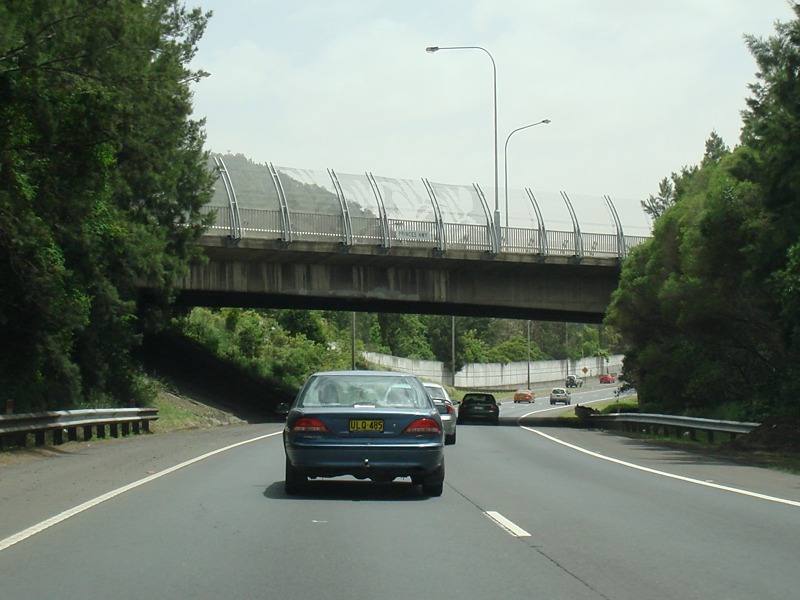
Mount Keira Road: Southern Fwy (NR1) as it passes under Mt Keira Rd (TD11) in West Wollongong, November 2009. Image © Paul Rands |
|
 |
Fowlers Road: Southern Fwy (NR1) as it passes under Fowlers Rd at Koonawarra, November 2009. Image © Paul Rands |
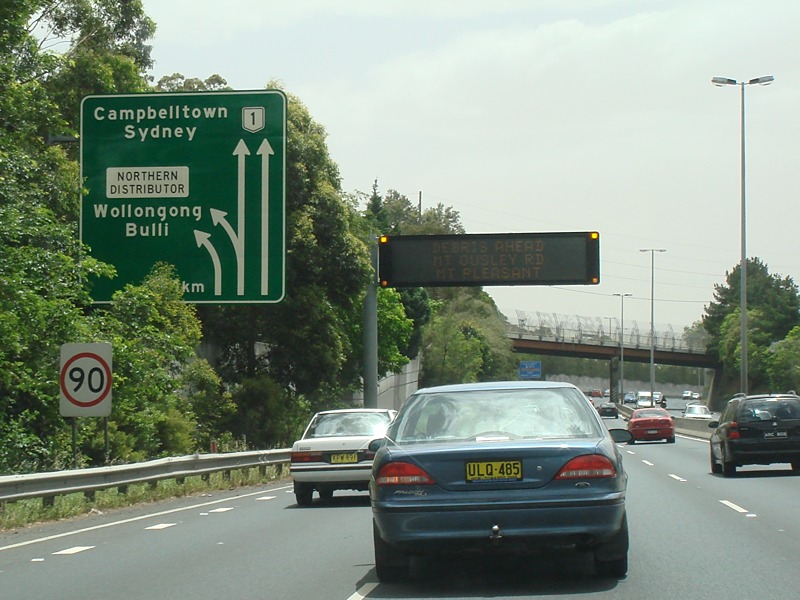 |
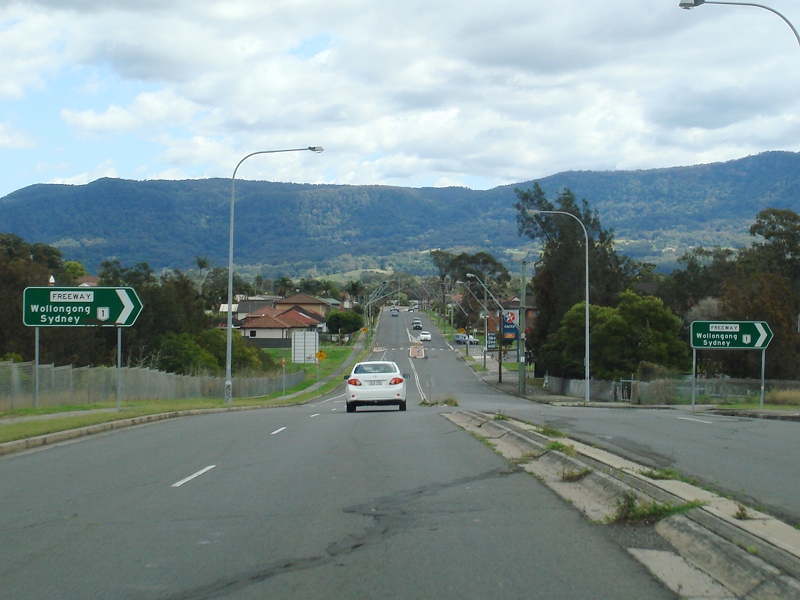
Advance Directional Sign: AD sign at West Wollongong approaching Memorial Dr (formerly Northern Distributor), November 2009. Click here for a photo of this location by Paul Rands from June 2006, prior to the removal of the last remaining freeway green F6 shielded sign in existence. Image © Paul Rands |
|
 |
Odometer Check Length Sign: Odometer check length sign at Dapto, November 2009. Image © Paul Rands |
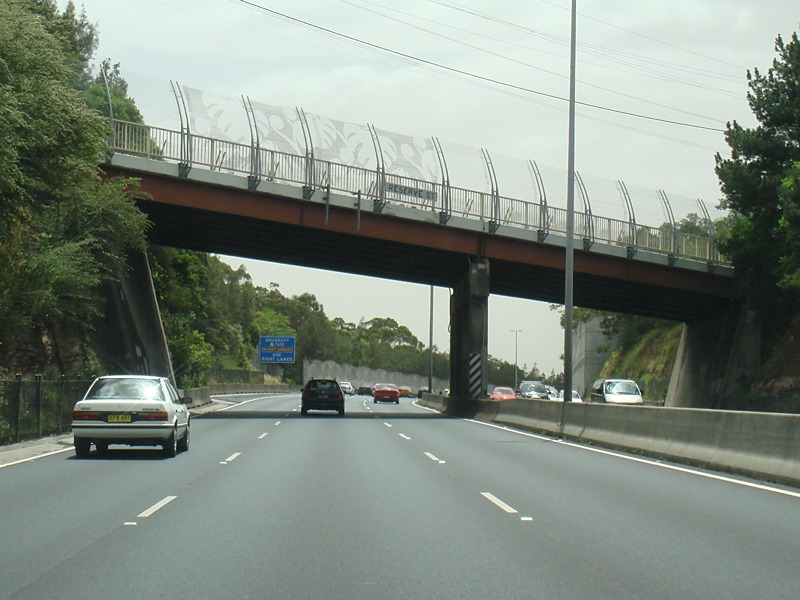 |
Reserve Street: Southern Fwy (NR1) as it passes under Reserve St in West Wollongong, November 2009. Image © Paul Rands |
|
 |
Emerson Road: Southern Fwy (NR1) as it passes under Emerson Rd at Dapto, November 2009. Image © Paul Rands |
|||
 |
Mount Brown: Southern Fwy (NR1) as it passes under the footbridge linking Laver Rd and Compton St at Mt Brown, December 2012. Image © Paul Rands |
|||
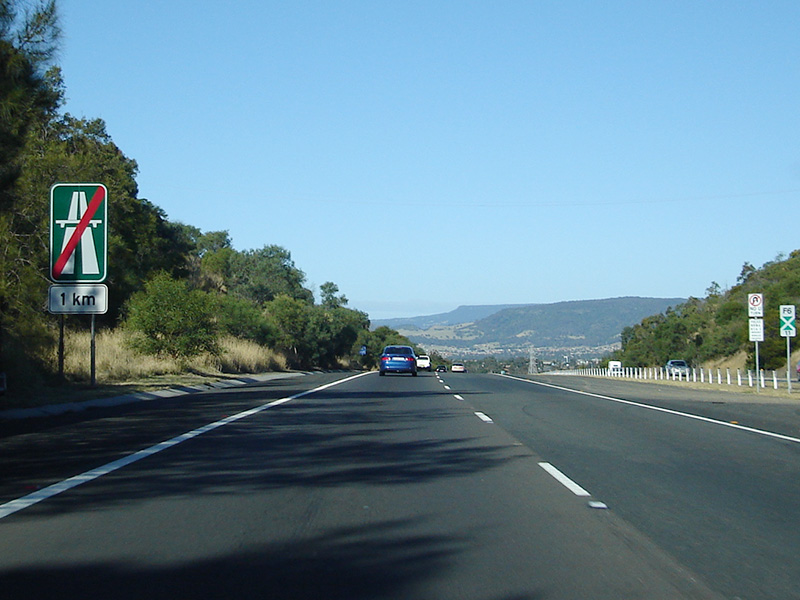 |
End Freeway 1km: Older style end freeway 1 km sign at Mt Brown, June 2006. Image © Paul Rands |
|||
 |
Princes Highway: Southern Fwy (NR1) as it passes over Princes Hwy (SR60) at Yallah, November 2009. Image © Paul Rands |
|||
 |
End Odometer Check Length: End of the 5 km odometer check length at Yallah, November 2009. Image © Paul Rands |
|||
 |
End Freeway: End of Southern Fwy (NR1) at Yallah, NR1 becomes Princes Hwy at this point, December 2012. Image © Paul Rands |
|||
| Click here for the continuation of National Route 1 between Yallah and Gerringong Click here for the continuation of National Route 1 between Waterfall and Gwynneville |
||||
1 Roads and Traffic Authority, Schedule of Classified Roads and State & Regional Roads, 31 January 2011
2 Department of Main Roads, Annual Report, 1945-46
3 Parsons Brinckerhoff, F6 Corridor Public Transport Use Assessment Final Draft Report, September 2004
4 Department of Main Roads, Annual Report, 1958-59
5 Department of Main Roads, Annual Report, 1960-61
6 Department of Main Roads, Annual Report, 1961-62
7 Department of Main Roads, Annual Report, 1965-66
8 Department of Main Roads, Annual Report, 1966-67
9 Department of Main Roads, Annual Report, 1967-68
10 Department of Main Roads, Annual Report, 1969-70
11 Department of Main Roads, Annual Report, 1971-72
12 Department of Main Roads, Annual Report, 1972-73
13 Department of Main Roads, Annual Report, 1973-74
14 Department of Main Roads, Annual Report, 1974-75
15 Department of Main Roads, Annual Report, 1976-77
16 Department of Main Roads, Annual Report, 1977-78
Last updated: 13-Aug-2020 14:42
This site © Paul Rands. All rights reserved. Some portions © (copyright) by their respective and credited owners. Permission must be obtained before using any images from this site. For details, please email by clicking here.