|
|
|
|
|
 |
|
Pacific Highway, New England Highway, John Renshaw Drive, Southern Freeway, Mount Ousley Road & Princes Highway (National Route 1) (Decommissioned) - Urunga to Clybucca |
Statistics:
Route Numbering:
General Information:
National Route 1 forms part of the main coastal route between Victoria and Queensland. The route features a mix of rural highway, arterial and freeway design standards. The route forms part of what is collectively known as Highway 1. It is Australia's coastal highway joining all mainland's state capitals and coastal towns circumnavigating the entire Australian continent. It is also the longest numbered highway in the world, covering more than 14 500 km.
In New South Wales, National Route 1 was truncated by National Highway 1 between Beresfield and Wahroonga, by Metroad 1 between Wahroonga and Waterfall and by M1 at Tweed Heads West.
Northern Section:
The northern section of National Route 1 took in a small section of New England Highway and the rest was made up by the Pacific Highway. The route varies from dual carriageway arterial and highway standard, to motorway standard and the rest is generally undivided rural highway conditions. The Pacific Highway is very well trafficked, and as a result notorious for a large amount of road trauma within the state. These crashes have resulted in more than 50% of the route being divided since the late 1980s.
The Pacific Highway section of NR1 runs between Brunswick Heads and Hexham, and also between Wahroonga and the Gore Hill Freeway at Artarmon. The northern section between Brunswick Heads and Hexham is a mix of dual carriageway, rural highway and urban arterial roadway. The southern section between Wahroonga and Artarmon is urban arterial standard and passes through one of Sydney's more affluent areas.
The highway traces its origins back to an early settler, George Peat, who owned the land between the Hawkesbury River and Mooney Mooney Creek. To provide access to his property, Peat began a ferry service across the Hawkesbury River in 1844 and surveyed, then constructed a road between Hornsby and Kariong in 1854. After his death in 1870, the ferry service was abandoned and the road fell into disrepair, finally closing to all traffic in 1899, following the completion of the Sydney-Newcastle railway.
Demand for a route between Sydney and Newcastle dates back to the early 20th century. When the only access was via the sea or via a long route through the town of Wiseman's Ferry. In the 1920s, the then Main Roads Board undertook a series of surveys to form an easier and more reliable route north from Sydney. In 1928 construction began on upgrading the old road and converting it to a modern standard, plus creating a new route north, utilising some of the abandoned Peat's Ferry Rd, while improving the horizontal and vertical alignments. In May 1930 the ferry service across the Hawkesbury River was re-established to service the new road until such times that a bridge became necessary. June 1930 marked the completion of the concrete surfacing.
During the time of the Hornsby to Gosford contruction, improvements were made to roads between Gosford to Newcastle as part of the link. On May 17 in 1929, the route was named as the Great Northern Highway. The work from Hornsby to Gosford cost almost £1 million, however it was money well spent, reducing the trip from Sydney to Newcastle from 9 hours to 4 ½ hours.
History:
Pacific Highway:
Click here for the former alignment between Urunga and Clybucca.
Click here for historic photos of Pacific Highway between Urunga and Clybucca.
| Urunga to Clybucca | Clybucca to Urunga | |||
| Preview: | Description: | Preview: | Description: | |
 |
Driver Reviver Sign: Driver reviver stations are operated during school holidays and long weekends, usually by volunteers to encourage people to break whilst travelling, Urunga, June 2006. Image © Dave Whiteman |
 |
Advance Directional Sign: AD sign approaching the Clybucca Bus Crash Memorial at Clybucca, July 2013. The fatal crash occurred 22 December 1989, that and another bus crash a few months prior, prompted an accelerated upgrade program for the Pacific Hwy. 16 Image © Paul Rands |
|
 |
Advance Directional Sign: AD sign at Urunga, approaching Newry Island Rd, November 2010. Image © Rob Tilley |
 |
Entering Clybucca: Pacific Hwy (NR1) as it enters the town of Clybucca, July 2013. Image © Paul Rands |
|
 |
Newry Island Road: Corner of Pacific Hwy (NR1) and Newry Island Rd at Urunga, November 2010. Image © Rob Tilley |
 |
Supplemental Advance Directional Sign: Supplemental AD sign at Clybucca, approaching Plummers Ln (TD12), July 2013. Image © Paul Rands |
|
 |
Yellow Rock Road: Corner of Pacific Hwy (NR1) and Yellow Rock Rd at Urunga, November 2010. Image © Rob Tilley |
 |
Advance Directional Sign: AD sign at Clybucca, approaching Plummers Ln (TD12), July 2013. Image © Paul Rands |
|
 |
Intersection Directional Sign: ID sign at the junction with Marina Cr at Urunga, November 2010. Image © Rob Tilley |
 |
Entering Barraganyatti: Pacific Hwy (NR1) as it enters the town of Barranganyatti, July 2013. Image © Paul Rands |
|
 |
Entering Urunga: Pacific Hwy (NR1) as it enters the Urunga town centre, July 2013. Image © Paul Rands |
 |
Divided Road 1km Ahead: Pacific Hwy (NR1) at Eungai Rail approaching the divided section of highway, July 2013. Image © Paul Rands |
|
 |
Kalang River: AD sign approaching Bellinger St & Ferry St and Kalang River at Urunga, July 2013. Image © Paul Rands |
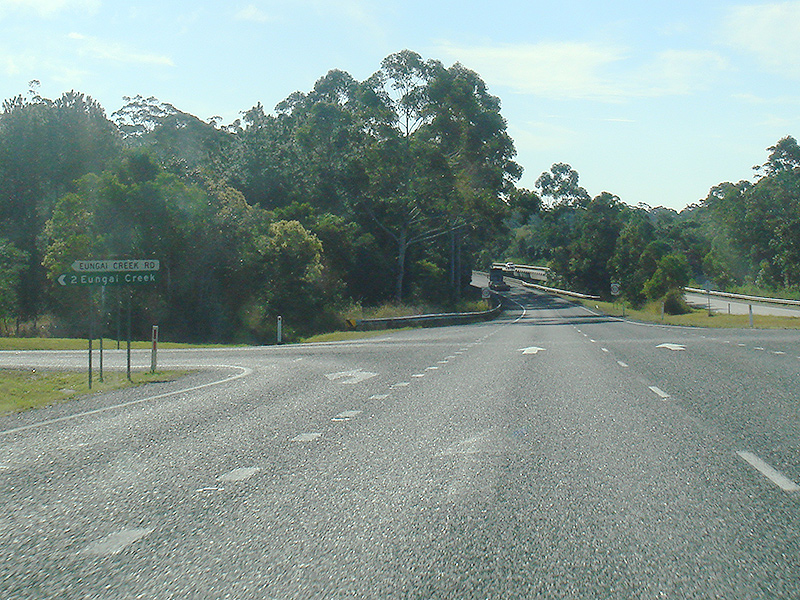 |
Eungai Creek Road: Corner of Pacific Hwy (NR1) and Eungai Creek Rd at Eungai Creek, July 2013. Image © Paul Rands |
|
 |
Bellinger Street & Ferry Street: Corner of Pacific Hwy (NR1), Bellinger St and Ferry St in Urunga, November 2010. Image © Rob Tilley |
 |
Reassurance Directional Sign: Tourism based distance sign at Eungai Creek, July 2013. Image © Paul Rands |
|
 |
Advance Directional Sign: AD sign approaching Pilot St, Urunga, July 2013. Image © Paul Rands |
 |
Advance Directional Sign: AD sign at Eungai Creek for Paddys Rest Rest Area, July 2013. Image © Paul Rands |
|
 |
Reassurance Directional Sign: Rest area distance sing near Pilot St, Urunga, November 2010. Image © Rob Tilley |
 |
Advance Directional Sign: AD sign at Eungai Creek for Paddys Rest Rest Area, July 2013. Image © Paul Rands |
|
 |
Pilot Street: ID sign assembly at the junction with Pilot St, Urunga, November 2010. Image © Rob Tilley |
 |
Reassurance Directional Sign: Rest area distance sign at Eungai Ck, July 2013. Image © Paul Rands |
|
 |
Crash Zone: Crash zone signage at Urunga, July 2013. Image © Paul Rands |
 |
End Divided Road: Approaching end of divided highway conditions at Eungai Creek, July 2013. Image © Paul Rands |
|
 |
Advance Direcitonal Sign: AD sign at Urunga approaching Hungry Head Rd, November 2010. Image © Rob Tilley |
 |
End Divided Road: Northern extremity of divided road at Eungai Creek, July 2013. Image © Paul Rands |
|
 |
Hungry Head Road: Corner of Pacific Hwy (NR1) and Hungry Head Rd at Urunga, November 2010. Image © Rob Tilley |
 |
Entering Warrell Creek: Pacific Hwy (NR1) as it enters Warrell Creek, July 2013. Image © Paul Rands |
|
 |
Advance Directional Sign : AD sign at Valla Beach, approaching Valla Beach Rd, November 2010. Image © Rob Tilley |
 |
Mill Lane: Corner of Pacific Hwy (NR1) and Mill Ln at Warrell Creek, July 2013. Image © Paul Rands |
|
 |
Valla Beach Road : Corner of Pacific Hwy (NR1) and Valla Beach Rd at Valla Beach, November 2010. Image © Rob Tilley |
 |
Advance Directional sign: AD sign at Donnellyville, approaching Albert Dr, July 2013. Image © Paul Rands |
|
 |
Deep Creek Road : Corner of Pacific Hwy (NR1) and Deep Creek Rd at Valla Beach, July 2013. Image © Paul Rands |
 |
Albert Drive: Corner of Pacific Hwy (NR1) and Albert Dr at Donnellyville, July 2013. Image © Paul Rands |
|
 |
Reassurance Directional Sign: Distance sign at Valla, November 2010. Image © Rob Tilley |
 |
Advance Directional Sign: AD sign at Donnellyville, approaching Scotts Head Rd (TD14), July 2013. Image © Paul Rands |
|
 |
Advance Directional Sign: AD sign at Valla, approaching Valla Rd, November 2010. Image © Rob Tilley |
 |
Scotts Head Road: Corner of Pacific Hwy (NR1) and Scotts Head Rd (TD14) at Donnellyville, July 2013. Image © Paul Rands |
|
 |
Valla Road: Corner of Pacific Hwy (NR1) and Valla Rd at Valla, November 2010. Image © Rob Tilley |
 |
Entering Macksville: Pacific Hwy (NR1) as it enters the town of Macksville, July 2013. Image © Paul Rands |
|
 |
Bypassed Town Sign: Bypassed town sign at Nambucca Heads, approaching Link Rd, November 2010. Image © Rob Tilley |
 |
Advance Directional Sign: AD sign approaching Boundary St, Macksville, July 2013. Image © Paul Rands |
|
 |
Entering Nambucca Heads: Pacific Hwy (NR1) as it enters the town of Nambucca Heads, July 2013. Image © Paul Rands |
 |
Advance Directional Sign: AD sign on River St in Macksville, approaching Pacific Hwy (NR1), June 2005. Image © Paul Rands |
|
 |
Advance Directional Sign: AD sign at Nambucca Heads, approaching Link Rd, November 2010. Image © Rob Tilley |
 |
Nambucca River: Pacific Hwy (NR1) as it crosses Nambucca River at North Macksville, July 2013. Image © Paul Rands |
|
 |
Link Road: Corner of Pacific Hwy (NR1) and Link Rd at Nambucca Heads, July 2013. Image © Paul Rands |
 |
Ferry Street: Corner of Ferry St and Pacific Hwy (NR1) at North Macksville, July 2013. Image © Paul Rands |
|
 |
Riverside Drive: Corner of Pacific Hwy (NR1) and Riverside Dr at Nambucca Heads, November 2010. Image © Rob Tilley |
 |
Reassurance Directional Sign: Distance sign at North Macksville, July 2013. Click here for a photo by Paul Rands of this location from June 2005. Image © Paul Rands |
|
 |
Riverside Drive: Corner of Pacific Hwy (NR1) and Riverside Dr at Nambucca Heads, November 2010. Image © Rob Tilley |
 |
Old Coast road: Corner of Pacific Hwy (NR1) and Old Coast Rd at North Macksville, July 2013. Image © Paul Rands |
|
 |
Bellwood Road: Corner of Pacific Hwy (NR1) and Belwood Rd at Nambucca Heads, July 2013. Click here for a close up photo by Rob Tilley of the sign from November 2010. Image © Paul Rands |
 |
Divided Road Ahead: Approaching the divided section of highway at Nambucca Heads, July 2013.This section of highway had Brifen fencing added to separate oncoming traffic. Image © Paul Rands |
|
 |
Reassurance Directional Sign: Distance sign at Nambucca Heads, July 2013. Click here for photo by Rob Tilley of this location from November 2010. Image © Paul Rands |
 |
Divided Road: The divided section of highway at Nambucca Heads, July 2013.This section of highway had Brifen fencing added to separate oncoming traffic. Image © Paul Rands |
|
 |
Old Coast road: Corner of Pacific Hwy (NR1) and Old Coast Rd at North Macksville, November 2010. Image © Rob Tilley |
 |
Entering Nambucca Heads: Pacific Hwy (NR1) as it enters the town of Nambucca Heads, July 2013. Image © Paul Rands |
|
 |
Entering Macksville: Pacific Hwy (NR1) as it enters the town of Macksville, July 2013. Image © Paul Rands |
 |
Bellwood Road: Corner of Pacific Hwy (NR1) and Belwood Rd at Nambucca Heads, July 2013. Image © Paul Rands |
|
 |
Advance Directional Sign: AD sign approaching Ferry St, North Macksville, November 2010. Image © Rob Tilley |
 |
Riverside Drive: Corner of Pacific Hwy (NR1) and Riverside Dr at Nambucca Heads, July 2013. Image © Paul Rands |
|
 |
Ferry Street: Corner of Ferry St and Pacific Hwy (NR1) at North Macksville, June 2005. Image © Paul Rands |
 |
Riverside Drive: Corner of Pacific Hwy (NR1) and Riverside Dr at Nambucca Heads, July 2013. Image © Paul Rands |
|
 |
Advance Directional Sign: AD sign at North Macksville approaching Wallace St and Partridge St, November 2010. Click here for a photo by Paul Rands of this location from March 2006. Image © Rob Tilley |
 |
Link Road: Corner of Pacific Hwy (NR1) and Link Rd at Nambucca Heads, July 2013. Image © Paul Rands |
|
 |
Nambucca River: Pacific Hwy (NR1) as it crosses Nambucca River at North Macksville, July 2013. Click here for a photo by Rob Tilley of this location from November 2010. Click here for a photo by Paul Rands of this location from March 2006. Image © Paul Rands |
 |
Reassurance Directional Sign: Distance sign at Nambucca Heads, July 2013. Image © Paul Rands |
|
 |
Bridge Plaque: Main Roads Board bridge plaque at Macksville, June 2005. Image © Paul Rands |
 |
Advance Directional Sign: AD sign at Valla Beach, approaching Valla Rd, July 2013. Image © Paul Rands |
|
 |
Nambucca River: Pacific Hwy (NR1) as it crosses Nambucca River at Macksville, June 2005. Image © Paul Rands |
 |
Deep Creek Road: Corner of Pacific Hwy (NR1) and Deep Creek Rd at Valla Beach, July 2013. Image © Paul Rands |
|
 |
Macksville Town Centre: Pacific Hwy (NR1) as it passes through Macksville, November 2010. Image © Rob Tilley |
 |
Advance Directional Sign: AD sign at Valla Beach, approaching Valla Beach Rd, July 2013. Image © Paul Randsr |
|
 |
Advance Directional Sign: AD sign approaching Boundary St, Macksville, July 2013. Image © Paul Rands |
 |
Valla Beach Road: Corner of Pacific Hwy (NR1) and Valla Beach Rd at Valla Beach, July 2013. Image © Paul Rands |
|
 |
Boundary Street: Corner of Pacific Hwy (NR1) and Boundary St, Macksville, November 2010. Click here for a photo by Paul Rands of this location from March 2006. Image © Rob Tilley |
 |
Valla Beach: Pacific Hwy (NR1) as it passes through Valla Beach, July 2013. Image © Paul Rands |
|
 |
Reassurance Directional Sign: Distance sign at Macksville, March 2006. Click here for a close up photo by Rob Tilley of the sign from November 2010. Image © Paul Rands |
 |
Crash Zone: Crash zone signage at Valla, July 2013. Image © Paul Rands |
|
 |
Advance Directional Sign: AD sign at Macksville approaching Upper Warrell Ck Rd, July 2013. Image © Paul Rands |
 |
Crash Zone: Crash zone signage at Urunga, July 2013. Image © Paul Rands |
|
 |
Intersection Directional Sign: ID sign at the corner of Pacific Hwy (NR1) and Upper Warrell Ck Rd at Macksville, November 2010. Image © Rob Tilley |
 |
Advance Direcitonal Sign: AD sign at Urunga approaching Hungry Head Rd, July 2013. Image © Paul Rands |
|
 |
Advance Directional Sign: AD sign at Way Way, approaching Scotts Head Rd (TD14), November 2010. Image © Rob Tilley |
 |
Services Sign: Services sign at Urunga, July 2013. Image © Paul Rands |
|
 |
Supplemental Advance Directional Sign: Supplemental AD sign at Donnellyville, approaching Scotts Head Rd (TD14), November 2010. Image © Rob Tilley |
 |
Entering Urunga: Pacific Hwy (NR1) as it enters the Urunga town centre, July 2013. Image © Paul Rands |
|
 |
Supplemental Advance Directional Sign: Supplemental AD sign at Donnellyville, approaching Scotts Head Rd (TD14), November 2010. Image © Rob Tilley |
|||
 |
Scotts Head Road: Corner of Pacific Hwy (NR1) and Scotts Head Rd (TD14) at Donnellyville, November 2010. Image © Rob Tilley |
|||
 |
Mill Lane: Corner of Pacific Hwy (NR1) and Mill Ln at Warrell Creek, July 2013. Image © Paul Rands |
|||
 |
Entering Warrell Creek: Pacific Hwy (NR1) as it enters Warrell Creek, July 2013. Image © Paul Rands |
|||
 |
Divided Road 1km Ahead: Pacific Hwy (NR1) at Eungai Creek approaching the divided section of highway, July 2013. Image © Paul Rands |
|||
 |
Divided Road Next 8km: At Eungai Creek, the Pacific Hwy becomes divided for 8 km, July 2013. Image © Paul Rands |
|||
 |
Advance Directional Sign: AD sign at Eungai Creek for Paddys Rest Rest Area, July 2013. Image © Paul Rands |
|||
 |
Advance Directional Sign: AD sign at Eungai Creek for Paddys Rest Rest Area, July 2013. Image © Paul Rands |
|||
 |
Advance Directional Sign: AD sign at Eungai Creek approaching Eungai Creek Rd (former Pacific Hwy alignment), November 2010. Image © Rob Tilley |
|||
 |
Reassurance Directional Sign: Rest area distance sign at Eungai Ck, July 2013. Image © Paul Rands |
|||
 |
Eungai Creek Road: Corner of Pacific Hwy (NR1) and Eungai Ck Rd at Eungai Creek, July 2013. Image © Paul Rands |
|||
 |
Reassurance Directional Sign: Tourism based distance sign at Eungai Creek, November 2010. Image © Rob Tilley |
|||
 |
Advance Directional Sign: AD sign at Eungai Creek, approaching Old Pacific Hwy, November 2010. Image © Rob Tilley |
|||
 |
Advance Directional Sign: AD sign at the end of the divided section of highway at Eungai Rail, approaching Station St, November 2010. Image © Rob Tilley |
|||
 |
Station Street: Corner of Pacific Hwy (NR1) and Station St at Eungai Rail, November 2010. Image © Rob Tilley |
|||
 |
Entering Barraganyatti: Pacific Hwy (NR1) as it enters the town of Barranganyatti, July 2013. Image © Paul Rands |
|||
 |
Supplemental Advance Directional Sign: Supplemental AD sign at Barraganyatti, approaching Stuarts Point Rd (TD14) and Blackbutt Shute Rd, July 2013. Image © Paul Rands |
|||
 |
Advance Directional Sign: AD sign at Barraganyatti, approaching Stuarts Point Rd (TD14) and Blackbutt Shute Rd, November 2010. Image © Rob Tilley |
|||
 |
Stuarts Point Road & Blackbutt Shute Road: Corner of Pacific Hwy (NR1), Stuarts Point Rd (TD14) and Blackbutt Shute Rd at Barraganyatti, July 2013. Image © Paul Rands |
|||
 |
Stuarts Point Road & Blackbutt Shute Road: Corner of Pacific Hwy (NR1), Stuarts Point Rd (TD14) and Blackbutt Shute Rd at Barraganyatti, November 2010. Image © Rob Tilley |
|||
 |
Entering Clybucca: Pacific Hwy (NR1) as it enters the town of Clybucca, November 2010. Image © Rob Tilley |
|||
 |
Supplemental Advance Directional Sign: Supplemental AD sign at Clybucca, approaching Plummers Ln (TD12), July 2013. Click here for a photo by Rob Tilley of this location from November 2010. Click here for a photo by Paul Rands of this location from March 2006. Image © Paul Rands |
|||
 |
Supplemental Advance Directional Sign: Supplemental AD sign at Clybucca, approaching Plummers Ln (TD12), November 2010. Image © Rob Tilley |
|||
 |
Advance Directional Sign: AD sign at Clybucca, approaching Plummers Ln (TD12), July 2013. Click here for a photo by Rob Tilley of this location from November 2010. Image © Paul Rands |
|||
 |
Plummers Lane: Corner of Pacific Hwy (NR1) and Plummers Ln (TD12) at Clybucca, November 2010. Note the incorrect shield colour on the ID sign. Image © Rob Tilley |
|||
 |
Advance Directional Sign: AD sign approaching the Clybucca Bus Crash Memorial at Clybucca, July 2013. The fatal crash occurred 22 December 1989, that and another bus crash a few months prior, prompted an accelerated upgrade program for the Pacific Hwy. 16 Image © Paul Rands |
|||
| Click here for the continuation of National Route 1 between Clybucca and Port Macquarie Click here for the continuation of National Route 1 between South Grafton and Urunga |
||||
1 Roads and Traffic Authority, Schedule of Classified Roads and State & Regional Roads, 31 January 2011
2 RTA Thematic History, 2nd Edition, 2006
3 Main Roads Board, Annual Report, 1930-31
4 Main Roads Board Annual Report, 1932
5 Department of Main Roads, Annual Report, 1934-35
6 Department of Main Roads, Annual Report, 1958-59
7 Department of Main Roads, Annual Report, 1964-65
8 Department of Main Roads, Annual Report, 1970-71
9 Department of Main Roads, Annual Report, 1971-72
10 Department of Main Roads, Annual Report, 1972-73
11 Department of Main Roads, Annual Report, 1973-74
12 Department of Main Roads, Annual Report, 1974-75
13 Department of Main Roads, Annual Report, 1976-77
14 Roads and Maritime Services, Projects, Pacific Highway Upgrade, Port Macquarie to Coffs Harbour, Completed Projects, Eungai Deviation
15 Roads and Maritime Services, Projects, Pacific Highway upgrade,Port Macquarie to Coffs Harbour, Frederickton to Eungai
16 Port Macquarie News, Clybucca: December 22, 1989, 20 Dec 2009
Last updated: 30-Aug-2017 06:28
This site © Paul Rands. All rights reserved. Some portions © (copyright) by their respective and credited owners. Permission must be obtained before using any images from this site. For details, please email by clicking here.